User guide
The interface and shortcuts
Comfortable, Compact and Focus modes, folding the side panels, and the keyboard shortcuts you can change.
Workspaces
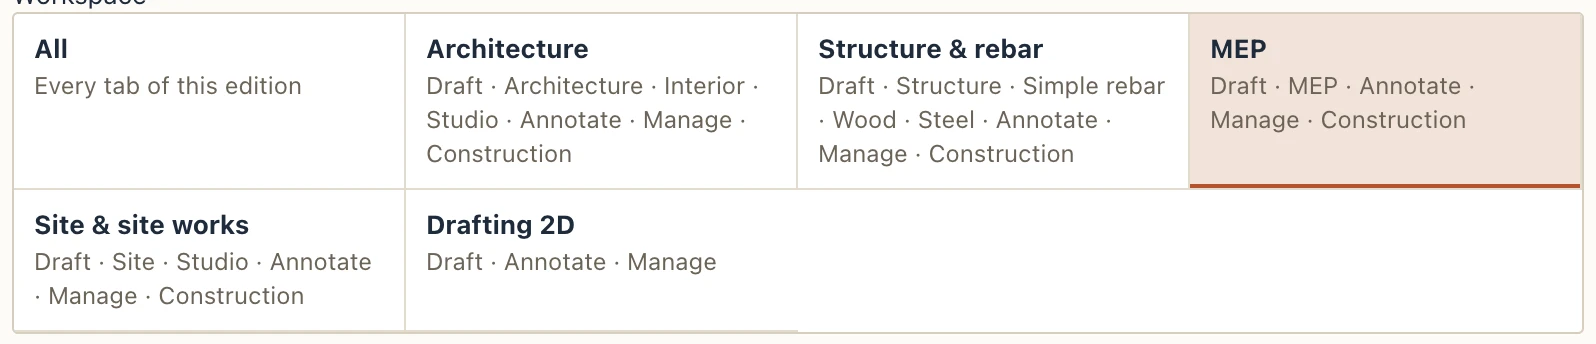
A workspace shows only the ribbon tabs your work needs, in the order that work uses them. Choose it from the button beside File, which names the workspace you are in, or on the start screen, at the top of View → Interface…, or from Commands… (Workspace: …): All (every tab of your edition), Architecture, Structure & rebar, MEP, Site & site works or Drafting 2D. The project stays one: a hidden tab's tools are still in Commands… and the keyboard shortcuts, and a model made in one workspace opens whole in another.
When the ribbon's tools are wider than the window, the mouse wheel over them scrolls them sideways.
The tabs stay on one line. When the window is too narrow for all of them, the last ones go under More at the end of the row, and the tab you are on always stays in sight.
The tabs are grouped by the work they serve. Interior holds the finishes and the furniture. Site holds the terrain, the landscape and the site works (scaffolding and formwork). Construction holds the work schedule and the estimate (4D and 5D).
Show, hide or move a tab under Tabs in the same dialog and the choice becomes My workspace, kept on this computer for next time; the other workspaces are still there to switch to. View always stays, since Interface… is in it.
Three modes
View → Interface… (Ctrl .) chooses how much stands around the view. Pick one of the three modes at the top of the dialog; the change shows at once.
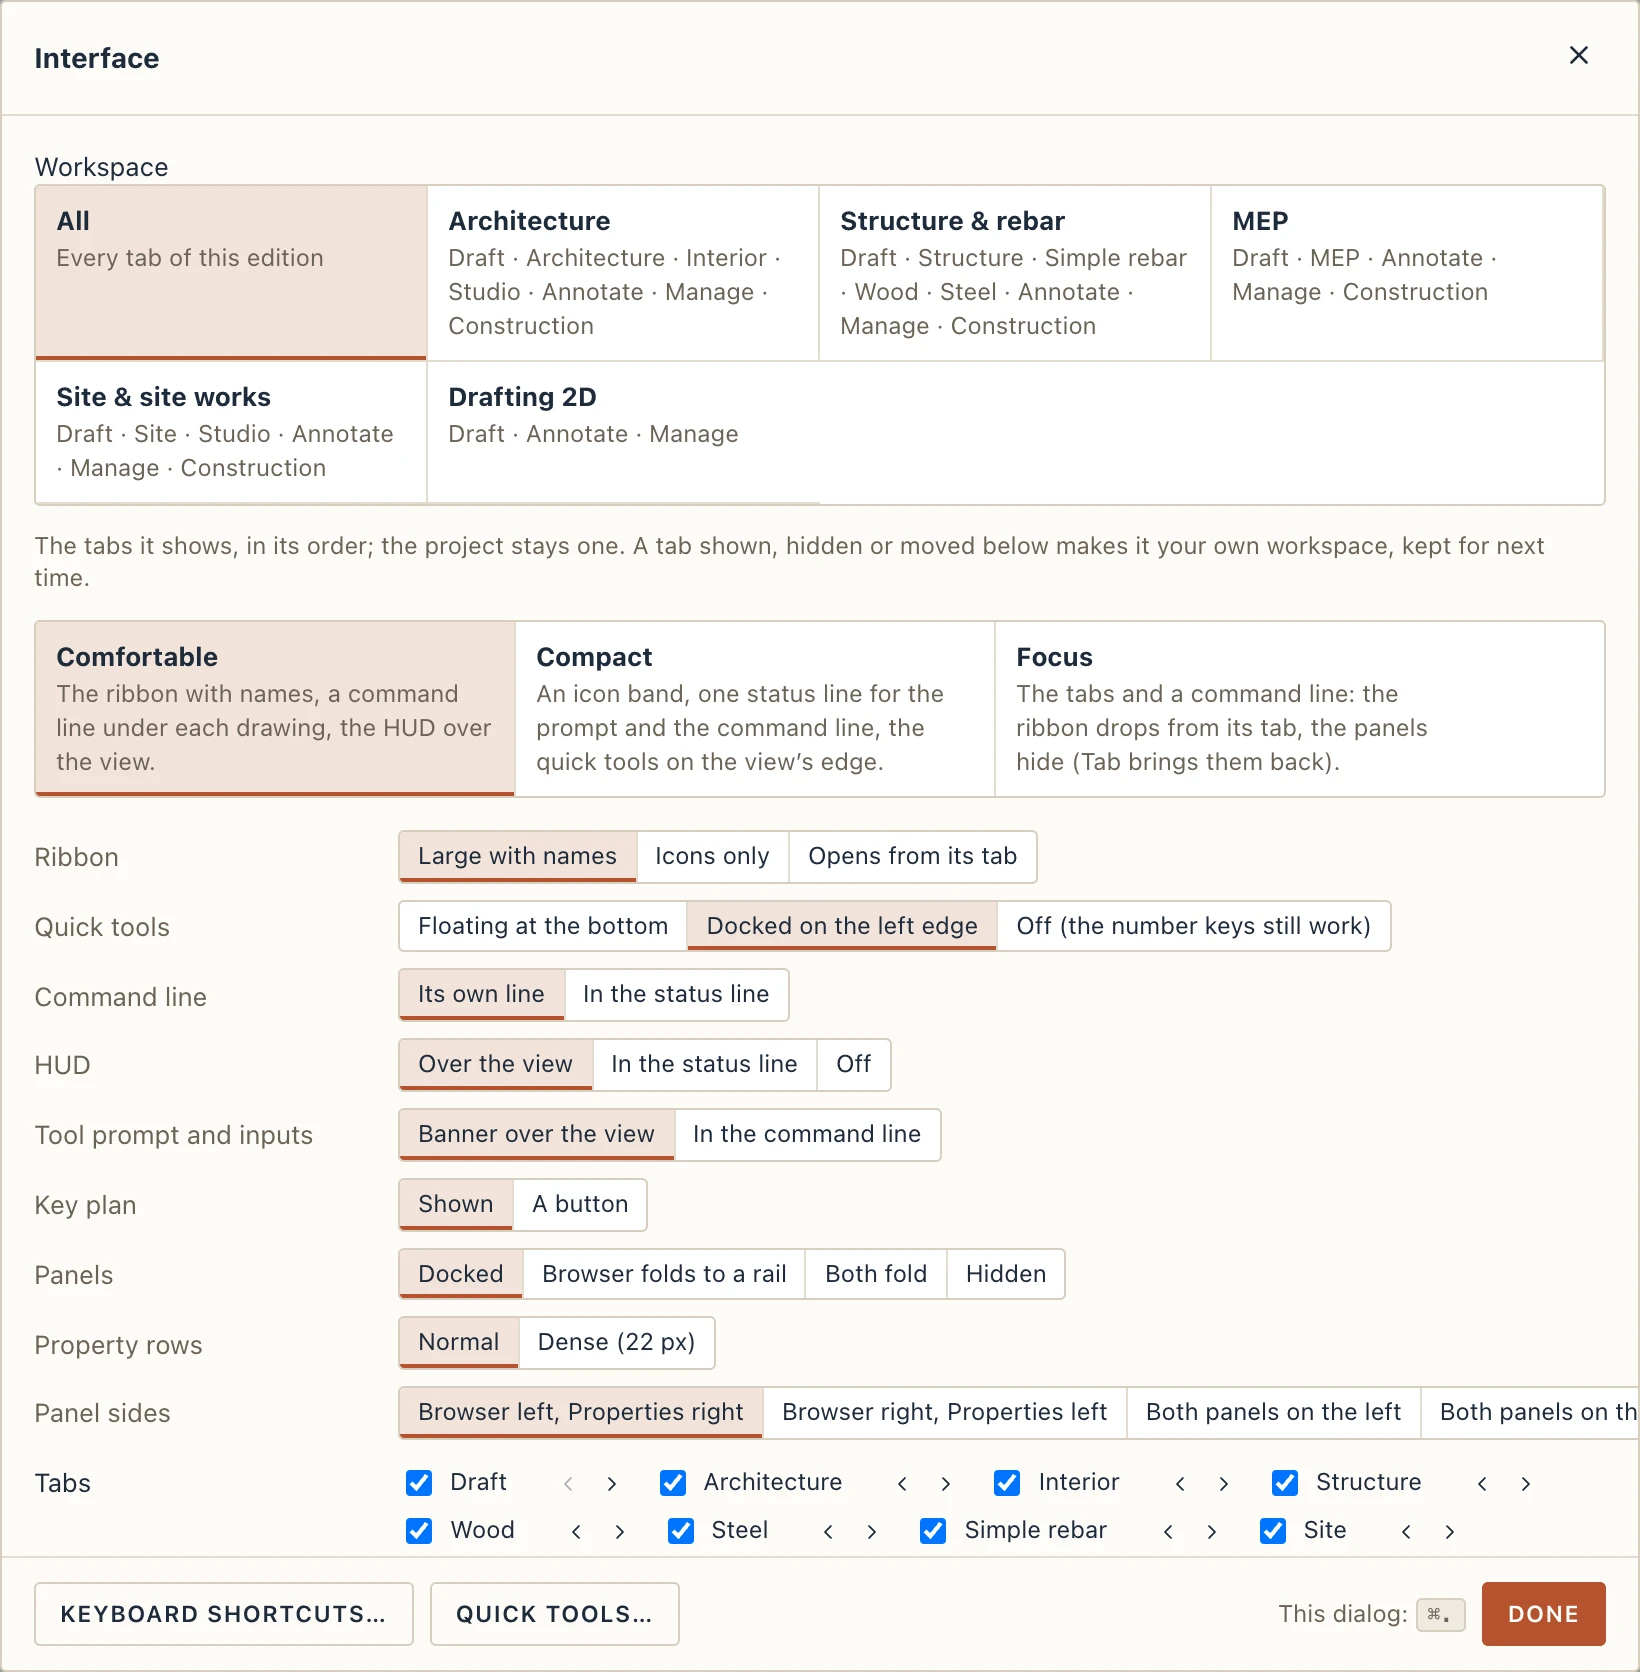
- Comfortable is the window as the other pages show it: the ribbon with large tools and their names, a command line under each drawing, and the HUD, the hint, the length and angle fields, the key plan and the quick tools over the view.
- Compact gives the view most of the window:
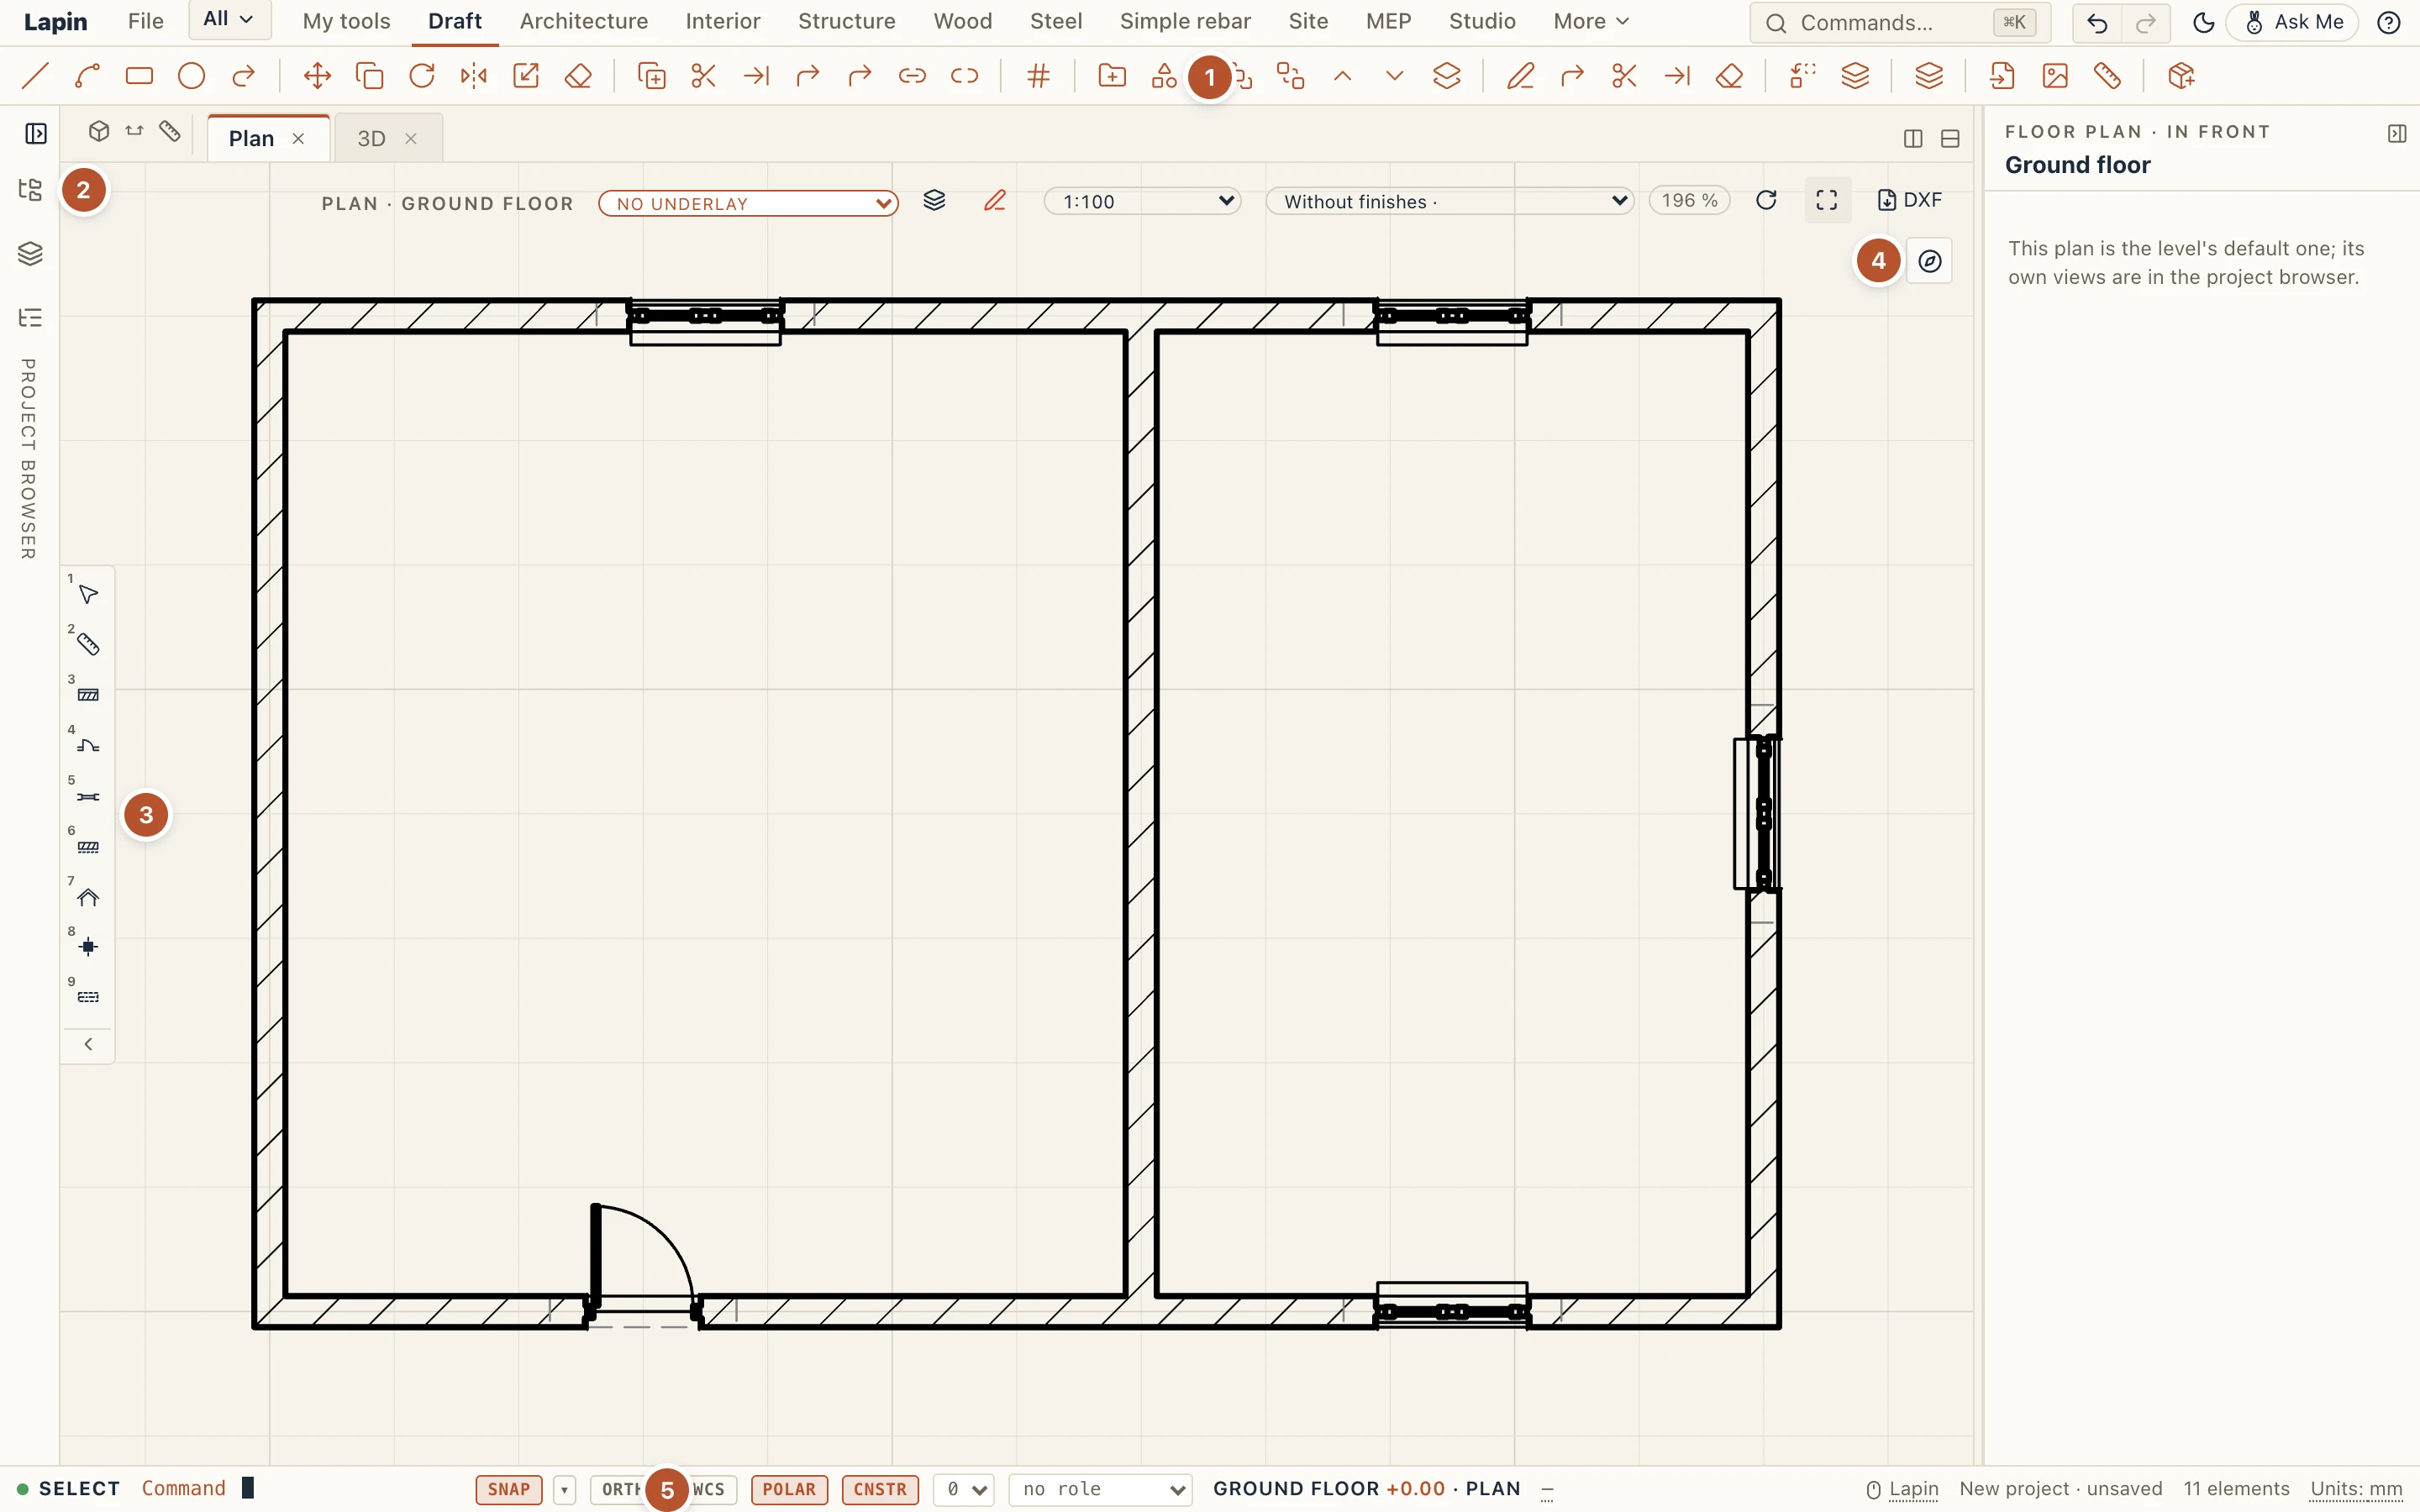
- The ribbon is one band of icons. Thin rules part the groups. Hover over a tool to see its name, its keys and its group.
- The project browser folds to a rail. Its icons open the project, the levels or the IFC tree over the view for a moment.
- The quick tools 1–9 stand on the view's left edge.
- The key plan is a button. Click it to open the map, and its × to fold it again.
- One status line holds the tool's name and what it asks for, what you type, the length and angle fields while you draw, SNAP, ORTHO and POLAR, the level and the view, then the project.
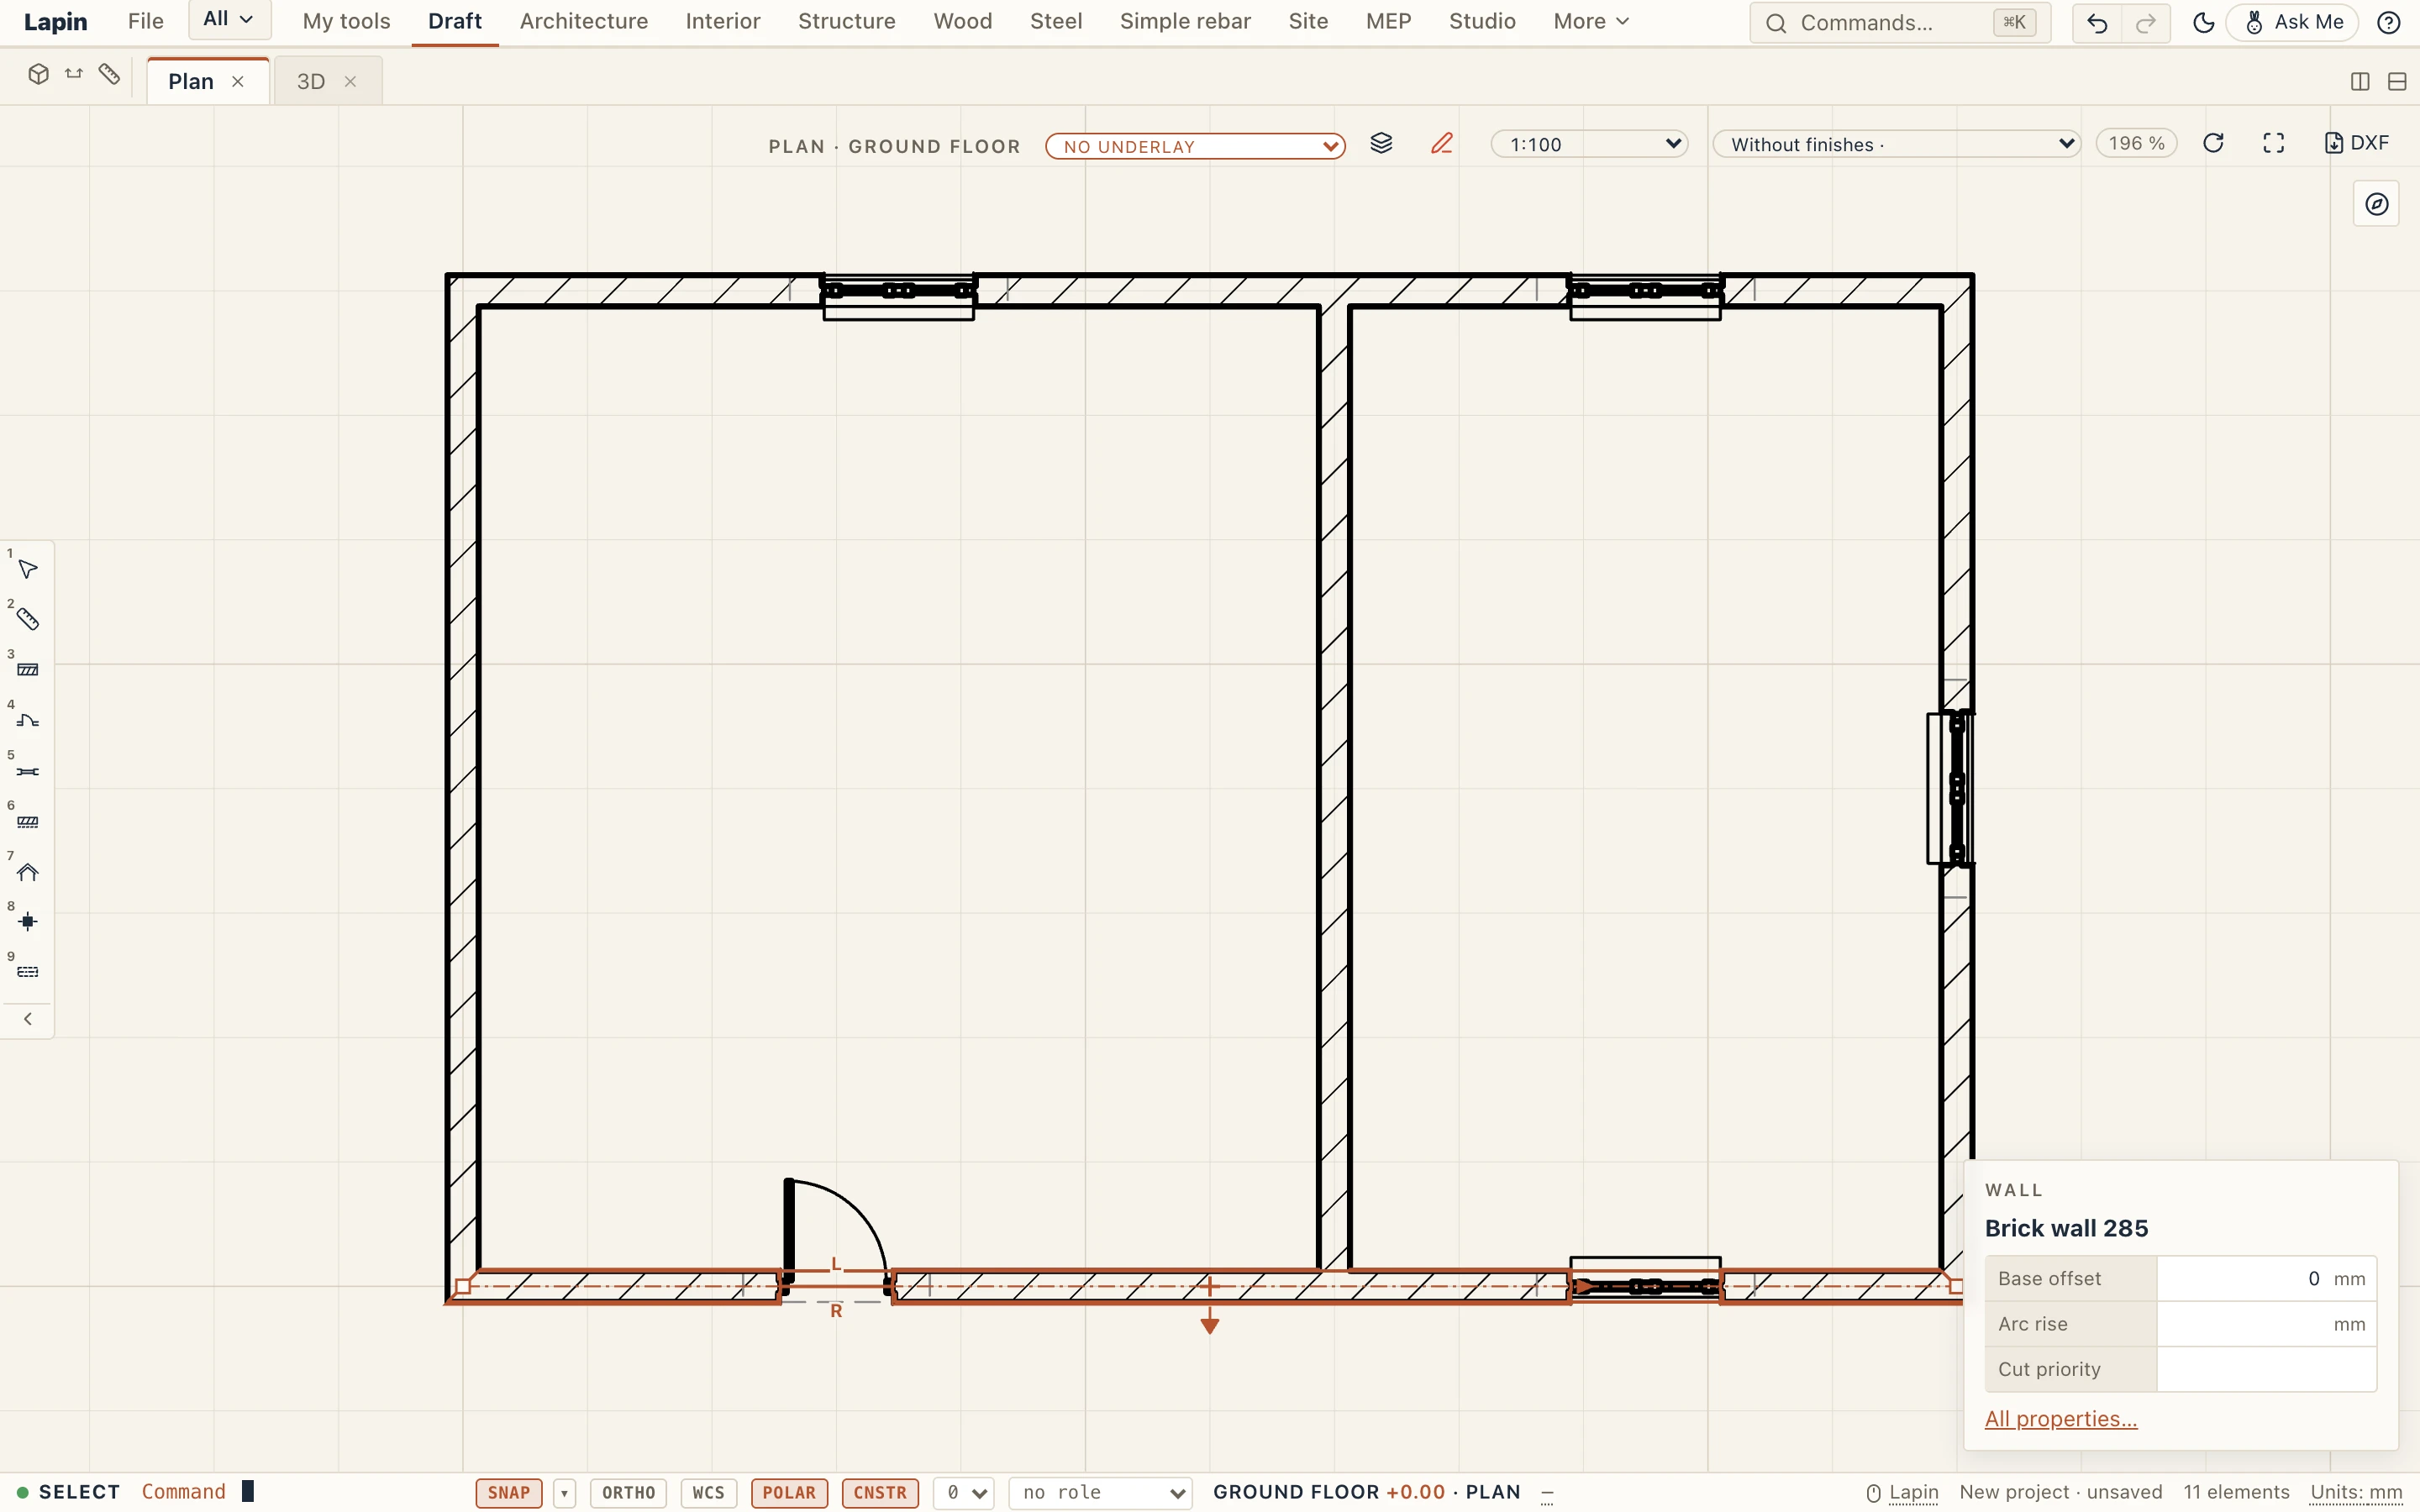
- Focus keeps only the tabs and a thin command line. Click a tab and its tools drop over the view; the band folds again once you pick a tool, or with Esc or a click elsewhere. The panels hide. When something is selected, a small card shows what it is and its first properties; All properties… opens the properties panel over the view. Tab brings both panels back, and hides them again.
In every mode the top bar keeps Undo and Redo at its right end: with their names in Comfortable, as two arrows in Compact and Focus (Ctrl Z and Ctrl Y; their tooltip says what they undo).
Below the modes, each part can be set on its own: the ribbon, the quick tools (or none: the number keys still work), the command line, the HUD, the tool's prompt and fields, the key plan, the panels and the height of the property rows. Changing one part makes the choice Custom.
Below the parts, Tabs: untick the ribbon tabs you do without (an architect may hide Structure, Simple rebar and MEP, an engineer Architecture and Site). View always stays, since Interface… is there. The tools of a hidden tab are still in Commands… and in the keyboard shortcuts.
Lapin keeps your choice on this computer, for you. The desktop app and the browser keep theirs apart. In the browser, Lapin starts in Compact when the window is less than 800 pixels tall, until you choose.
Quick tools
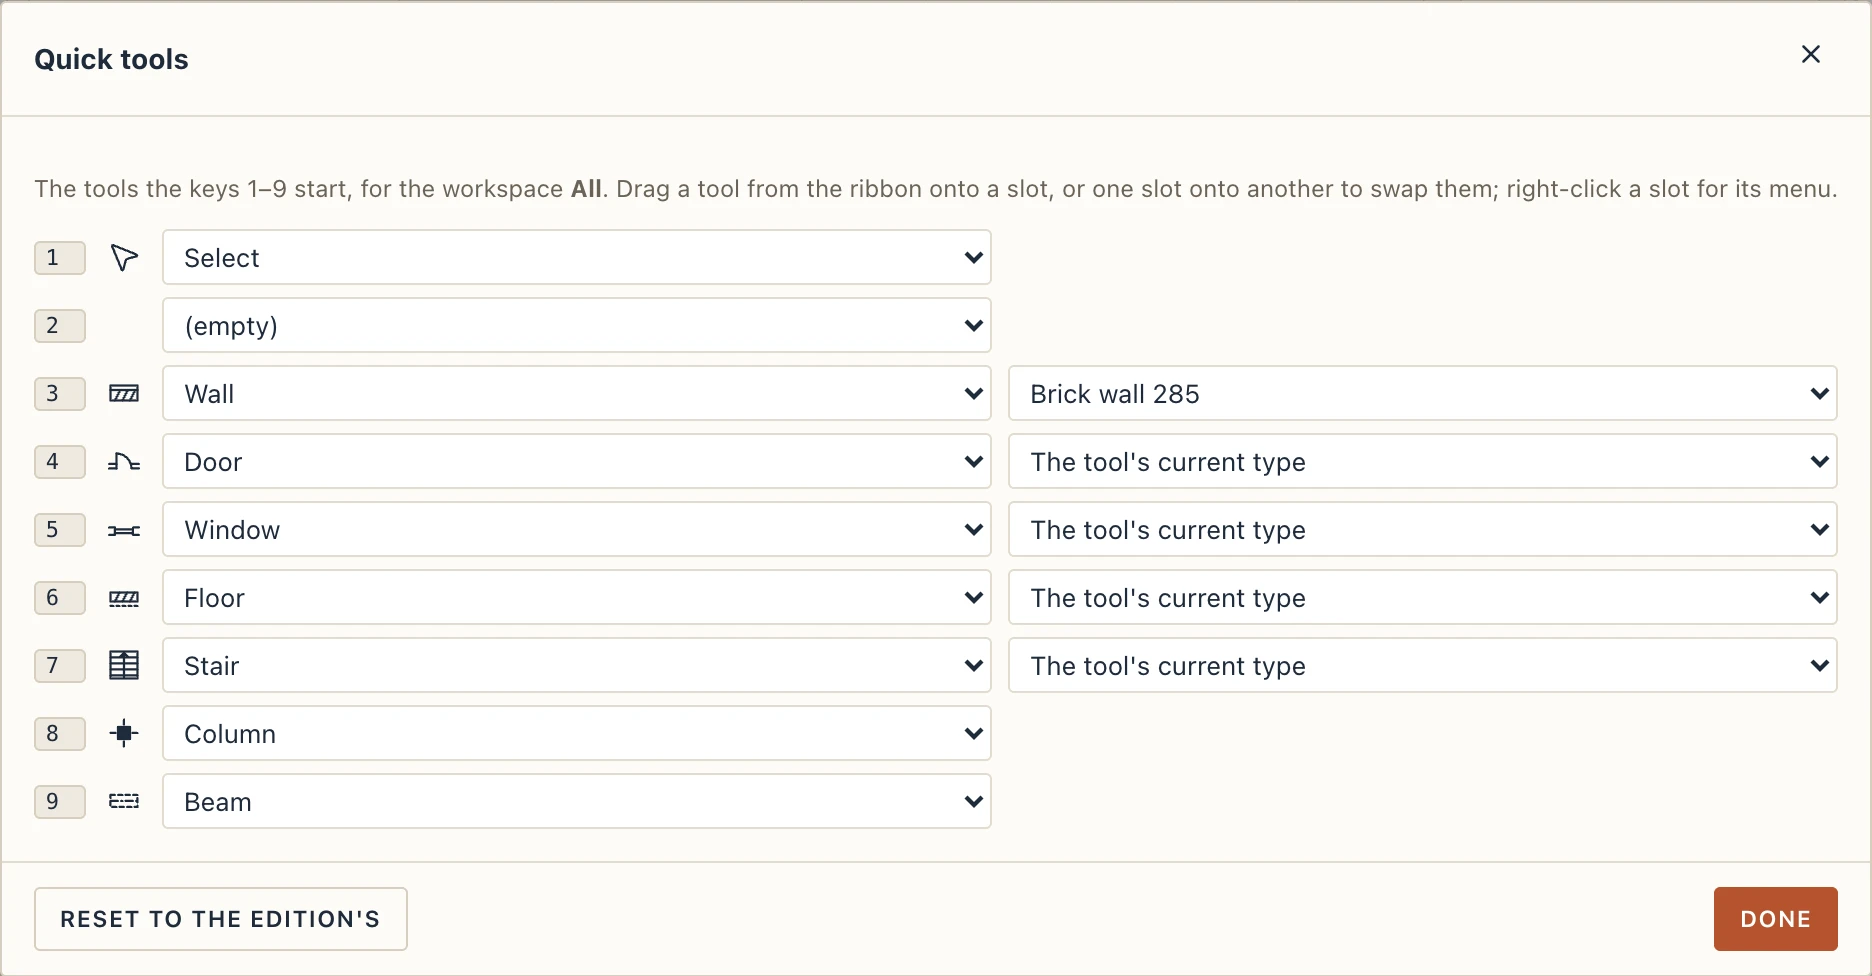
The quick tools are the numbered slots on the view's left edge, against the project browser, so they move with it; small and see-through until the pointer comes to them (View → Interface… can float them at the bottom of the view instead); the keys 1–9 start them. Each workspace has its own: they start as your edition gives them, and you choose them yourself:
- drag a tool from the ribbon onto a slot. A tool stands in one slot only, so it leaves the one it was in;
- drag one slot onto another to swap them;
- right-click a slot: Choose a tool…, Empty this slot or Reset quick tools;
- View → Quick tools… sets the nine slots from lists, and Reset to the edition's brings back your edition's own.
- a tool that places elements of a type (a wall, a door, a floor, a stair…) can hold one of the project's types: choose it in the slot's right-click menu, or beside the tool in View → Quick tools…. The slot then shows the type's name, and pressing it starts the tool with that type, so one slot can hold the brick walls and another the partitions. The type is kept by its name: the slot works in every project with a type of that name, and in one without it the tool takes its current type.
Floating at the bottom, each slot shows its tool's name, and an empty slot after the last waits for a tool. Lapin keeps your quick tools on this computer, for you.
The arrow at the bar's end hides the quick tools; a small Quick tools handle stays where they were and brings them back. They are hidden apart in the model's views (plans, 3D, sections) and in sheets and schedules, so you can keep them off the documents and on the drawings.

My tools
My tools is a ribbon tab of your own, the first in the tab row: you put in it only the tools you use, taken from any tab, in groups you name.
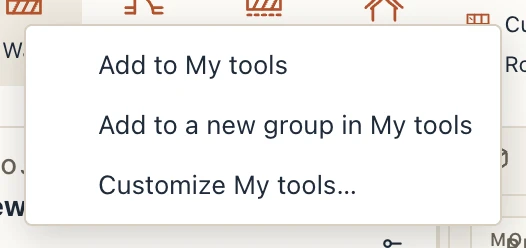
- Put tools in. Right-click any tool in the ribbon → Add to My tools, Add to My tools in… a group, or Add to a new group in My tools. Or drag a tool from another tab onto the My tools tab: held over it for a moment, the tab opens, and you drop the tool where a line shows it will land.
- Order them in the ribbon itself. Drag a tool before or after another, in its group or into another group; drag a group by its name to move it among the groups. A line shows where it will land, the others slide aside, and dropping anywhere else changes nothing. Double-click a group's name to rename it. Right-click a tool for Make small or Make large, Move earlier, Move later and Remove from My tools; right-click a group's name for Rename group, Delete group, New group and Undo the last change. By keys, Alt ← or → moves the tool focused and Delete removes it.
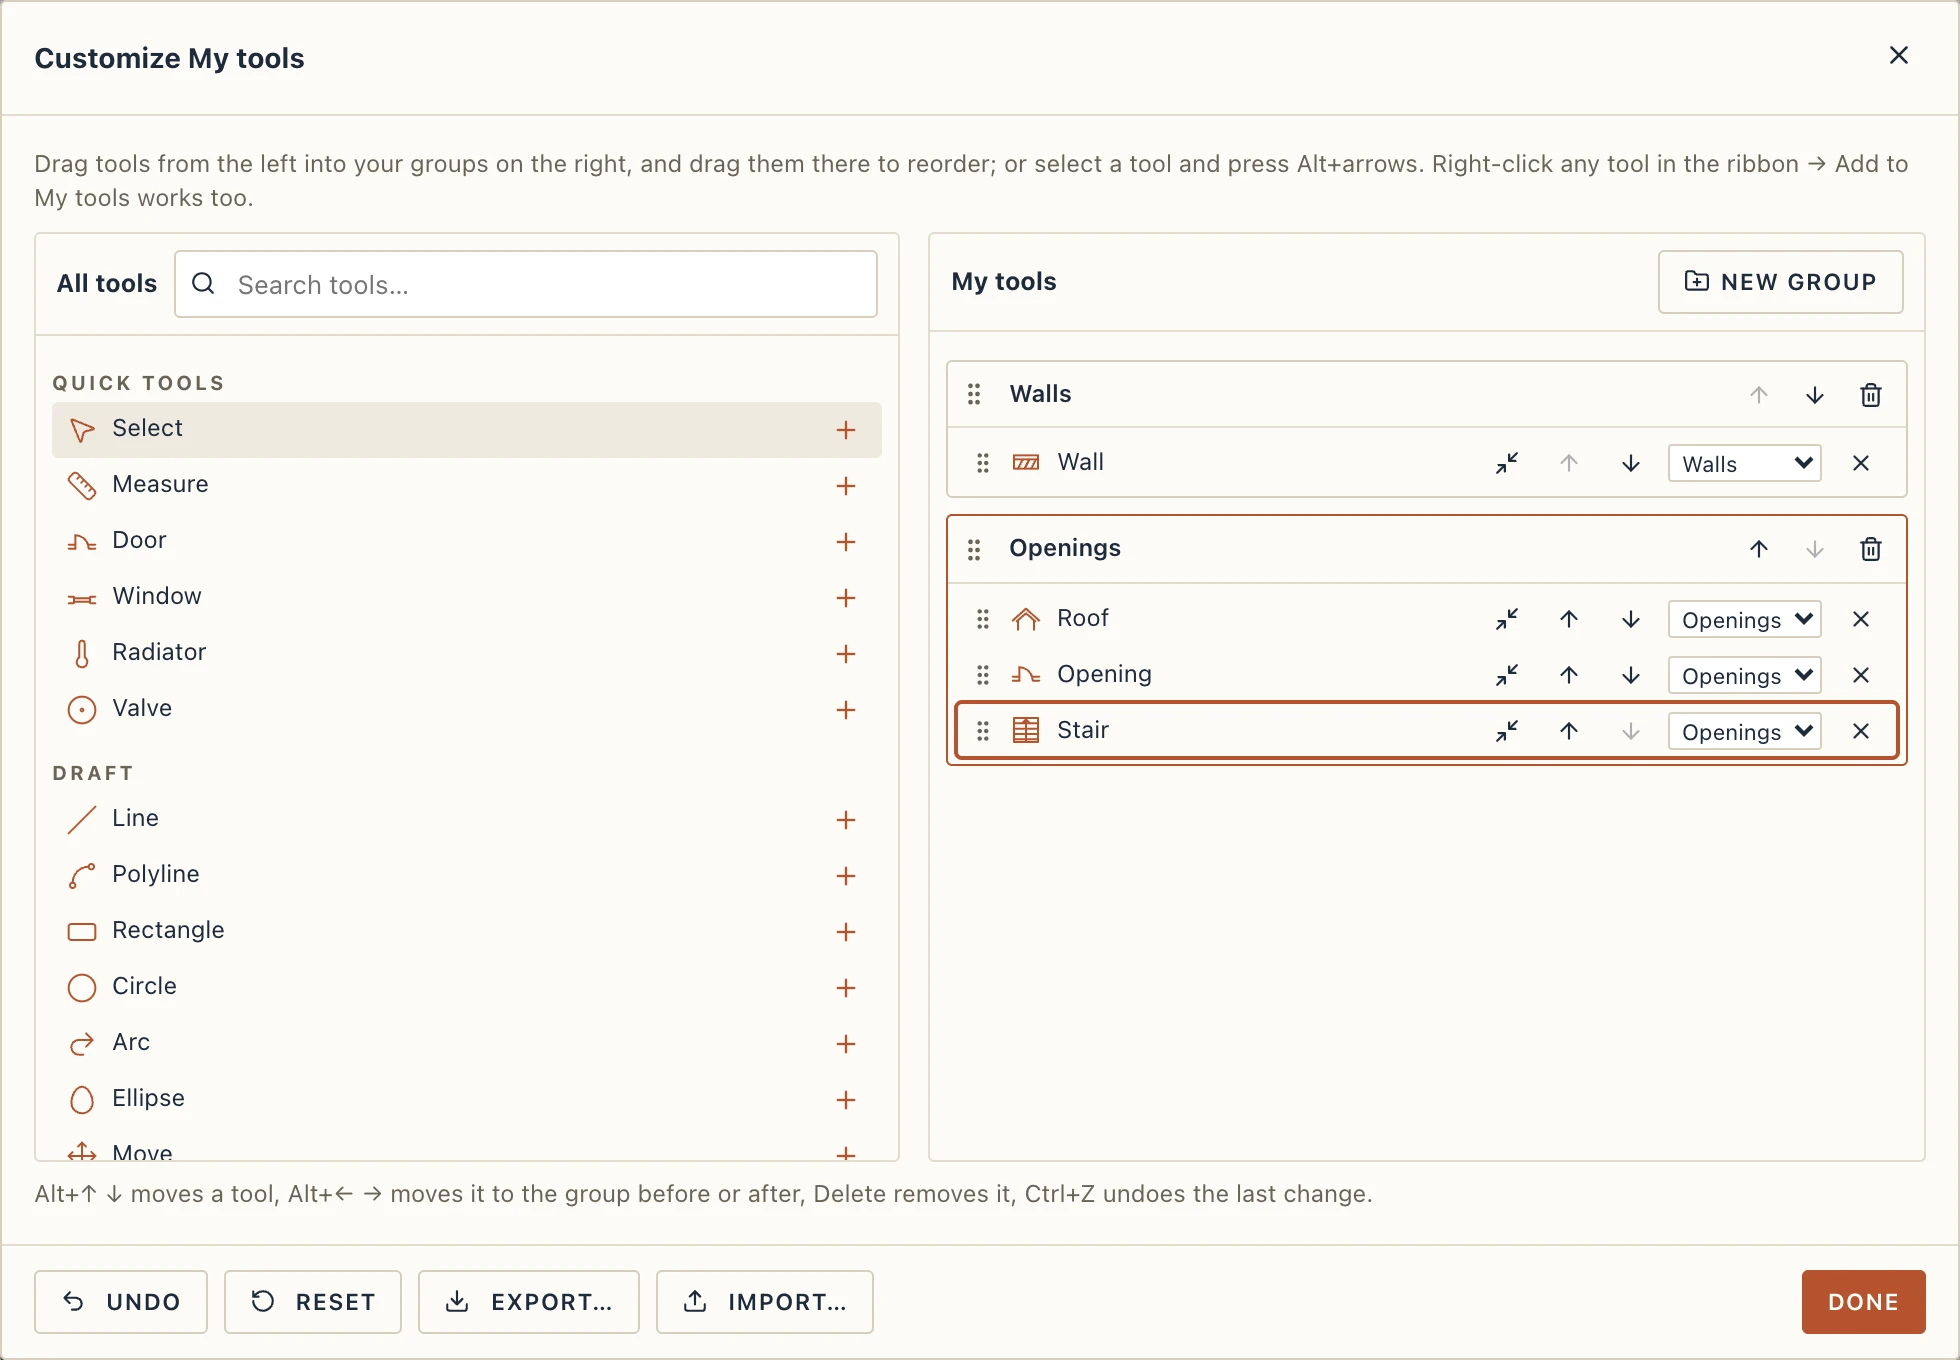
- Customize My tools… (the gear at the end of the tab, View → Interface, or Commands…) shows every tool of the application on the left, searched and grouped by tab, and your tab on the right. Drag tools across, or press + (or Enter) to add one; drag within the right side to reorder; drag a tool back to the left to take it out. Each row also has buttons to move it up or down, to show it as a large or small tool, a list to move it to another group, and × to remove it. By keys, Alt ↑ ↓ move the tool focused (across the ends of its group too), Alt ← → move it to the group before or after, Delete removes it and Ctrl Z undoes the last change. Undo and Reset are at the bottom, so a wrong drop loses nothing.
- Export… and Import… save the tab as a small file you can take to another computer or give to a colleague.
Lapin keeps My tools on this computer, for you (the desktop app and the browser apart). A tool your edition lacks is hidden, not lost: it comes back with its module.


Architecture → Opening is every opening: its first choice is what to put, by host (a door, a window, a bay window or an opening of a shape in a wall; a floor opening; a roof window or a dormer), and the old tools (Door, Window, Bay window, Wall opening, Floor opening, Roof window, Dormer) start it set to their kind, with their letters. Join walls (JW) joins two walls; Draft's Join, Trim and Extend work on drafted lines, and the Linework group's Join linework, Trim linework and Extend linework on the lines a view draws of the model.
Manage → All types lists the types dialogs of every tab (Wall types, Floor types, Doors & windows, Structure types, Furniture types…) in one place; each tab keeps its own Types group.
Enter and Esc
One rule in every view, for every tool and command:
- Enter finishes: it closes an outline (a floor, a room, a floor opening: three points or more), ends a polyline or a run, ends a chain (walls, beams: the pieces drawn stay), ends a tool that picks an element and then a point at the pick, and ends a drafting command.
- Esc cancels the step in progress: the points of what is not made yet go, what a chain or a command already made stays. With nothing in progress, Esc leaves the tool; with no tool on, it lets the selection go.
The Place catalogue
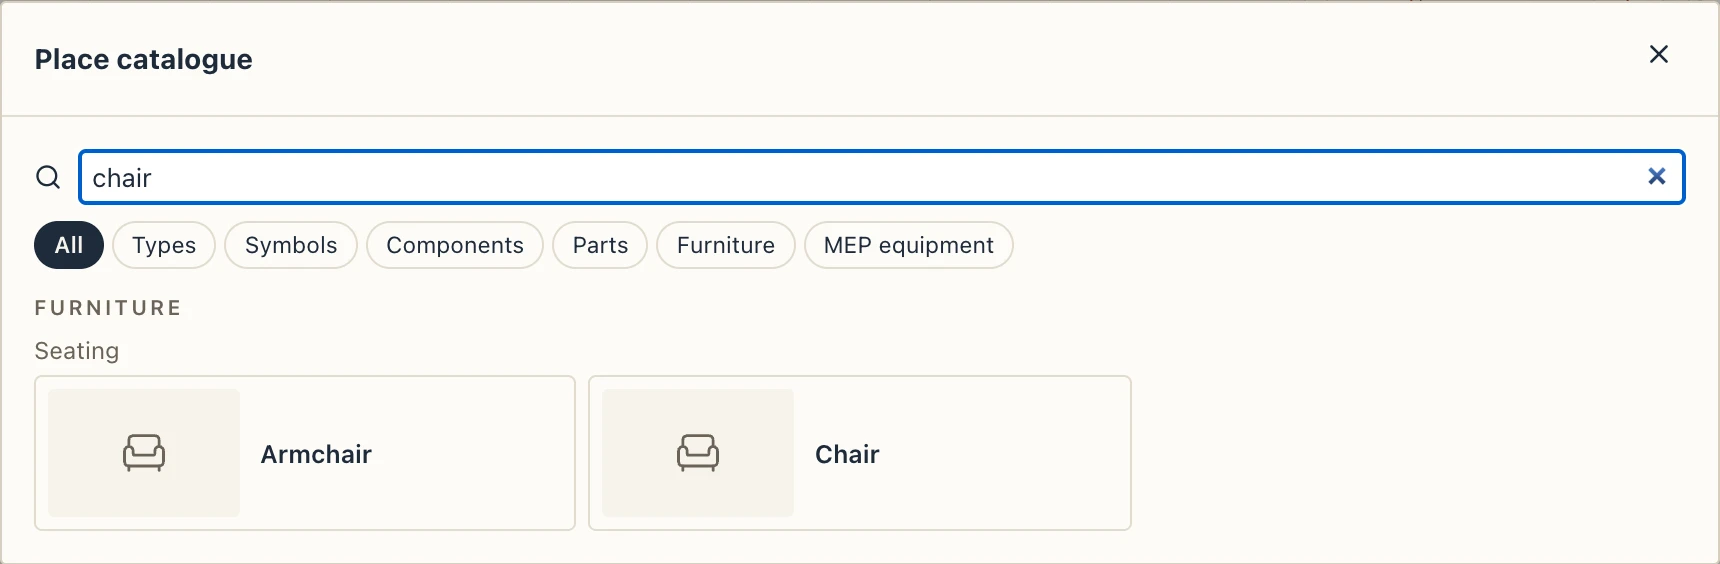
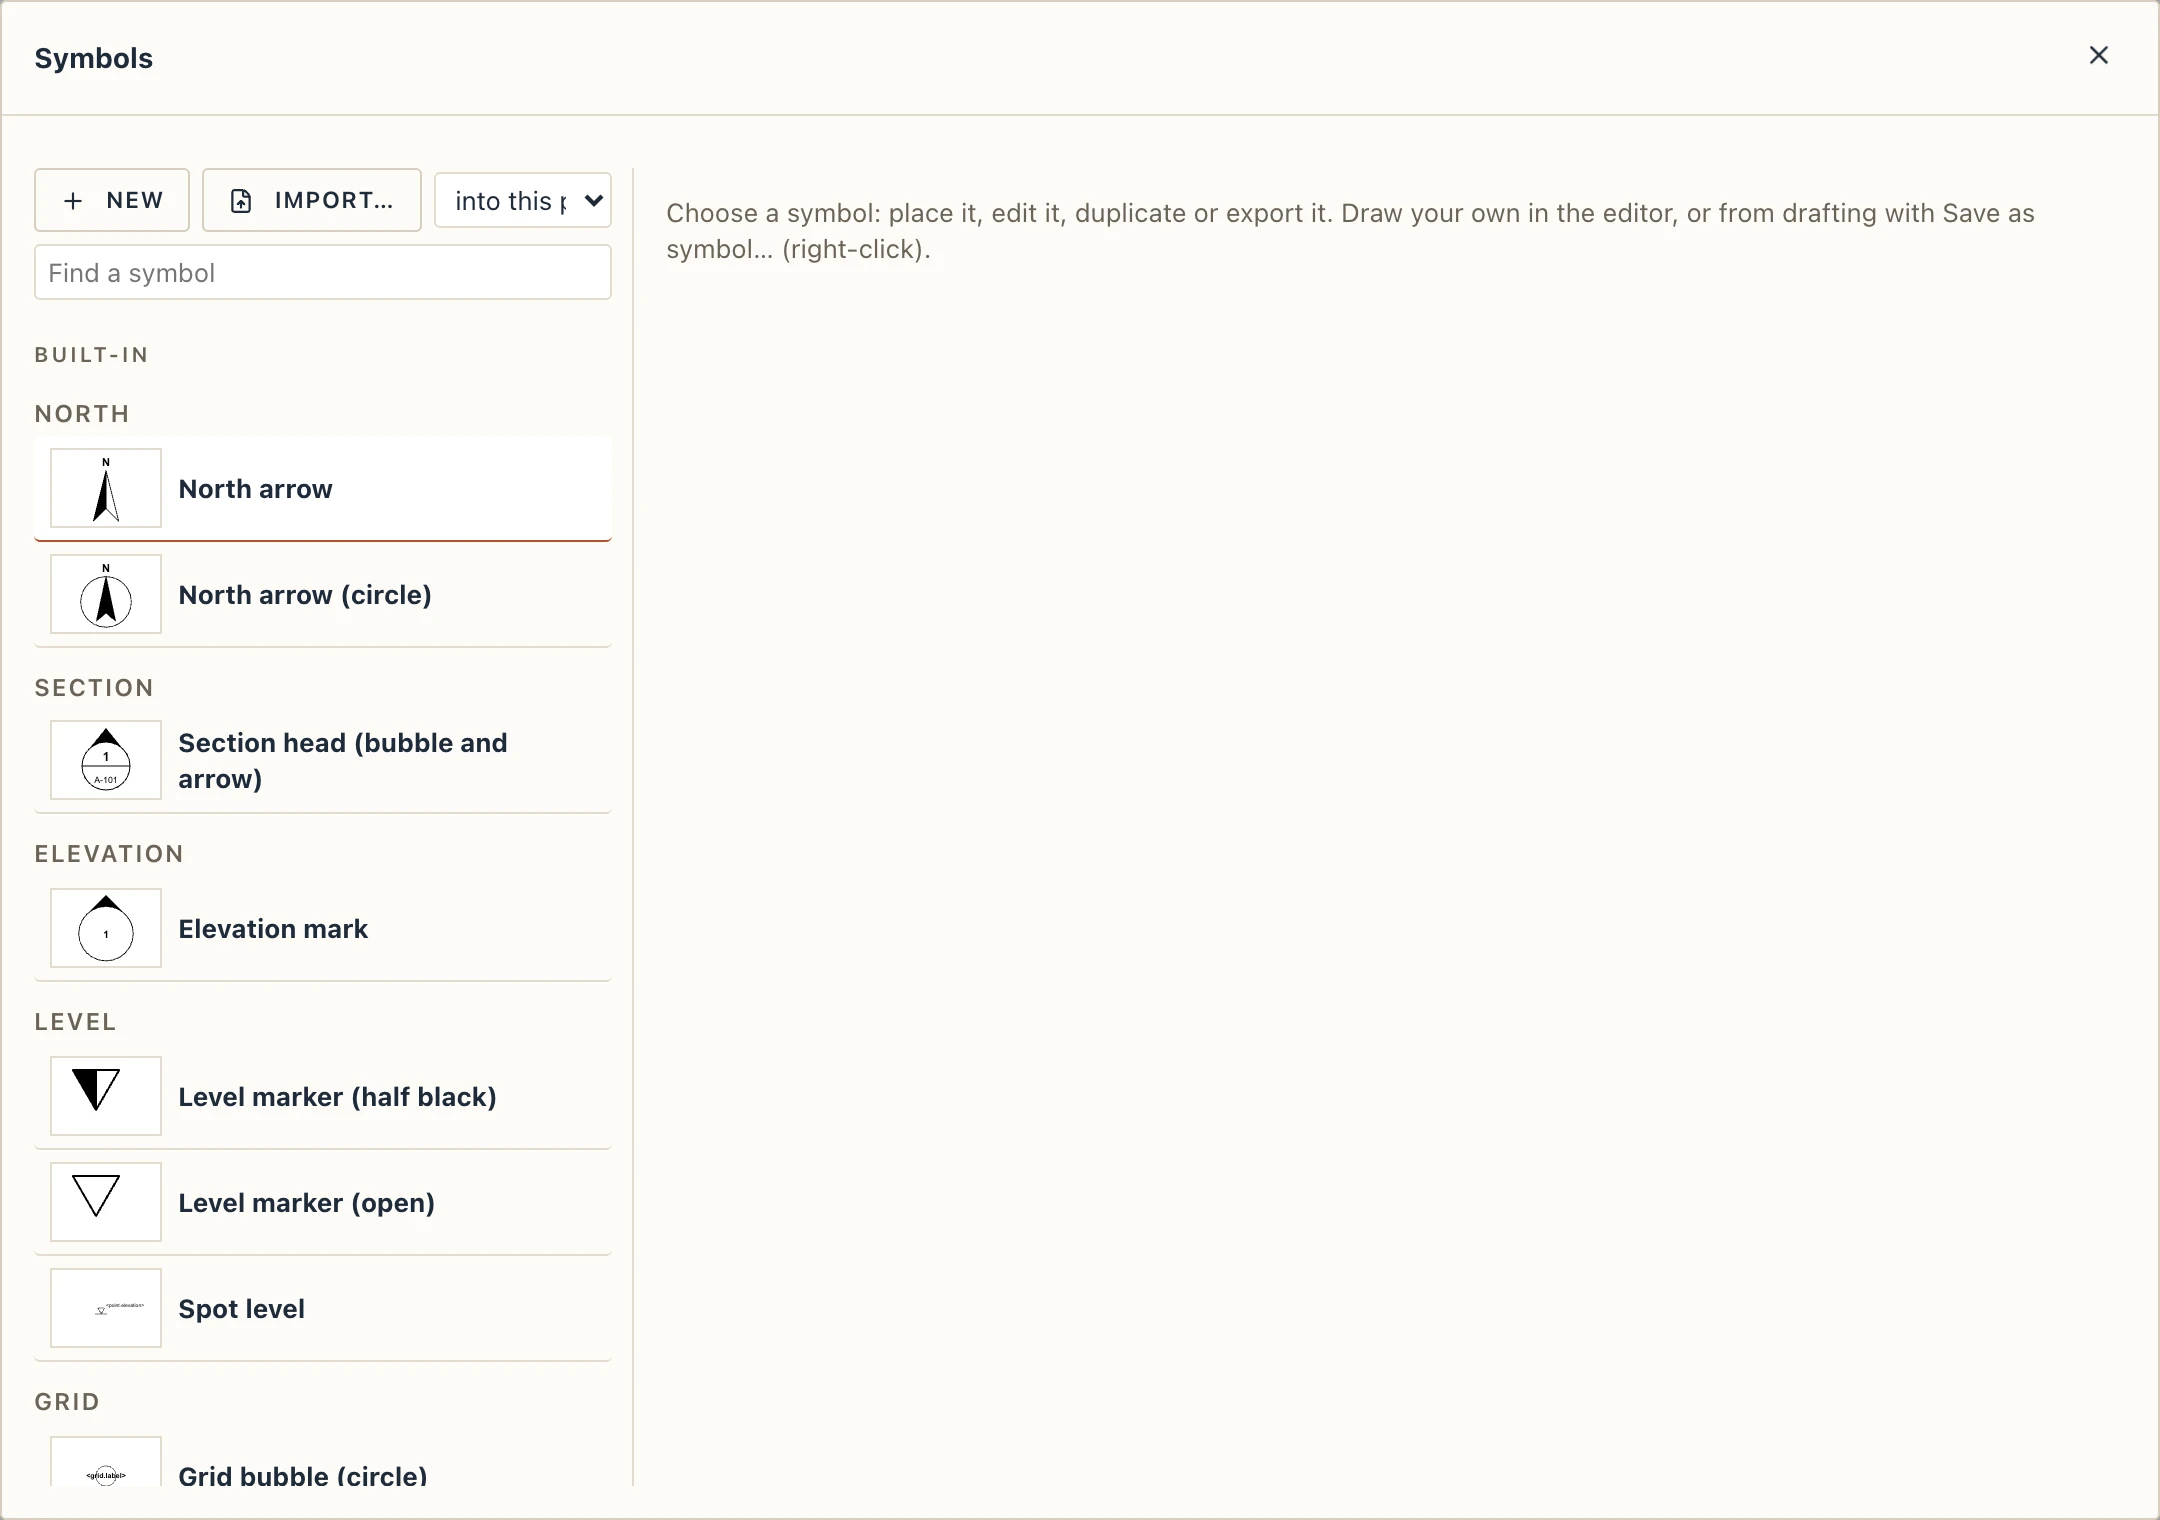
Manage → Place from catalogue… is one window for everything that can be put in a view, from every module of the edition: the project's Types (as the catalog below), the Symbols (Lapin's, the project's with the blocks a DXF file brought, this computer's), the Components and apartment types, the Parts (Studio's parts, once families), the Furniture (the project's types, My furniture, Lapin's kinds) and the MEP equipment. One search at the top looks through all of them (every word you type must be in the name, the group or the description); the chips under it show one source. A card starts placing it, with its tool. Symbols… (Manage and Annotate), Components (Manage), Parts… (Studio) and My furniture… (Interior) open the catalogue on their source; its button at the top right (Symbols…, Components…, Parts…, My furniture…) opens the dialog that makes and edits them.
The catalog
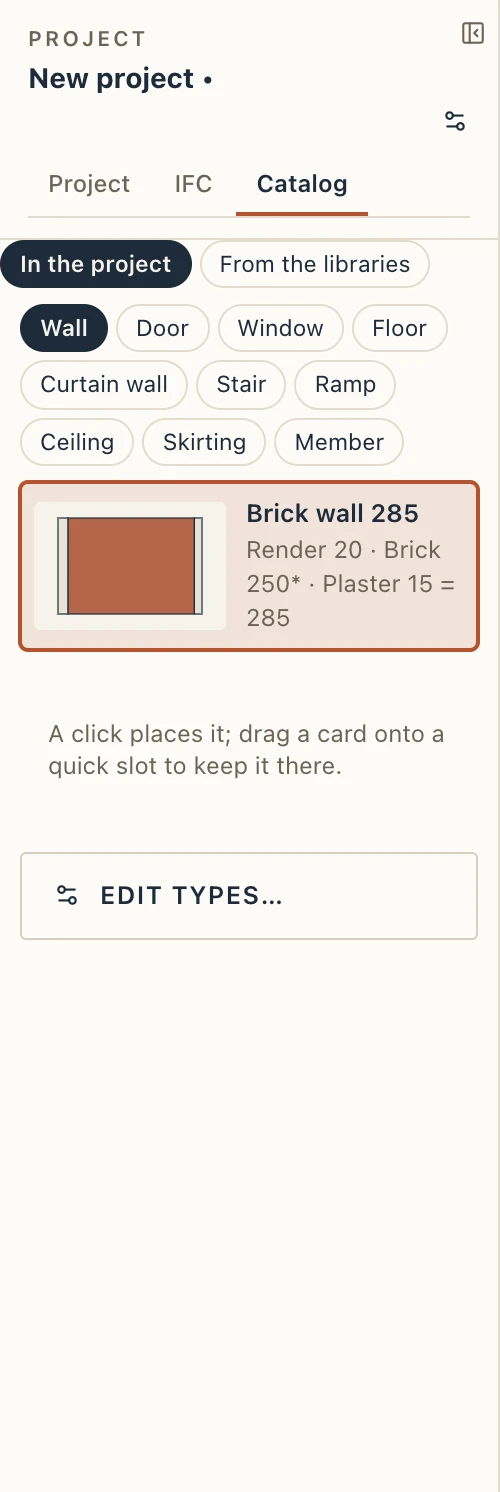
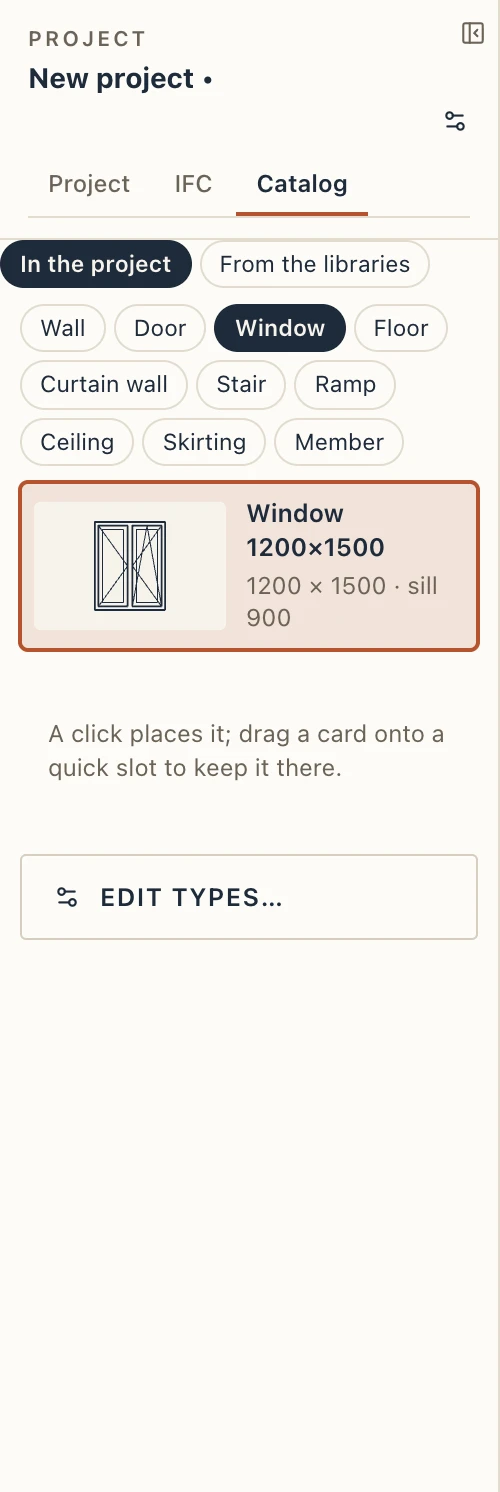
The project browser's Catalog tab shows the project's types for each tool that places typed elements: walls, doors, windows, floors, curtain walls, stairs, ramps, ceilings and skirtings. Each type is drawn small (a wall's layers as its plan cut, a floor's as its section, a door's or window's elevation, a skirting's profile), with what it is in a few words.
- click a card to place elements of that type: the tool starts with it;
- drag a card onto a quick slot to keep the tool with that type there;
- Edit types… opens the dialog where those types are made and changed.
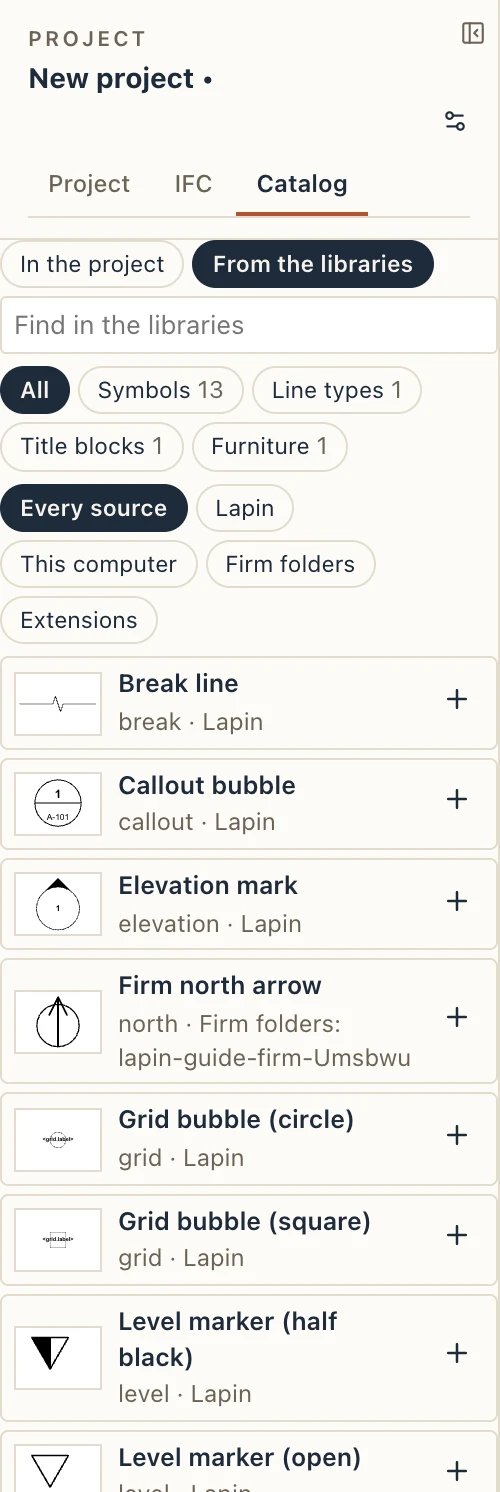
From the libraries at the top of the tab lists what can be added to the project from every source: Lapin's own, This computer, the firm folders and the installed extensions. There are entries for types, symbols, line types, drafting standards, rule packs, bar shapes, shared parameters, hatch patterns and families, with a search, a kind and a source filter, the symbols drawn small, and each entry's source and licence. Add to project brings it in through the library's own import, in one step to undo; a type brings what it is made of (materials, profiles).
Firm folders in the library dialogs
Each library's dialog (Symbols…, Type packs…, Line types in Drafting standards, Drafting standards, Rules…, Bar shapes…, Shared parameters, Materials for .pat files, Price lists…, Studio → Parts…, Manage → Title blocks… and Interior → My furniture…) has a Firm folders block that lists the files of its kind in your firm folders. A click reads the file through the one import preview, with the same choices as Import… (see below). Save to firm folder… writes the library's own export into a writable folder, replacing a file of the same name. The small disk button keeps a copy of a file on this computer.
Importing a library file: one preview, the same choices
Every library file comes in the same way, whichever dialog, firm folder or Catalog entry brings it: symbols, type packs, the wall and floor types' JSON, drafting standards, .lin line types, .pat hatches, rule packs, shared parameters, field names, title blocks, bar shapes, parts (and the older families), and My furniture's .lapinlib. When all of it is new to the project, or already there the same, it comes straight in. When something is there already but made otherwise, the Import preview lists the file, item by item: New, The same, Same name (another item of that name) or Same item, changed (the same style, line type, parameter, bar shape or furniture entry, edited since), with what differs. For each one that differs, choose:
- Keep both: the file's comes in beside the one there, with (2) after its name (Bubble (2)). The default for an item of the same name.
- Replace: the one there takes the file's in place; what uses it follows (the symbols placed, the walls of a type, the sheets of a title block). The default for the same item changed.
- Skip: the one there stays as it is.
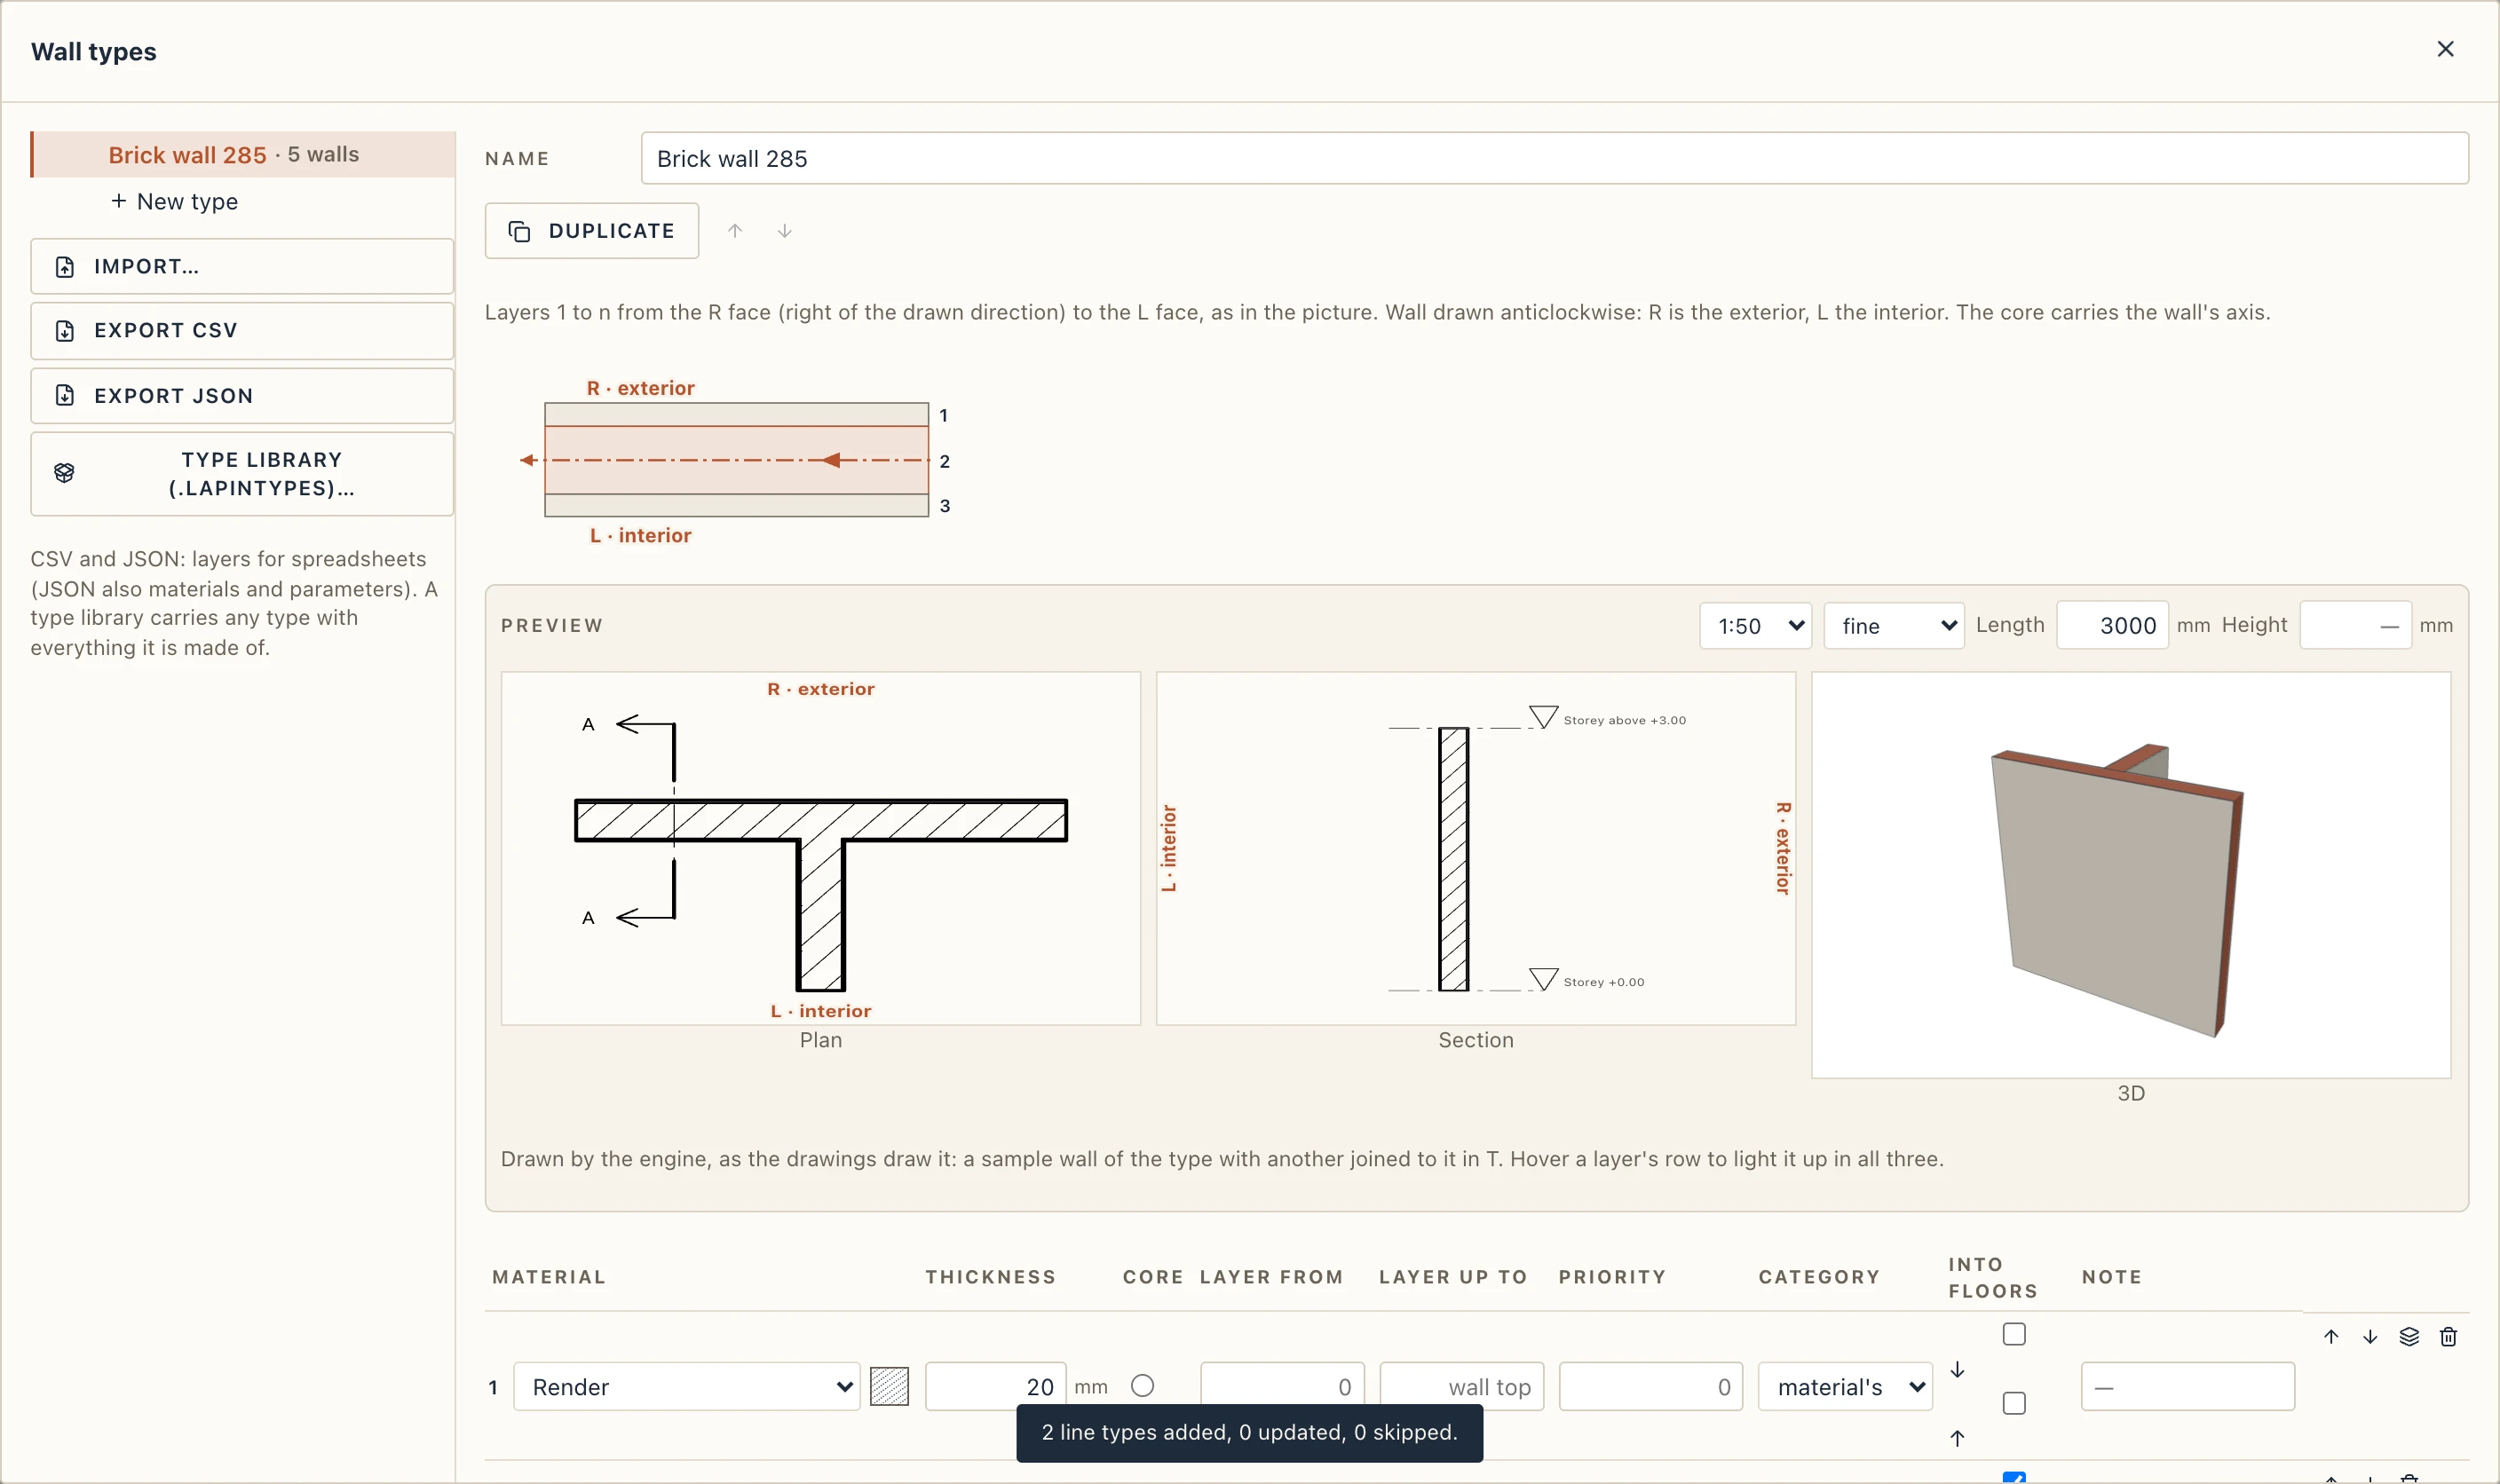
Apply to all… sets one choice for every item that offers it (a bar shape is named by its code, so it is replaced or skipped, never kept twice; a type pack's material keeps the project's by default). Import brings the file in, in one step to undo, and a notice counts what was added, updated, kept and skipped, and what was kept beside under a new name.
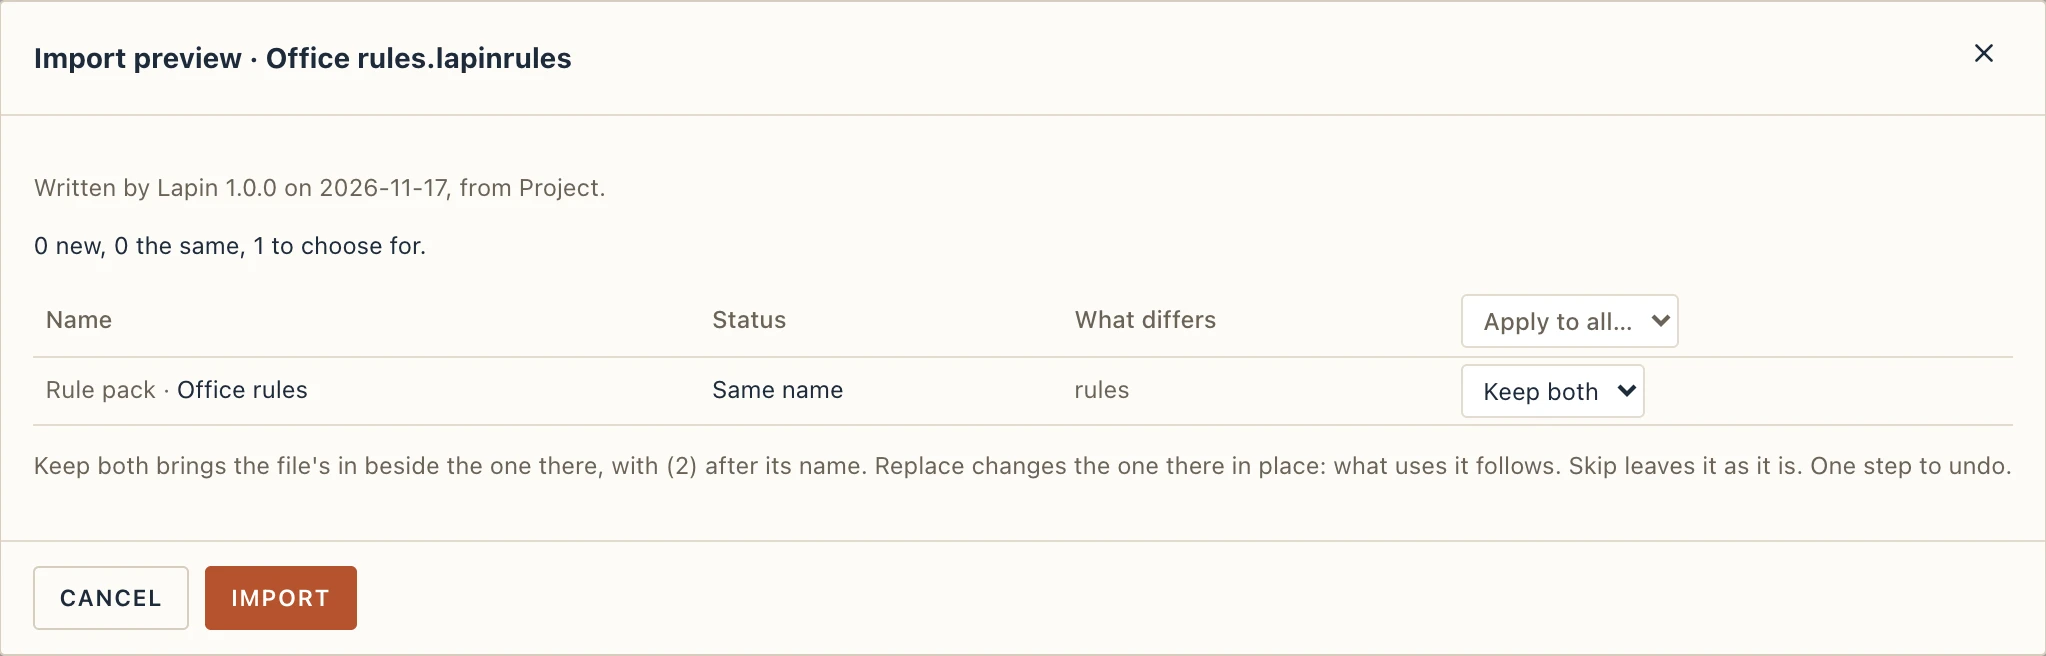
A file written by this version says at the top who wrote it: Written by Lapin 0.1.1300 on 2026-11-16, from Bloc P+4 (the project it came from). A file saved before this version has no such line (Written by an earlier Lapin) and reads as it always did. A file from a newer Lapin is refused with a sentence: update Lapin to read it.
Save to library at a type configurator
The dialogs that make types (wall, floor, door and window, stair, curtain wall, column and beam, steel and furniture types) have Save to library: the chosen type is written as a .lapintypes with its layers, materials, profiles and parameters, to This computer or a writable firm folder. It then appears in the Catalog, ready to add to another project in one click.
Folding the side panels
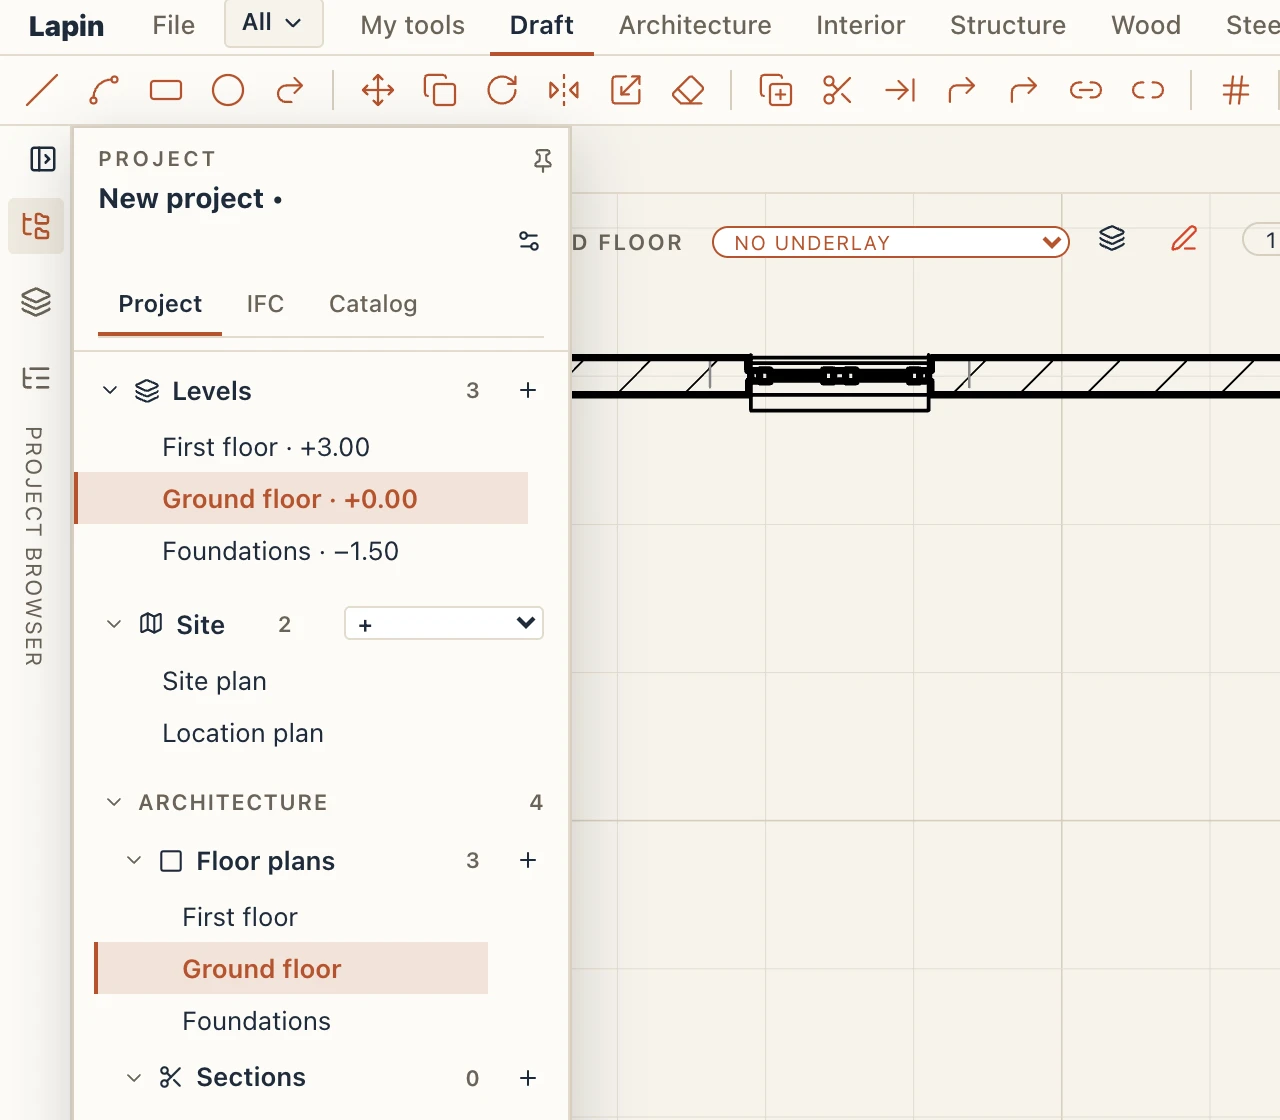
In every mode, the project browser and the properties panel fold to a thin rail on their side:
- the button at the top right of the panel folds it, and the arrow on its rail unfolds it;
- double-click the edge between the panel and the view;
- Ctrl B folds or unfolds the browser, Ctrl ⇧ B the properties, and Tab both.
Click an icon on a folded panel's rail to open the panel over the view without unfolding it. It goes away with Esc or a click elsewhere; its pin keeps it open. Drag the edge of a panel to make it wider; Lapin remembers the width.
Panels on either side
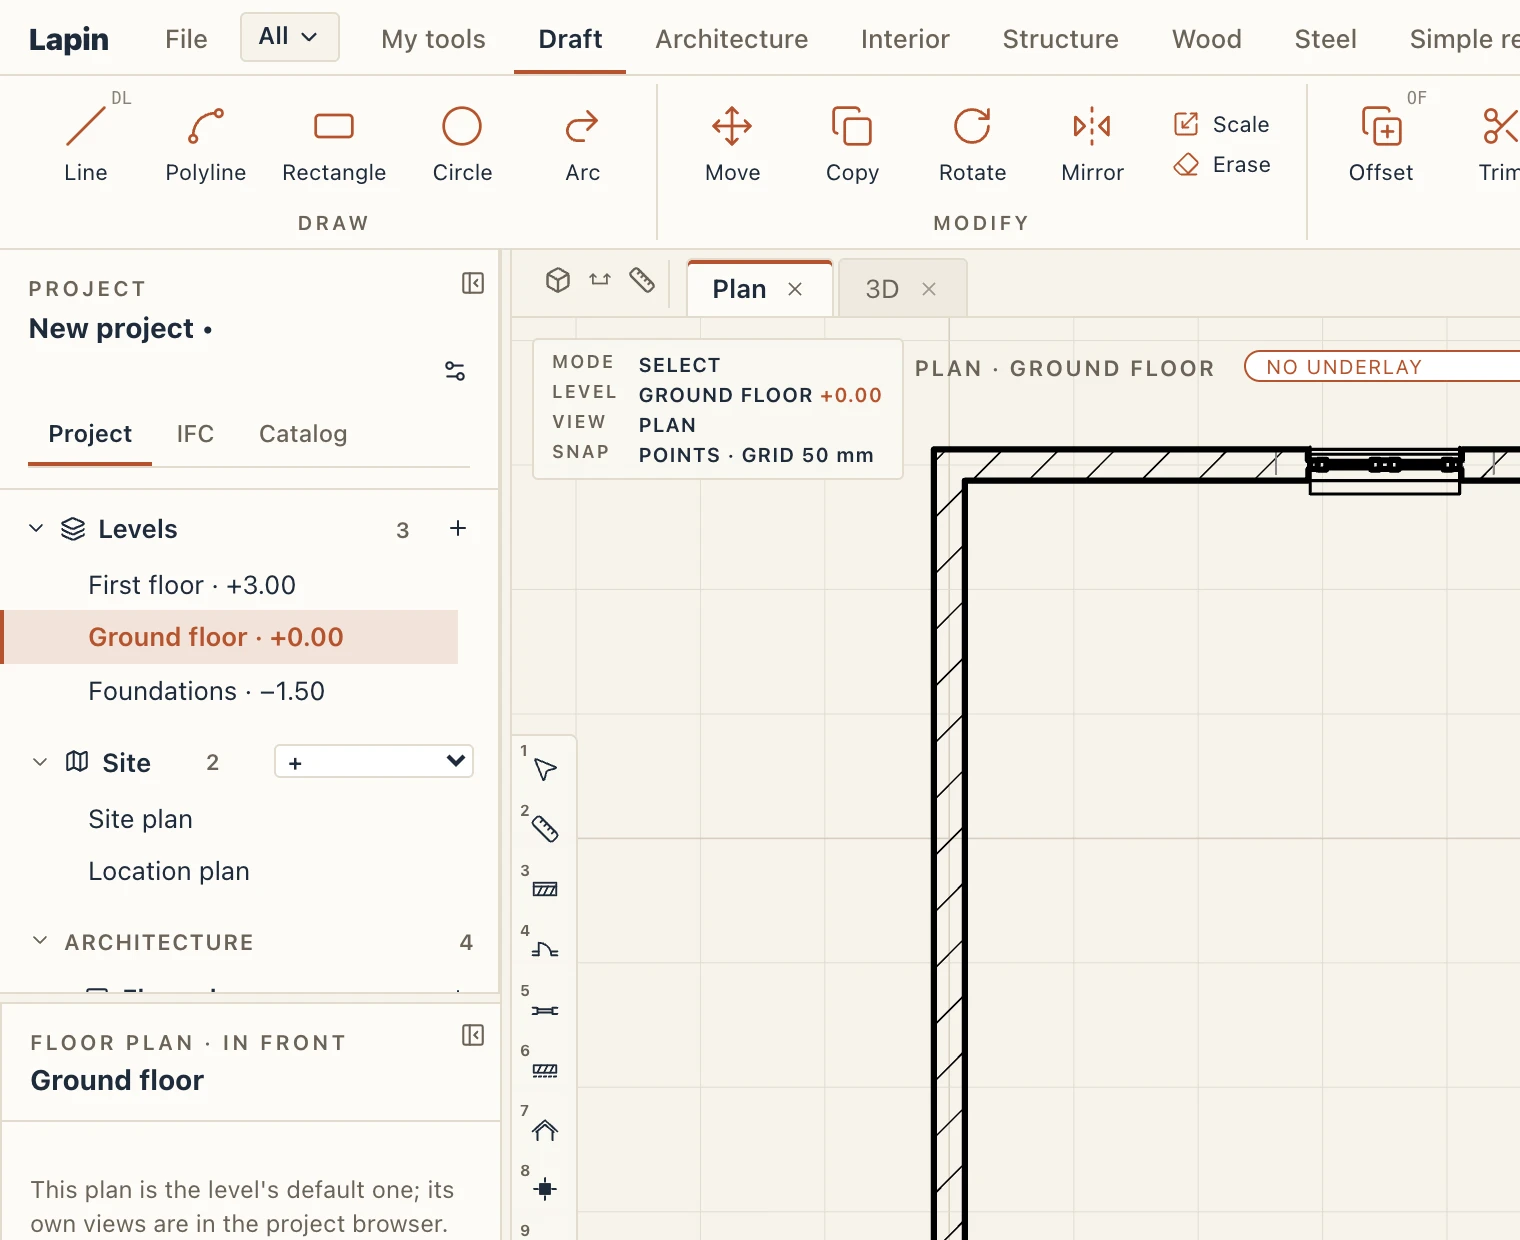
View → Panels puts the project browser and the properties panel where you want them, as in Revit: Browser left, Properties right (the default), Browser right, Properties left, Both panels on the left or Both panels on the right. With both on one side they stand one under the other; drag the divider between them to share the height (double-click it to halve), and drag the side's edge to make it wider. Each panel still folds, on its own: a folded one is a thin bar in the stack, or a rail when both are folded. The assistant tab (desktop) stays with the properties. Lapin remembers the arrangement on this computer. The same four choices are in View → Interface…, under Panel sides, beside the other parts of the interface.
Light and dark
The moon at the right end of the ribbon turns the interface dark (graphite); the sun turns it light again (paper). In the dark theme plans, sections and elevations lie on the dark background, their black pens in light ink; sheets stay paper. The configurators' small drawings (a door's or window's plan, section and elevation, a roof's, a balcony's, an elevator's, a hall's, a stair's…) and the previews of tags, title blocks and materials are drawn on a light paper card in both themes, so their lines, texts and dimensions read as on a printed drawing.
The theme is kept: Lapin starts again in the one you left it in. File → Preferences… also offers As the system, which follows the computer's own light or dark setting.
Preferences
File → Preferences… (Ctrl+,, also in View → Interface) holds your own settings, kept on this computer for every project and applied at once:
- General: the theme (light, dark, or as the system), the language, and links to Interface… and Keyboard shortcuts….
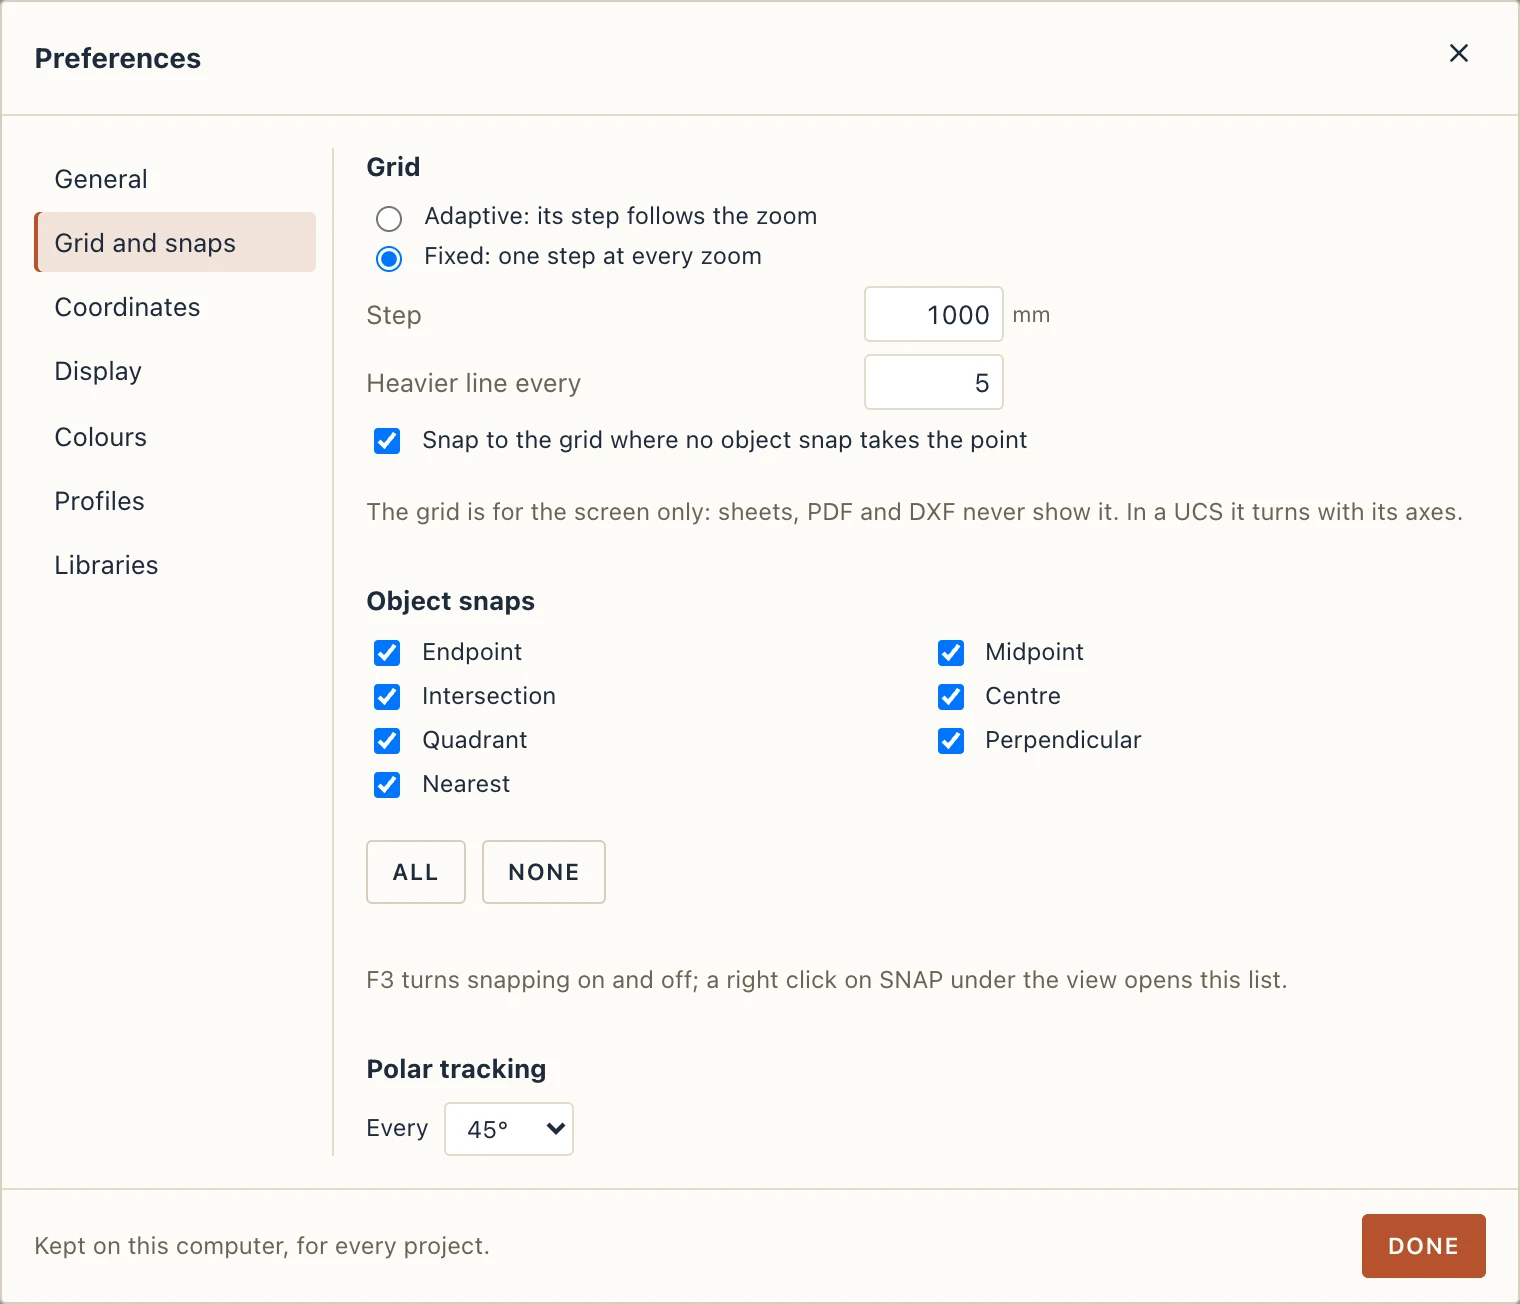
- Grid and snaps: the plan's grid, adaptive or fixed, snapping to it, which object snaps the cursor takes, and the polar tracking angle (see Snaps and helpers).
- Coordinates: what the status line reads at the cursor, whether the project's points are shown, and the UCS (see Real coordinates).
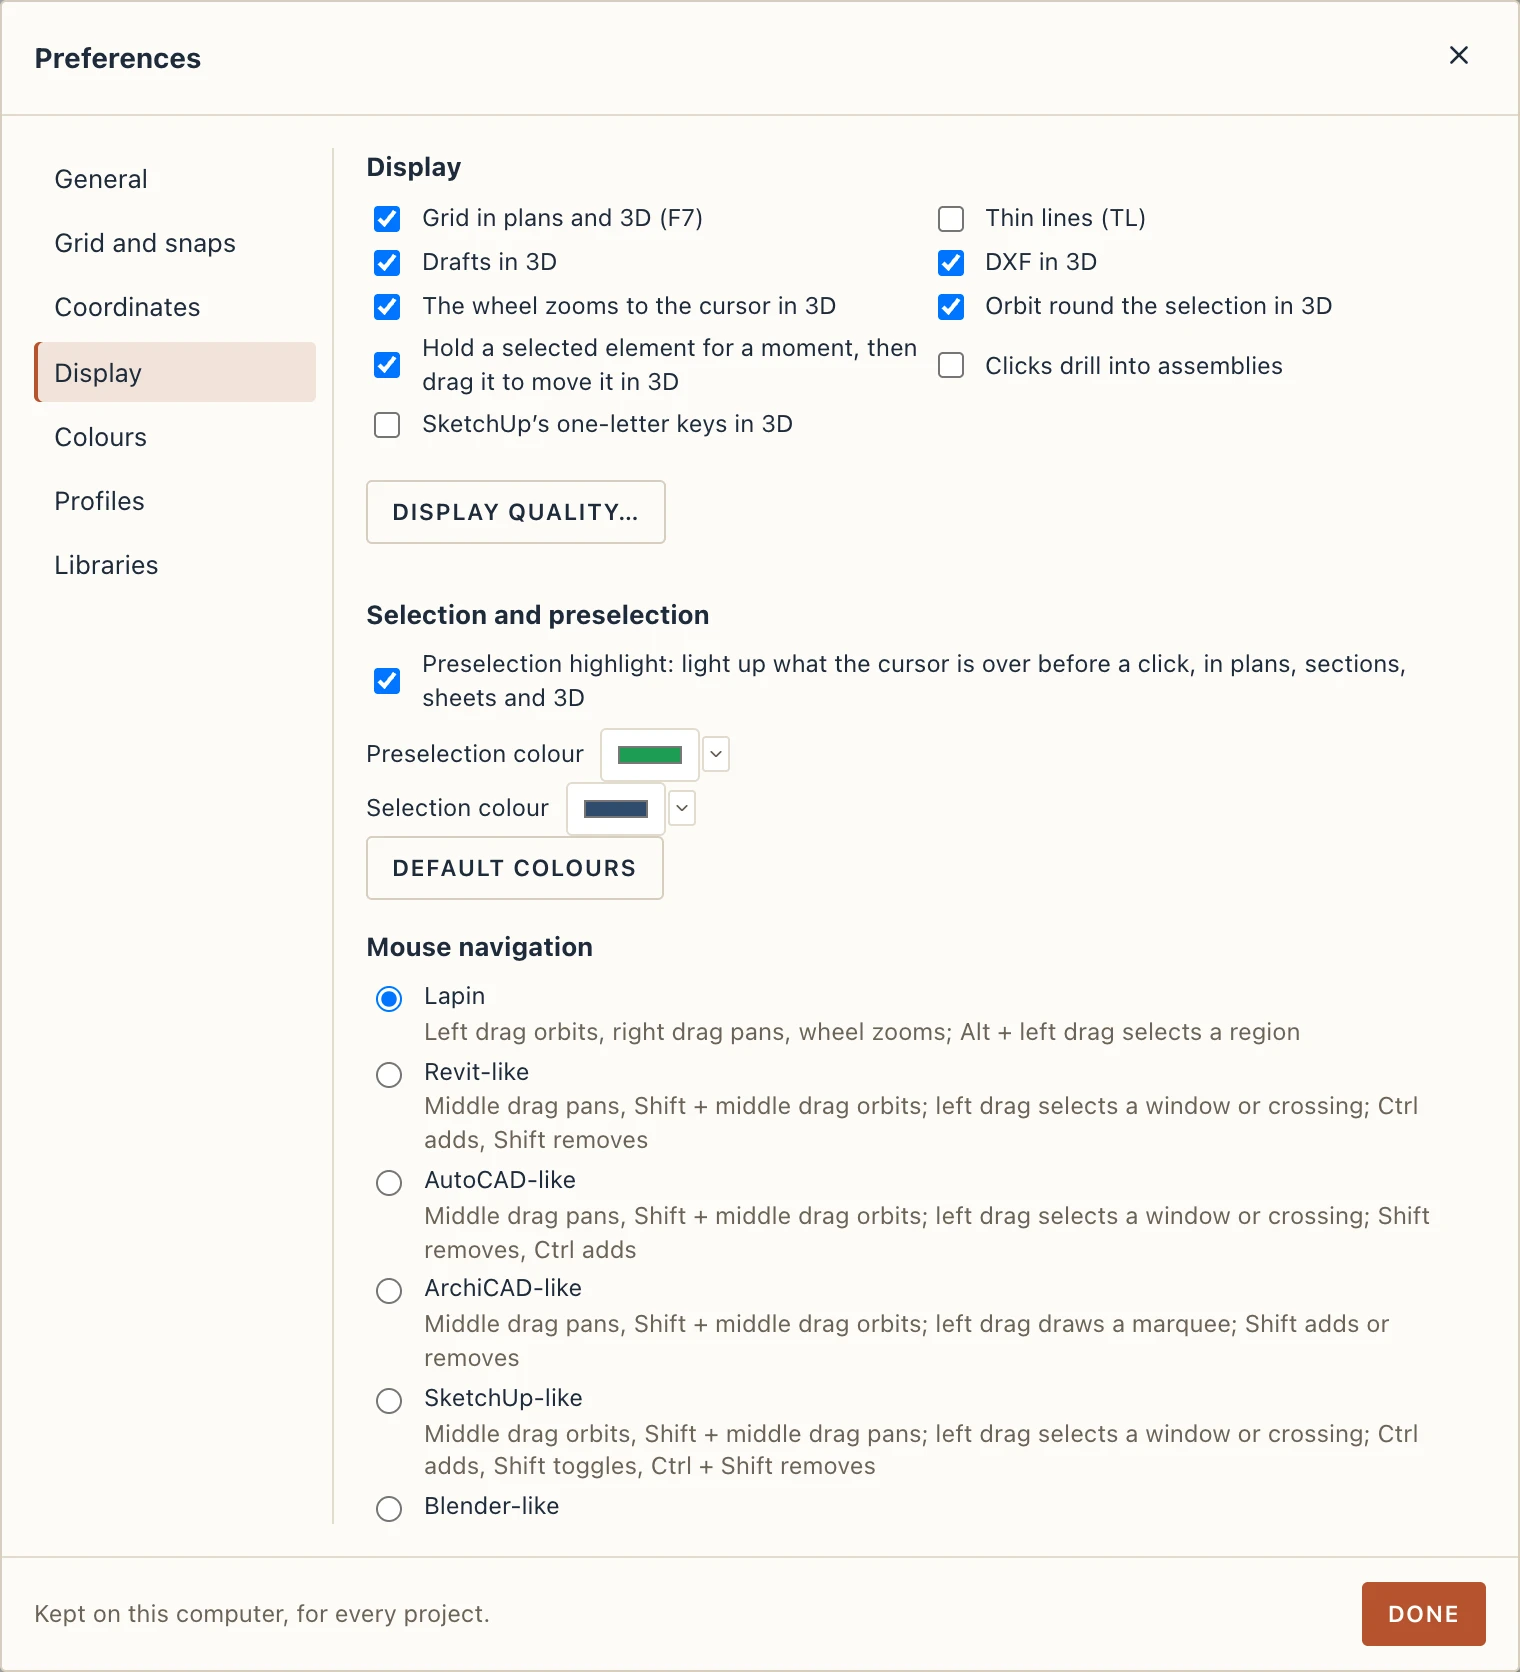
- Display: the switches of View → Graphics (grid, thin lines, drafts and DXF in 3D) and how the 3D view is navigated, in one place. Under Selection and preselection: Preselection highlight lights up what the cursor is over before you click, in plans, sections, sheets and 3D (drafted shapes, dimensions, tags, symbols, inset views and sheet views too; it is off while a tool is waiting for a point), and the Preselection colour and Selection colour are yours to choose; Default colours brings back the theme's.
- Colours: the swatches the colour fields offer, below.
- Profiles: the profile standards a new project offers and those the pickers show (see Profile libraries).
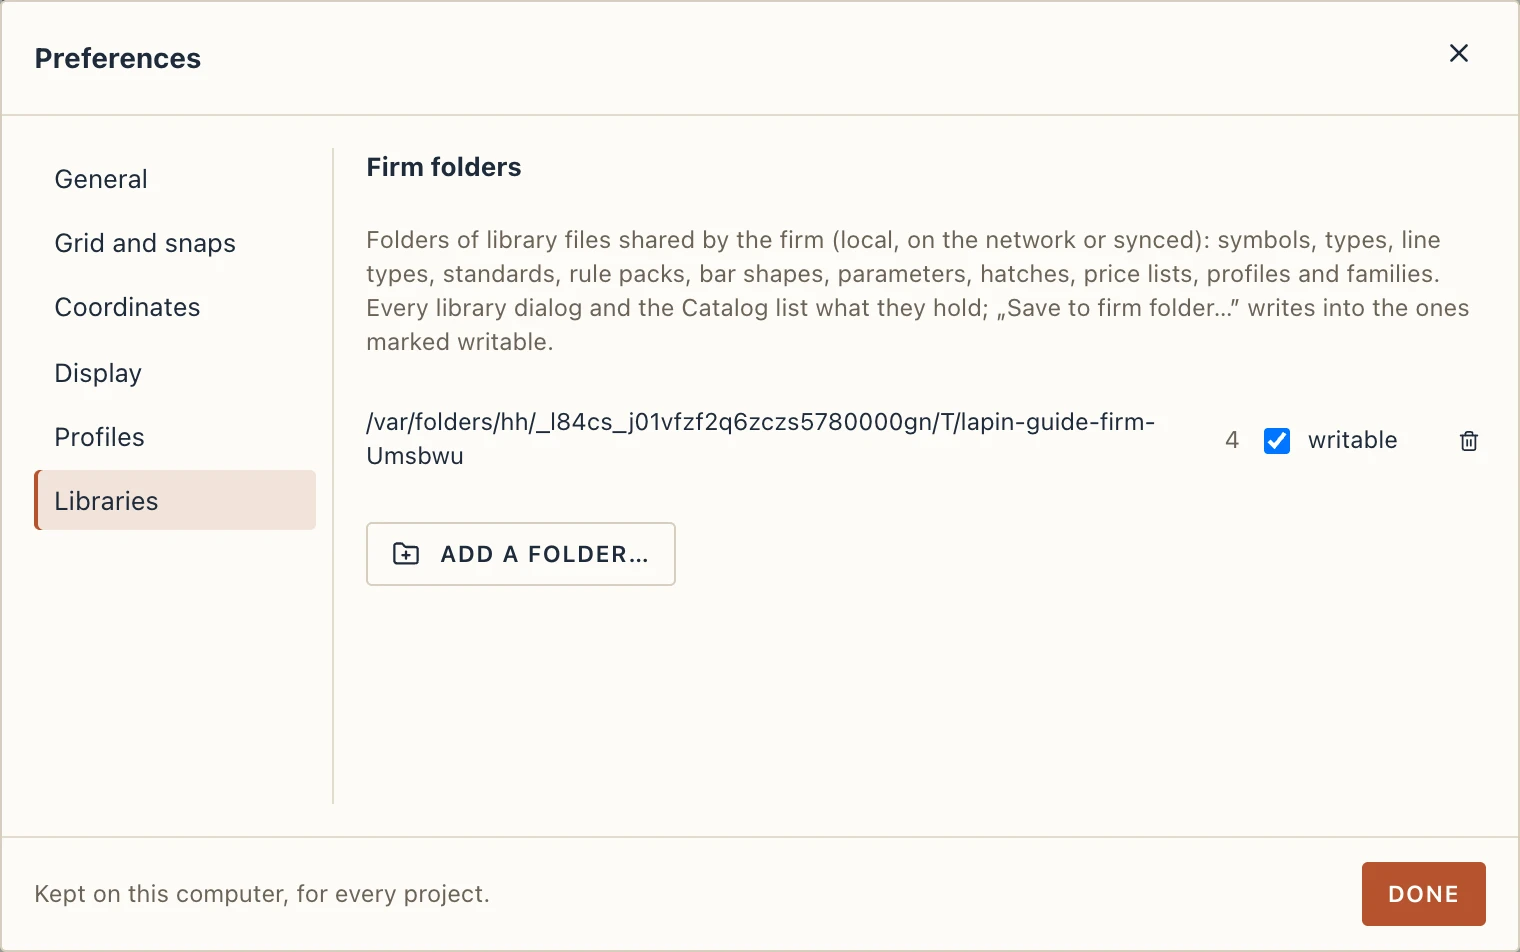
- Libraries (desktop app): the firm folders, any number of local, network or synced folders that hold library files (symbols, types, line types, standards, rule packs, bar shapes, parameters, hatches, price lists, profiles, parts). Tick writable to let Lapin save into a folder. The library dialogs and the Catalog read them (below).
Colour swatches
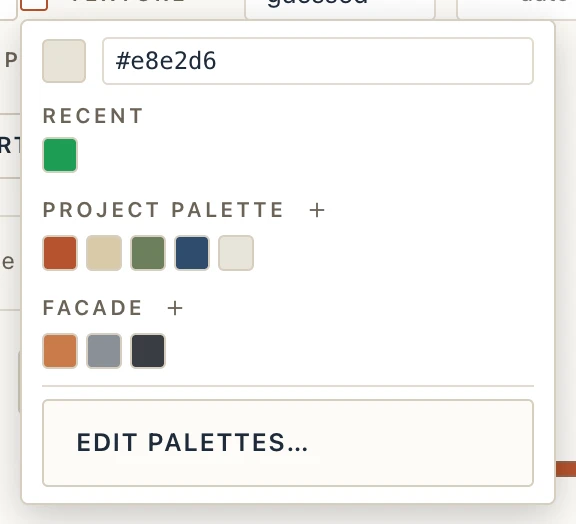
Every colour field in Lapin (materials, layers, room colours, hatches, view shadows, schedules…) is the system's colour input with a small arrow beside it. The arrow opens the swatches: type a hex colour, or pick one of
- Recent: the colours you chose lately, kept for you automatically.
- Project palette: swatches kept in the project, so everyone who opens it sees them. Each change is one undo step.
- Your palettes: any number, kept on this computer for every project.
The + beside a palette adds the colour in the field to it. Edit palettes… (also File → Preferences → Colours) creates, renames, moves and deletes your palettes, adds or removes a colour in a palette and reorders its colours (select a swatch, then the arrows), and Add the colours of the materials in use puts every colour of the materials the project uses into a palette. Palettes of your own are not part of the standards file (.lapinstandards); to share a set of colours with a team, put them in the project palette.
View tabs and windows
Three quick buttons stand before the tabs: 3D opens the 3D view, Section (SE) starts the section tool and Measure (ME) the measure tool, so the three most used views and tools are one click away from any view.
Each view opened has a tab above the view. Drag a tab to put the view somewhere else. Dragged out of the window, or onto its edge, it opens in a window of its own where you drop it, for a second screen (desktop app). Dropped on the right or bottom quarter of a view, it splits the view and opens beside it or under it. Dropped on the other pane, it opens there. While you drag, the place it would go is lit and named. A click on a tab still just opens it.
Ctrl Tab brings the next tab in front and Ctrl Shift Tab the one before (also Ctrl Page Down and Page Up), going round from the last to the first; on a Mac it is the Control key, since ⌘ Tab belongs to the system. They do nothing while you type in a field. They are commands (Next view tab, Previous view tab) you can reassign in the shortcuts.
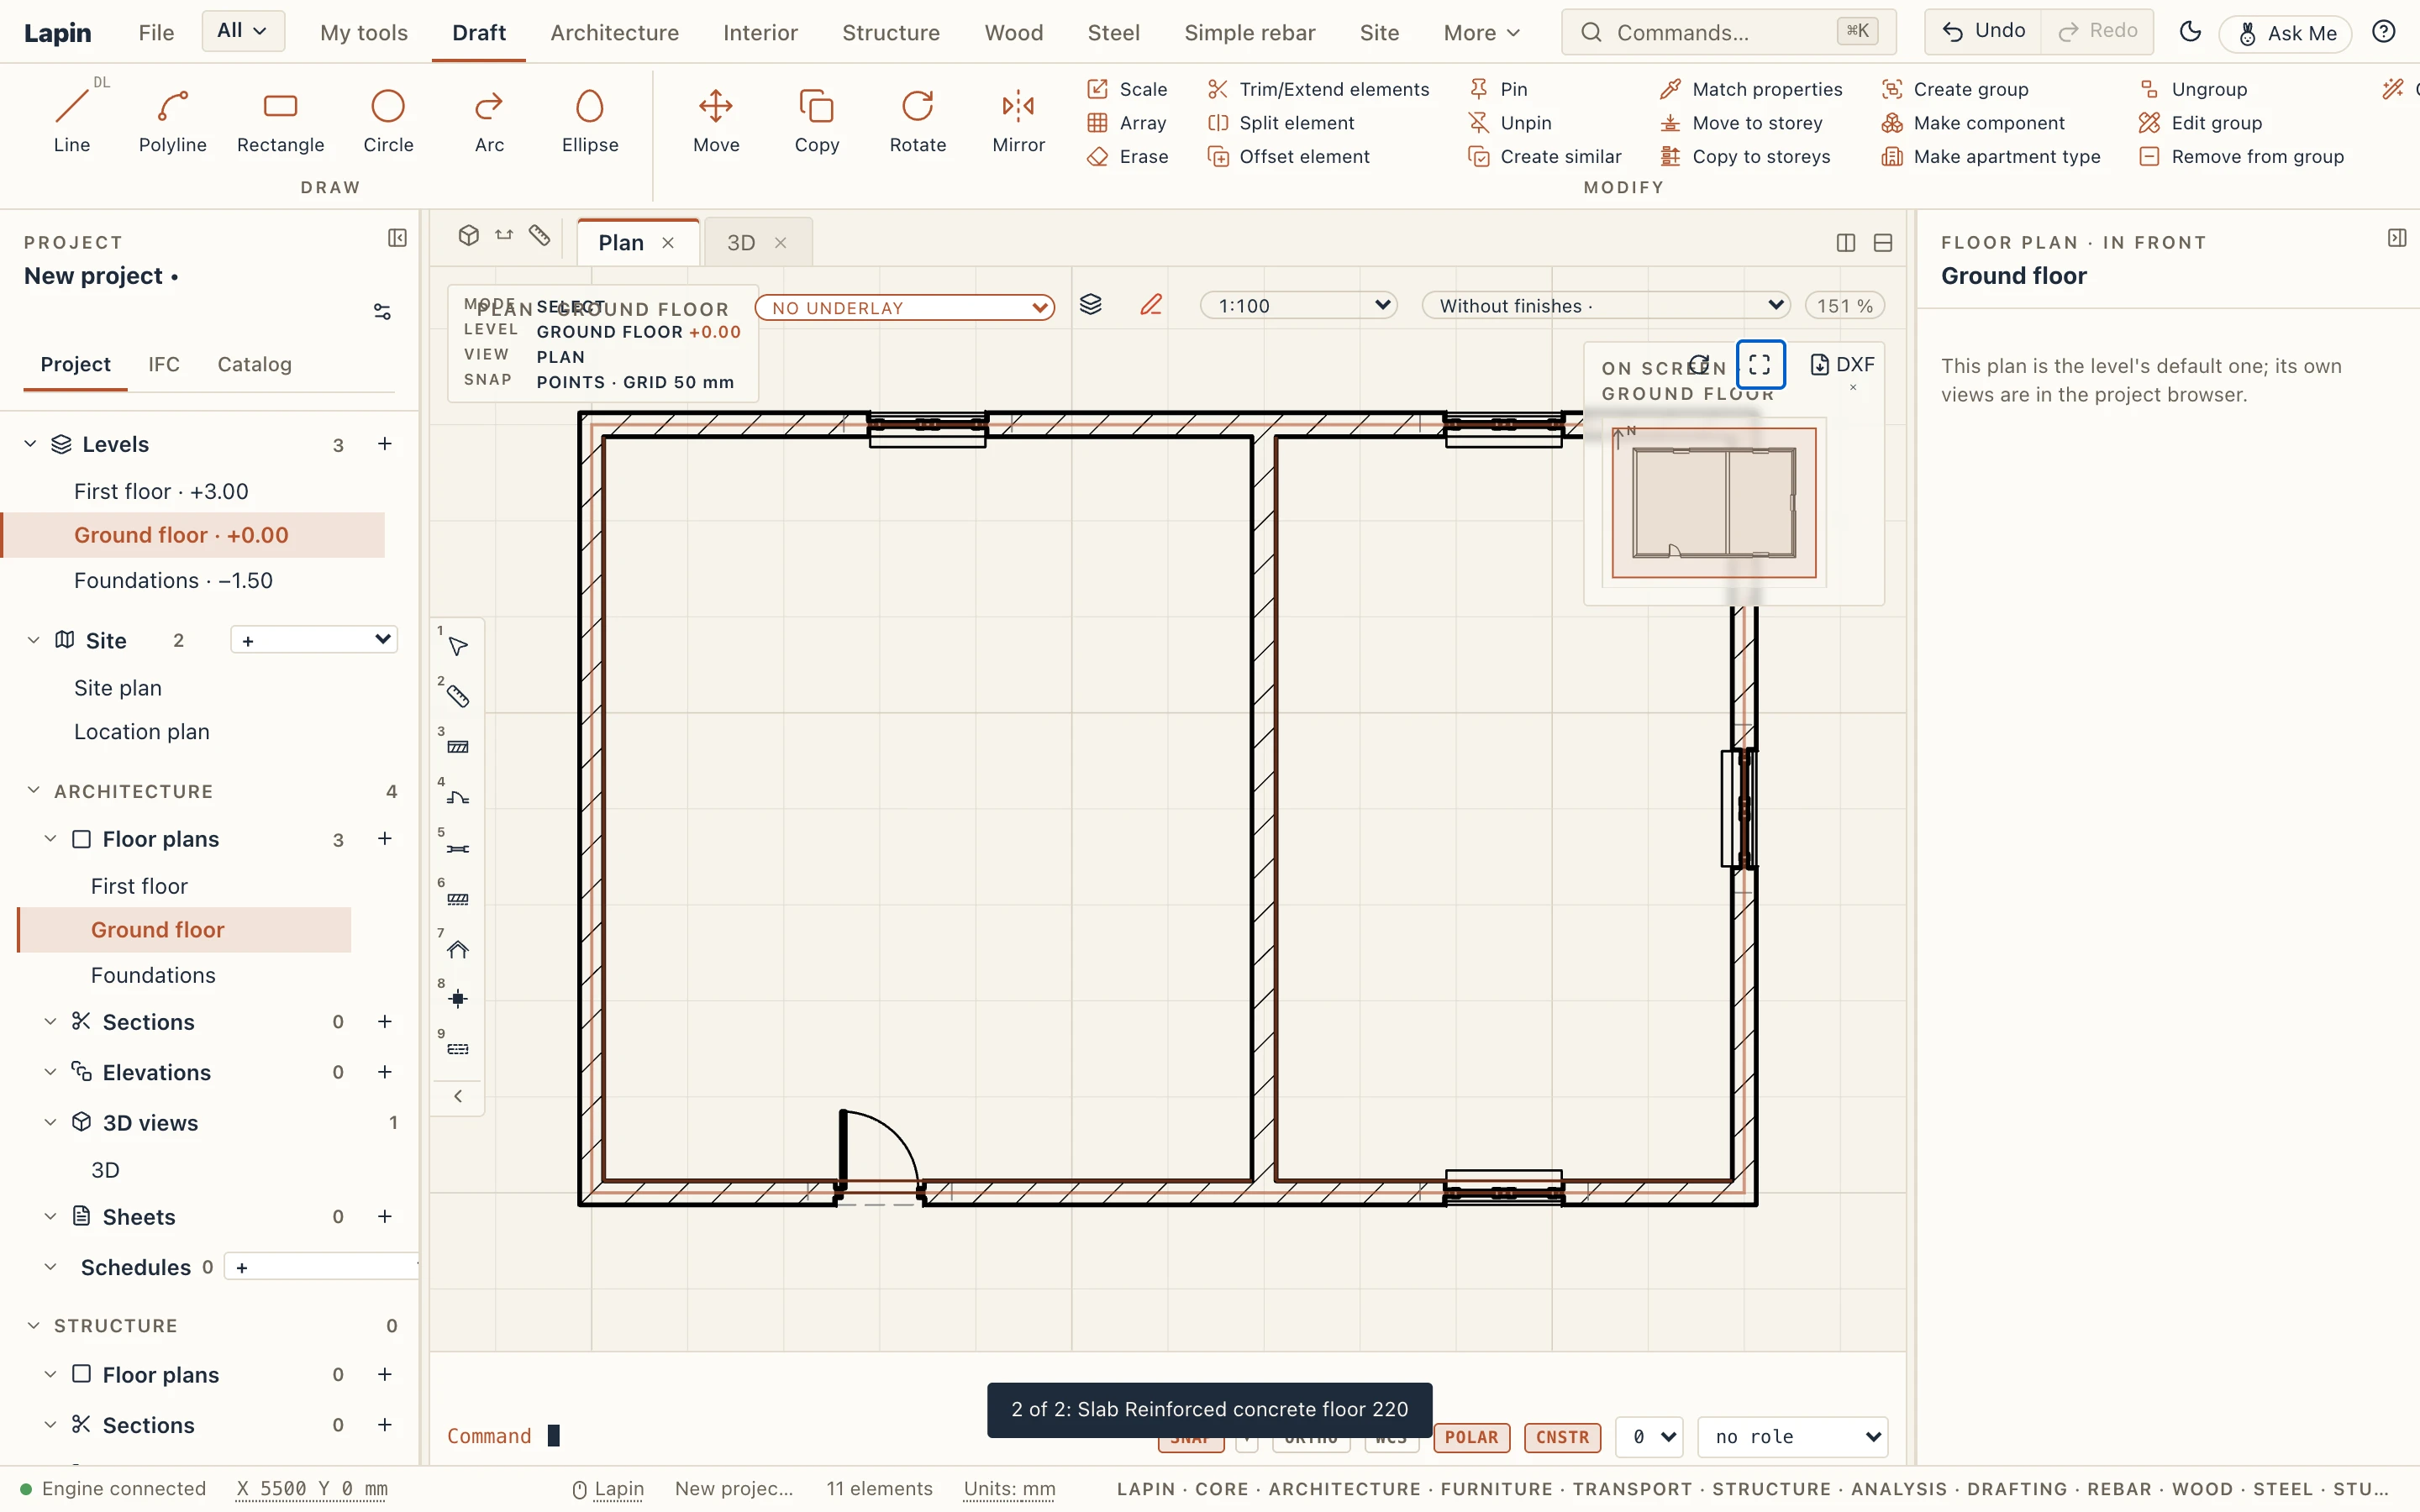
Tab over overlapping elements. In a plan, section or elevation, when more than one element lies under the pointer (a wall over a slab over a room), Tab lights the next one and Shift Tab the one before, going round; the status line says which ("2 of 3: Slab Floor 1"), and a click selects the lit one. Move the pointer and it goes back to picking what is under it. With nothing or one element under the pointer, or while a tool or a command is running, Tab keeps its other meanings: it folds the panels, and over a grip shared by several elements it goes through them. Light the previous element under the pointer is the command to reassign if you want another key.
A 3D tab keeps its state while you work in another view: the camera (where it looks from, perspective or orthographic) and the section box, on or off and where you left it, are as they were when you come back from a plan or a sheet. Each 3D view (the plain 3D and every saved one) keeps its own, for as long as the project is open; a saved view's own camera and box open it when nothing was kept yet.
A right click on a tab offers the same: Open in a new window, Split: open beside, Split: open below (or Open in the other pane when the view is split), Close and Close the others. The window button at the right of the tabs, and View → New window, open the view in front in a window of its own. The windows share the model, the selection, the storey and the tool; each keeps its own zoom.
What a click selects
Ctrl+A (Select all) selects everything the view in front shows that a click could take: in a plan, a section, an elevation or a drawing view, all that a selection window over the whole view would take; in 3D, the elements shown (not those hidden by the view or put away with Hide / Isolate). In a text field it selects the field's text, as usual.
A click, a selection box or a lasso takes only what the view shows, in plans, sections, elevations, sheets' views and 3D. An element the view's Visibility / Graphics hides (its category, a subcategory, a filter), one put away with Hide / Isolate or by the view's phase, one outside the view range or crop, on a level, link or group not shown, or cut away by a section box, is passed over: the click takes what is drawn under it, and the element under the cursor that lights up is one you can see. With Drill into assemblies on, a click inside a whole still steps into its parts. With the modelling lines shown instead of the drawing (the pen button at the top of the plan), everything on the screen can be picked. The project browser, a schedule, a link in the properties panel and the dependencies still select an element by its name, hidden or not; the properties panel then says Not shown in this view.
Right-click on a selection
A right click on a selected element (in a plan, a drawing or the 3D view) offers what applies to it:
- Select similar in this view and Select similar in the whole project select the elements of the same class and the same type (those of the same class when the element has no type). In the view, only what the view shows counts, and in a plan only the level you are on.
- Select all with the same… opens a list of what the element is told apart by: its type, its width, its core material, its material, its storey. Each entry shows the element's value; choosing it selects every element of the class that has the same one, whatever the rest.
- Edit type… opens the types dialog of the element's type (the one Edit types… opens), with that type current.
- Previous selections lists the last ten selections, the newest first. A selection goes in the list when you clear it or pick something else; one that was taken again moves to the front, and elements that are gone drop out. Click one to select it again. The command Select the previous selection (Ctrl Alt Z, changeable in Keyboard shortcuts) takes the newest one without the menu.
- In 3D, Hide, Isolate and Show all (HH, HI, HR) work as in Revit, for now.
Several elements at once
Select several elements (Shift-click, or drag a box) and the properties panel shows the last one picked, with N selected beside its class. A value they share is shown; one that differs reads varies. Change a field and every selected element that has it takes the new value, in one step that Undo takes back: the height and base offset of walls, the type of every selected wall, door or beam, the sill of windows, the phases of every selected element whatever its class, the layer and colour of drafted lines, the style of texts. What is each element's own stays its own: a room's number, a wall's length, a door's place along its wall.
Hide in a plan or a section
A right click in a plan, a section or an elevation, with something selected, offers to put it away:
- Hide in view hides the selection in this view for good, as Revit's Hide in view: it is kept with the project, and the view's sheets, PDF and DXF leave it out too. Each hide is one undo step. A level's default plan becomes its plan view when something is hidden in it.
- Hide for now (HH) and Isolate for now (HI) hide the selection, or everything else, in this view only until Reset temporary hide/isolate (HR). They are not saved or undone, and they print nothing differently. The same keys in 3D hide and isolate in the 3D view, as before.
- Reveal hidden draws what the view hides in magenta, so it can be picked: select it and choose Unhide in view to show it again. Choose Reveal hidden again to turn it off.
Quick select
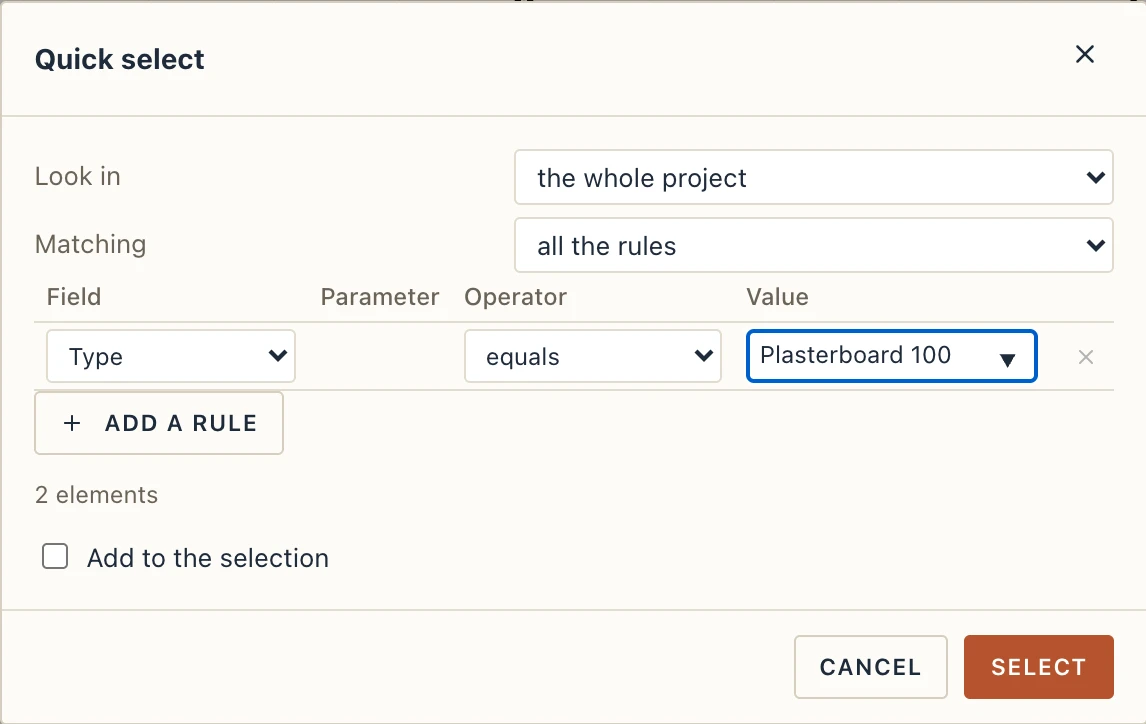
Quick select… (in the right-click menu of a view, or View → Select → Quick select, QS) selects elements by rules, as AutoCAD's QSELECT and Revit's filters do. Its rules are written in the same editor as the view filters, the clash search sets, a field schedule's filter and a task's rule: each rule picks a field (an element's IFC class, Type, Storey, Material, Name, Category, Group, Linked file, Phase created or Phase demolished, Predefined type, a Parameter (as text) by its name, such as a fire rating, or any field of the project, its quantities among them) and compares it: is, is not, contains, does not contain, starts with, is less than, is at most, is greater than, is at least, is between (either end may stay empty), is one of, is none of, has a value, has no value. A list takes its values by commas. The value box suggests the values the model has. Elements must match all the rules or any of the rules. Look in chooses what the view in front shows (its crop, what it hides and what is hidden for now count) or the whole project. The count of elements found follows as you type; Select selects them, or adds them to the selection with Add to the selection ticked.
Mouse navigation styles
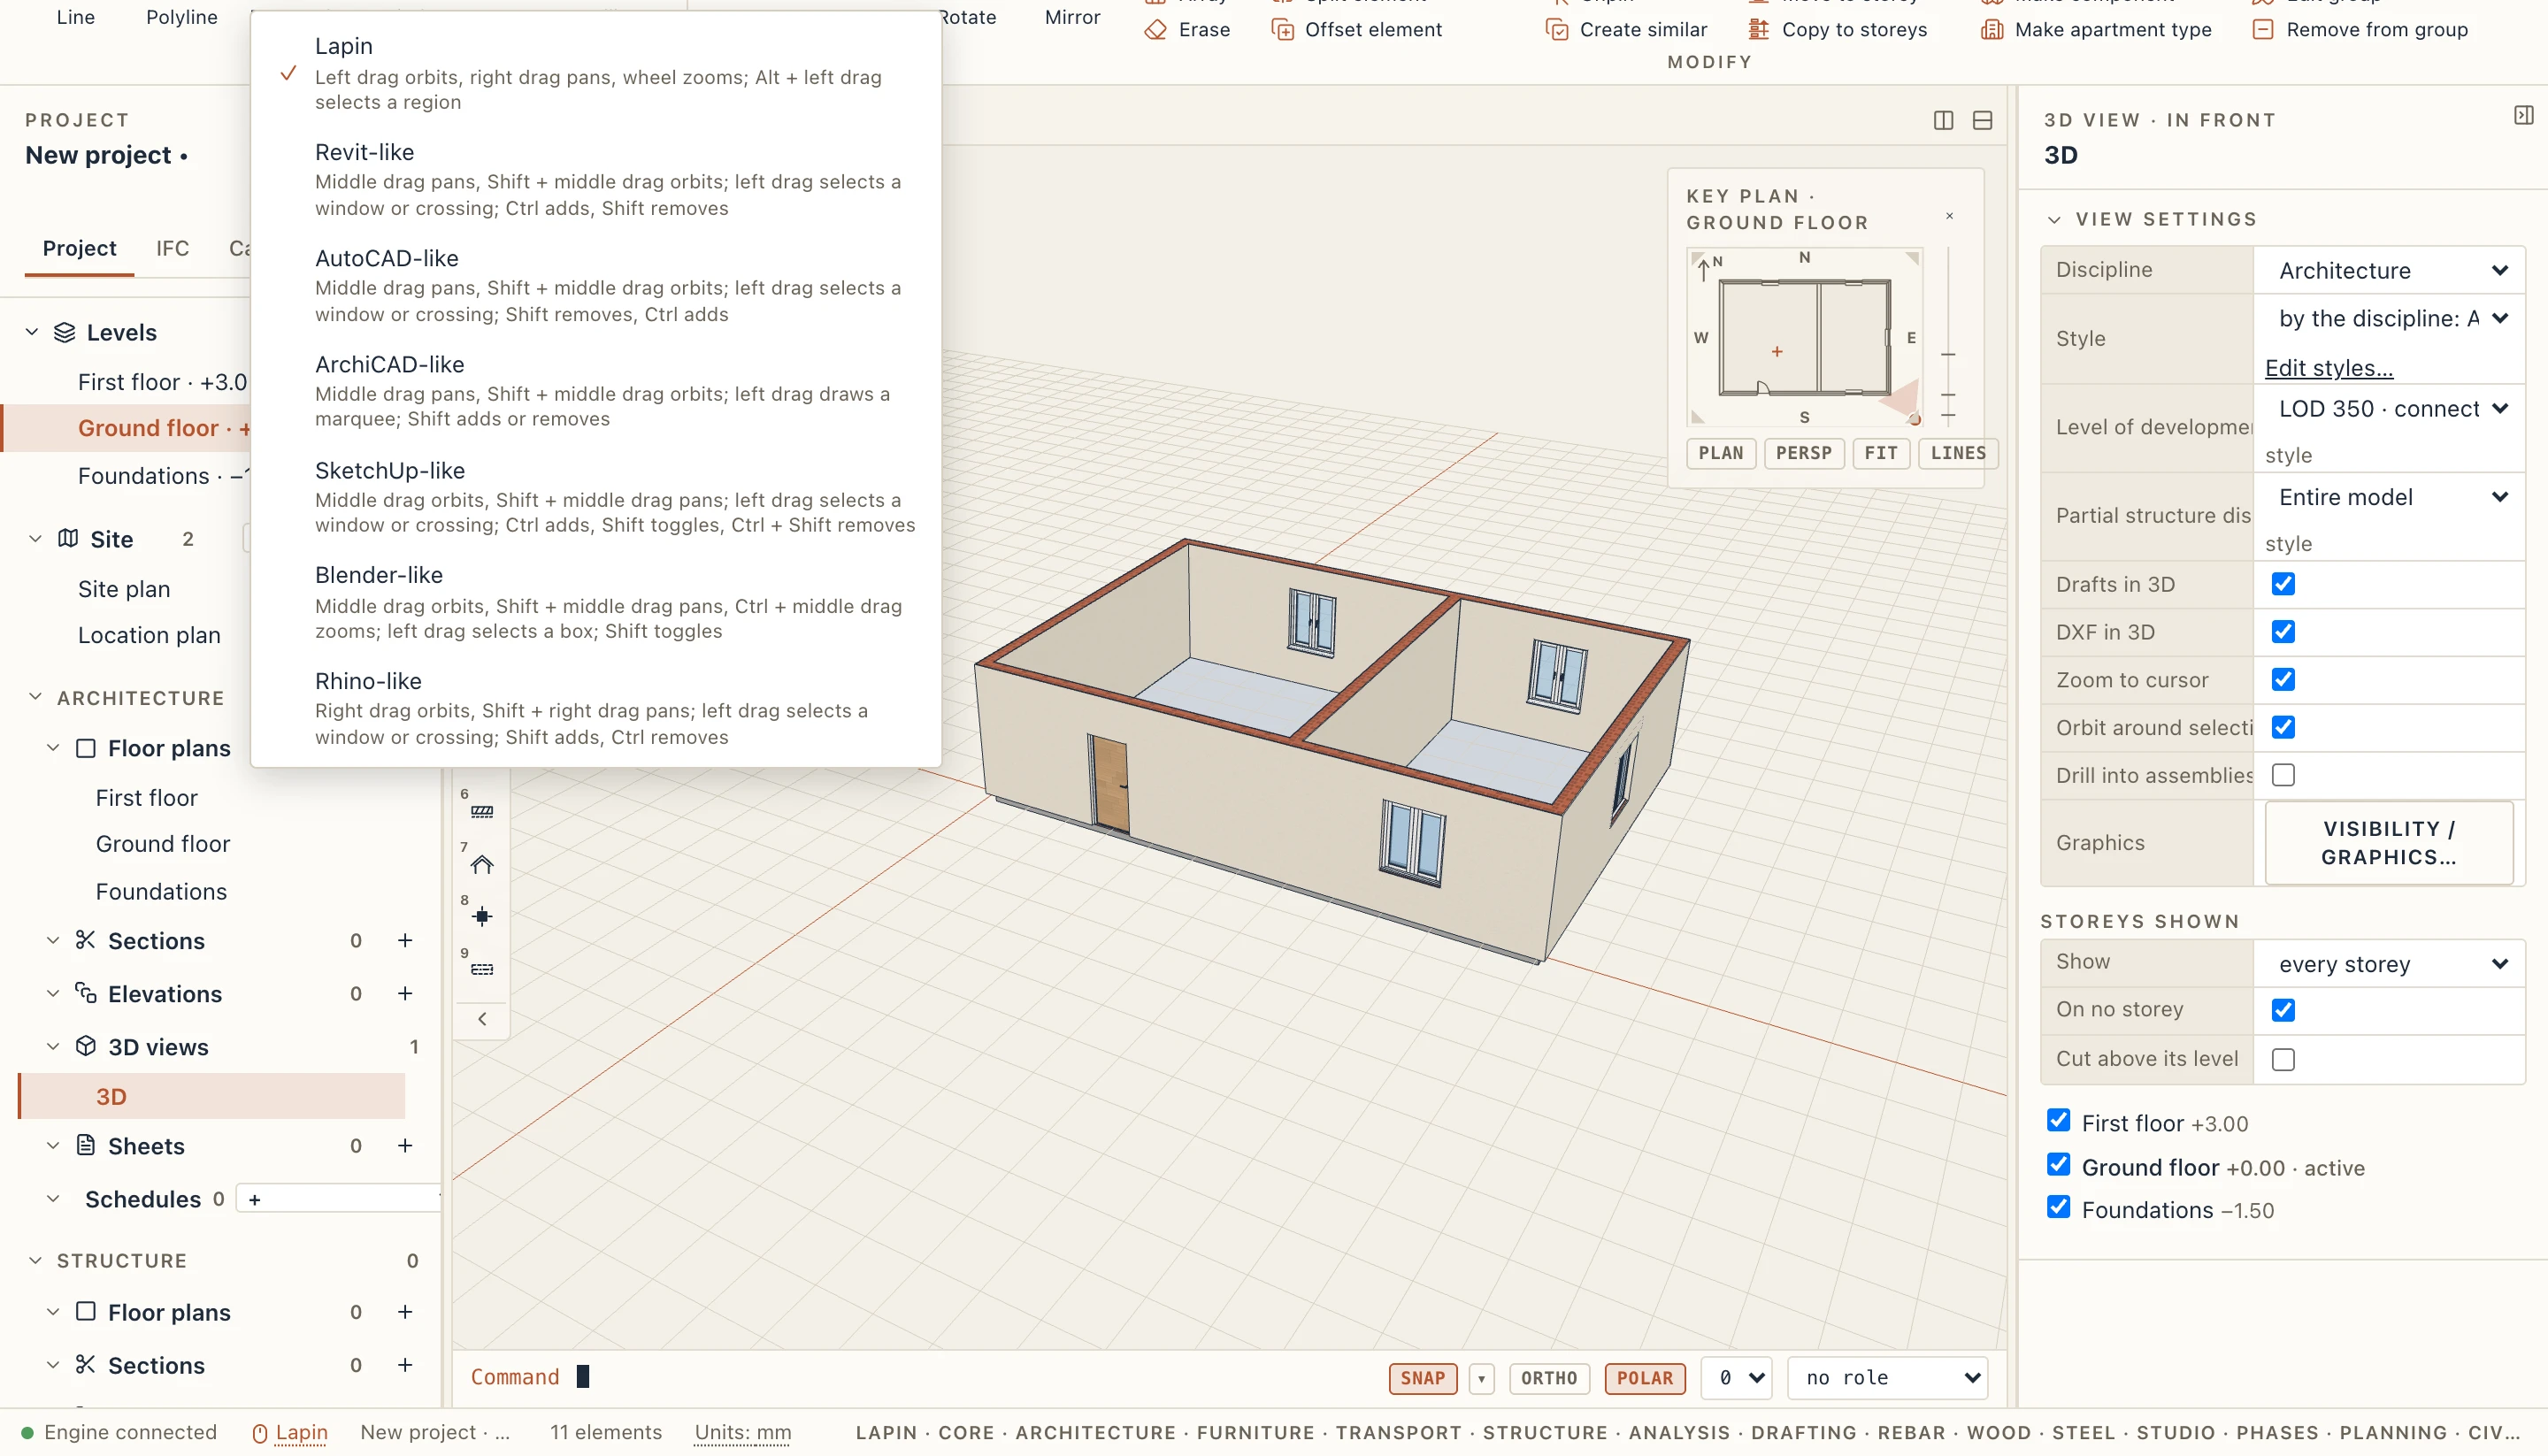
The status bar, at the bottom, names the mouse navigation style in use (Lapin to begin with). Click it to choose another: Revit-like, AutoCAD-like, ArchiCAD-like, SketchUp-like, Blender-like or Rhino-like, each listed with its main gestures. File → Preferences → Display → Mouse navigation sets it too. It is kept for you, on this computer, for every project, and it applies to the 3D view and to plans, sections, elevations and sheets alike.
| Style | Orbit (3D) | Pan | Zoom | Select | Region |
|---|---|---|---|---|---|
| Lapin | left drag | right drag (also Shift or Ctrl + left drag) | wheel; middle drag | click; Shift toggles; Ctrl picks the part | Alt + left drag |
| Revit-like | Shift + middle drag | middle drag | wheel | Ctrl adds, Shift removes | left drag |
| AutoCAD-like | Shift + middle drag | middle drag | wheel | Shift removes, Ctrl adds | left drag |
| ArchiCAD-like | Shift + middle drag | middle drag | wheel | Shift adds or removes | left drag |
| SketchUp-like | middle drag | Shift + middle drag | wheel | Ctrl adds, Shift toggles, Ctrl + Shift removes | left drag |
| Blender-like | middle drag | Shift + middle drag | wheel (to the middle of the view); Ctrl + middle drag | Shift toggles | left drag (a box) |
| Rhino-like | right drag | Shift + right drag | wheel | Shift adds, Ctrl removes | left drag |
Lapin is the way Lapin always worked and stays the default: nothing changes until you choose another. In the others a left drag that starts on empty space (or on an element that is not selected) draws a selection region in the 3D view, as it does in plans: dragged to the right, a window (a solid outline) takes the elements whose whole visible geometry lies inside it; dragged to the left, a crossing (dashed) takes every element it touches. Blender-like always takes what the box touches, whichever way it is dragged. Space while dragging turns the box into a lasso. The keys in the table's Select column say how the region joins the selection: with Ctrl in Revit-like it adds, with Shift it takes out; held with no key it replaces. Pressing on a selected element, holding a moment and dragging still moves it, in every style. Only what the view shows counts: an element hidden, isolated out, cut away by a section box or on another phase is never taken, and a group or an assembly is taken as a click would take it.
Selecting in plans, drawings and 3D. In Lapin's own style Shift pressed on empty space leaves the selection as it is (only a plain click on nothing lets go), and a region (a box or a lasso) drawn with Ctrl (⌘ on a Mac) takes what it meets out of the selection, as Shift adds to it; a click with Ctrl still picks the part. A press that moves only a few pixels is a click at the place you pressed, not a box, and a box that takes nothing never lets the selection go. In plans and drawings the element a click would select lights up under the cursor and the cursor is a pointing hand; the snap marker shows only where a command asks for a point. Esc ends what is running first (a command, a tool); with nothing running it steps up out of a drilled-in selection, and then clears the selection.
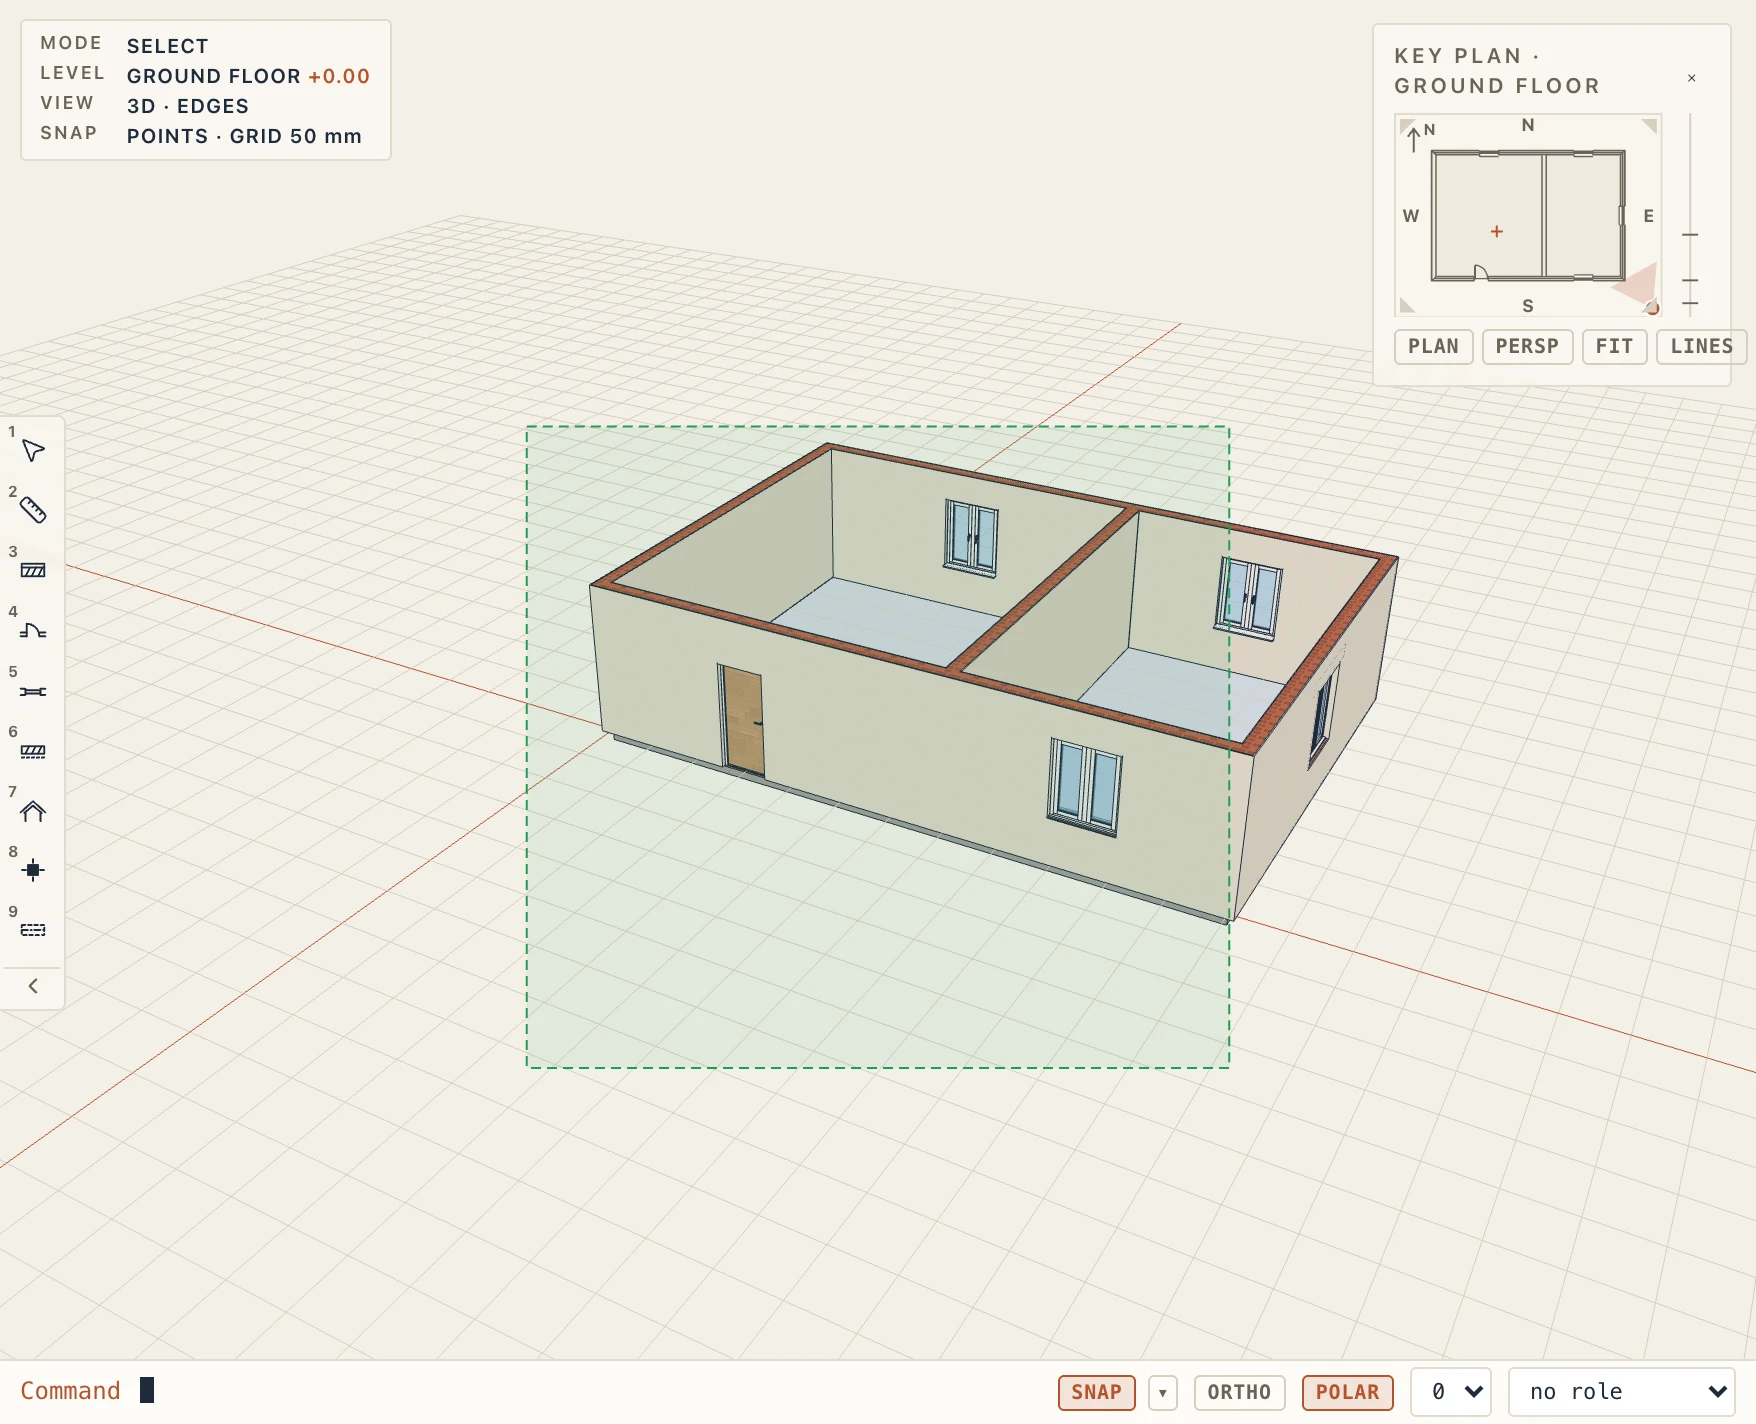
In plans, sections, elevations and sheets the style chooses which button pans and which keys add to or remove from the selection; a left drag still draws a window or a crossing, and the middle button pressed twice still fits the view (in 3D too, in Revit-like and AutoCAD-like). The other styles assume a mouse with three buttons: on a trackpad, with no middle button, keep Lapin's. Only the controls are borrowed: the names are plain labels, and nothing else of those programs is imitated.
Modify and Joins on every tab
The Modify group (Move, Copy, Rotate, Mirror, Array, Delete, Pin, Create similar, Match properties, the group tools) is the same on Draft, Architecture, Interior, Structure, Steel, Wood, Studio, Site and MEP. On Draft and Studio it joins the group of those tabs that was already called Modify, so each button appears once (Draft keeps Scale, Array and Erase; Studio keeps Move 3D, Rotate 3D, Mirror 3D and its own Array, which makes the solid's parametric array). Create similar works on anything a tool places: it starts that tool set up like the selected element (a wall's or a column's type, a beam's arc, a piece of furniture's kind and type, an MEP node's role, a run's system, a road's template, a bar's shape, a placed part's part and values, a load's value). It is greyed out until the selection is something it can start from.
The Joins group (Mitre, Butt, Swap) is the same on Architecture and Structure and acts on what is selected: the corners of the selected walls, beams and strip footings. Steel's own Mitre and Fit join two members and stay on the Steel tab.
A tool that was several buttons is one with a choice in the command line's bar: Wall, Beam, Strip footing and the room separation line have Line / Arc; Path has Path / Road; Place furniture (Interior) and Place node (MEP) choose the kind of piece or node. The old names (Curved wall, Road, Sofa, Radiator…) still work as quick slots, My tools entries, shortcuts and in saved interfaces: they start the same tool already set to that choice.
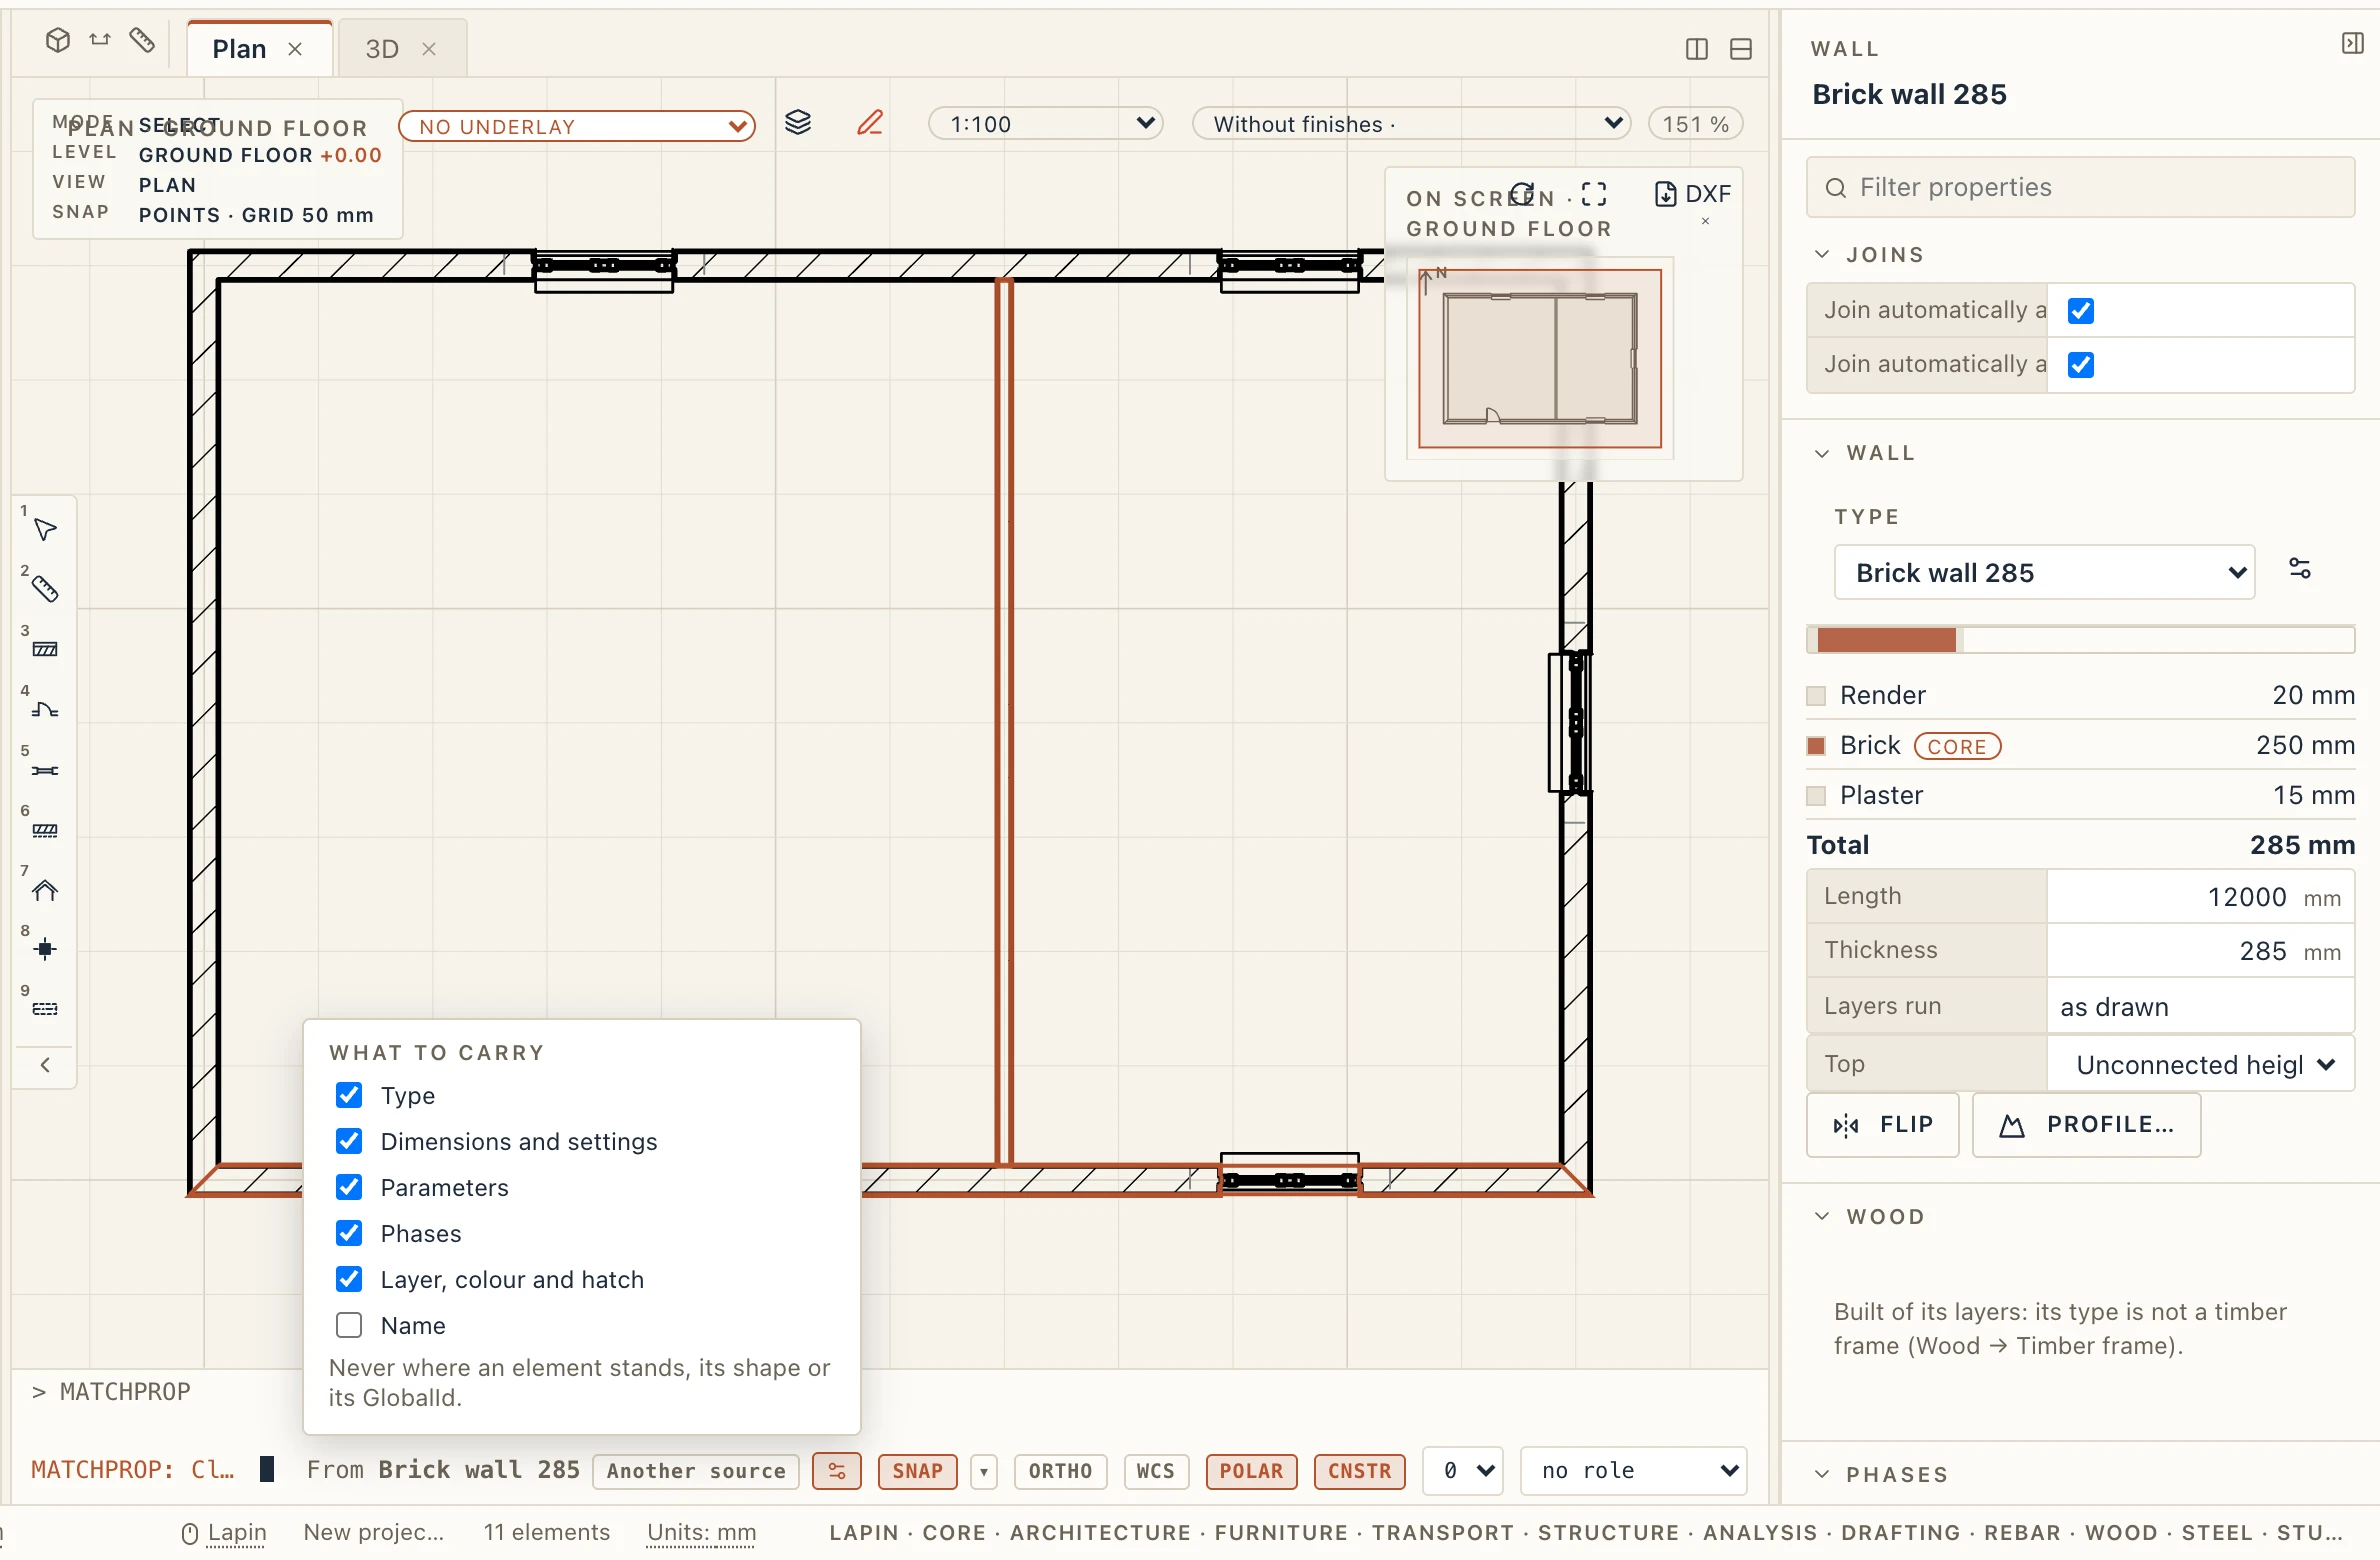
Match properties
Modify → Match properties (MA, or MATCHPROP on the command line as in AutoCAD; Revit calls it Match Type) gives other elements what one element has. Select the element to copy from, or start the command and click it first; then click each element that should take its properties. The element under the cursor lights up before you click, in plans, sections and 3D. Each click is one step that Undo takes back. Apply to the selection gives them to every other selected element at once. Press Enter or Esc when you are done.
The gear in the command line's bar lists what is carried, and Lapin remembers your choice: Type (to an element of the same class), Dimensions and settings (height, offsets, materials, cut priority, a text's style, a door's or window's frame position and sill; to another class only the fields it has too), Parameters (your own; a standard set's only to the same class), Phases, Layer, colour and hatch (drafted shapes) and Name (off at first). Where an element stands, its shape and its GlobalId are never carried. A pinned element still takes them: a pin keeps an element in place, not its settings.
To remove a whole property set from an element or a type, use the button named after the set under its parameters in Properties → Parameters (the set's name beside a bin): every parameter in that set goes in one undo step.
Parameters worked out by formulas
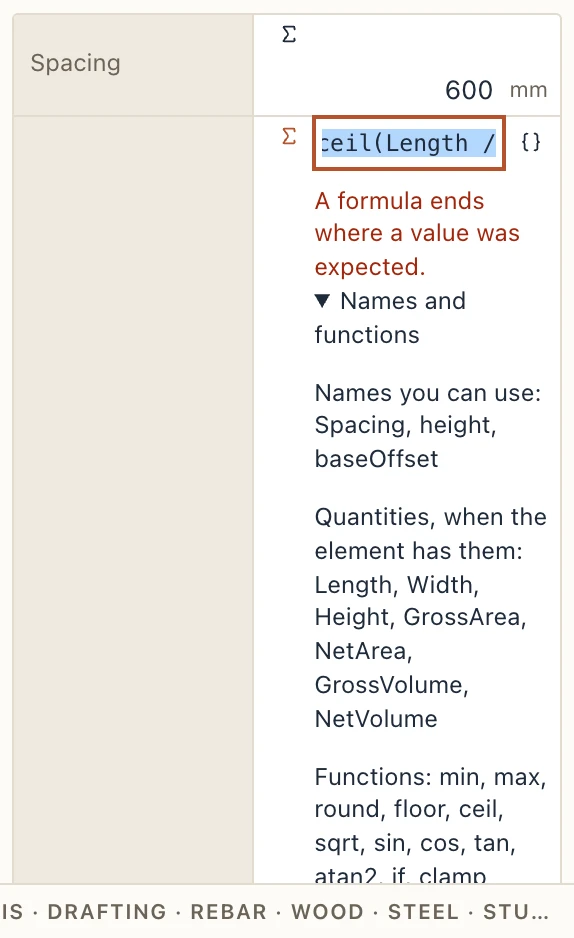
A parameter of your own that is a number, a length, an area, an angle, a yes/no or a text (not a choice) can be worked out instead of typed. In Properties → Parameters, press the Σ button before its value: the value becomes a formula field. Type the formula and press Enter (or leave the field) to keep it. Under the field Lapin shows what the formula gives, = 21, or why it does not read; a formula that does not read is not kept. Press Σ again to go back to a value: the last result stays as the value.
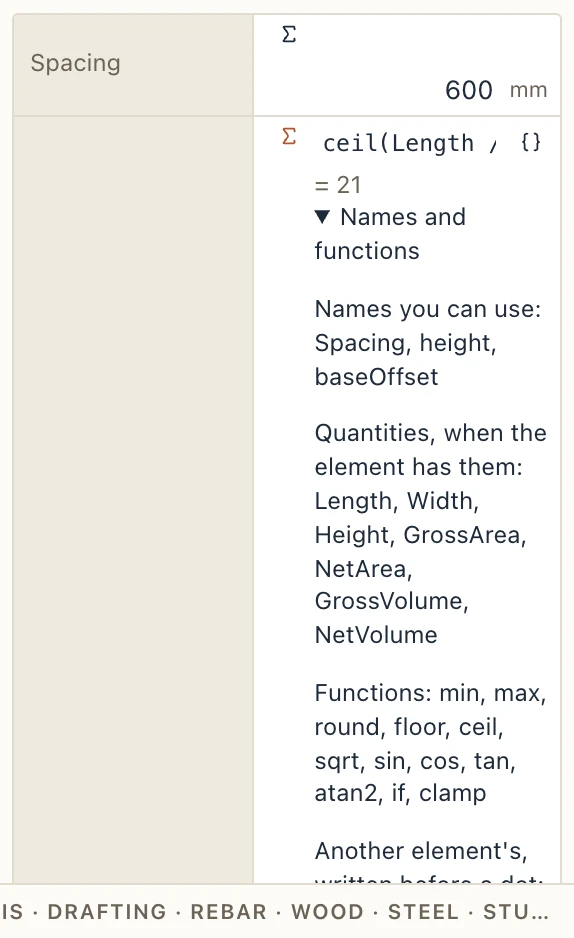
A formula is kept as written and worked out every time it is asked for, so it follows the element: change the wall's length or the Spacing and Studs changes with them. Tags, schedules and the IFC export read the result. What a formula may use:
- Names: the element's other parameters and its type's, and the element's own numbers (Height, Width). A name with spaces may be written without them: Fire rating or FireRating. A parameter may use another that is a formula.
- Quantities, when the element has them: Length, Width, Height, GrossArea, NetArea, GrossVolume, NetVolume.
- Functions: min, max, round, floor, ceil, sqrt, sin, cos, tan, atan2, if and clamp, with + − × ÷ and brackets. Decimals are written with a dot; arguments are separated by a comma or a semicolon.
Names and functions under the field lists the names this element offers. A yes/no formula is yes when its result is not zero (if(Height > 3, 1, 0)).
The same language works in the live text of symbols and tags, written {= attr.w * 2 | 0.00}.
Texts worked out
A text parameter's formula gives a text. Write it in either of two ways:
- A text with fields in braces, as a tag writes them:
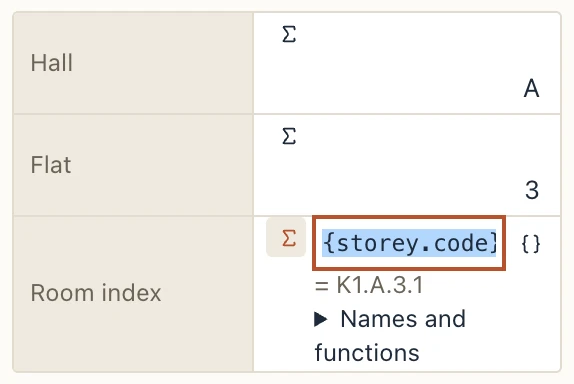
{storey.code}.{Hall}.{Flat}.{number}gives K1.A.3.1 for a room numbered 1 with the parameters Hall = A and Flat = 3 on a storey whose code is K1. Whatever is outside the braces is written as it is. - An expression with texts: texts in quotes (
"K"or'K'), joined by&(storey.code & "." & number) or by concat (concat(storey.code; "."; number)).
The functions for texts: text(x; "00") writes a number as a format says (7 → 07; "0.00" two decimals), pad(x; 3) fills it to three characters with zeros in front, upper, lower, trim, left(x; n), right(x; n) and len. Two texts compare as texts, case aside: if(storey.code == "K1"; "basement"; "upper"). A formula given to a new parameter with no kind makes it a text when it gives one.
Reading other elements: the storey, the project, the host, the rooms
A name may read another element's parameter or field, written before a dot:
storey.…the storey the element stands on (storey.code,storey.name,storey.elevation);building.…andsite.…above it;project.…the project's information (project.number,project.client) and its own parameters;type.…the element's type;group.…the group it is in;assembly.…the whole it is a part of;host.…a door's or window's wall (host.FireRating);room.…the room the element stands in (a door's or window's on its interior side);fromRoom.…andtoRoom.…the rooms on a door's exterior and interior side (they change sides when the door is flipped).
The project's own parameters are global. Add them in Manage → Project information…, under The project's own parameters at the bottom (a key, a label, a type and a value): any element's formula or tag reads one by its key alone (zone), or as project.zone.
Nothing of this is stored on the element: it is read every time it is asked for. Change the storey's code from K1 to K2 and every room's formula, stamp, tag, schedule and the IFC export say K2 at once. A formula that reads itself, directly or through others, gives no value and says so.
The Parameters inspector
Which names can an element read? Properties → Parameters → Parameters inspector lists every one, with its value now: the fields every element has ({name}, {mark}, {type}, {class}), its attributes (a room's {number}, a wall's {height}), what its module works out (a room's {finish.floor}), its quantities, its own parameters, the standard IFC properties of its class, the project's parameters by their key, and then, group by group, what it reads through its storey, building, site, the project, its type, group, assembly, host and rooms ({storey.code}, {project.number}, {room.name}, {host.FireRating}…). Type in Search the fields to narrow it down; hover a field for what it is. Click one to copy it, then paste it into a tag, a title block, a symbol's text or a formula.
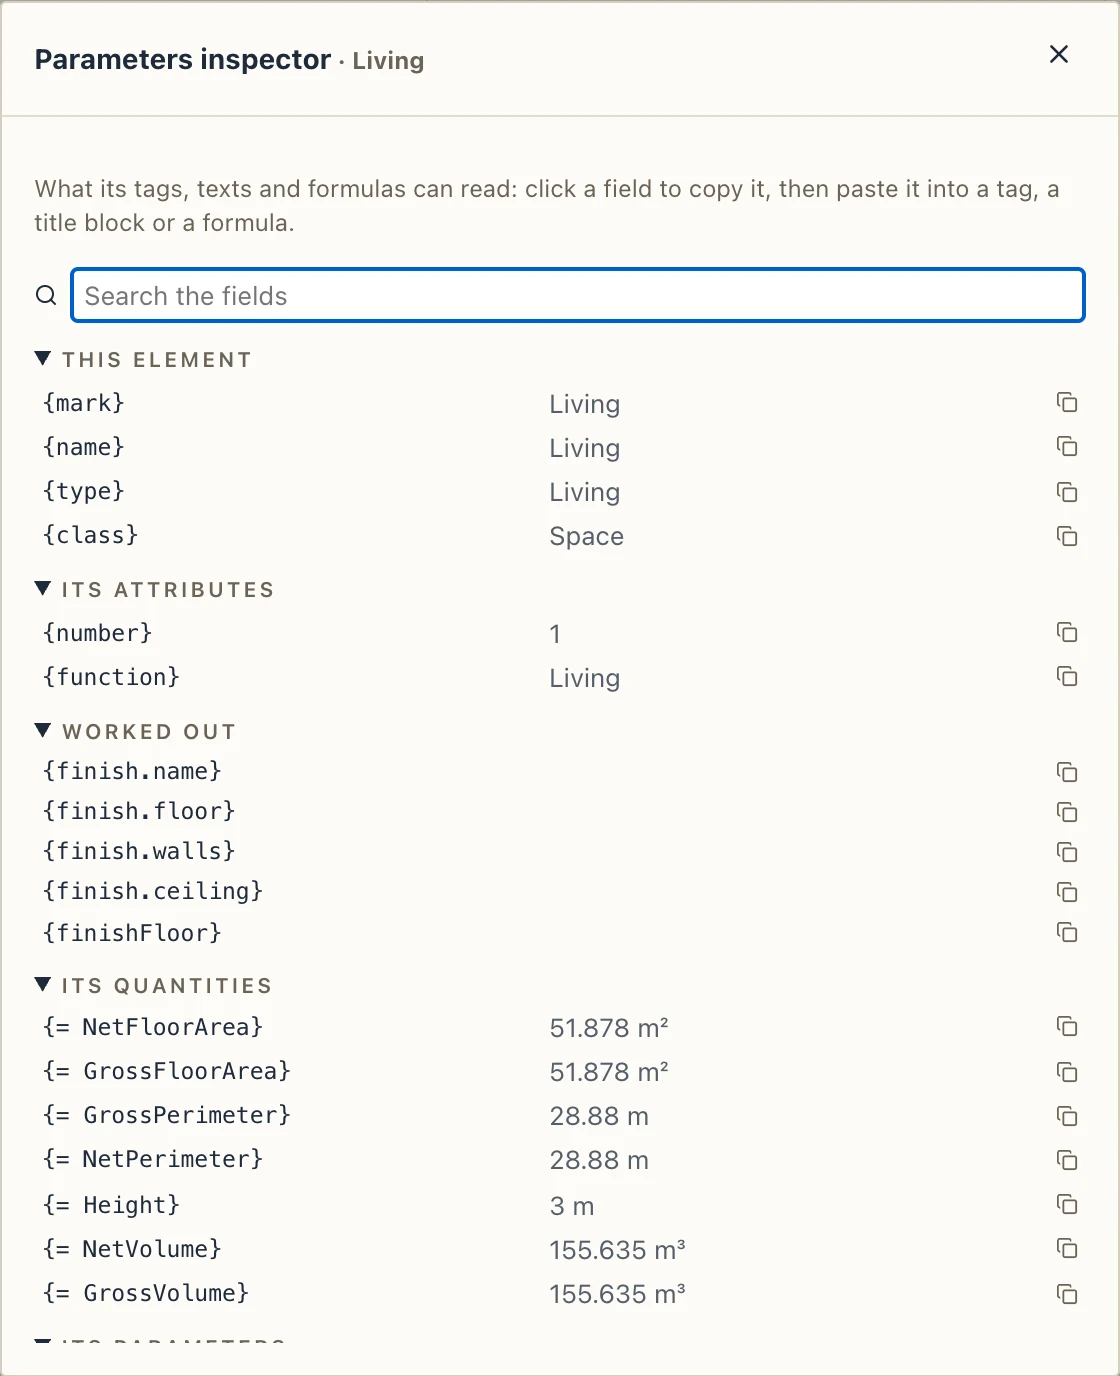
While a formula is open, the { } button beside it (Insert field…) opens the same list under it: a click puts the field where the cursor is, {storey.code} in a text with fields, the bare name (storey.code, FireRating) in an expression. A quantity is read only by formulas: in a text it goes in as {= NetArea}.
Keyboard shortcuts
View → Keyboard shortcuts… (KS) lists every command the keyboard can reach, by tab. Each row shows the command's shortcuts.
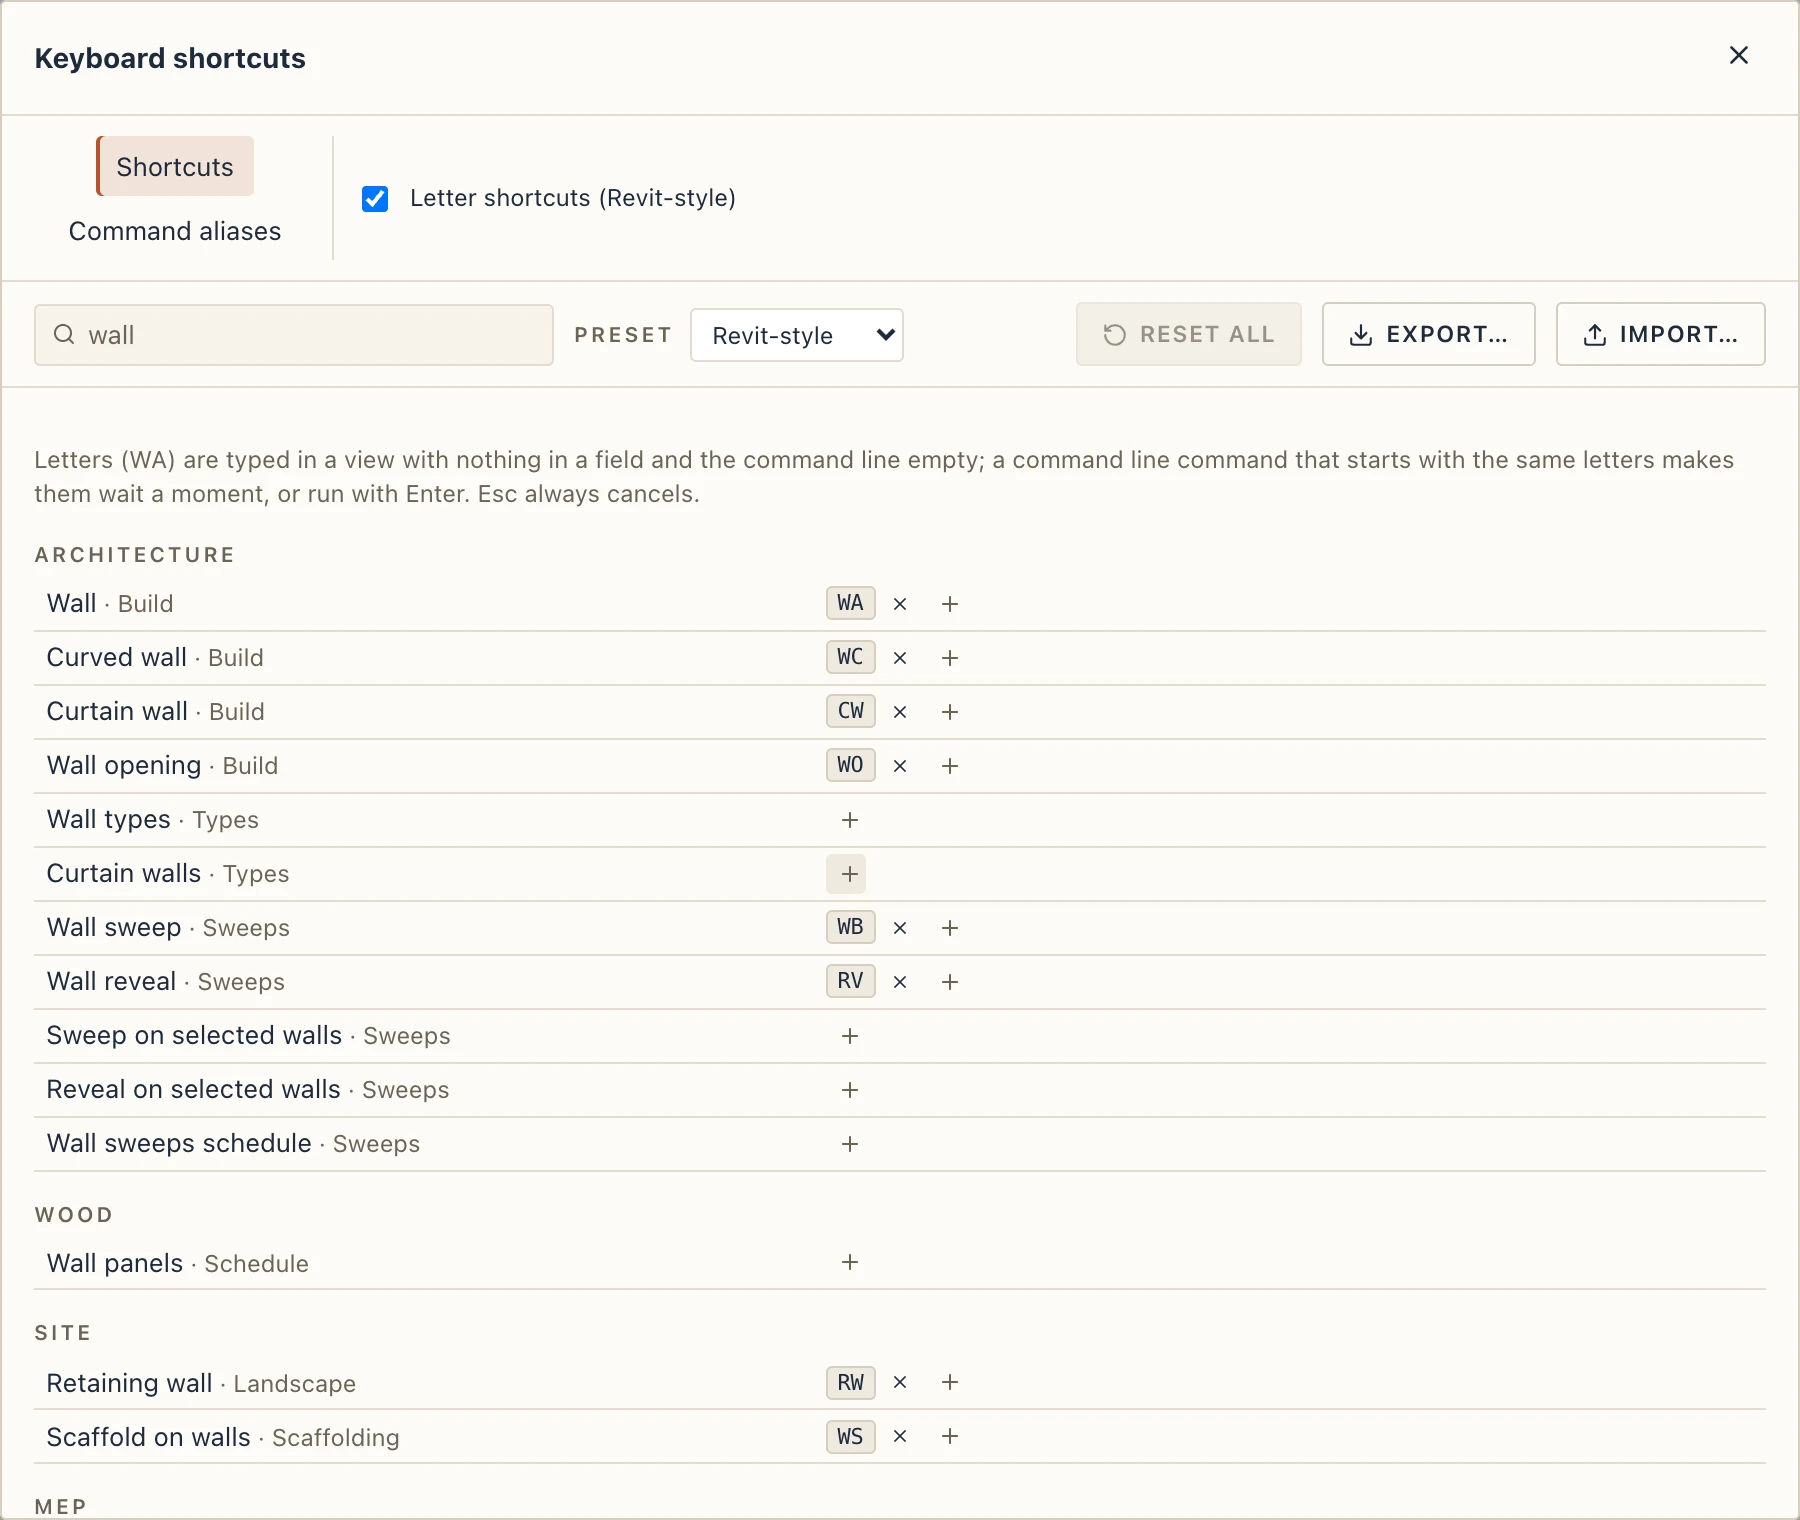
- Search by a command's name or by a key.
- + adds a shortcut: press a combination (Ctrl ⇧ W, F4), or type up to three letters and press Enter. Esc stops.
- If another command already has the shortcut, Lapin says which one. Reassign takes it from that command, Keep both leaves it to both (the first in the list wins), Cancel changes nothing.
- × removes a shortcut. The arrow at the end of a row puts that command back as the preset has it, and Reset all does it for every command.
- Preset chooses the set you start from: Revit-style (the default: Revit's usual letters, where Lapin has the command) or Lapin classic (Lapin's own letters from before).
- Export… writes your shortcuts to a file, and Import… reads one, for another computer or a colleague.
Tooltips, the menus and the command palette (Ctrl K) always show the shortcuts as they are now.
Letters and the command line
There are two ways to type a command. Letters such as WA work when no field has the focus and the command line is empty: type them over the view. The command runs at once. When a command line command starts with the same letters (DI and DIMADD), Lapin waits a moment: keep typing to write the longer command, or press Enter or Space to run the shorter one now. While a command asks for a point or a value, letters and digits go to it. Command line commands such as L, M or TRIM followed by Enter work in every preset. Esc always cancels.
When the two collide, choose how they share the keyboard:
- Letter shortcuts (Revit-style), in this dialog and in Preferences → General → Keyboard, is on by default. Turn it off to keep only the command line: every letter you type goes to it, and Enter or Space runs a command, an alias of yours, or, when the text is neither, the command whose letters it is (WA Enter still starts the wall). Chords (Ctrl + a key, the function keys, Delete) and the number keys of the quick tools keep working.
- The ` key (the one left of 1, found by its place on any layout, and a shortcut like the others: Command line: take all typing) gives the command line all the typing, with the letters on or off. The command line is outlined and says so; no letters start a tool, no number picks a quick tool. Enter runs what you typed and gives the typing back, unless a command then asks for a point or a value: the mode stays until that command ends. Esc or the same key leaves it.
Command aliases
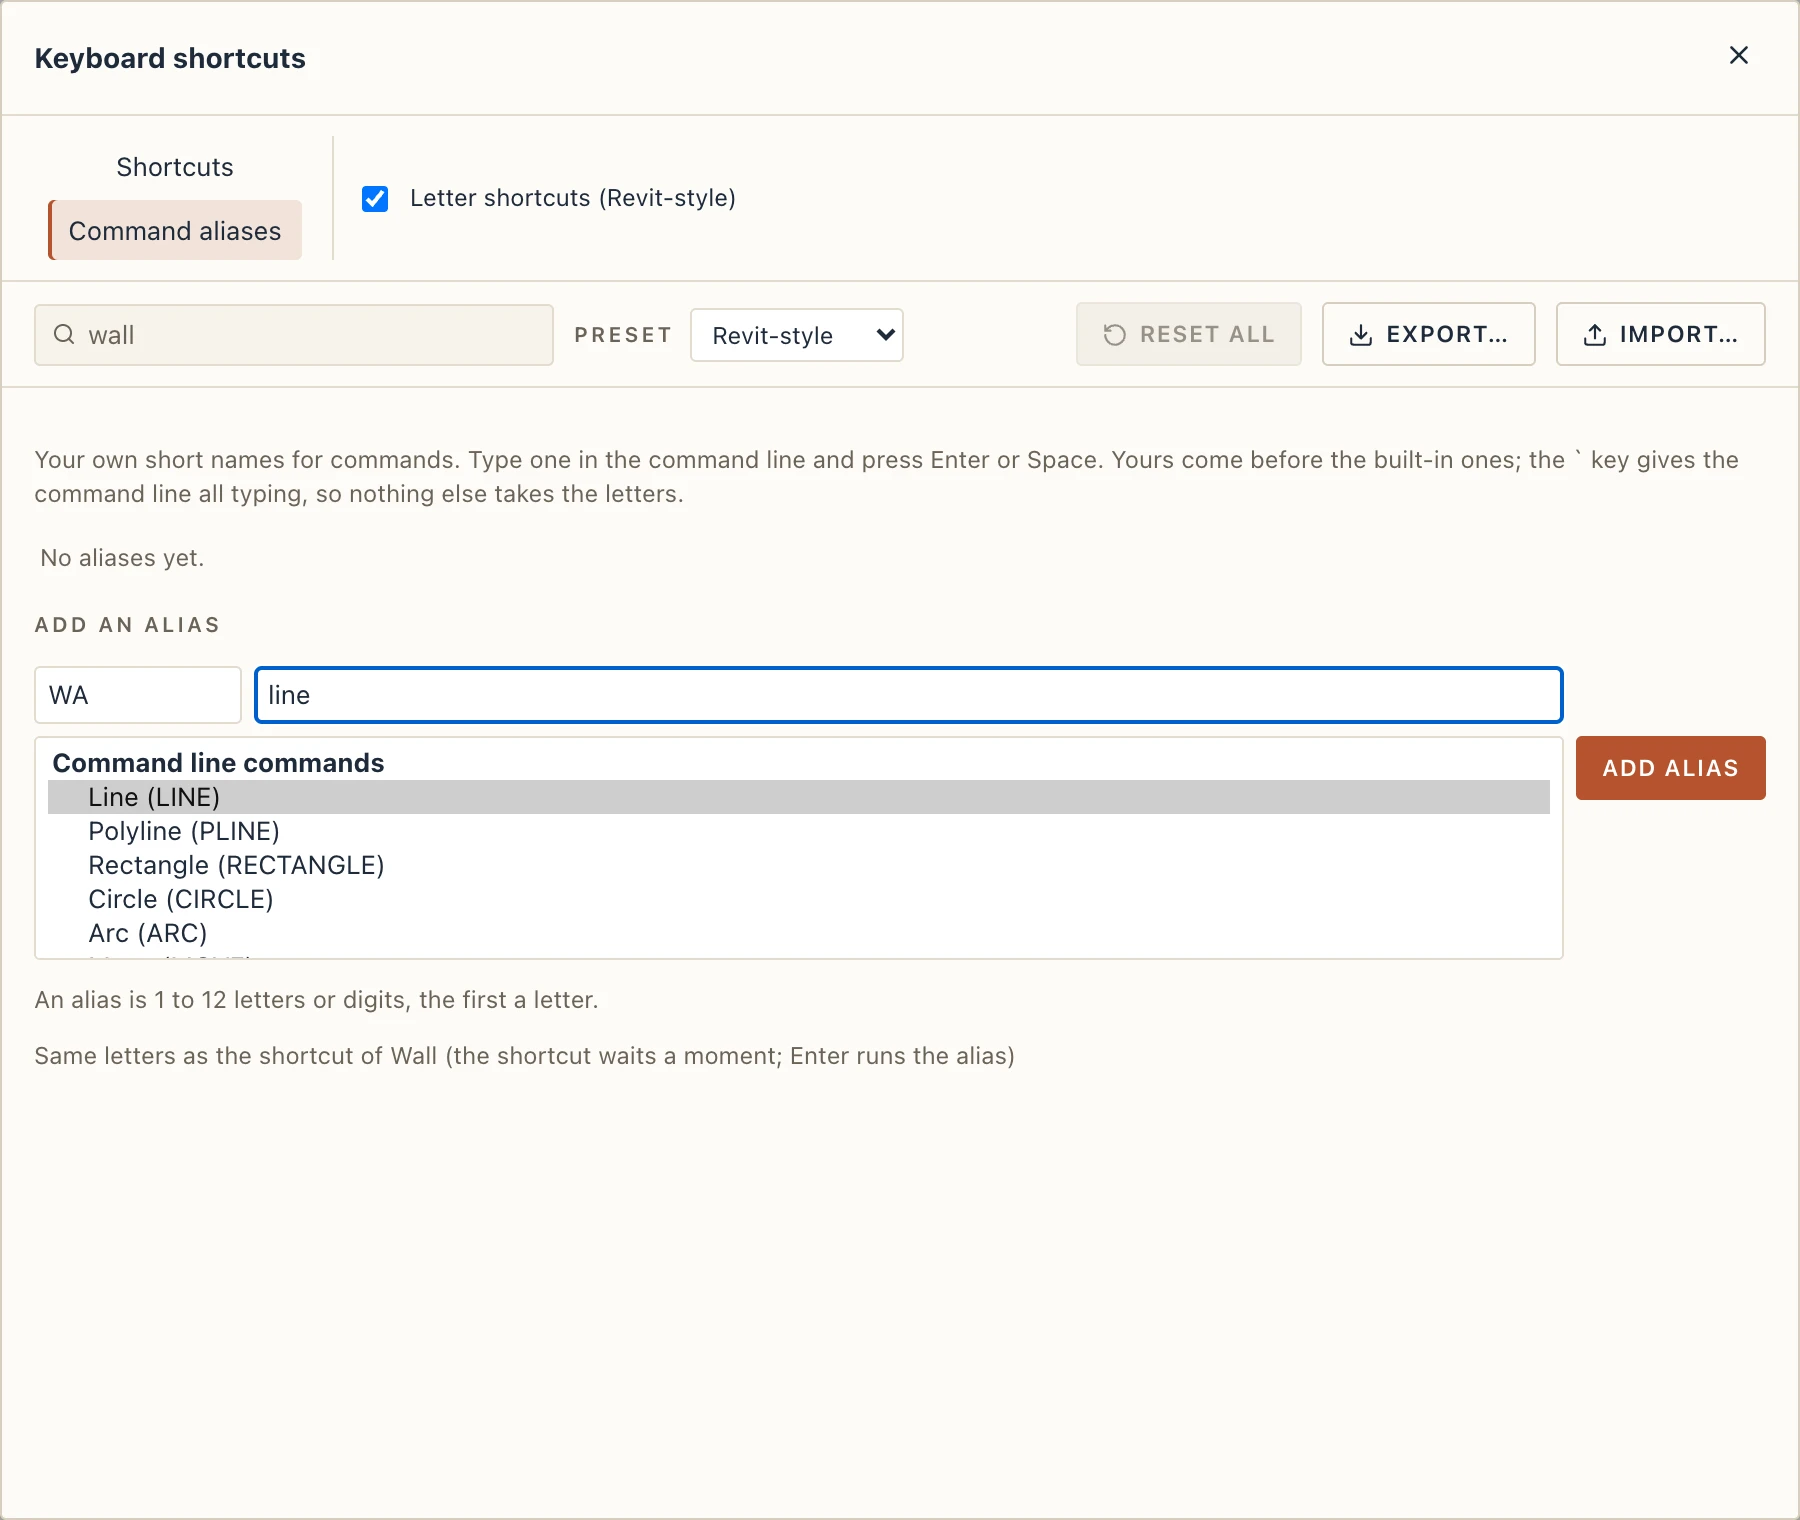
The Command aliases page of the dialog holds names of your own for commands. Type 1 to 12 letters or digits (the first a letter), find the command in the list (a command line command such as LINE, or any ribbon or app command), and press Add alias. Type the alias in the command line and press Enter or Space. Yours come before the built-in names. The page says what an alias replaces: a built-in command line name, a shortcut with the same letters, or a shortcut it makes wait (with the letters on, a shortcut that is an alias, or the start of one, waits a moment so you can type on and press Enter). Aliases are kept with your shortcuts, in Export… and Import… too.
The default shortcuts
These are the Revit-style shortcuts, as Lapin has them now:
| Command | Keys |
|---|---|
| General | |
| Undo | Ctrl Z |
| Redo | Ctrl Y Ctrl ⇧ Z |
| New project | Ctrl N |
| Open… | Ctrl O |
| Save | Ctrl S |
| Save as… | Ctrl ⇧ S |
| Delete the selection | Del ⌫ |
| Select the previous selection | Ctrl Alt Z |
| Commands… | Ctrl K |
| Command line: take all typing | ` |
| Keyboard shortcuts… | KS |
| Interface… | Ctrl . |
| Preferences… | Ctrl , |
| Views | |
| Next view tab | Ctrl Tab Ctrl PageDown |
| Previous view tab | Ctrl ⇧ Tab Ctrl PageUp |
| Zoom in | + = |
| Zoom out | - ZO |
| Zoom to the selection | ⇧ Z |
| Zoom to fit | ZF ZE |
| Zoom region | ZR |
| Zoom before | ZP |
| Drawing aids | |
| Object snap | F3 |
| Ortho | F8 |
| Grid | F7 |
| Polar tracking | F10 |
| Panels | |
| Project browser: fold or unfold | Ctrl B |
| Properties: fold or unfold | Ctrl ⇧ B PP |
| Both panels: fold or unfold | Tab |
| Quick tools | |
| Measure | ME |
| Draft | |
| Line | DL |
| Scale | RE |
| Offset | OF |
| Trim | TR |
| Bring to front | Ctrl ⇧ ] |
| Send to back | Ctrl ⇧ [ |
| Bring forward | Ctrl ] |
| Send backward | Ctrl [ |
| Architecture | |
| Wall | WA |
| Door | DR |
| Window | WN |
| Floor | SB |
| Roof | RF |
| Curved wall | WC |
| Curtain wall | CW |
| Bay window | BW |
| Wall opening | WO |
| Floor opening | SH |
| Railing | RL |
| Sunshade | SN |
| Wall sweep | WB |
| Wall reveal | RV |
| Join | JW |
| Attach to roof | AR |
| Room | RM |
| Stair | ST |
| Ramp | RU |
| Balcony | BY |
| Elevator | LF |
| Move | MV |
| Copy | CO |
| Rotate | RO |
| Mirror | MM DM |
| Delete | DE |
| Unpin | UP |
| Create similar | CS |
| Match properties | MA |
| Create group | GP |
| Make component | CK |
| Make apartment type | CU |
| Ungroup | UG |
| Edit group | EG |
| Convert to native | NV |
| Interior | |
| Finish room | FR |
| Finish painter | FP |
| Ceiling | CG |
| Skirting in room | SK |
| Sofa | SO |
| Armchair | AC |
| Bed | BD |
| Wardrobe | WD |
| Table | TB |
| Kitchen | KT |
| Structure | |
| Column | CL |
| Beam | BM |
| Curved beam | BC |
| Strip footing | SF |
| Pad footing | PF |
| Curved strip footing | CF |
| Steel | |
| Member | SM |
| Simple rebar | |
| Section here | RH |
| Section across | SX |
| Inset view | IV |
| Straight bar | RB |
| Stirrup | RS |
| Bar in section | BS |
| Split bar | RC |
| Stirrups along | RR |
| Site | |
| Terrain from points | TP |
| Flat terrain | TF |
| Parcel | PC |
| Spot level | SP |
| Breakline from linework | BL |
| Platform | PD |
| Ditch | DH |
| Raise | SU |
| Lower | SL |
| Flatten | FN |
| Smooth | SS |
| Path | PA |
| Road | RD |
| Retaining wall | RW |
| Plant | PN |
| Planting zone | PZ |
| Corridor… | CR |
| Road from linework | LR |
| Double swing gate | GT |
| Entourage | EN |
| Entourage row | ER |
| Scaffold | FS |
| Scaffold on walls | WS |
| Formwork | FW |
| Formwork on face | FF |
| MEP | |
| Edit system | ES |
| Run | RN |
| Connect | CN |
| Detour | DU |
| Redraw path | RP |
| Cable tray | CT |
| Boiler | BO |
| Radiator | RA |
| Wall fan | VF |
| Gas main along… | GM |
| Service connection | GS |
| Smoke detector | SD |
| Heat detector | HD |
| Manual call point | MC |
| Internal hydrant | HY |
| Studio | |
| Coincident | CNC |
| Horizontal | CNH |
| Vertical | CNV |
| Dimension | CDI |
| Point on object | CNO |
| Parallel | CNL |
| Perpendicular | CNP |
| Tangent | CNT |
| Equal | CNE |
| Symmetric | CNS |
| Midpoint | CNM |
| Fix | CNF |
| Horizontal distance | CDX |
| Vertical distance | CDY |
| Radius | CDR |
| Diameter | CDD |
| Angle | CDA |
| Line | KL |
| Rectangle | KR |
| Circle | KC |
| 2-point arc | KA |
| Offset | KO |
| Sketch on face | KF |
| Finish sketch | KE |
| Look at plane | KP |
| Tape measure | KM |
| Follow Me | FM |
| Rectangle on face | FRE |
| Circle on face | FCI |
| Polygon on face | FPL |
| Push/Pull | PU |
| Fillet edge | FE |
| Chamfer edge | CE |
| Annotate | |
| Aligned | DI |
| Room dimensions | ID |
| Exterior dimensions | ED |
| Text | TX |
| Tag | TG |
| Grid axis | GR |
| Level | LL |
| View boundary | VB |
| Construction | |
| Add to task… | TA |
| Mark done | MD |
| Mark started | MS |
| View | |
| Section | SE |
| Jogged section | SJ |
| Curved section | SV |
| Section along | SA |
| Section box | BX |
| Visibility | VV |
| Thin lines | TL |
| Select region | SR |
| Hide | HH |
| Isolate | HI |
| Show all | HR |
| Quick select | QS |
| Graphics (VG) | VG |
The number keys 1–9 pick the quick tools.
Moving a dialog
Every dialog moves by its title bar, as a window does: press on the title and drag, with the mouse or a finger. It stays inside the window, opens again where you left it for as long as the program is open, and a double click on the title puts it back in the middle. That way you can move a dialog off the part of the model you are working on, or look at the model behind it.