User guide
False ceilings
Hang a false ceiling in a room, choose a tile grid or continuous plasterboard, put light panels and air diffusers in its cells, and count them.
A false ceiling hangs under the slab above, at a height you set. It is drawn over an outline or over a room, and its type says how it is built: tiles laid on an exposed grid, or a continuous plasterboard. Light panels and air diffusers sit in the cells of the grid, and the quantities count them.
Drawing a ceiling
The tools are in Interior → Ceiling:
- Ceiling (CG) draws a ceiling over an outline: click its corners, then the first one again, or press Enter.
- Ceiling in a room fills the room you click, following its outline between the walls' faces. There has to be a room there (Rooms); with none, Lapin says so.
While either tool is on, the properties panel shows New element with the ceiling type to lay, to choose before the click. The ceiling goes on the active level and hangs at its Height over it: 2700 mm unless you change it. Select the ceiling and its properties show its Ceiling type and its Height; both change there, and the grips on its corners reshape the outline.
A ceiling follows nothing once drawn: if you move a wall, move the ceiling's corners too.
Ceiling types
Interior → Ceiling types (or Ceiling types… in a ceiling's properties) lists the project's types on the left, with how many ceilings use each. Choose one to edit it, or start from New grid ceiling or New plasterboard ceiling. Save type changes every ceiling of the type at once; Place with it makes the tools lay it from now on. A project gets its first type, a grid ceiling, when you draw the first ceiling.
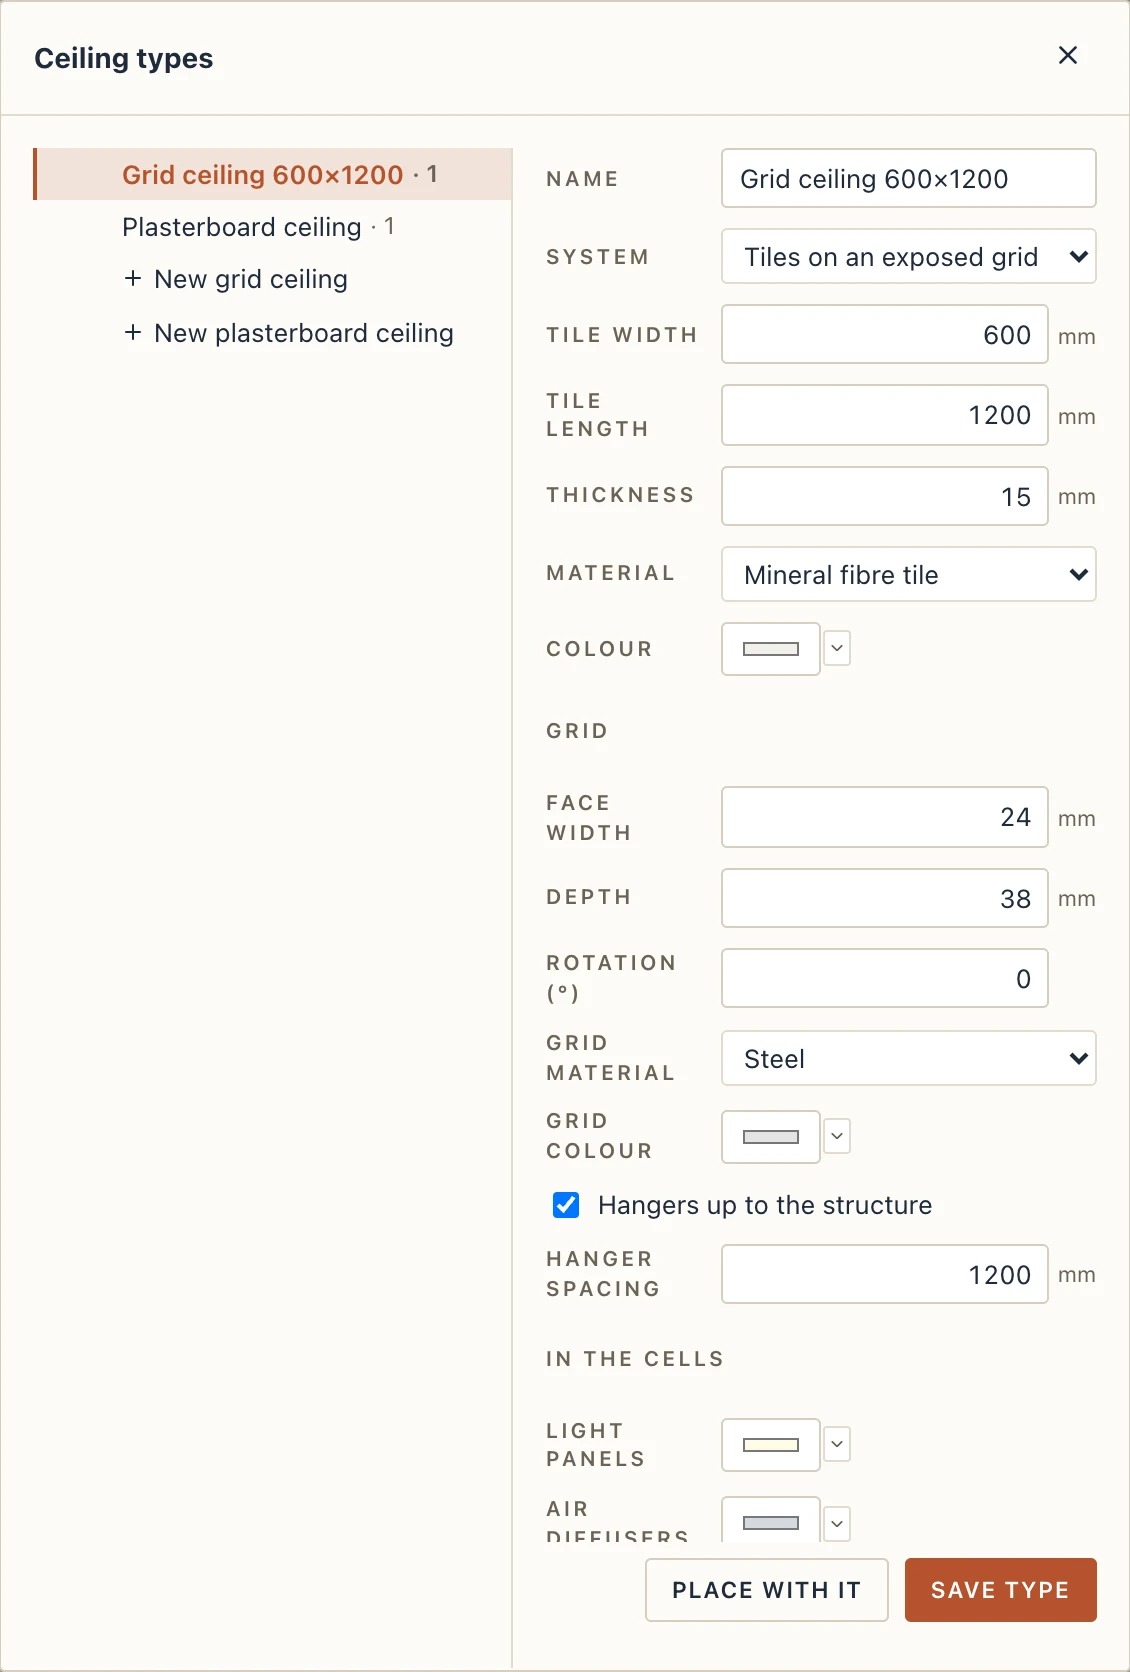
The System chooses what is built:
- Tiles on an exposed grid. The default, Grid ceiling 600×600: lay-in tiles on a grid of tees.
- Tile width and Tile length (600 × 600), Thickness (15 mm), the tile's Material and Colour.
- Grid: the Face width (24 mm) and Depth (38 mm) of the tees, a Rotation (°) of the whole grid, the Grid material and Grid colour. The tees run along both ways at every cell line, with an angle round the edge of the ceiling.
- Hangers up to the structure, at the Hanger spacing (1200 mm): rods from the tees up to the top of the storey.
- Plasterboard, continuous. The default, Plasterboard ceiling, is one board of the ceiling's outline, 12.5 mm thick, with no grid and no hangers. Its module width and length still make the cells the fixtures use.
In the cells chooses the colours of the light panels and the air diffusers.
The grid is centred on the ceiling, so the tiles cut at the edges come out equal on both sides. Turn the grid by its Rotation (°) and the cells turn about the middle of the ceiling.
Light panels and air diffusers
Light panel and Air diffuser, beside the ceiling tools, put one in the cell you click. A fixture takes a whole cell: the tile there gives way, a light panel fills it and a diffuser is a plate with its square neck. A cell the ceiling's edge cuts takes none (Lapin says so). Clicking a cell that has a fixture with the other tool changes it.
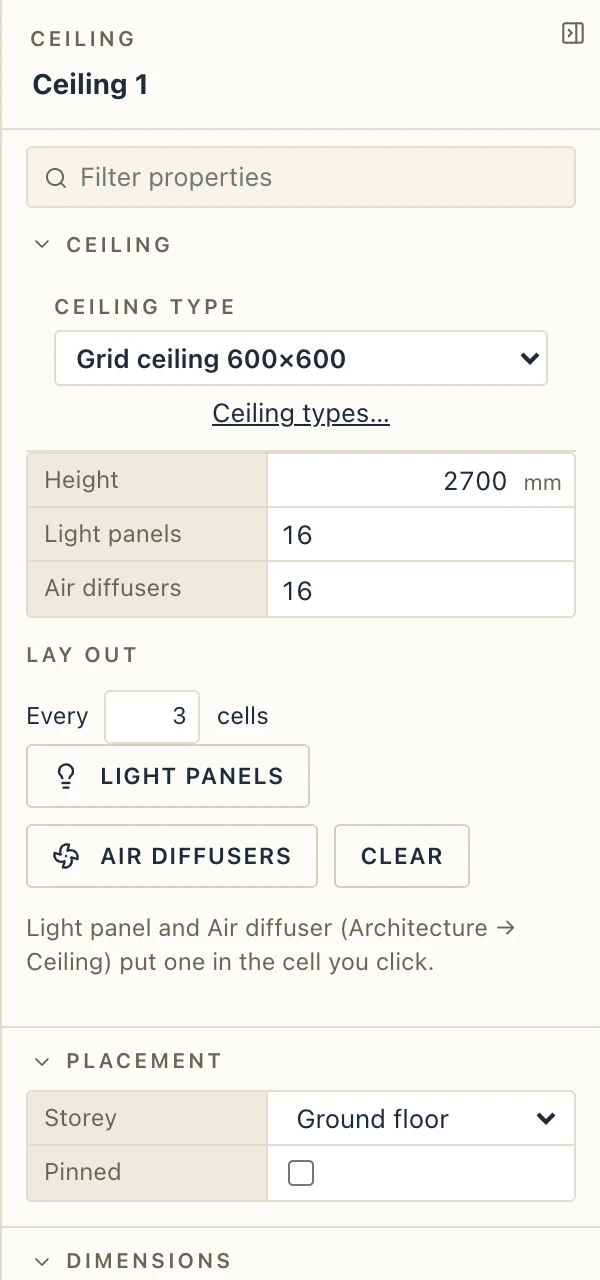
To fill a ceiling in one go, select it and, under Lay out in its properties, set Every n cells and press Light panels or Air diffusers. Each puts one fixture of its kind in every n-th whole cell, both ways, and replaces the ones of that kind laid before. The light panels start one cell in from the corner and the diffusers at the corner, so with the same n they fall in different cells. Clear takes all the fixtures away.
The properties panel counts the light panels and the air diffusers.
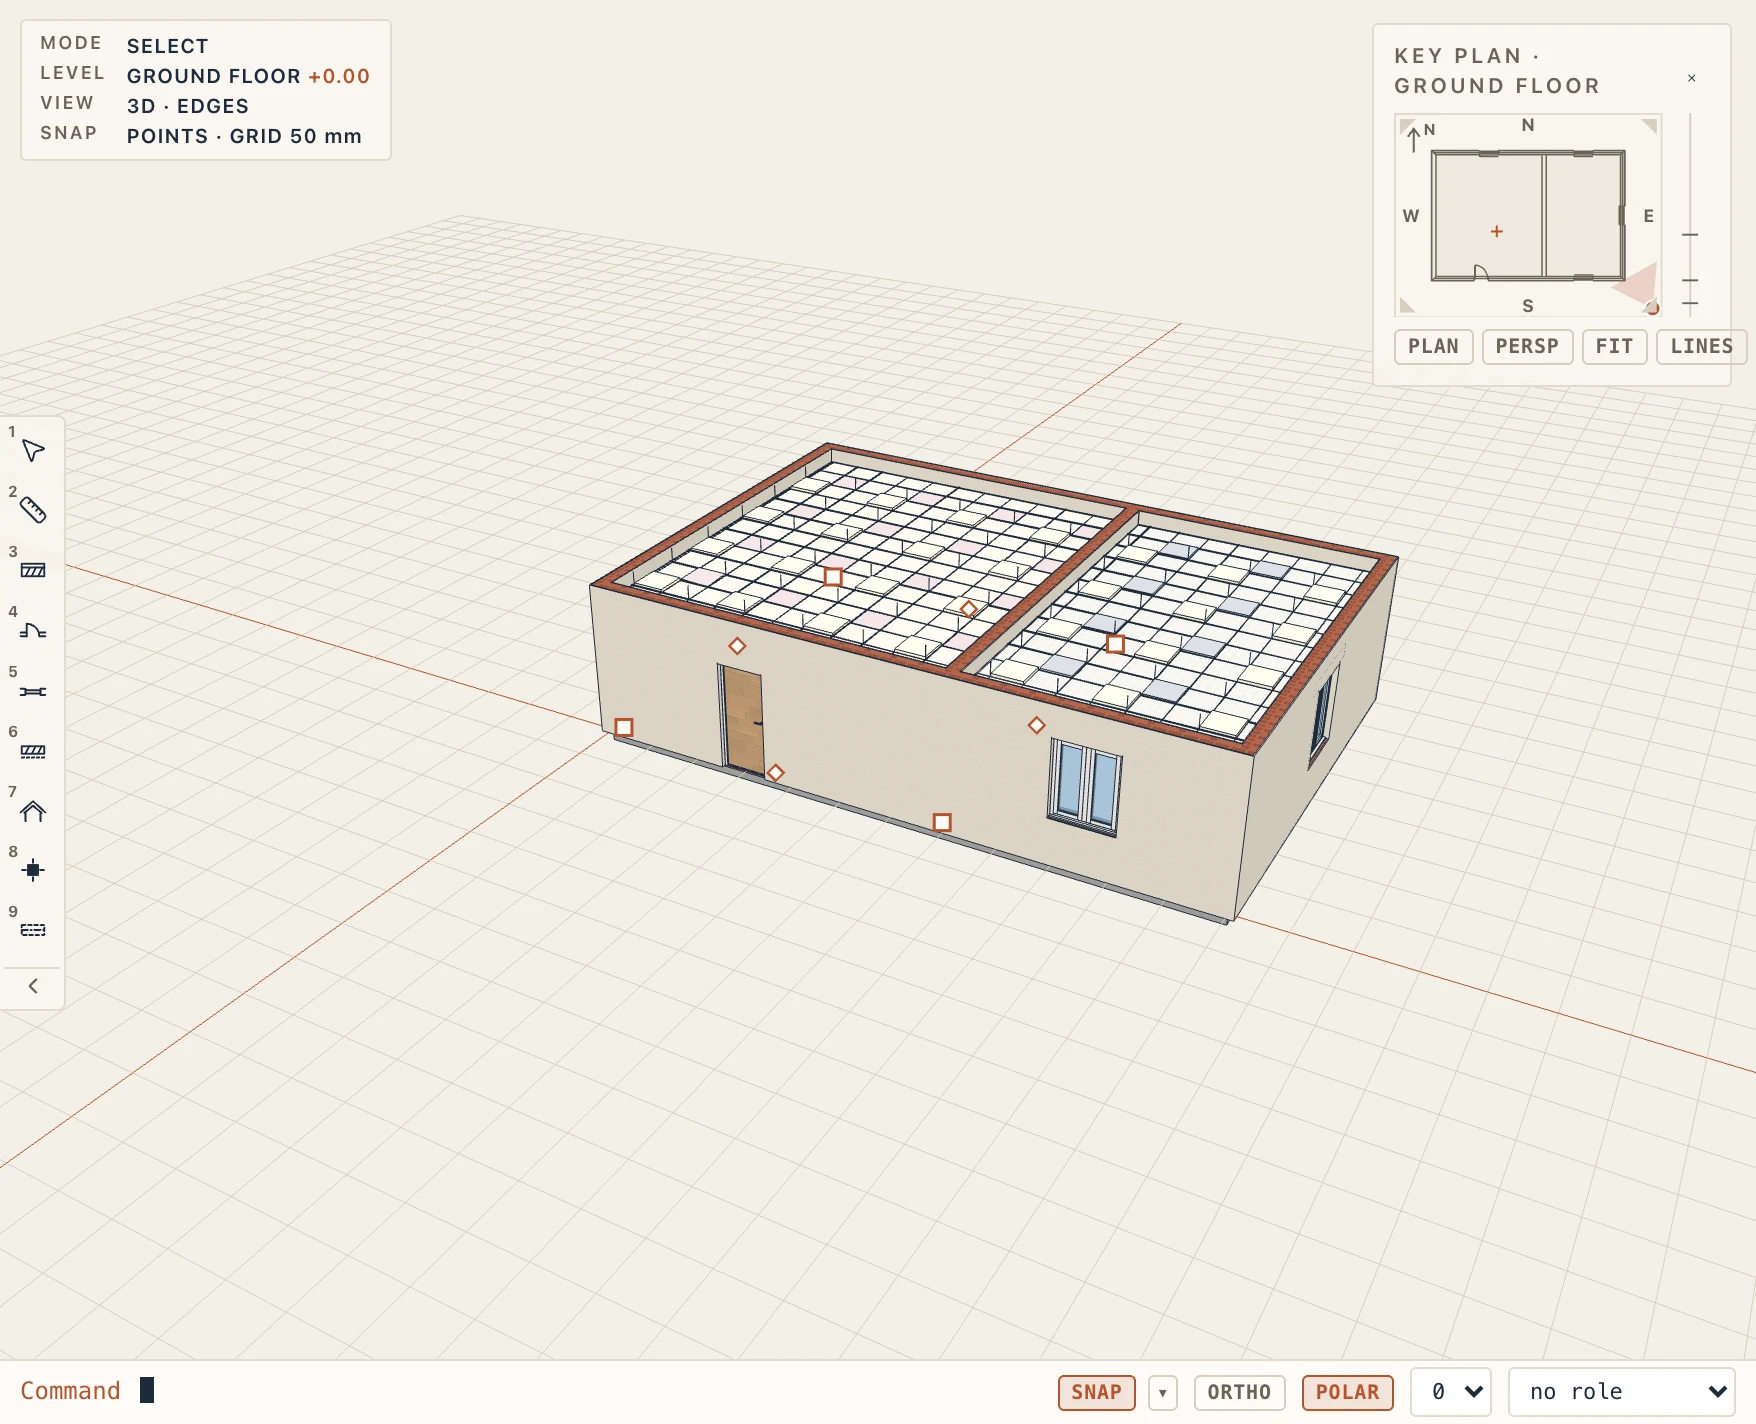
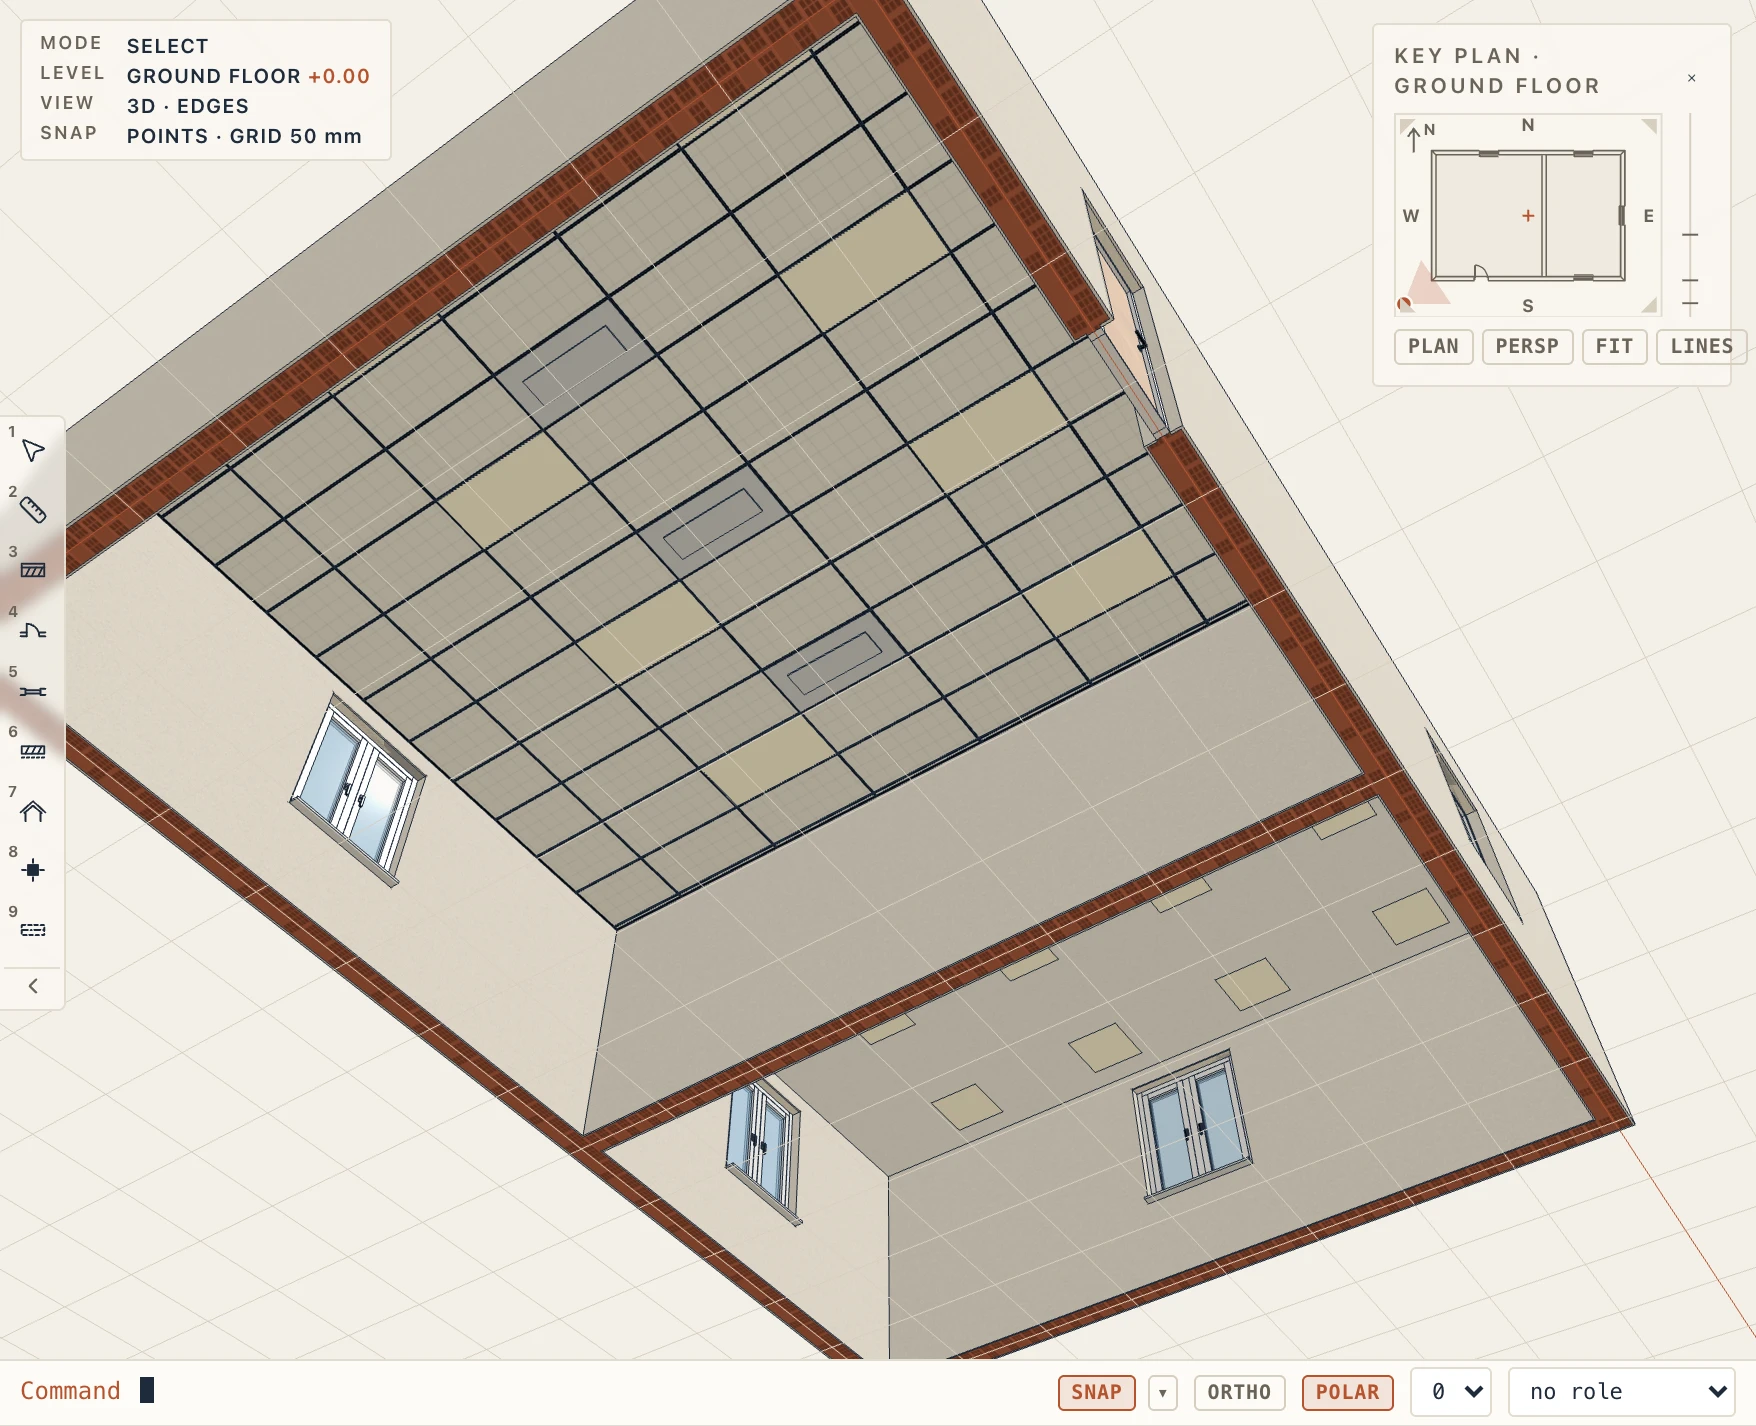
Seen from below in 3D, a 600 × 1200 grid ceiling with a light panel and a diffuser every third cell, and a plasterboard ceiling with light panels in the next room:
On plans
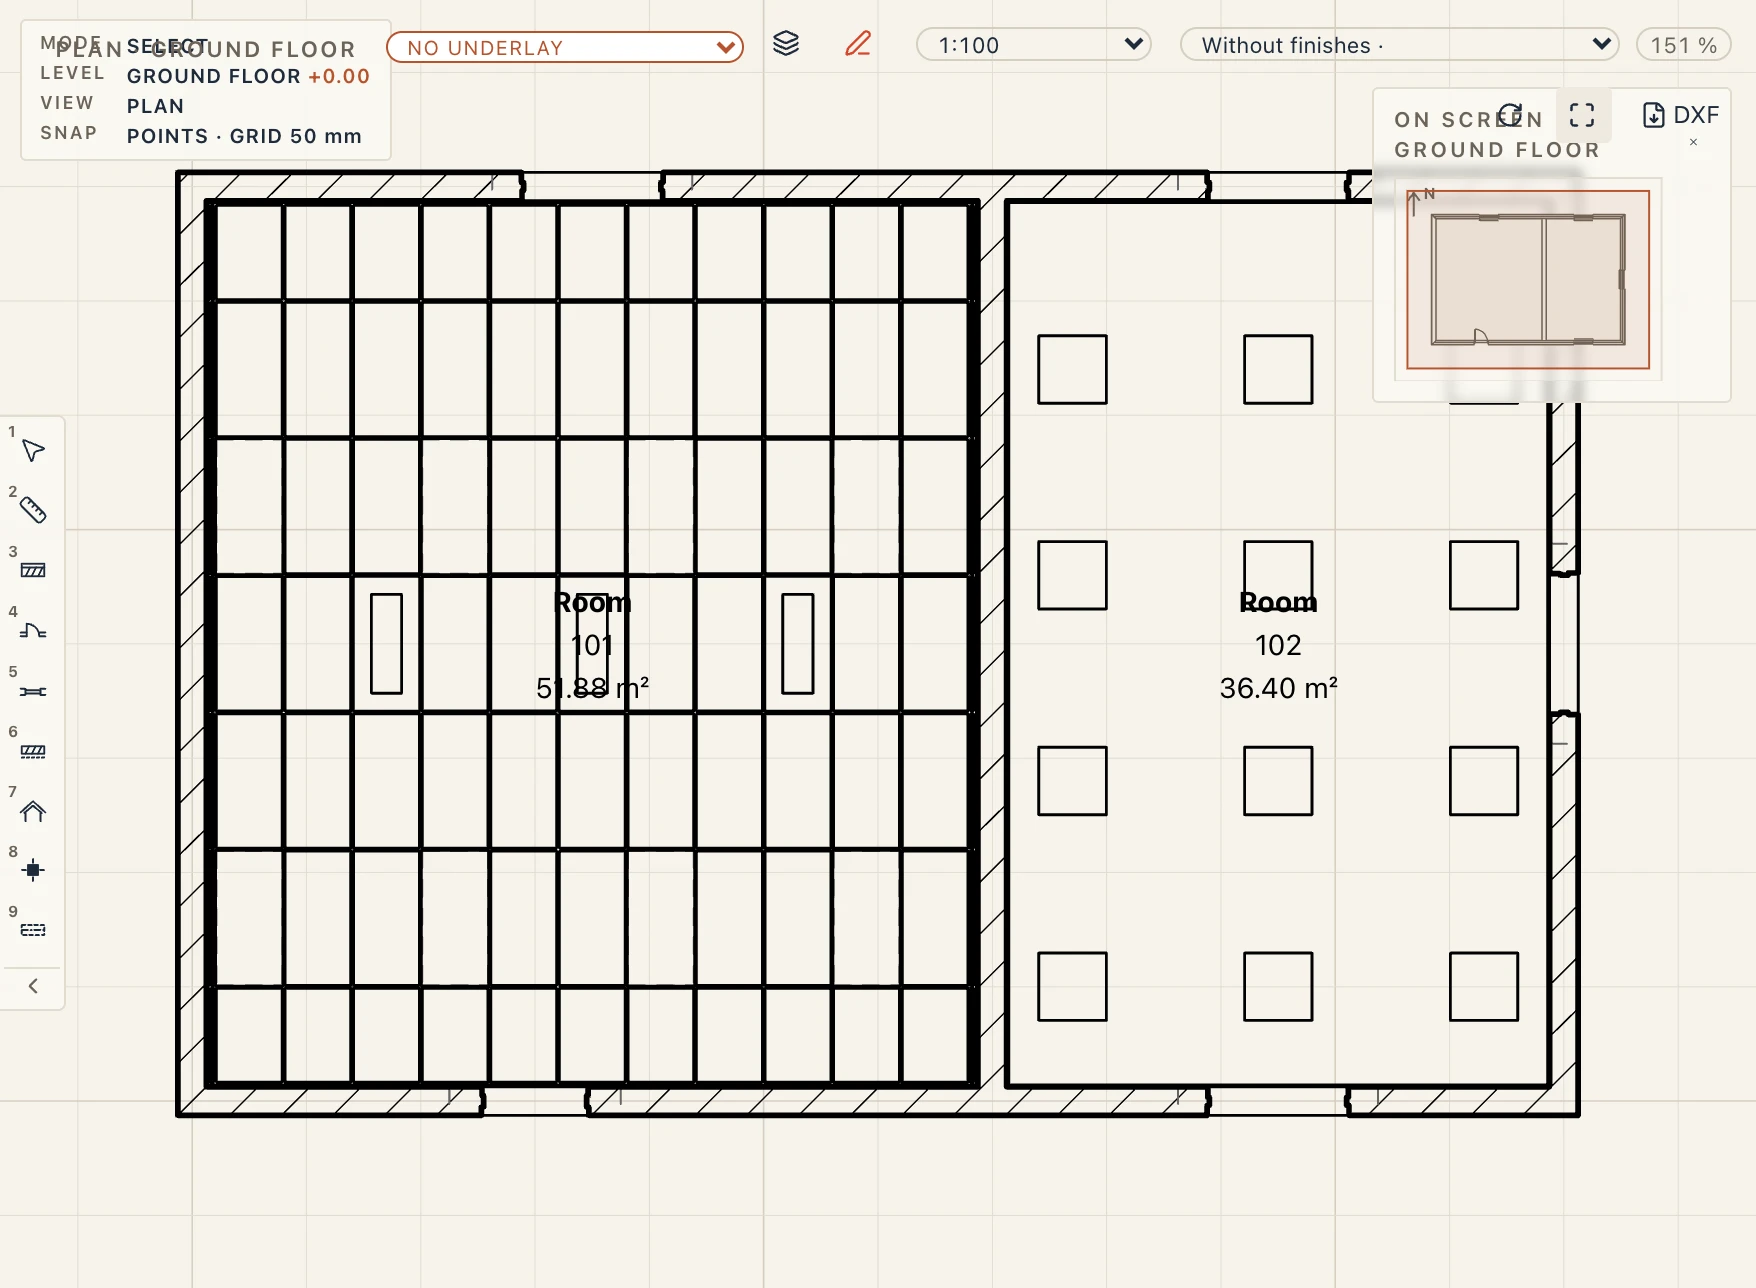
On a plan, a ceiling is drawn as the outline of what lies above the cut, as other overhead elements are, if the view's style shows overhead (View → View settings). To see the ceilings from below, set the plan's Seen from to below (ceiling plan) in View → View settings: a reflected ceiling plan. See Views.
Quantities and IFC
Select a ceiling and its Quantities list:
- the gross and net area (the outline's) and the thickness, as IFC's covering quantities;
- the perimeter;
- the whole tiles (a grid ceiling's whole cells, less those a fixture takes; cut tiles are not counted);
- the light panels and the air diffusers.
Construction → Quantity takeoff adds the ceilings up by type, and the estimate sorts them under finishes (Schedules, Cost).
In IFC a ceiling is an IfcCovering of predefined type CEILING, of an IfcCoveringType (its ceiling type), with its tiles, grid, hangers, light panels and diffusers as the covering's shape. The fixtures are not separate IFC elements.
A room's ceiling finish (Rooms) is another thing: layers lined under the slab. A false ceiling is for a hung system with fixtures; use the finish when a coat is all there is.