User guide
Doors and windows
Place doors and windows in walls, move them, design their types in the configurator, make them bay, bow or box windows, and shade them.
Placing a door or a window
Every opening starts from one tool, Architecture → Opening. Its first choice, in the command line's bar and at the head of the properties panel, is what to put: in a wall a Door, a Window, a Bay window or an Opening of a shape with nothing in it; in a floor a Floor opening; in a roof a Roof window or a Dormer. Each kind is placed as this page and Floors and roofs describe. The letters of the old tools start it already set: DR a door, WN a window, BW a bay window, WO an opening in a wall, SH an opening in a floor; quick slots and My tools holding the old tools keep working.
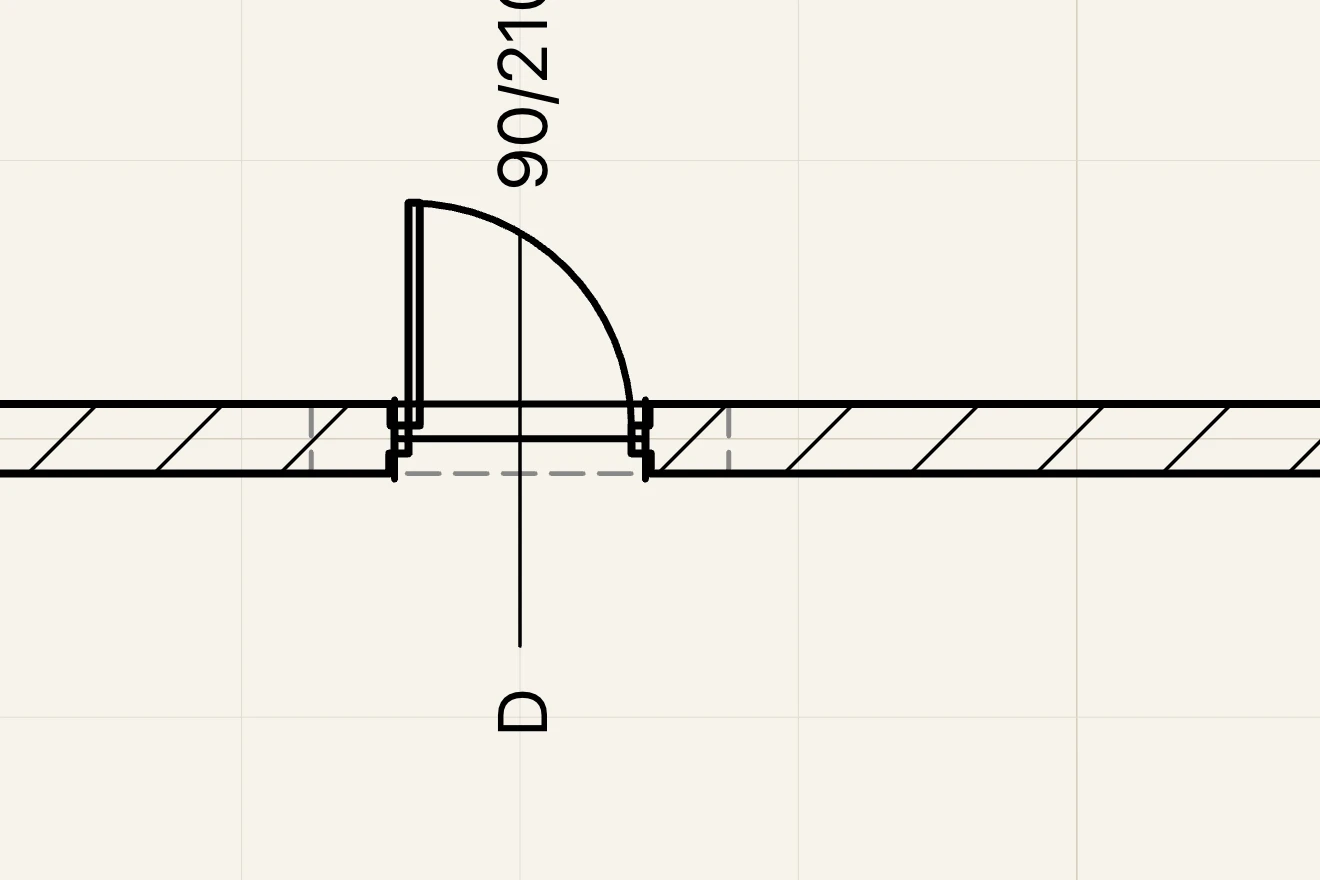
For a door or a window, set Opening to Door (DR) or Window (WN), then click a wall where you want the opening. Lapin cuts the opening in every layer of the wall and adds the lintel the wall type asks for.
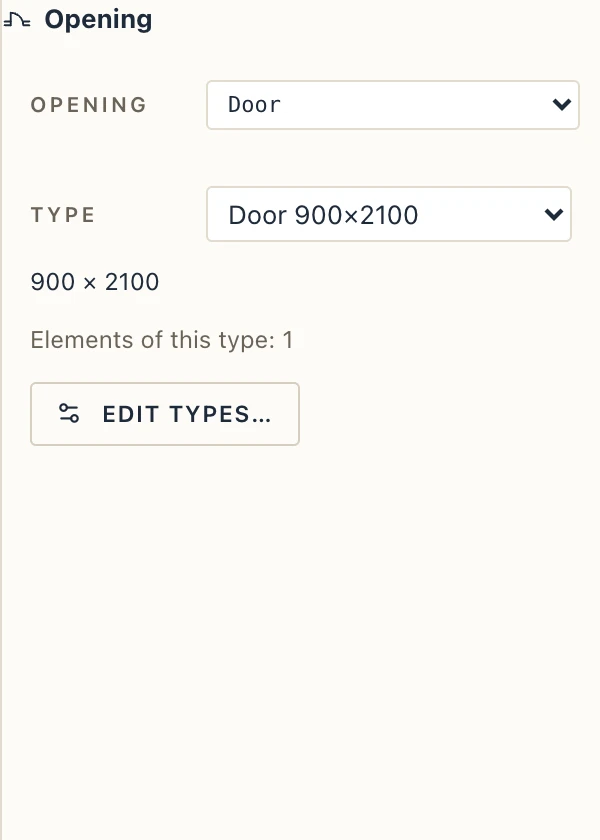
While Door or Window is on, the properties panel shows the type it will place, with its size: choose another there before you click the wall.
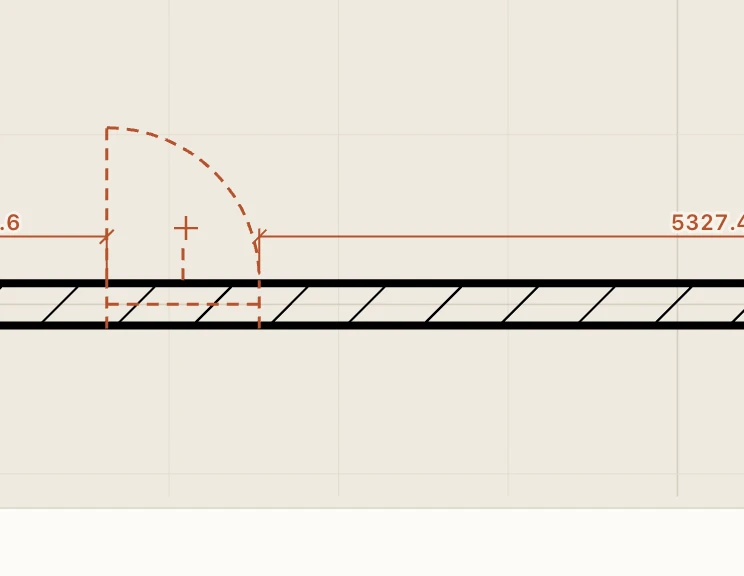
The plan shows the door or window before you click. The side of the wall your cursor is on is the side it opens to, and the cursor can stand beside the wall as well as on it, so a thin wall is easy to place on. Space moves the hinges to the other jamb and stays that way until you press it again. In the 3D view, the face of the wall you click decides the side, and Space works the same, without the preview. You can still change both afterwards with Hand and Side.
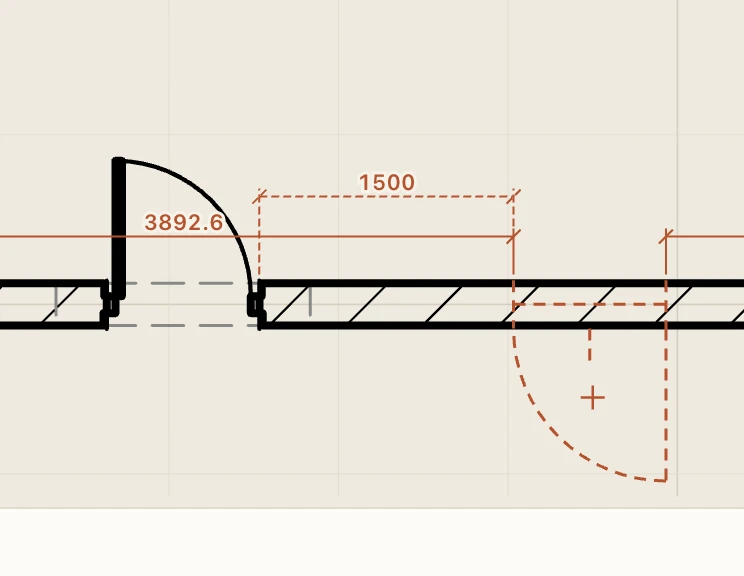
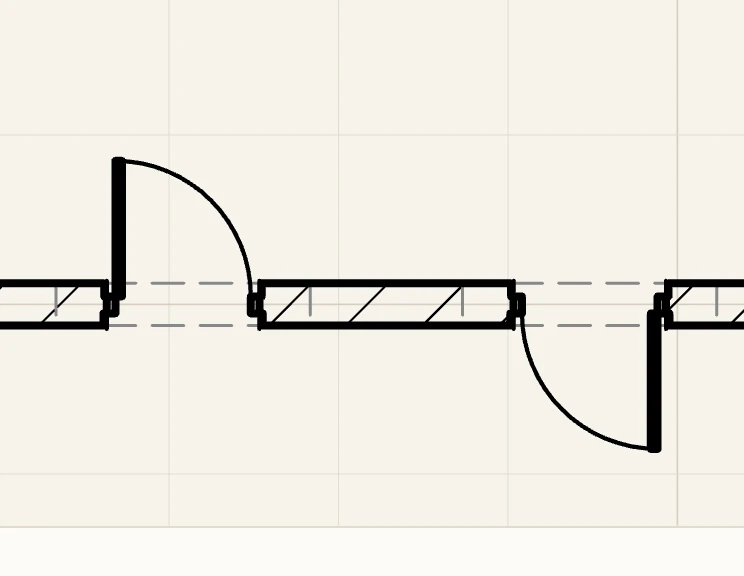
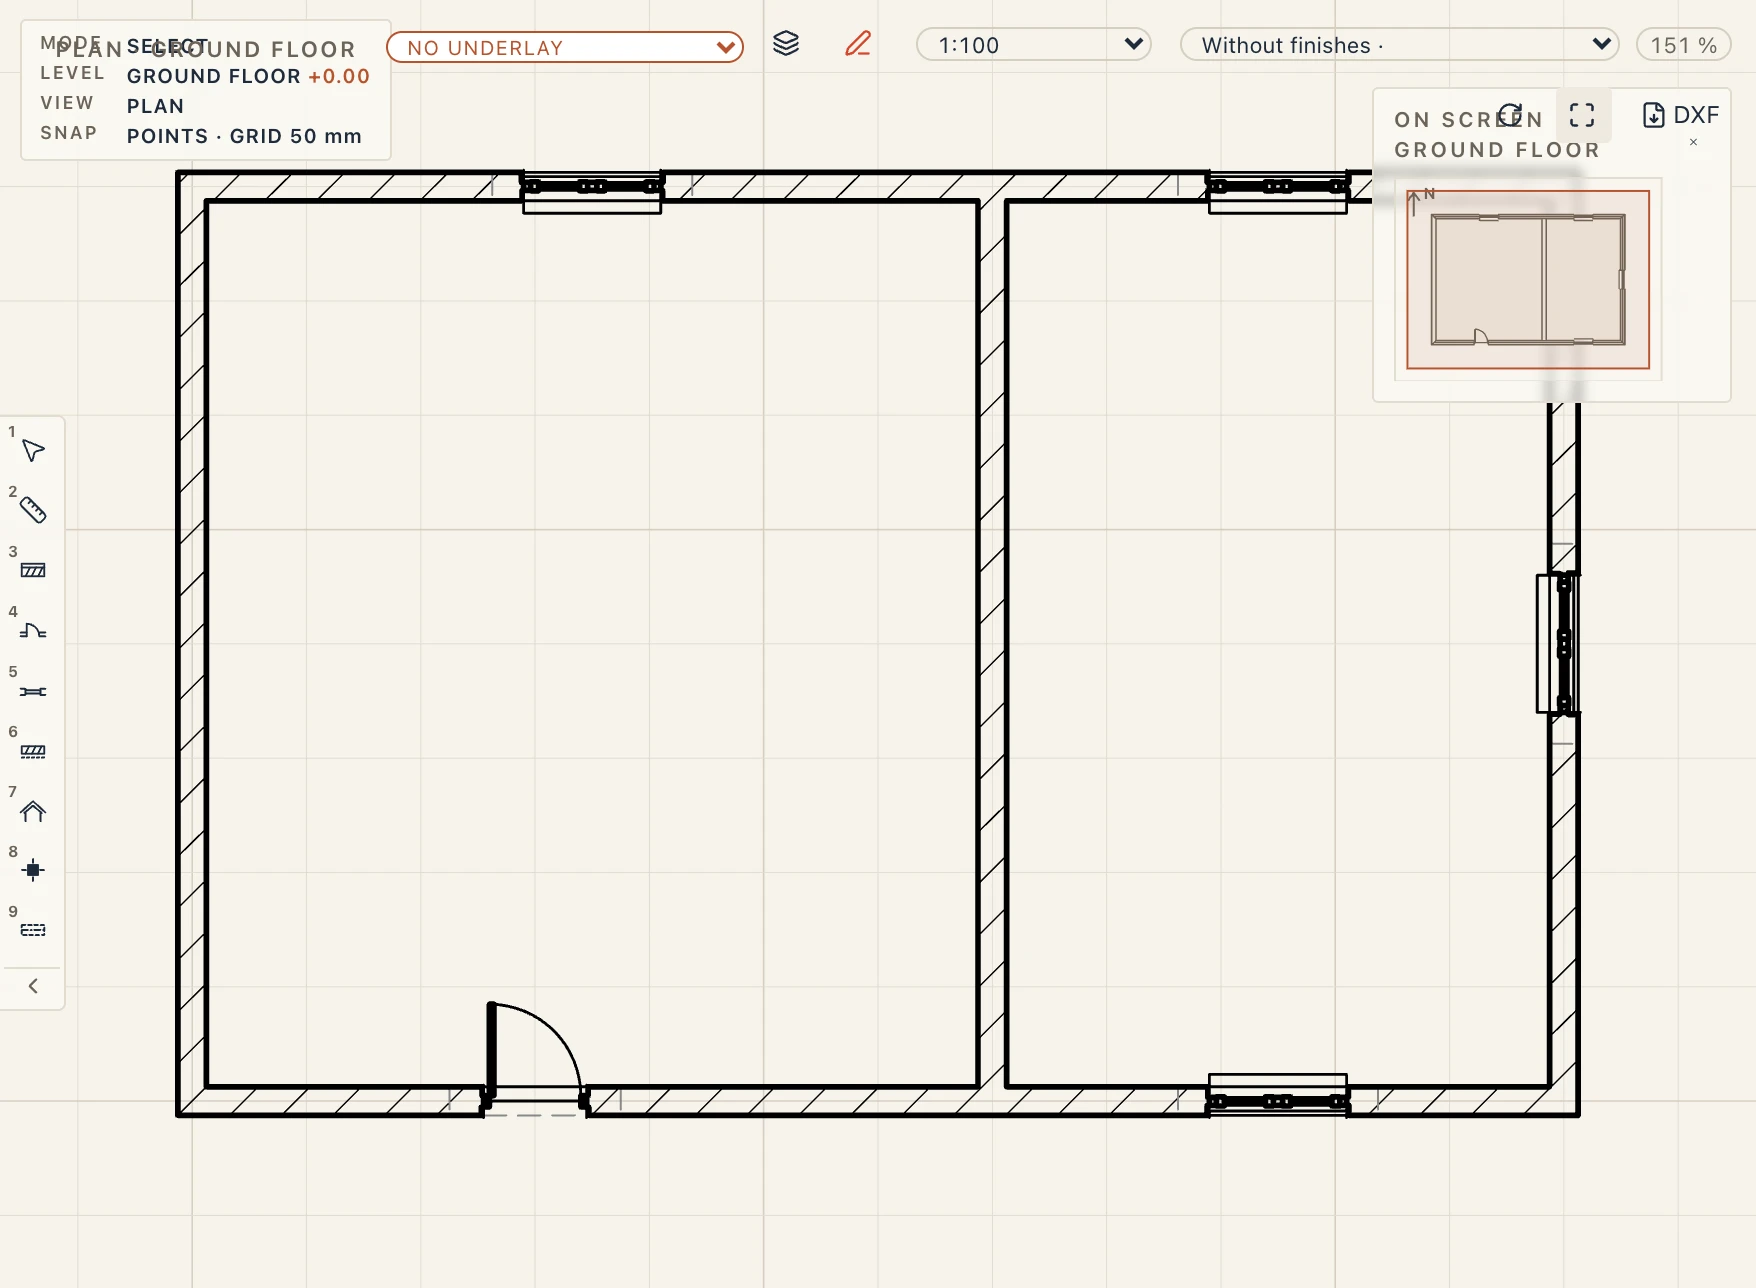
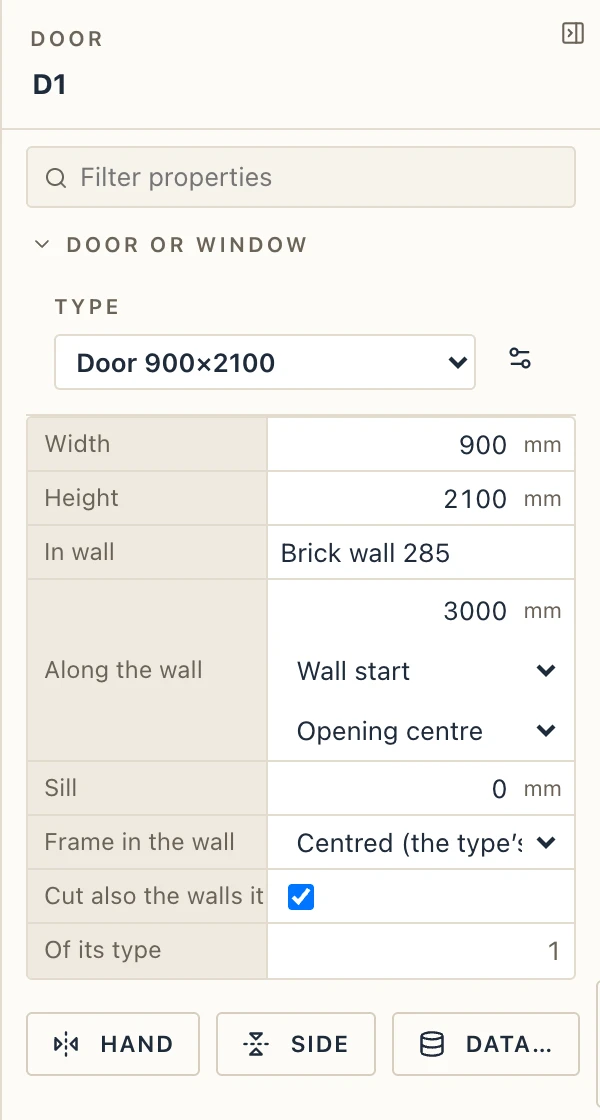
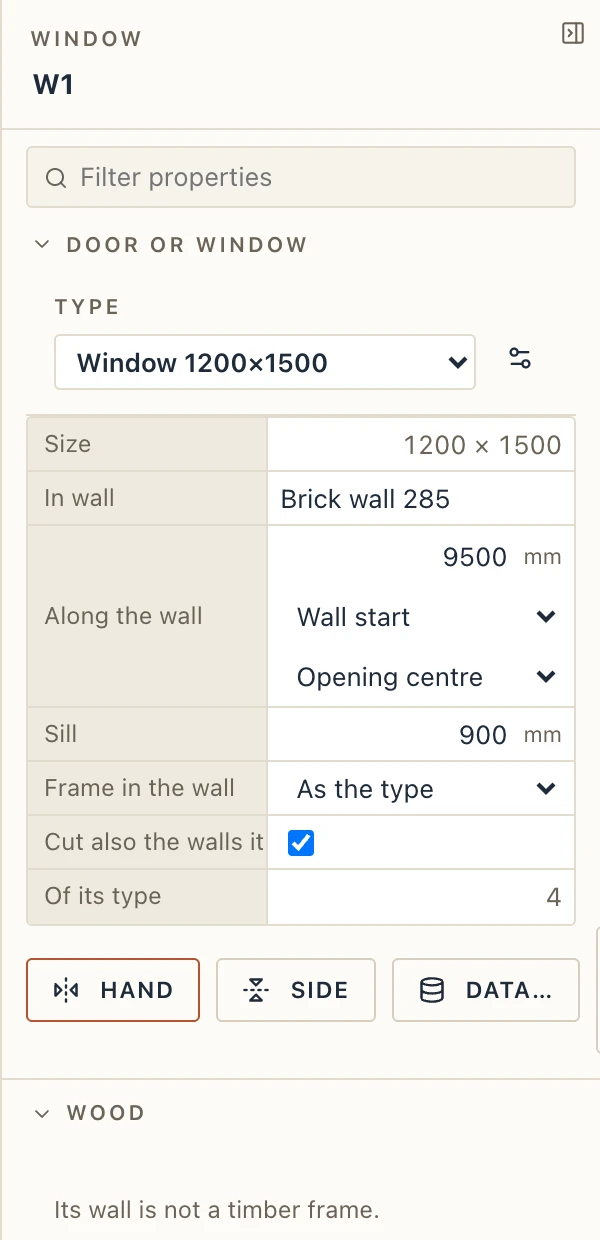
To move a door or window along its wall, select it and drag it. To change it, use the properties panel: its type, its sill height, and which side it opens to (Side). With several doors and windows selected, Hand, Side, the sill and the type change all of them in one step, and so does a flip arrow in the plan.
One type, many sizes. A door's or window's Width and Height in the properties panel are its own: a type holds the construction (frame, sashes, profiles, materials, data) and the size new ones are placed at, so one type serves every size of the same window, 1200 × 1200, 900 × 1500 and 1800 × 1200 alike. Type a width or a height, or drag either jamb of the selected door or window in the plan, the other jamb staying put: the opening, the plan symbol, the 3D, the quantities, the tags and the IFC export (its OverallWidth and OverallHeight) follow, and it must fit its wall as a moved one must. It stays of its type: a change to the type (its profiles, its panes, its materials) reaches it, and a change of the type's size reaches only those still at the type's size. Type's size gives its own size up. The schedules list a type once per size used.
For an exact distance, use Move (M) or Copy (CO) on the command line, as for any element: select the door, window or wall opening, click a base point, then type the distance (500) or click a second point. Only the part of the move along the wall counts: the opening slides along its wall and keeps its sill. Moved into another wall of the same storey, it goes into that wall and still opens the same way in the room. A copy is a new door or window of the same type, with the next number. If it would not fit (past the wall's end, or over another opening), nothing moves. Rotate and Mirror place it the same way, and a mirror changes its hand.
Temporary dimensions
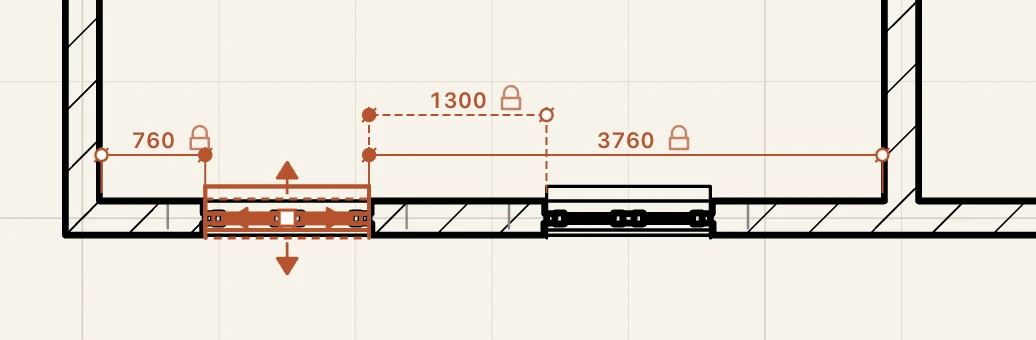
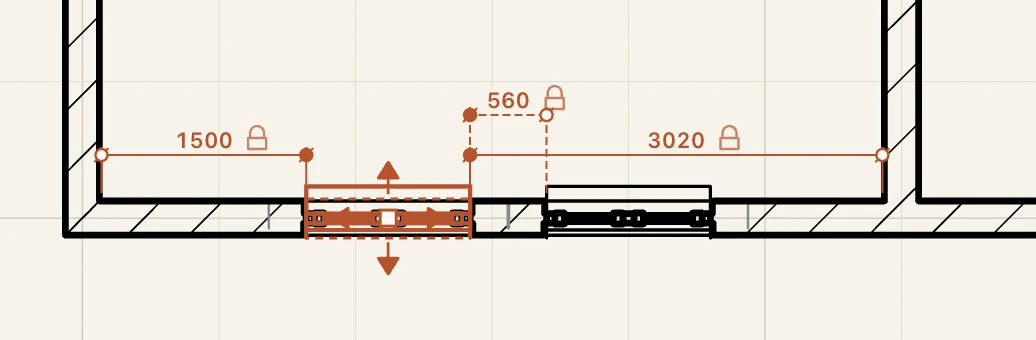
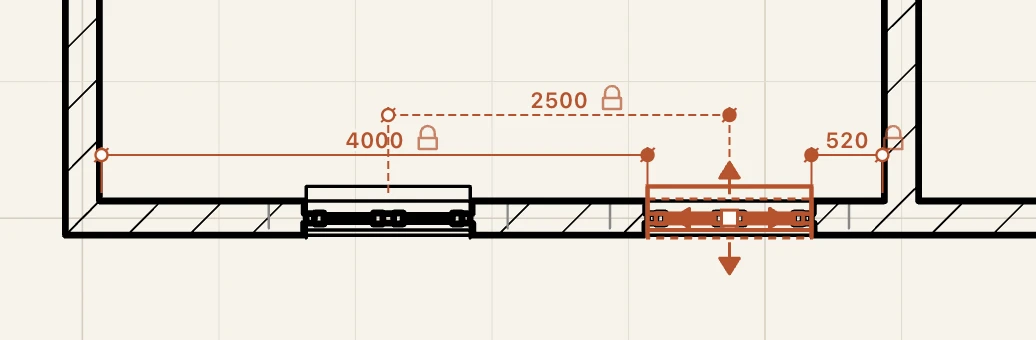
Select one door, window or wall opening in a plan and Lapin draws temporary dimensions along its wall, on the face the walls meeting it come in to: from each of its edges to the nearest face of a wall that meets or crosses its wall (or to the wall's own end), and, when another opening of the same wall is nearer, a second, dashed one to that opening. They follow the opening while you drag it, and they are shown while you place one with Door or Window, before the click.
- Click a value to type it, in the project's unit (sums such as
1200+300work), and press Enter: the opening slides along its wall until the dimension reads it, the other end staying where it is. One undo step. Escape leaves it as it was. If the opening would no longer fit (past the wall's end, or over another opening), nothing moves and the notice says why. - Click the dot on the opening's end to measure from its centre instead of its edge.
- Click the dot on the other end to measure to the next thing there: a wall's near face, its far face, its core's faces (a layered wall), its axis; another opening's near edge, its centre, its far edge.
- Click the padlock beside a value to keep it as a permanent dimension of the plan, held on what its ends lie on, like one drawn with Annotate → Dimension. It does not lock the distance: the opening can still be moved.
So "this window's corner 1500 from that wall's face" is: select the window, click the value towards the wall, type 1500, Enter. "This window's axis 2500 from the other window's axis" is: click the dot on the window's end and the dot on the other window's end until both measure centres, then type 2500.
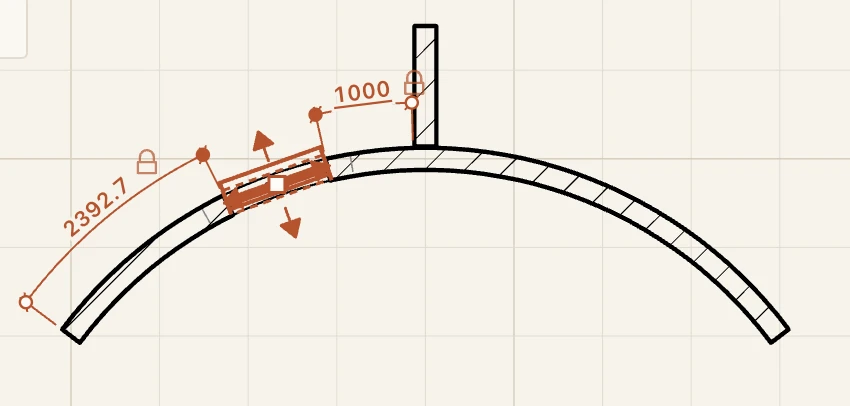
In a curved wall they run round the arc, concentric with it, and read the length along the face they are drawn on (the outer face is longer than the inner one); a value typed moves the opening round the arc. Their padlock makes an arc-length dimension of the plan, which keeps its value as drawn: it does not follow the wall.
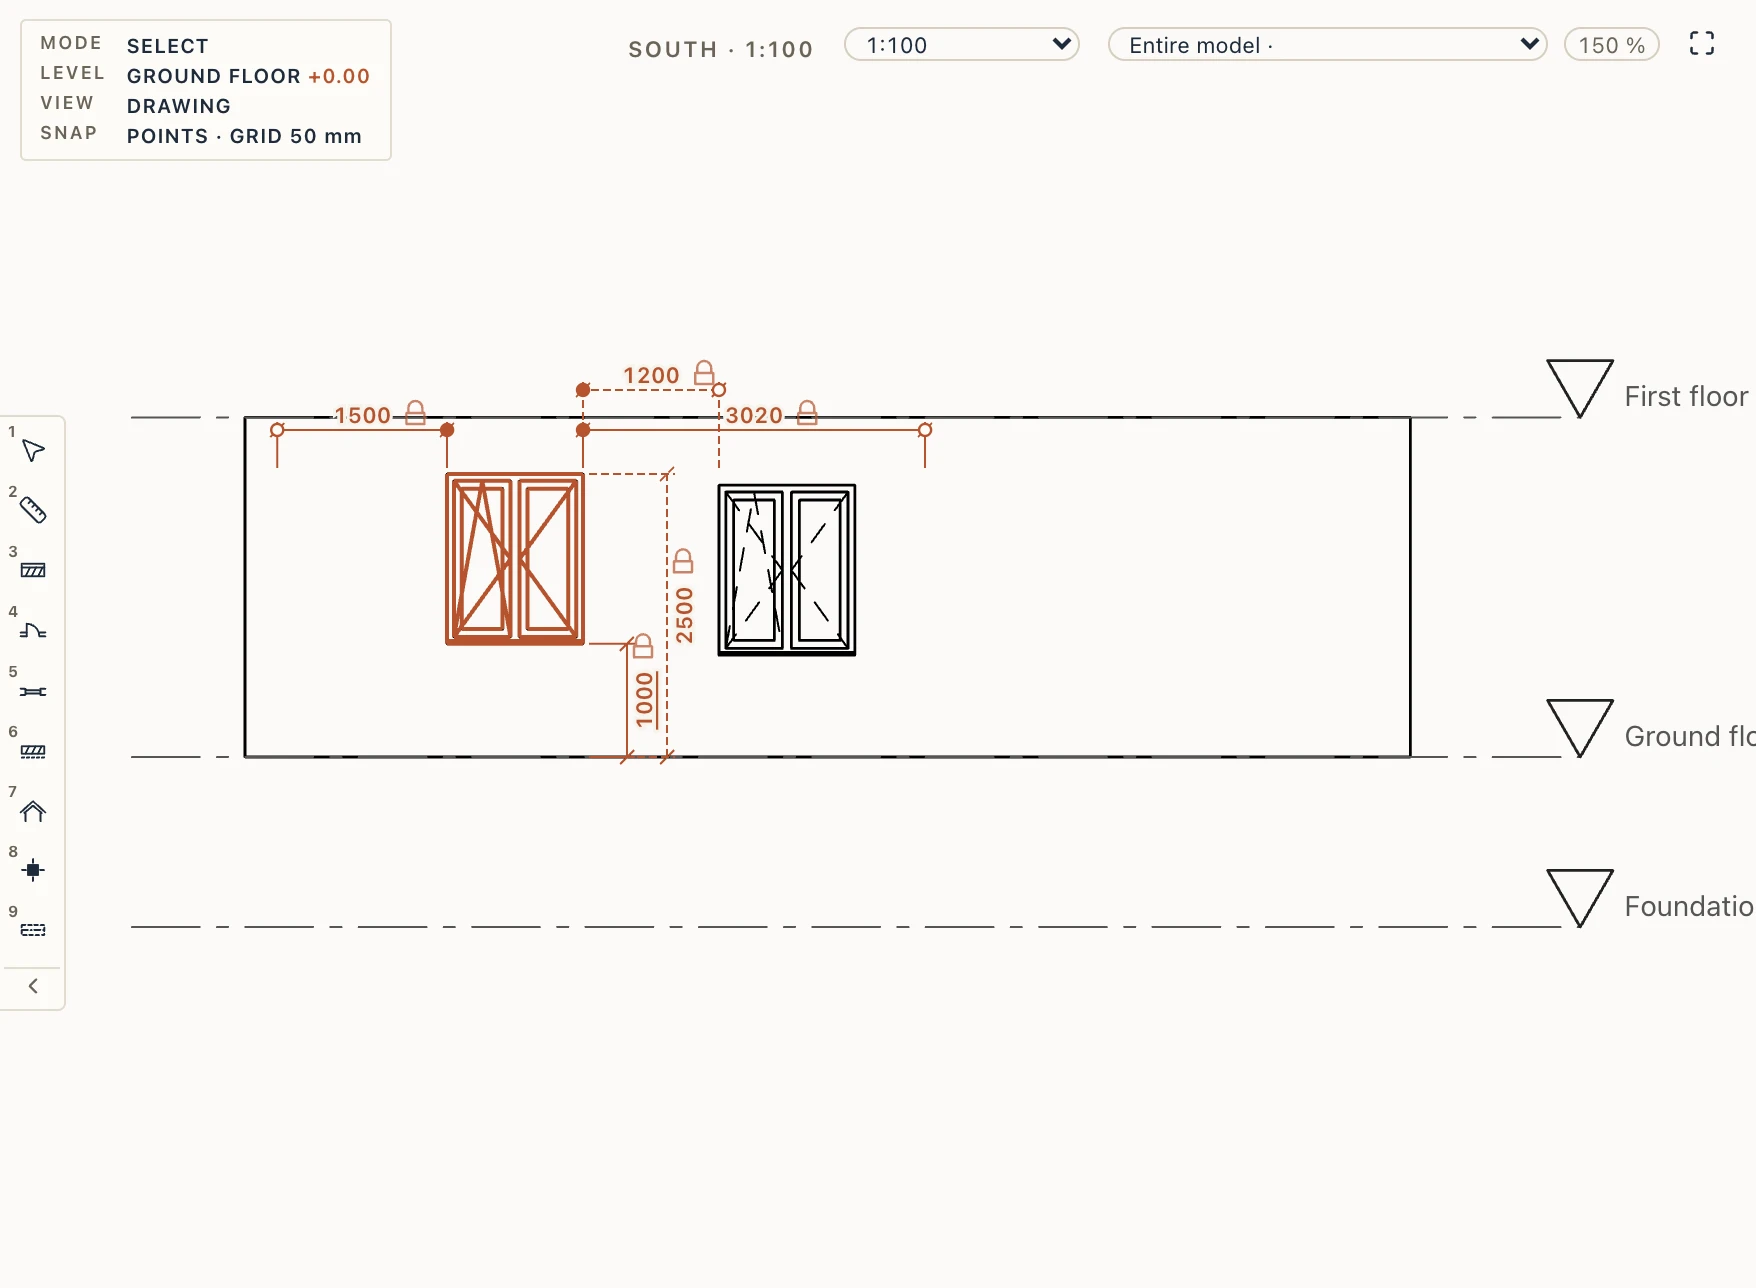
In a section or an elevation that sees the opening's wall face-on (the wall running along the view, within 10°), the opening selected has its dimensions along the wall over its head, to the same walls and openings, on the face the view sees, and two up its side: from the storey's level to its bottom (its sill height) and to its top (its head height). Typing either moves the opening up or down; the other follows. A wall cut obliquely or seen edge-on, a curved wall and a jogged or curved section show none.
Openings without a door or window
Architecture → Opening set to Opening of a shape (WO) cuts an opening alone through a wall where you click it: a passage, a hatch, a hole for a door that comes later. Set its width, height and sill in the properties panel before the click. Selected, its size, its place along the wall and its sill are changed there; like a door, it must fit in the wall and stay clear of the wall's other openings. In IFC it is an opening voiding the wall, with nothing filling it.
Selected, an opening has grips like a window: drag its middle to slide it along the wall, or a jamb to make it wider or narrower while the other jamb stays put; the length beside the mouse can be typed, as when you draw. It is picked by a click in its gap in the plan, or in its hole in the 3D view, where its outline lights up. Move (M) slides it along the wall by a typed distance, and its height and sill are in the properties panel.
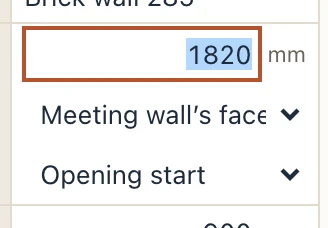
Along the wall in the properties panel (of an opening, a door or a window) is a distance with two choices beside it: Measured from (the wall's start, the face of the nearest wall meeting it, or that wall's core face) and Measured to (the opening's start, centre or end). Typing a value moves the opening so that this distance reads it, the reference staying put, in one undo step. The choices only change how the same position is read, so nothing is stored in the model; Lapin remembers your last choice.
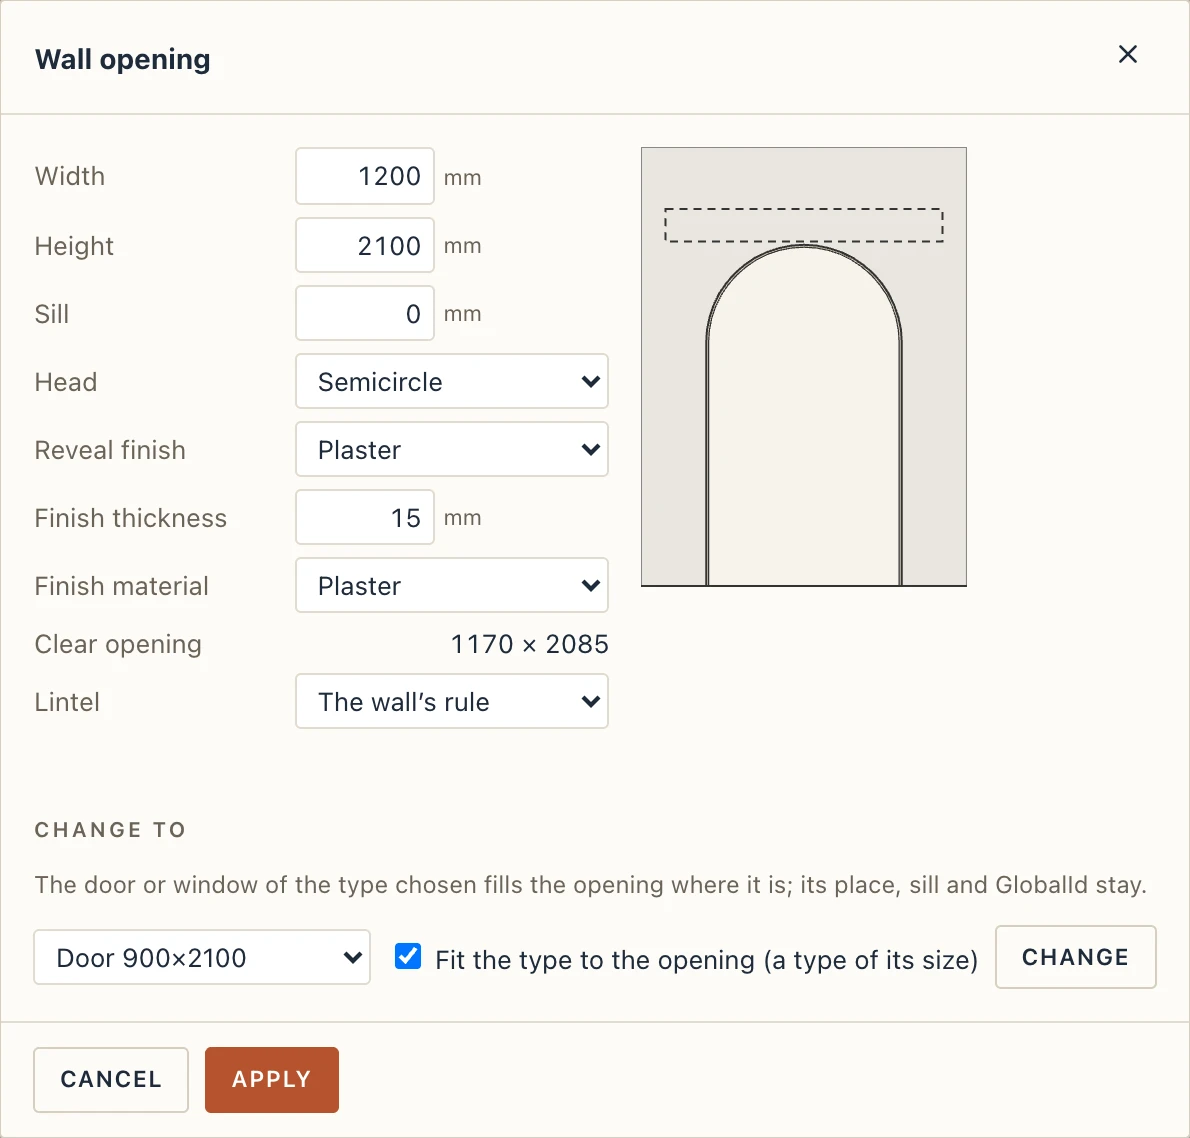
Head shapes its top: Rectangle, Segmental arch (a shallow arc), Elliptical arch (a half ellipse, a quarter of the width high unless you say), Semicircle, Radiused corners (a flat head with its top corners rounded), or Circle (a round hole, for a pipe or a porthole). Rise of the head sets how high a segmental or elliptical head rises, Corner radius how round the corners are (150 mm unless you say, never more than half the width); empty, the kind's own. The wall's opening follows the outline in 3D, in elevations and sections and in IFC; a plan shows its jambs as before.
Reveal finish lines its jambs and head inside the hole: Plaster (15 mm unless you say) or a Lining (20 mm of timber), with its Finish thickness and Finish material; an opening above the floor is finished under it too. The finish is part of the wall's body, in 3D, elevations, sections and quantities, and the clear opening is what it leaves. Lintel is The wall’s rule (the lintel the wall type asks for, as over a door) or None. Several openings selected change together, in one undo step.
Edit the opening… opens its configurator: the same fields over a picture of the opening in its wall, applied together. Change to door… and Change to window… fill it with a door or window of a type you choose, where it is: its place, its sill and its GlobalId stay, and Fit the type to the opening gives it a type of its size and head (the project's of that size, else one made from the type chosen and named by its size). The other way, a selected door's or window's Change to opening takes it out and leaves its hole as an opening of the same size and head. Each is one undo step.
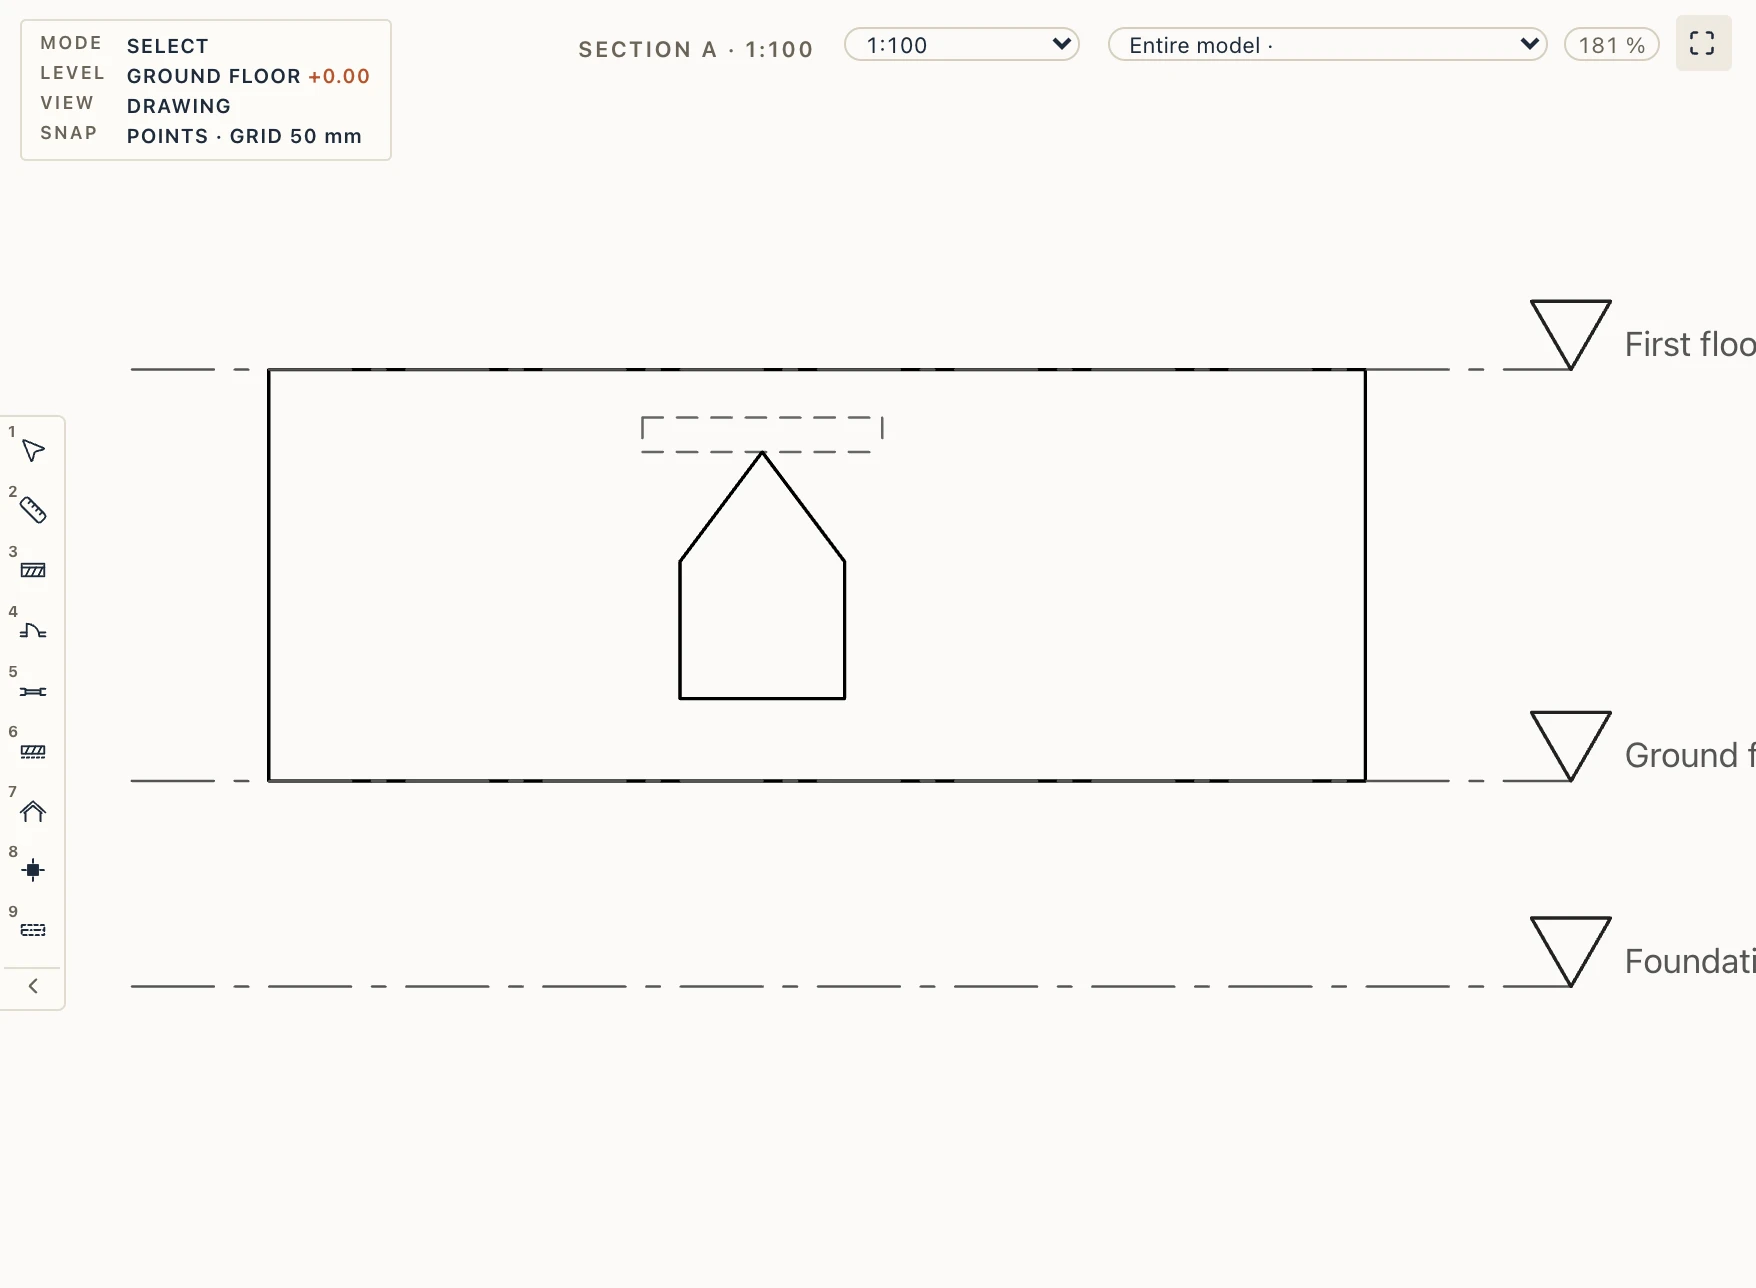
An opening can also have its own outline, any shape: draw it closed on a section or an elevation that looks at the wall square on (Draft: a polyline, a rectangle, a circle, arcs), select it and choose Draft → Convert to… → Wall opening. The opening goes in the straight wall behind the shape, its width, height, place along the wall and sill taken from the outline's bounds, the outline itself cut through the wall (its arcs along the true curve). Resized, it stretches with its box; another head chosen in its properties replaces the outline. In IFC it is an IfcOpeningElement of that shape, and comes back as it was.
Openings through several walls
A door, a window or an opening cuts every wall its hole passes through, not only the wall it is in: a wall stacked on it (a door that starts in a 1 m reinforced concrete wall and goes on up through the masonry on it), a wall under it, or a lining against its face. Each wall that lies along the opening's wall — parallel to it, touching or overlapping it — is cut where the hole reaches into it, through its whole thickness, in 3D, plans, sections, elevations and quantities, and the lintel goes into the wall the head is in. Nothing is stored for it: move the opening, or move the walls, and the cut follows; a wall the hole no longer reaches is whole again. So a door may run out of its own wall into the walls it cuts, but not into nothing.
Cut also the walls it passes through, in the properties panel of a door, a window or an opening, is on unless you turn it off; off, it cuts its own wall alone and must fit in it again. In IFC each wall cut gets an opening element of its own. Walls imported from an IFC file from another program keep the file's holes and are not cut this way. Walls meeting at a corner, curved walls, floors, beams and columns are not cut by it.
The configurator
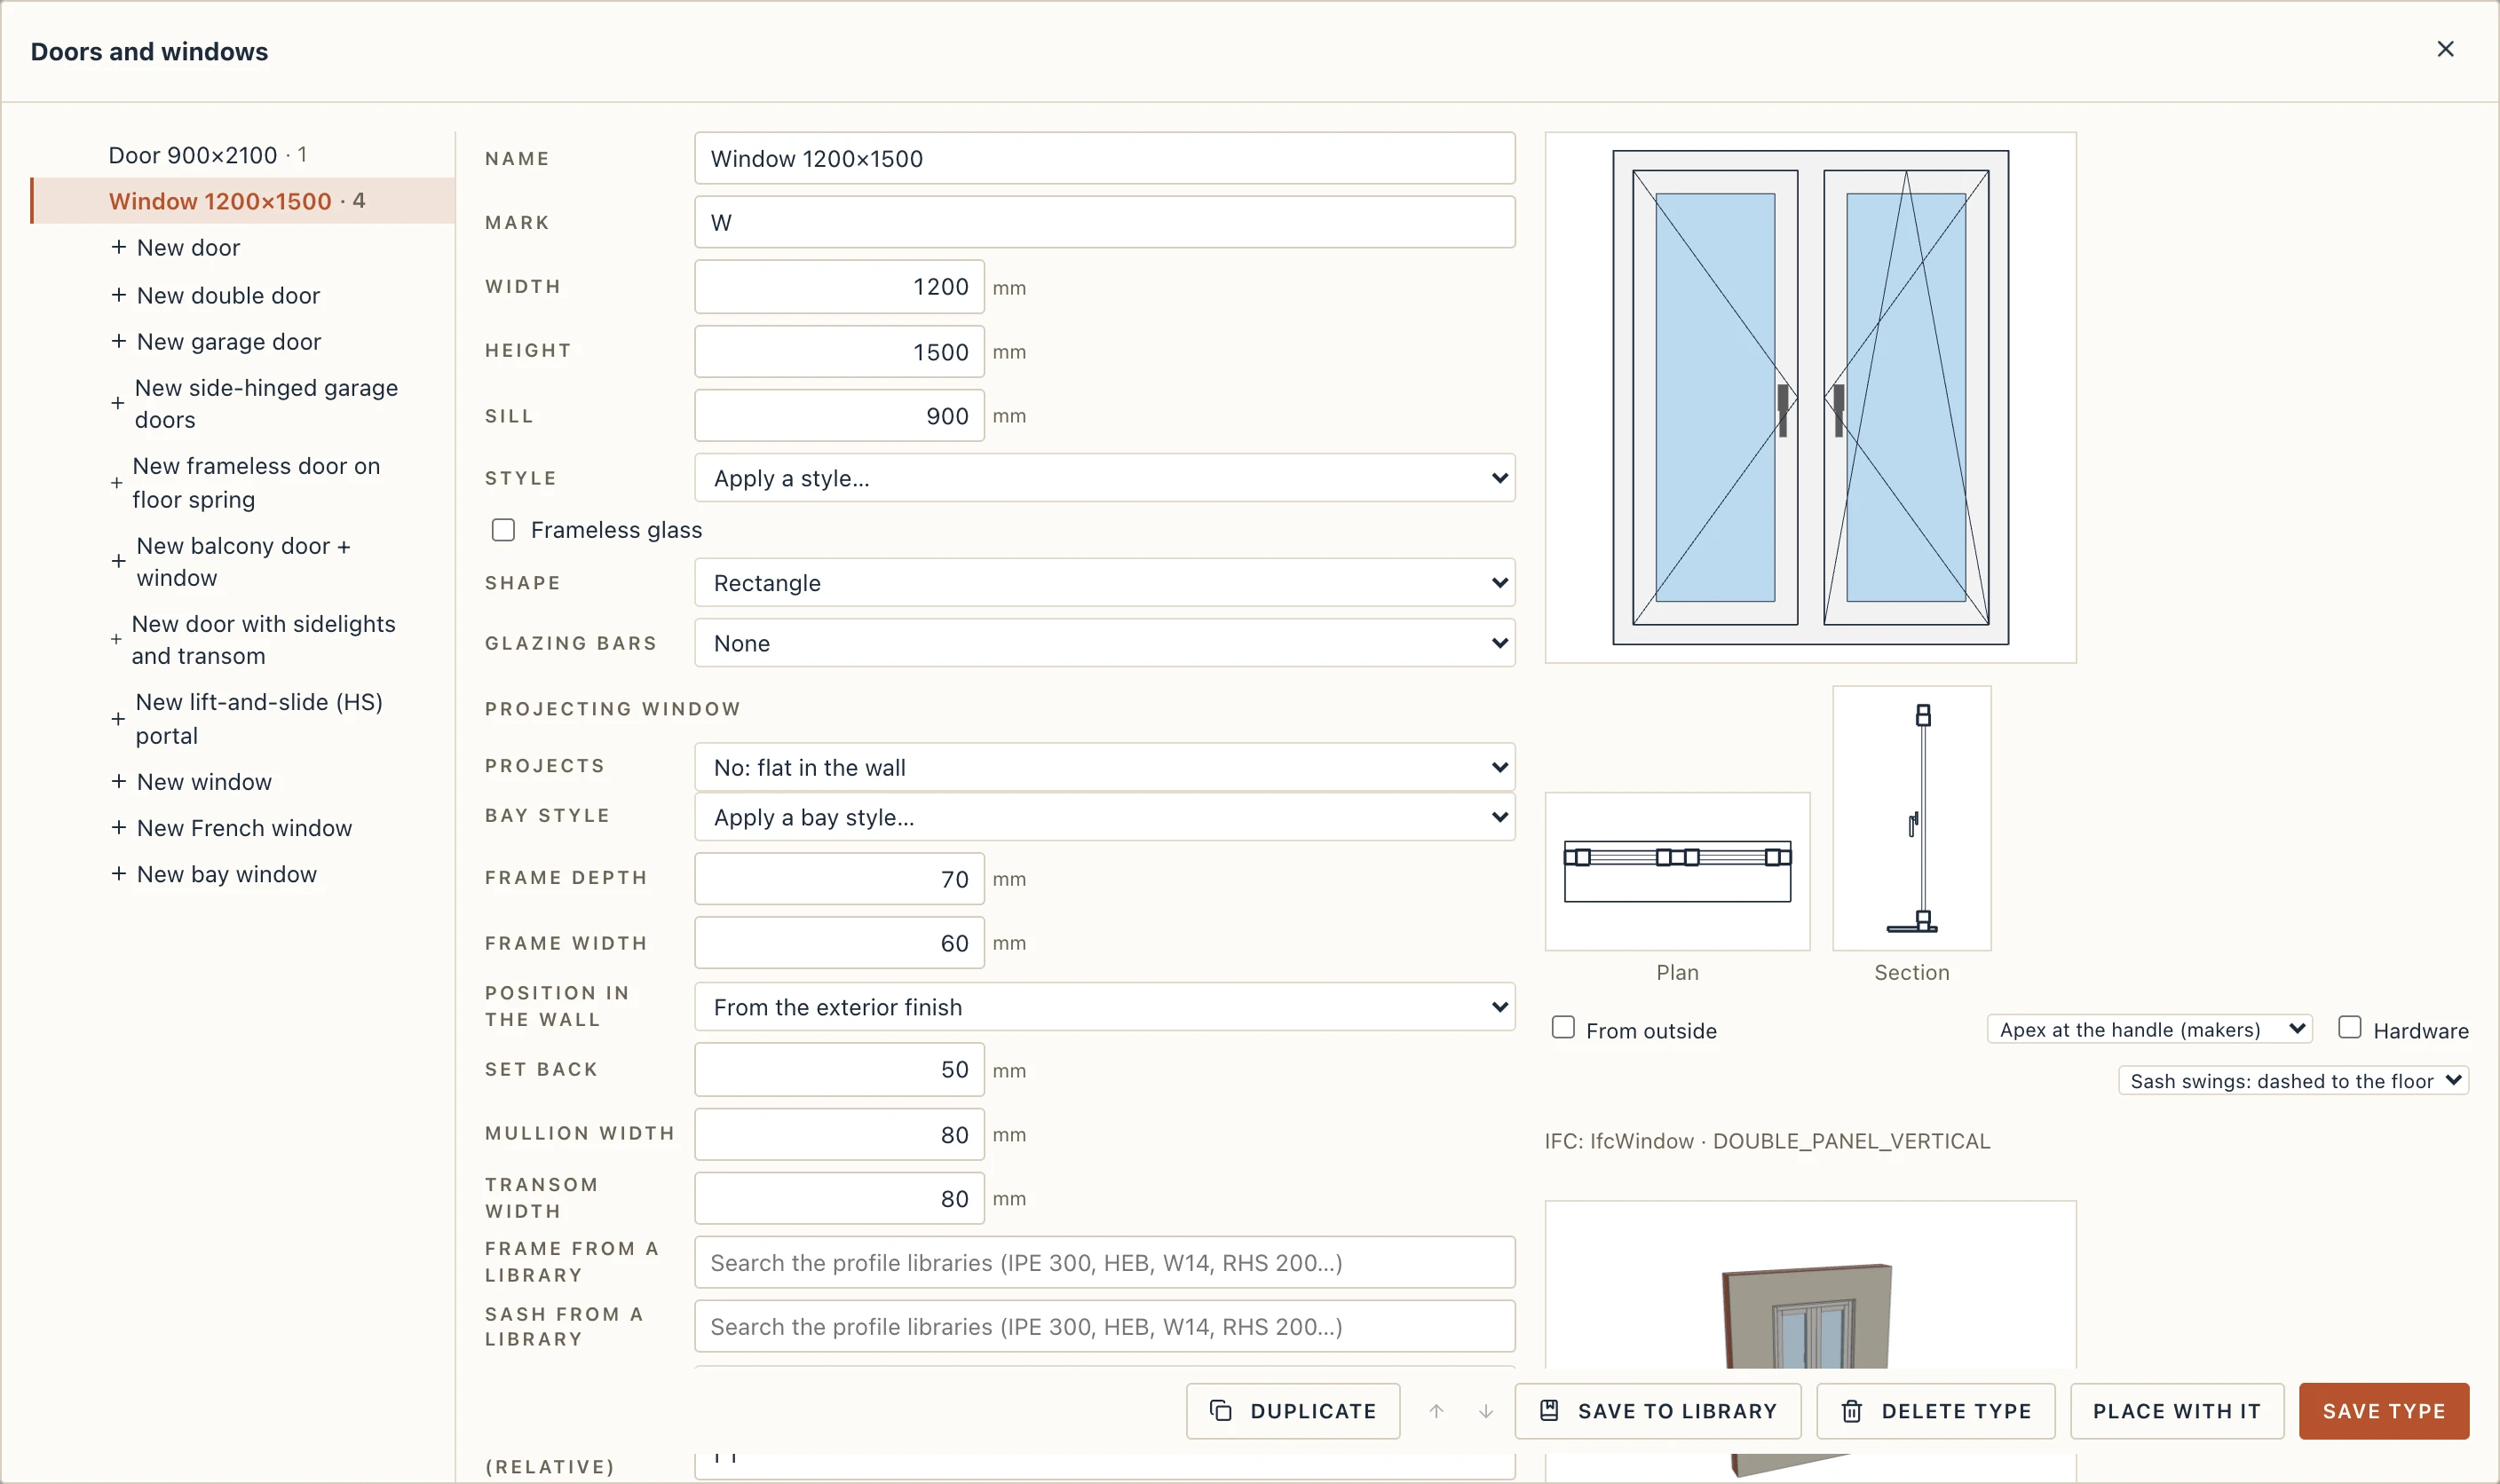
Architecture → Doors & windows opens the configurator. Every door and window type of the project is listed on the left. You can change:
- the type's name and mark (the letter in the tags);
- its width and height;
- the frame's depth and width;
- its columns and rows of panels, and how each panel opens;
- the reveal finish, the surround on the facade, the threshold, and the colours.
The drawings on the right show the type as it will be drawn in elevation, plan and section, while you change it. Under them, a 3D preview shows the type standing in a piece of wall of the project's first wall type, with its reveal, sills, lining and materials, as you change it (a bay, bow or box window too): drag to turn it, use the wheel to zoom, right-drag to pan. It starts from outside.
Left and right. A door's swing is named the way architects name it: look from the handle towards the hinges; a leaf that opens to the left of that line is a left swing, one that opens to the right a right swing. The configurator's choices for a leaf say it so, with the side of its hinges in a pane's Opens, seen from outside, the side the panels are pushed from: Swing right (hinges at left). An IFC file names the hand its own way (the hinges as seen looking the way the leaf opens), so the same door is written there as SINGLE_SWING_LEFT; Lapin turns one into the other when it writes and reads IFC. A window's left and right are seen from inside, the side its sashes open to: Side hung right (hinges at left) in the configurator, whose panes are seen from outside. IFC writes the same window as left-handed. The elevation is seen from inside, the side the panels open to, unless From outside is ticked; like the plan, it shows the door as it stands in the model. A door flipped to the other hand (Hand, or a flip arrow along the wall) is the mirror image of its type; the schedules list it on its own card (see Schedules).
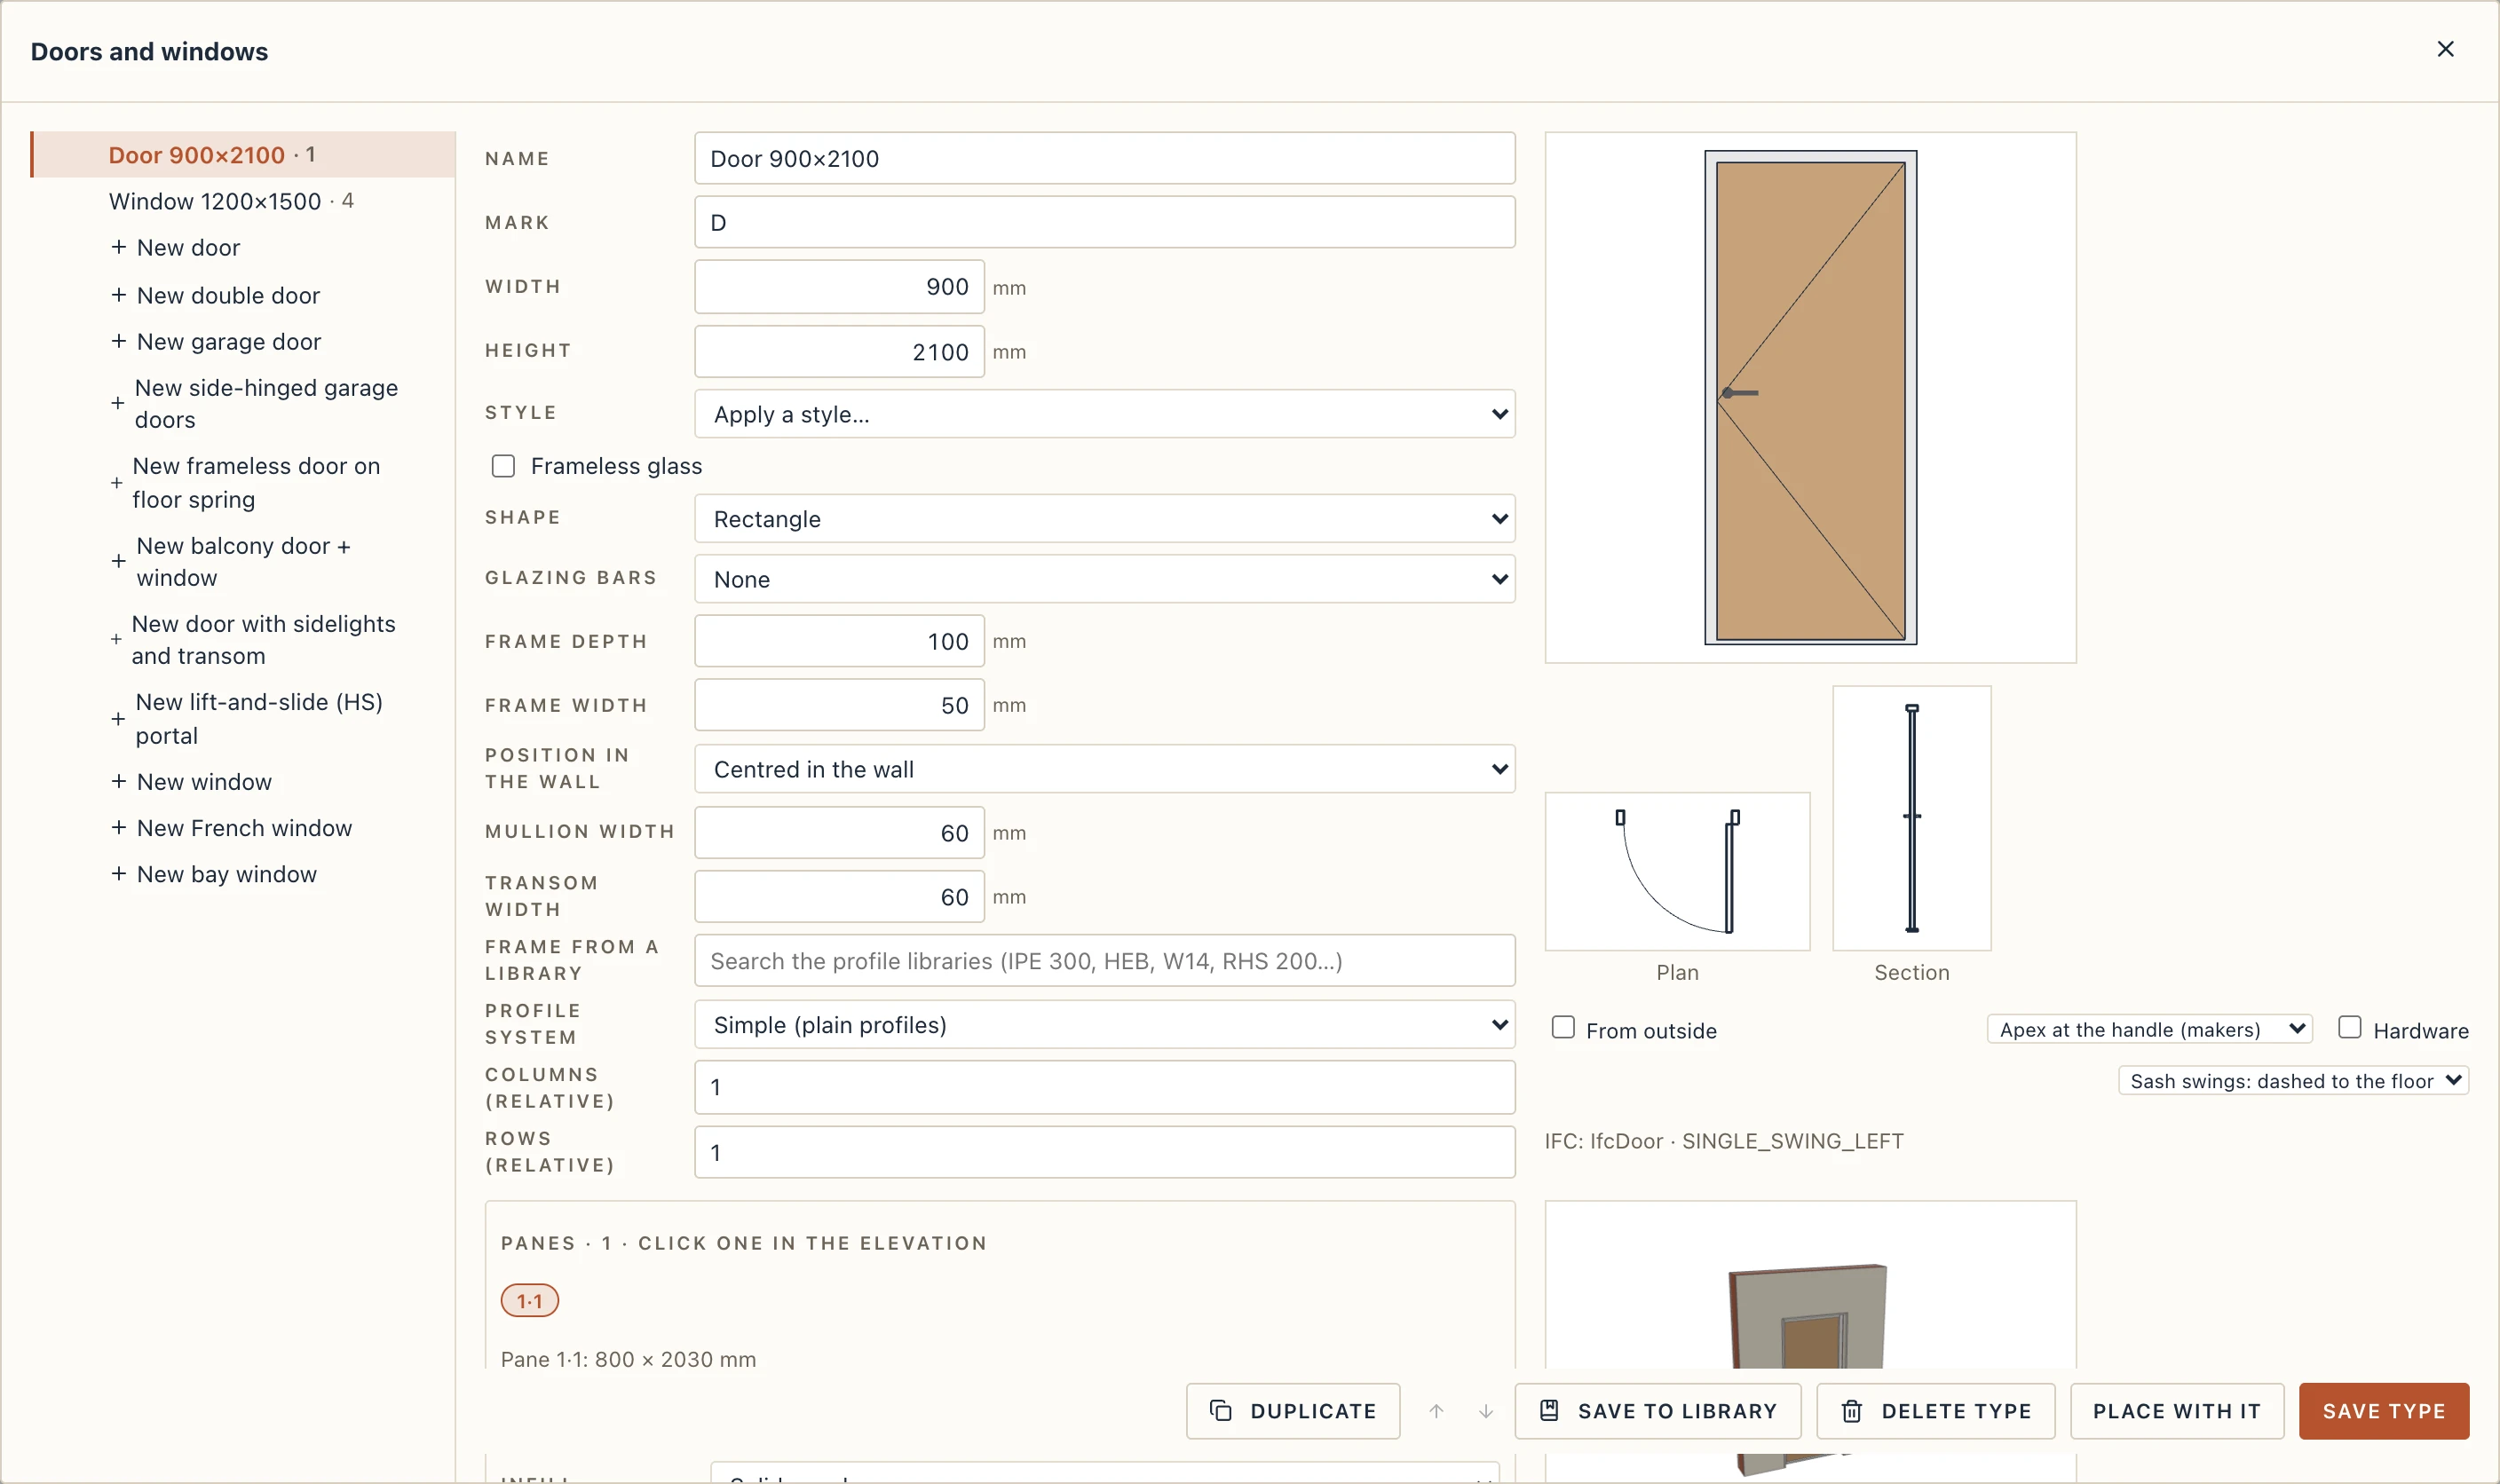
Save type keeps your changes. Every door or window of that type follows them. Place with it closes the configurator and starts placing that type.
Panes, mullions and profiles
A door or a window is a grid of panes. Every pane chooses how it opens and what fills it, so one type can hold a pair of leaves with side lights and a transom over them, or a window with a solid panel under a sash.
Columns (relative) and Rows (relative) divide the opening quickly: 1 1 is two equal panes, 1 1 1 three, 2 1 a wide one beside a narrow one. Rows count from the bottom up.
Column widths and Row heights give the same sizes in millimetres. Type one and the last takes up the rest. In the elevation you can also drag a mullion or a transom; the distance shows as you drag.
Mullion width and Transom width are their own sizes, apart from Frame width. A frame of 50 mm with mullions of 50 mm reads as 50 mm everywhere.
Panes lists every pane. Click one, in the list or in the elevation, to edit it:
- Opens: fixed, a sash (side-hung, tilt-and-turn, bottom-hung, top-hung, pivoting, sliding) or, on a door, a leaf.
- Infill: Glass or Solid panel. A door's leaves and side panels can be solid, and so can a window's pane (a panel under a sash, an opaque light).
- Split: Into columns or Into rows, at a distance in millimetres from the pane's left or bottom edge (half by default). Split across, a door leaf keeps its lower part and the upper part becomes a fixed glazed fanlight.
- Merge: with the pane beside it, above it or below it, when they share a whole edge. Mullions and transoms no pane needs any more go.
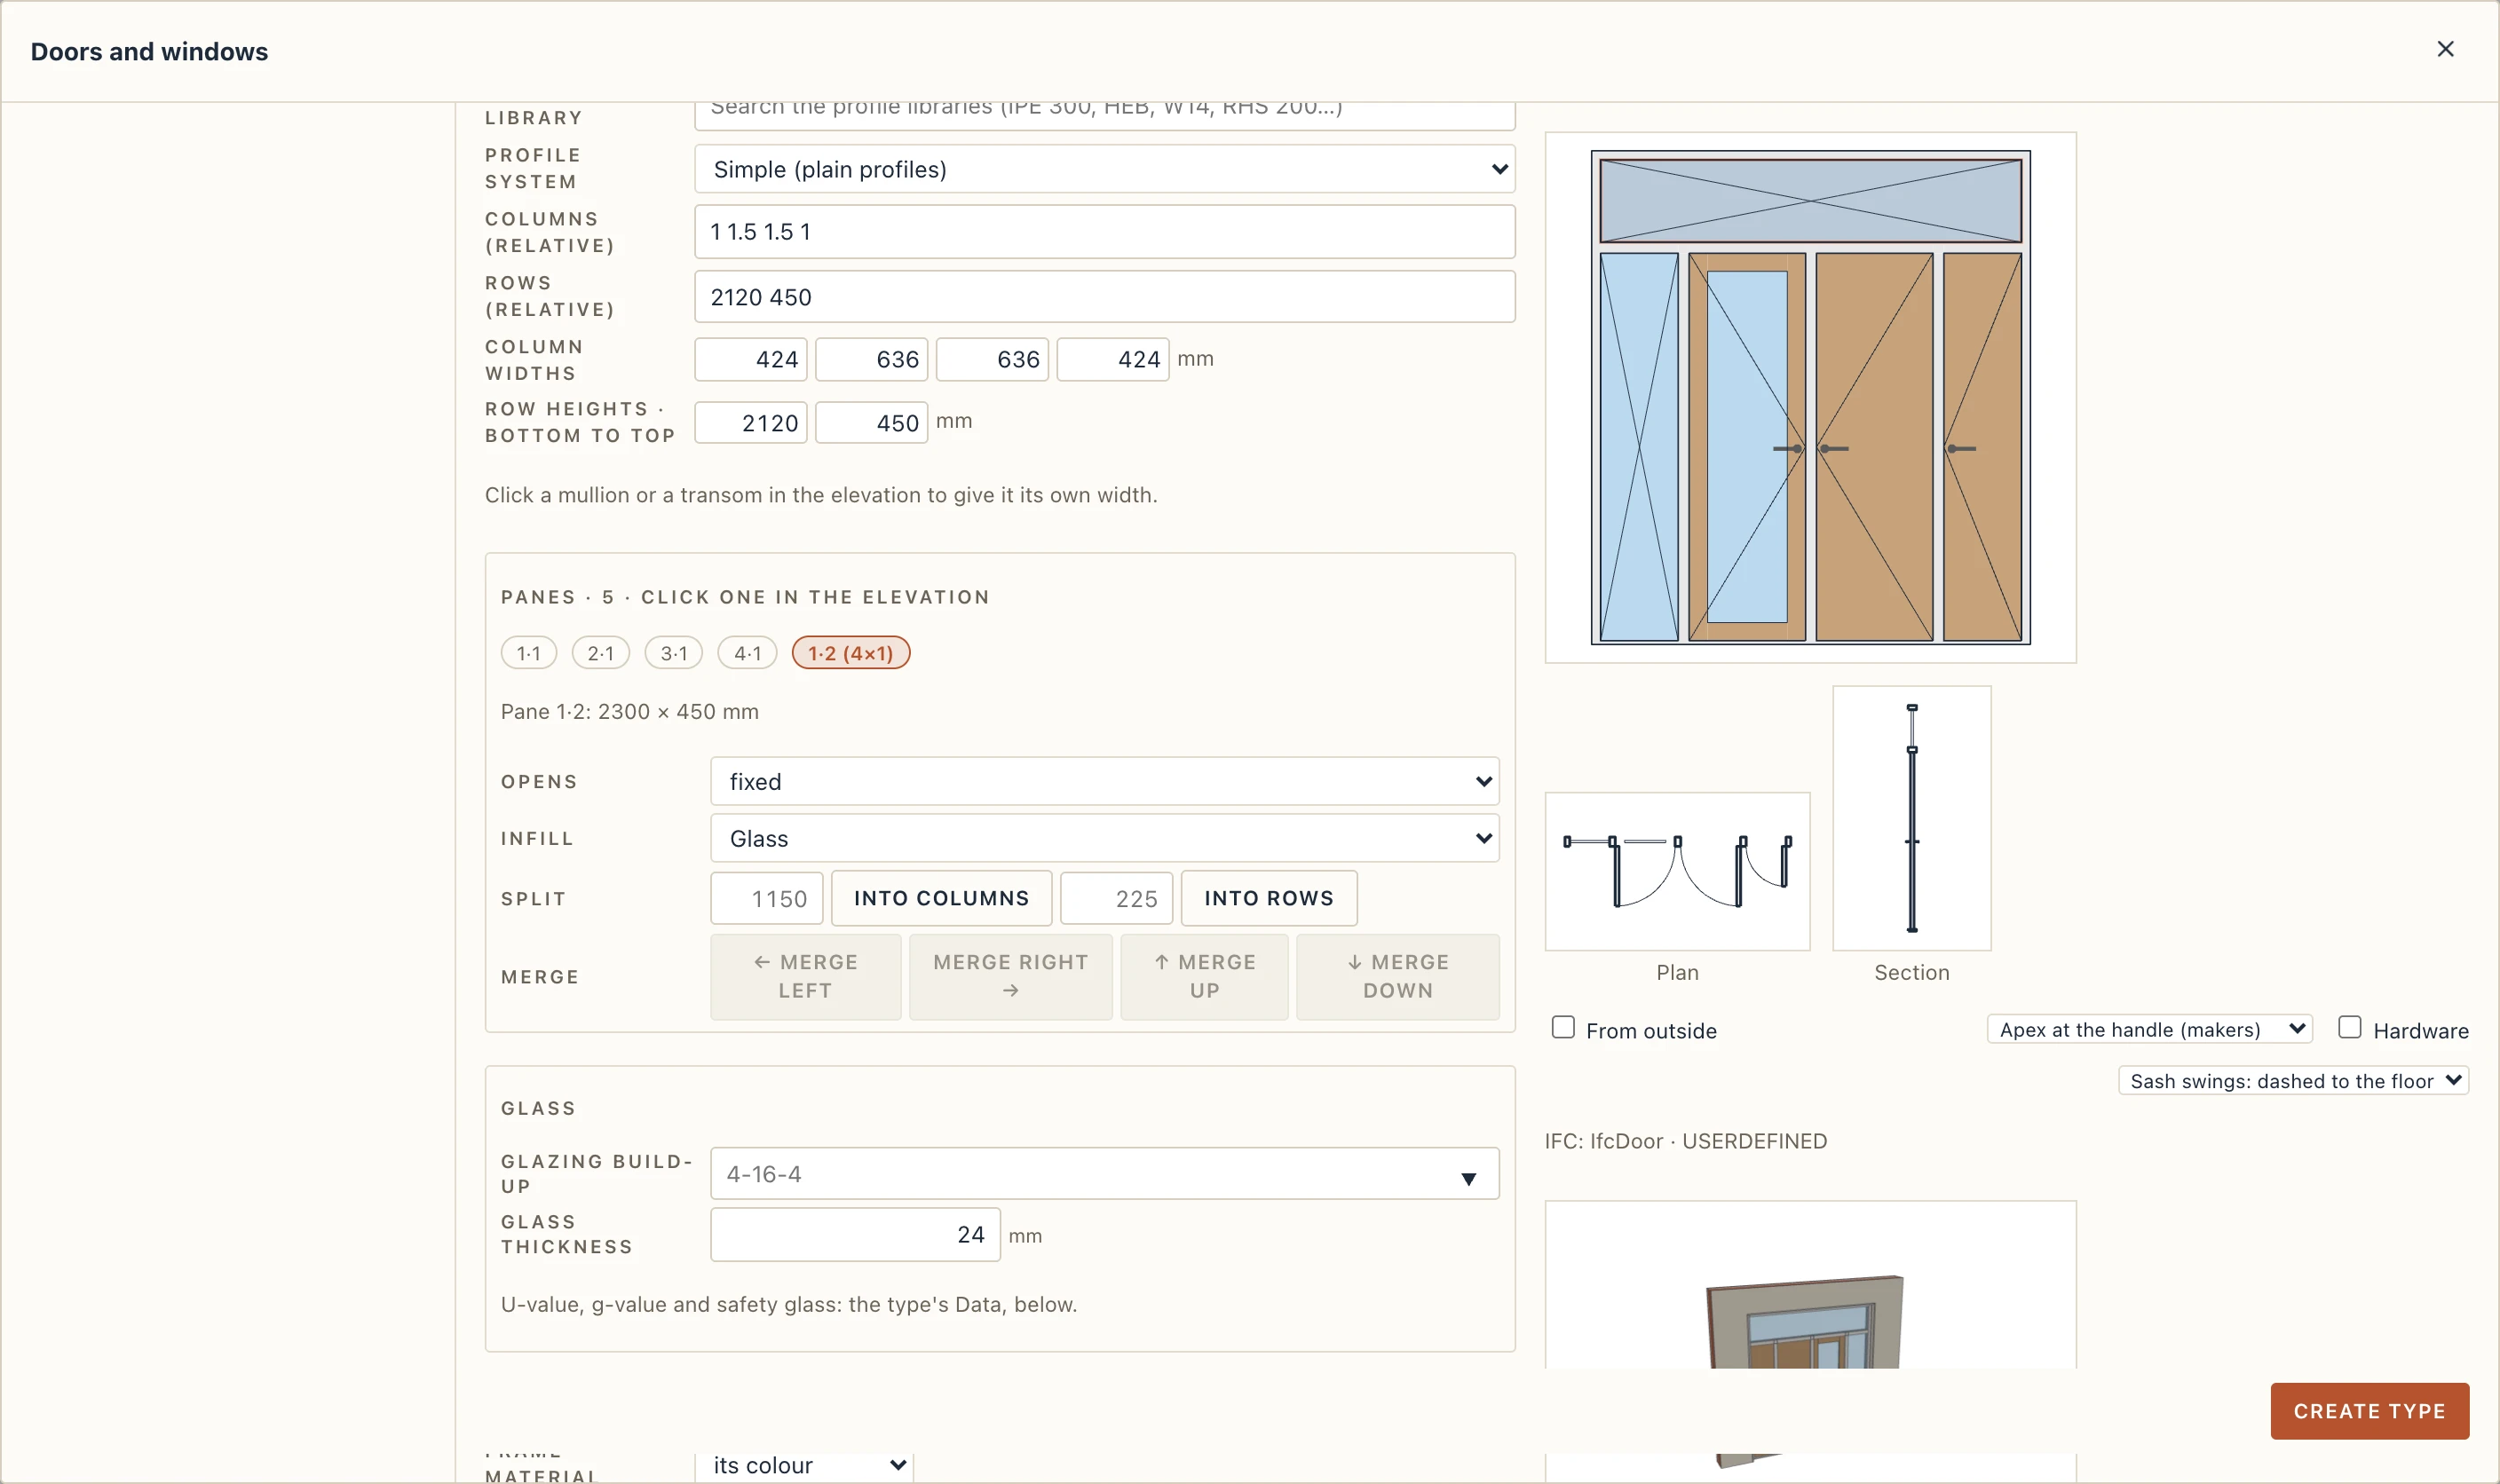
Width of one mullion or transom. Click a mullion or a transom in the elevation (a click, not a drag) and it is picked: its Width appears, with No mullion (No transom) to take it away so the two panes meet, and Default (frame's) to give it the common Mullion width again. Each one keeps its own width when you add, split or merge columns and rows.
Double doors and meeting leaves
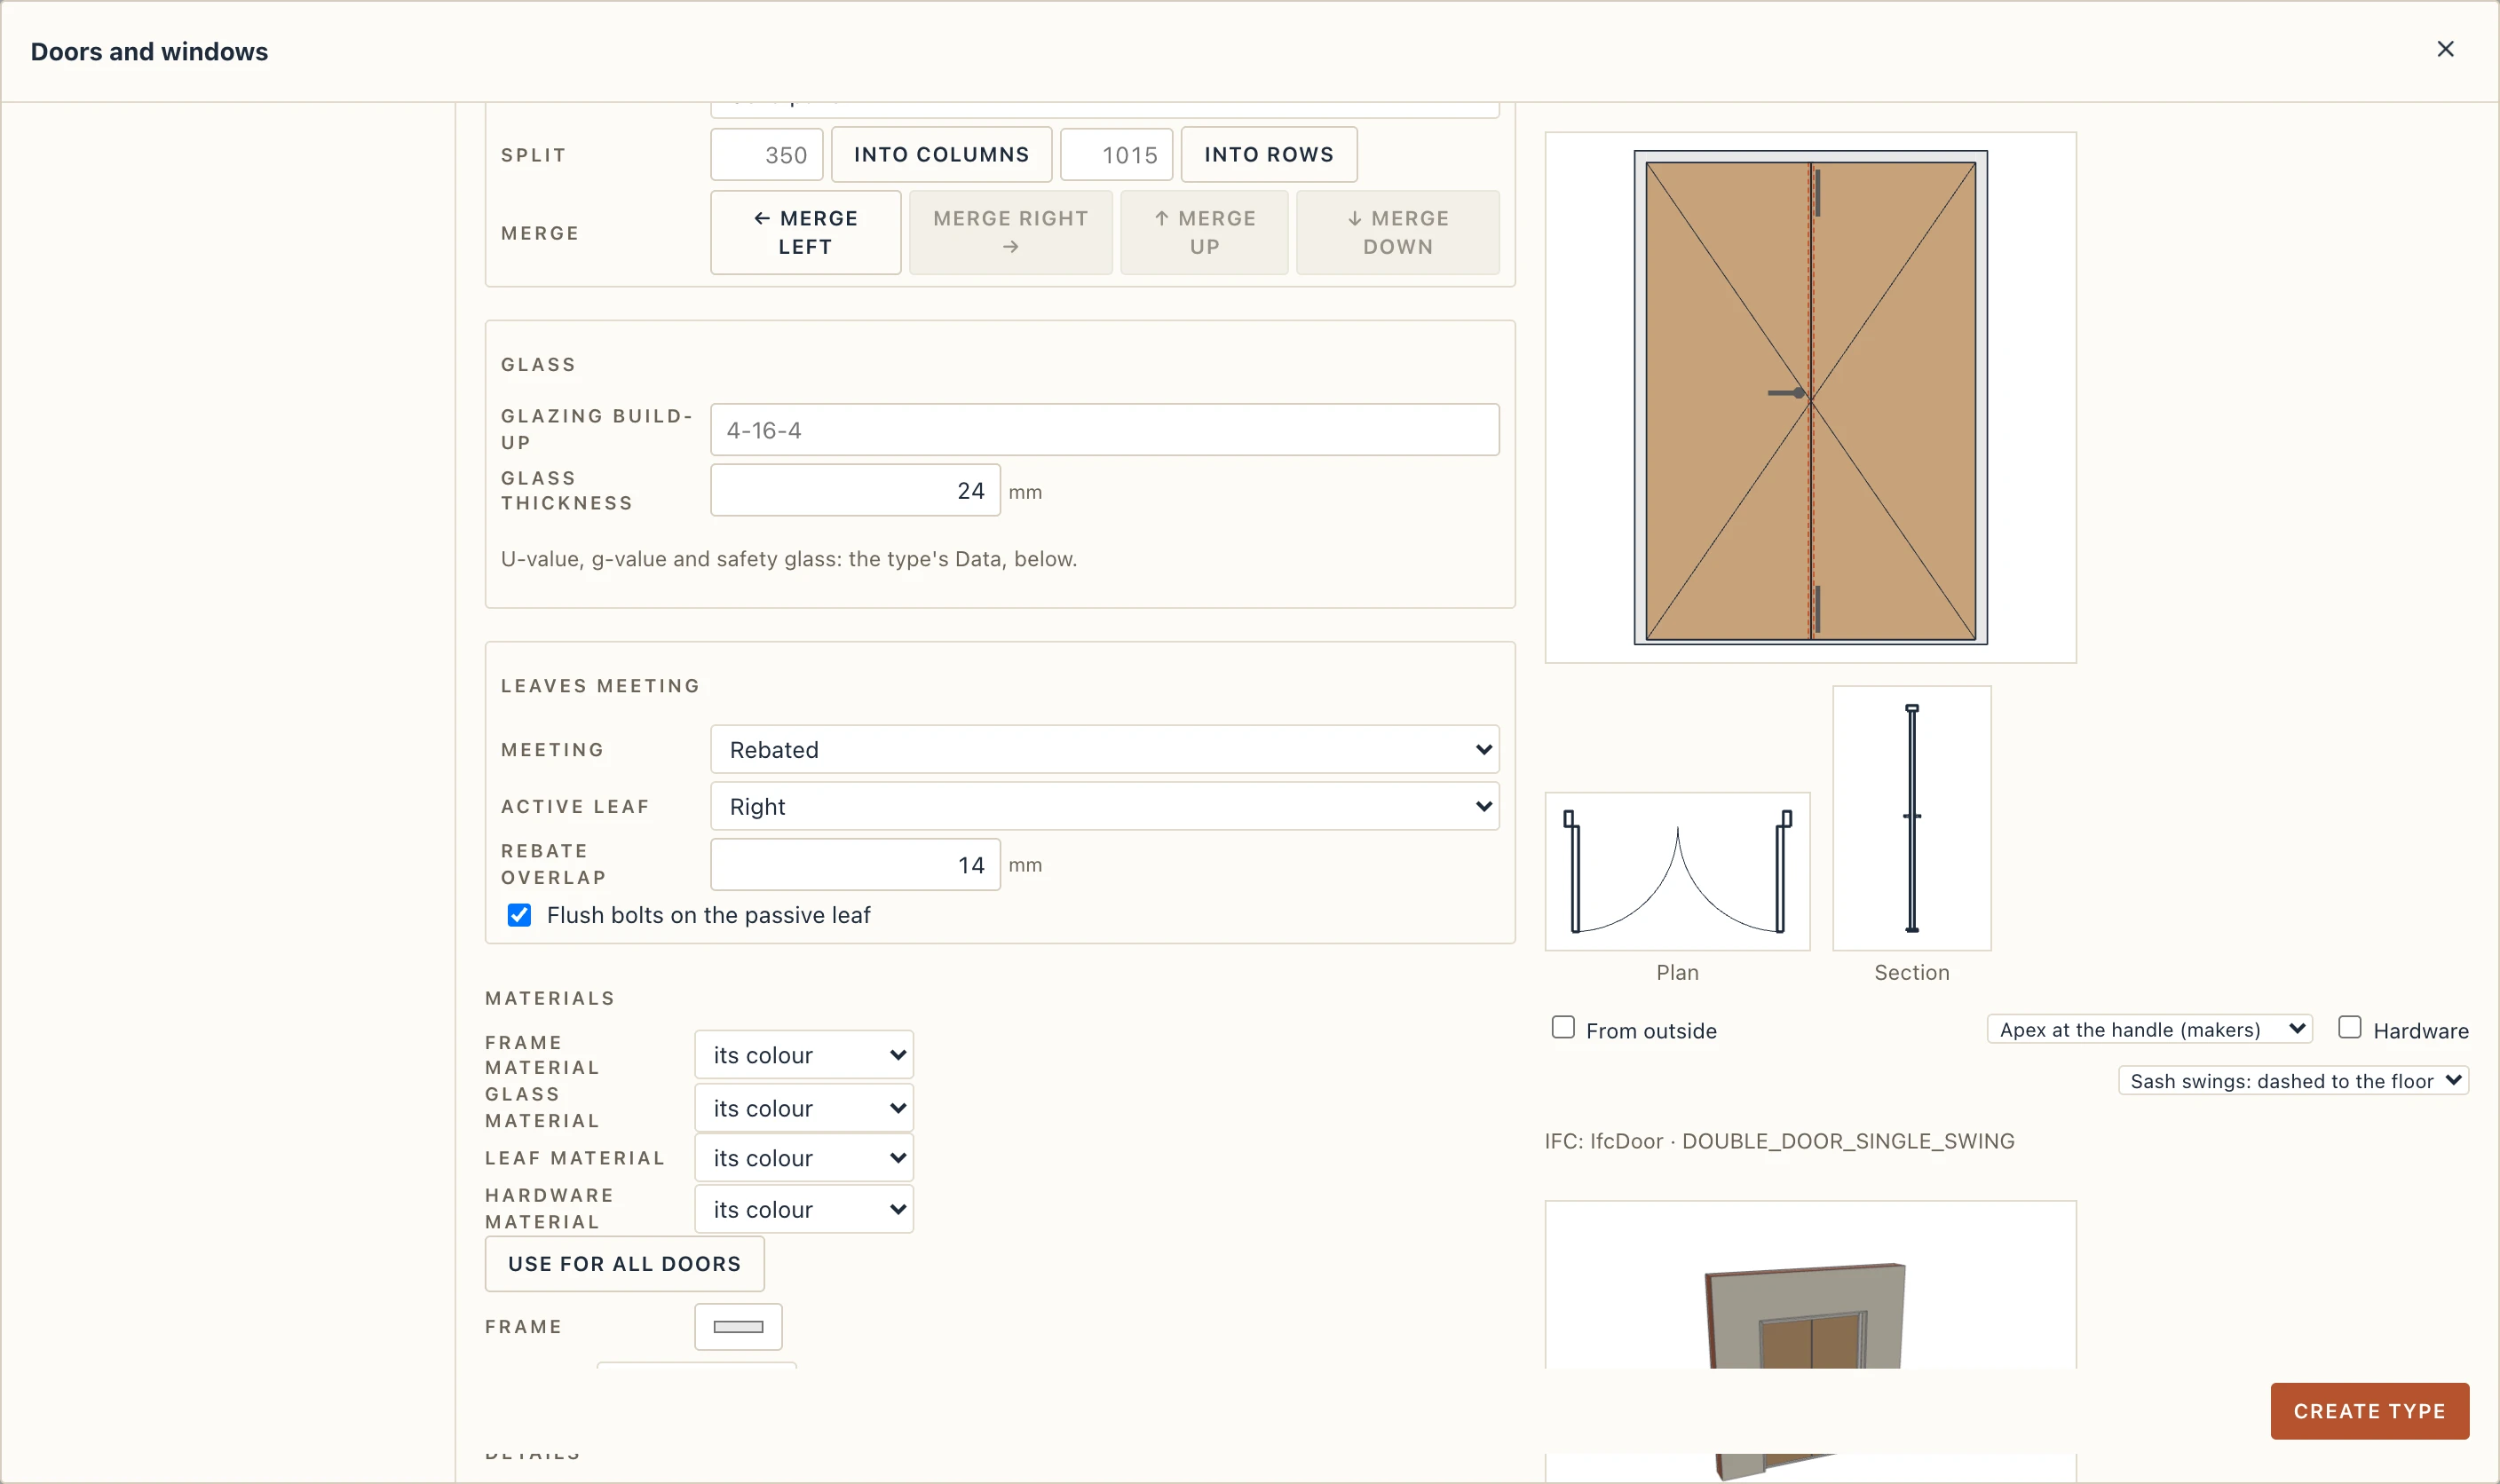
New double door starts a pair of leaves with no mullion between them (1500 × 2100 mm). Any two door leaves, one hinged left and one hinged right, meet when the mullion between them is 0; the side lights next to them keep their mullions.
Where two leaves meet, Leaves meeting says how:
- Butt: the leaves simply touch.
- Rebated: a meeting stile, the active leaf lapping over the passive one by the Rebate overlap.
- Cover strip: a strip (astragal) over the joint, with its width and thickness.
The Active leaf (Left or Right, as the grid reads, the left one hinged on the left, seen from outside) opens first and has the handle; Flush bolts on the passive leaf puts bolts in the other one. One setting serves every pair of the type, and leaves that swing both ways always meet butt. A type made before this keeps its leaves butting, both with handles.
Doors and windows in one frame
Door leaves and window sashes can share one frame: a balcony door with its window, an entrance door with side lights and a transom, a lift-and-slide portal. In Opens, the list is grouped into Door leaves, Window sashes and, on a door, Garage doors, and every pane of a door or a window may take any of them. It stays one object with one mark and one line in the schedule:
- With at least one door leaf it is a door (an IfcDoor). A new window type given a leaf becomes a door; the line under the drawings says which, IfcDoor or IfcWindow.
- With window sashes and no leaf it is a window. A pane that is only fixed keeps what it was made as.
- A saved type keeps its class: a window type cannot take a leaf in place. Create as a new type makes the door (or the window) beside it.
A sash in a door's bottom row stands on a bottom rail, the frame's width over the threshold, as a window's sash does; the leaves keep the threshold. The window boards (Interior sill over the parapet, Exterior sill over the parapet) run only over a solid panel at the bottom of a door's column (the parapet under its window part), on the transom over it; where the glass or a leaf reaches the floor there are none. A sash in a door has a window handle; the leaves keep the door's.
The presets: New balcony door + window (a glazed leaf, and beside it a tilt-and-turn sash over a solid parapet panel, PVC, 4-16-4), New door with sidelights and transom, New lift-and-slide (HS) portal and New French window (two side-hung sashes to the floor, no boards; a window).
Lift & slide (HS) and Tilt & slide (PSK) leaves run on the frame's inner track, over the fixed pane beside them on the outer one; their long handle is on the stile you pull. They stand on the threshold, so they go in the bottom row; the HS portal's threshold is flush. Their elevation symbol is the arrow of the way they run, with the lift (HS) or the tilt (PSK).
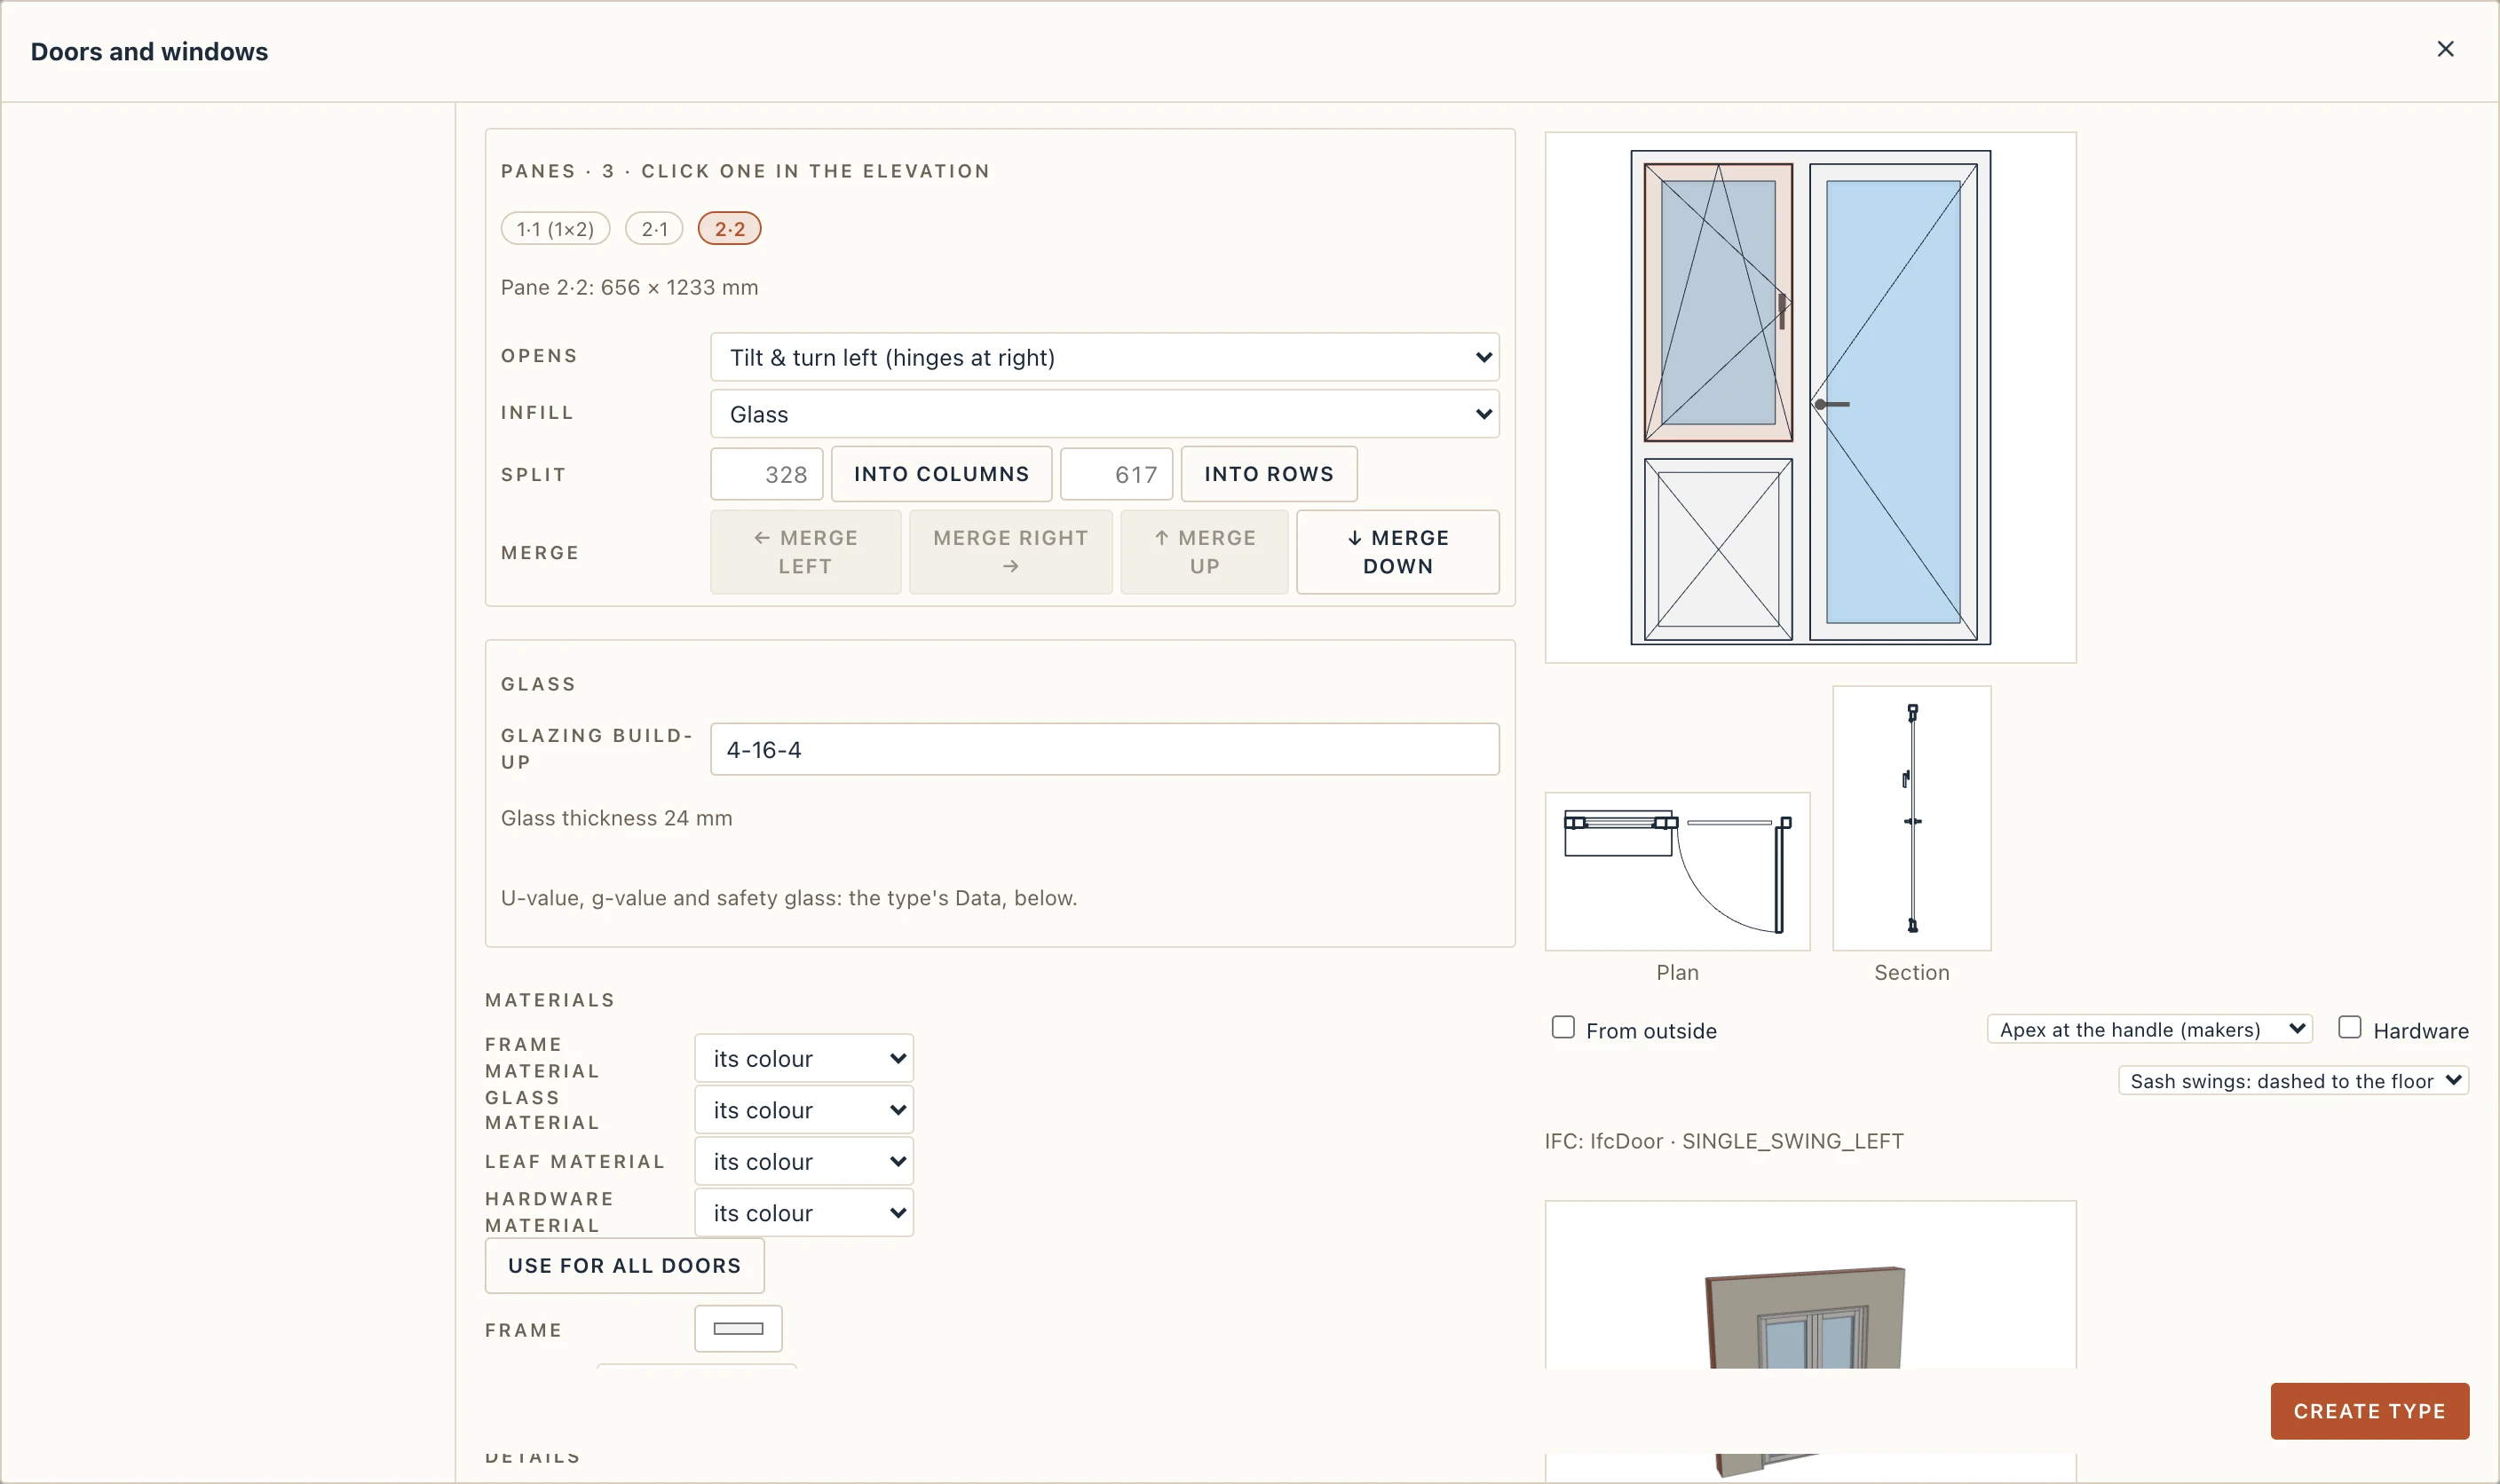
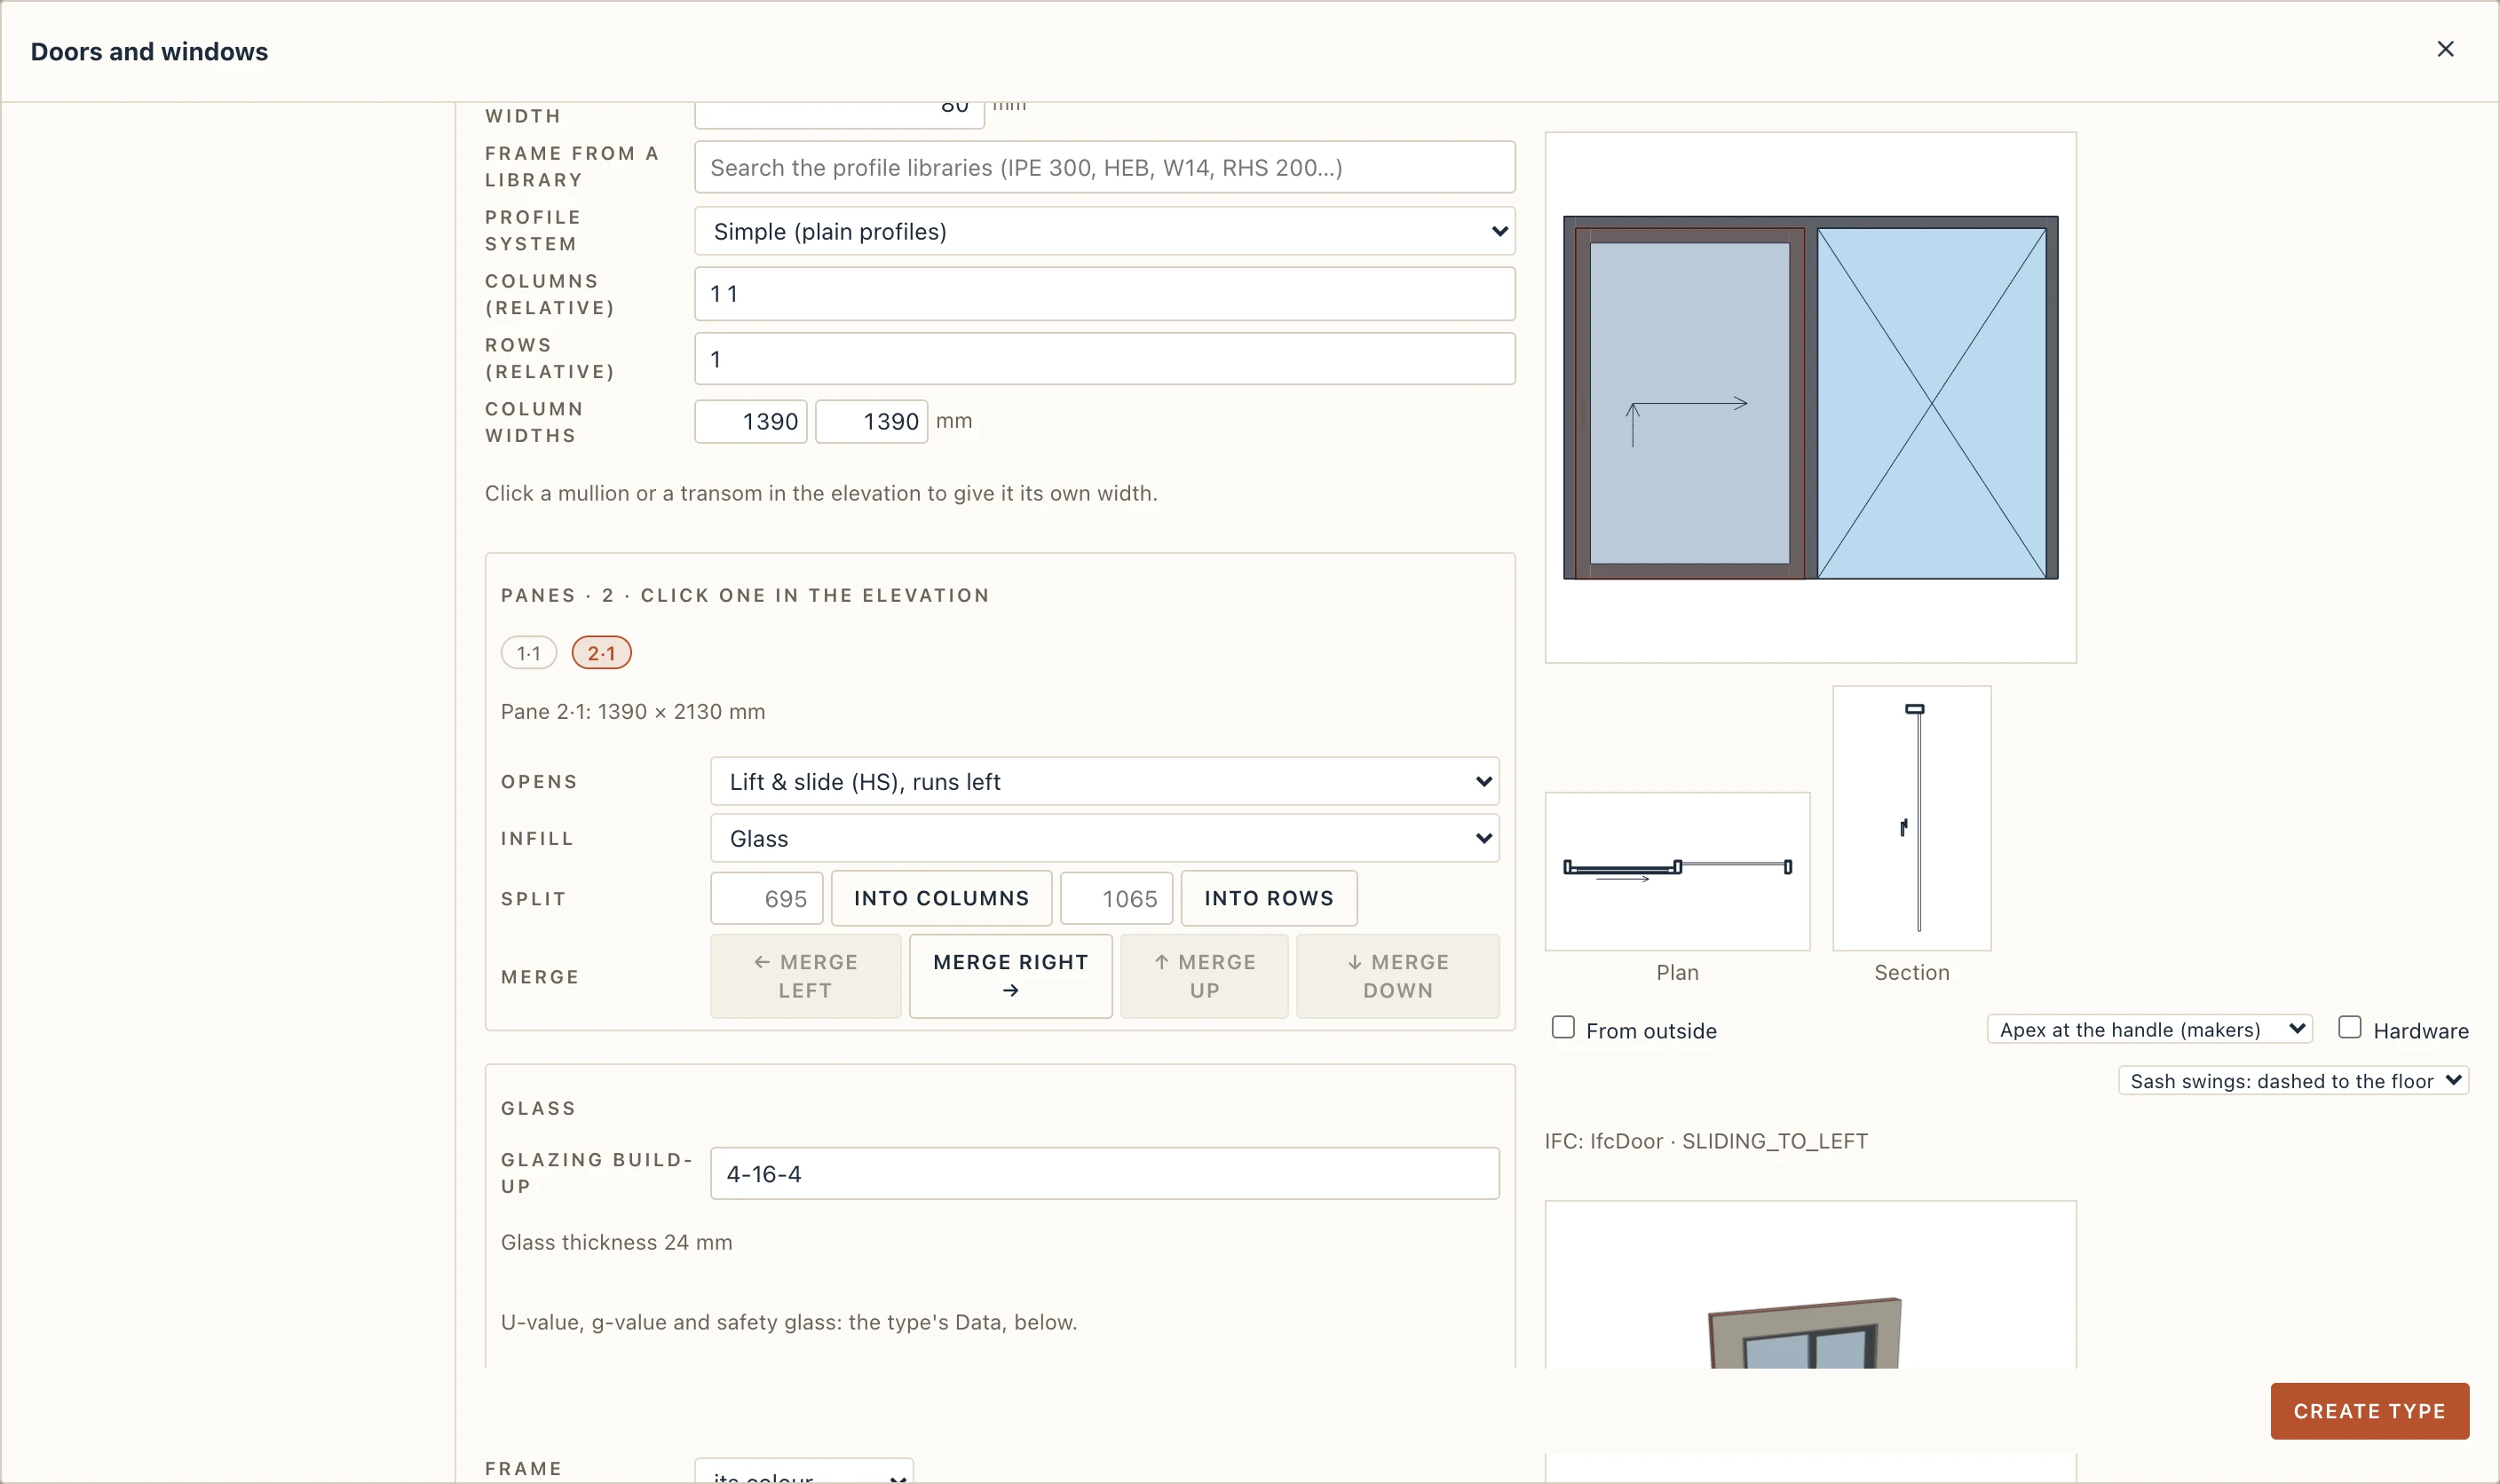
The glass. Under Glass, Glazing build-up is the glass as the makers write it: panes and cavities in millimetres, from outside in, 4-16-4 double, 4-12-4-12-4 triple, 33.1-16-4 with a laminated pane outside (33.1 is two 3 mm sheets and one interlayer). It sets the glass's thickness in 3D, in sections and in plans, shown beside it; without one, type a Glass thickness. A build-up thicker than the sash and frame can hold is refused. The U-value, g-value and safety glass are the type's Data.
Sashes' swings in plan. French windows and balcony doors are often drawn with their sashes' sweep, dashed. The list under the drawings sets it for the whole project: Sash swings: dashed to the floor (the default: side-hung and tilt-and-turn sashes whose bottom is within 150 mm of the floor), none, all dashed or all solid. A door leaf's arc is always drawn; sliding sashes keep their arrow.
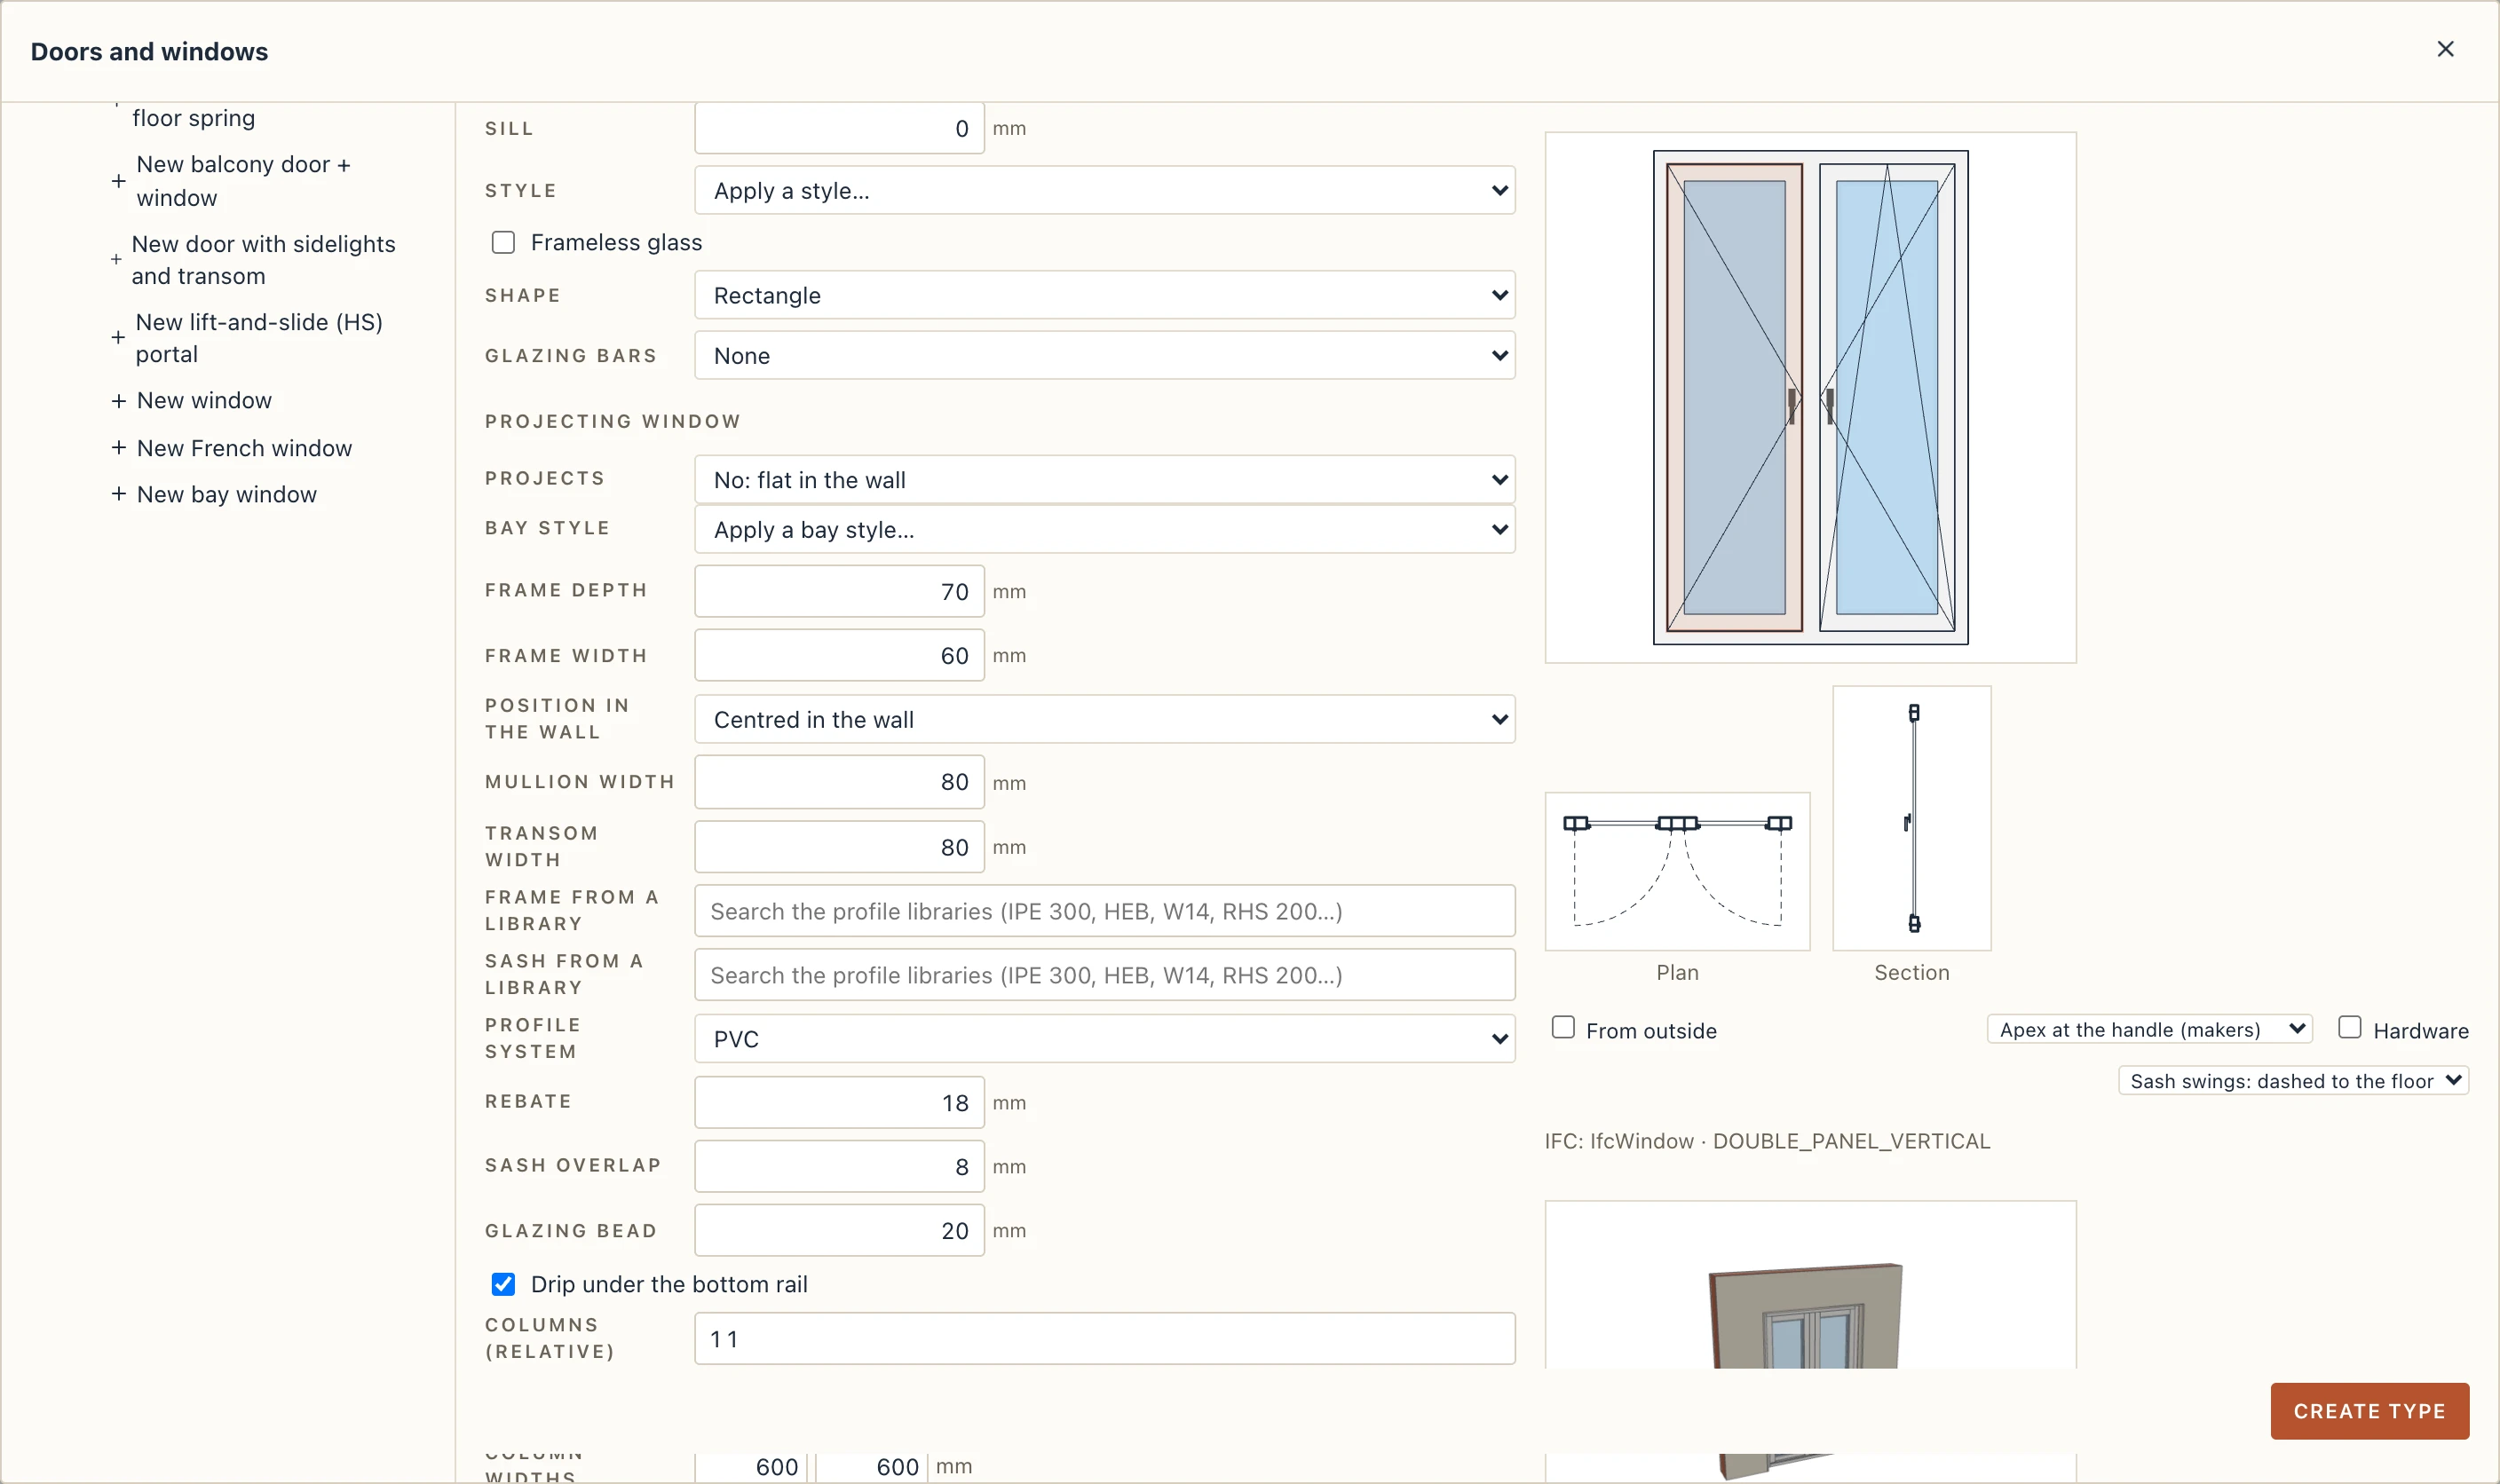
In IFC the element is an IfcDoor whose OperationType is the nearest IFC has (a single swing door, a swing door with a fixed side pane, a sliding door for a lift-and-slide portal), and every pane is an IfcDoorPanelProperties: a leaf's own operation, a fixed pane FIXEDPANEL, a sash USERDEFINED. What IFC cannot say goes in the type's Lapin_Joinery set: PanelOperations (each pane in IFC's window terms, SIDEHUNGRIGHTHAND, TILTANDTURNLEFTHAND…, or LIFTANDSLIDE), Opening (lift-and-slide) and Glazing (the build-up); the glass is also in Pset_DoorWindowGlazingType (the panes, their thicknesses, laminated or not). Lapin reads its own file back whole, and the panes' own operations from Lapin_Joinery in a file from elsewhere.
Profile system starts the type from a PVC, Aluminium, Timber or Steel (slim) profile: it sets the frame, mullion, transom and sash sizes and gives the profiles their finer shapes. The frame has a Rebate the sash closes on, the sash laps over the frame by its Sash overlap, Glazing beads hold the glass, and a window has a drip under its bottom rail. Every size stays editable. Simple (plain profiles) keeps plain rectangular members, as before.
Frame from a library and Sash from a library take a profile from your profile libraries (an aluminium or PVC section read from a DXF, say): straight frame and sash members then have its real outline, holes included, in 3D, in sections and in plans, with its width and depth. It replaces what it is the real shape of, the system's stop, lip and drips; glazing beads stay. Curved heads and round windows keep a plain band, and so do this grid's mullions and transoms. Plain goes back to a rectangle of that size.
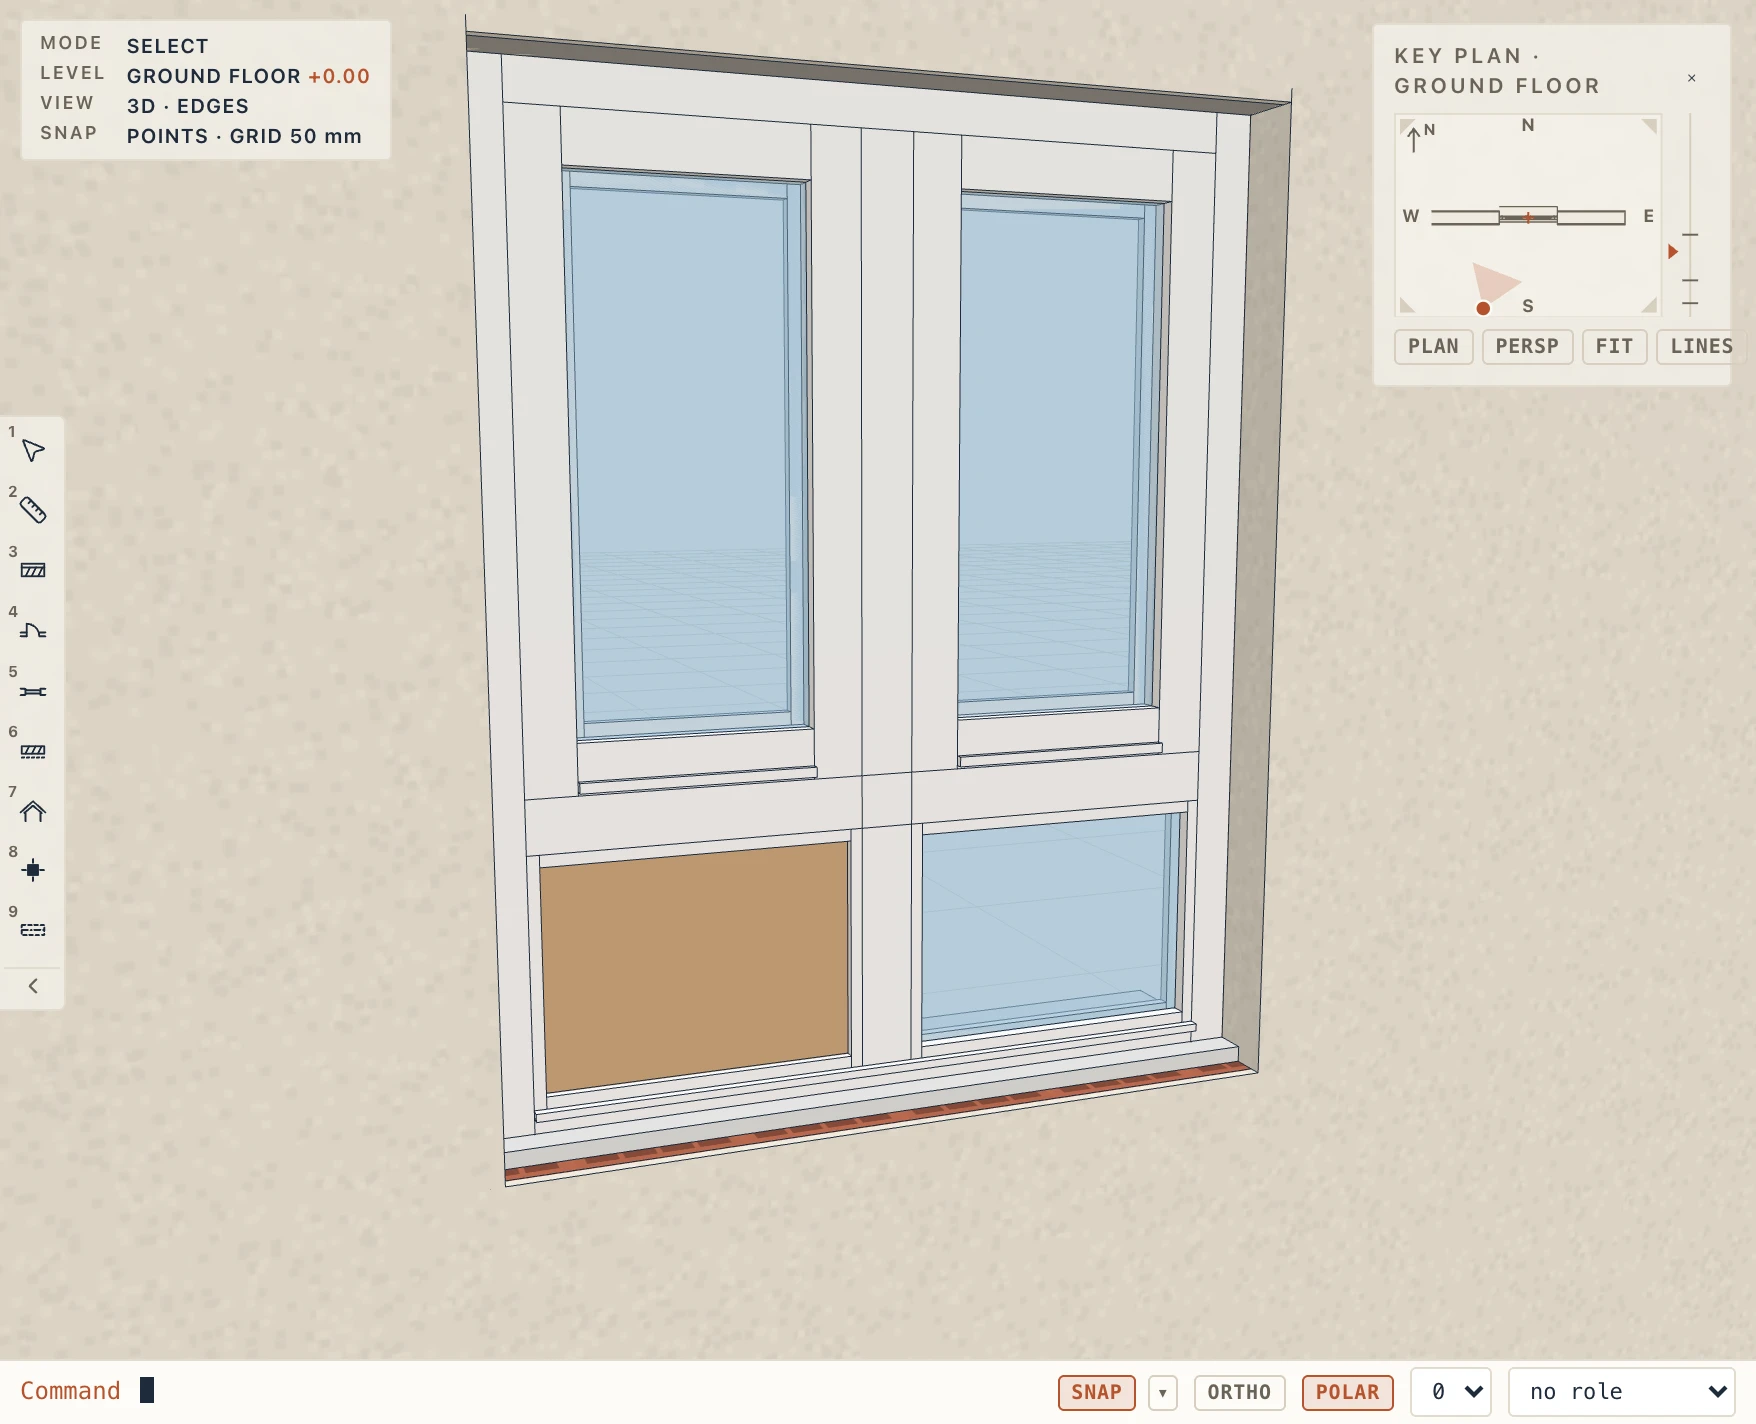
Under Details, Interior sill and Exterior sill switch the sills on and off, and Jamb linings switches the reveal's finish on the jambs and head. Where sills and linings are not used, untick them.
Shutters, grilles, window boxes and canopies
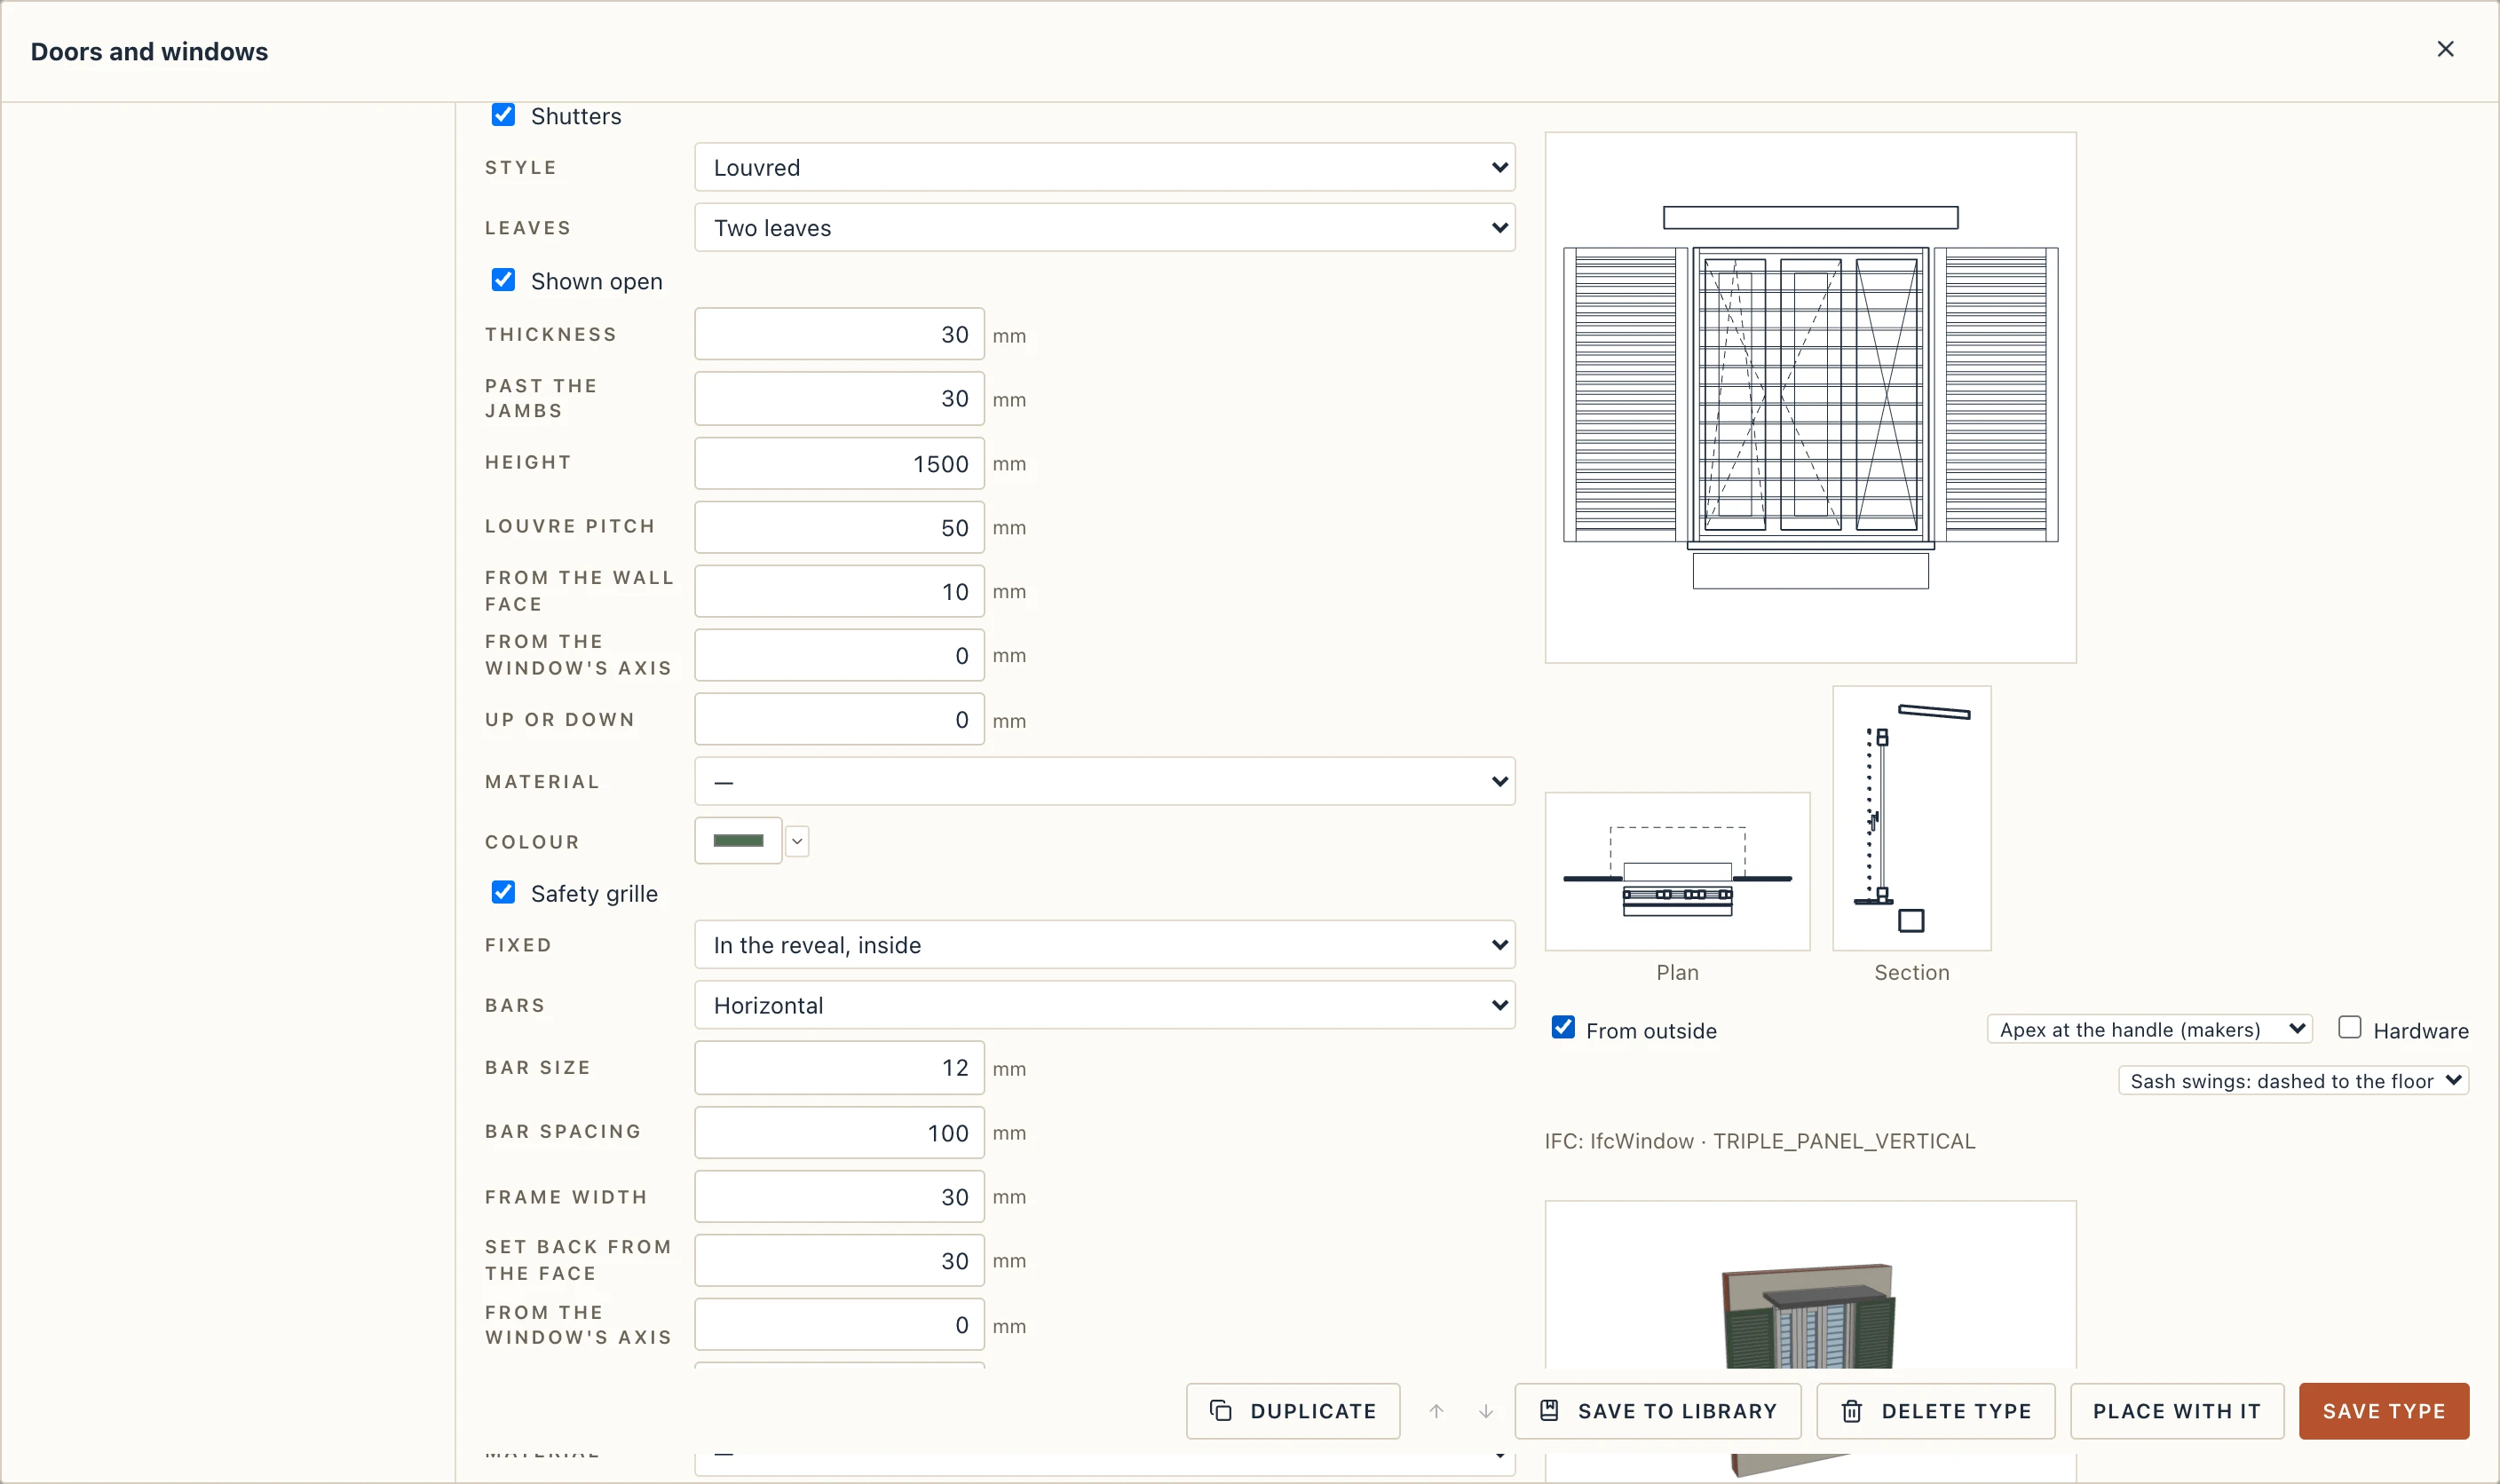
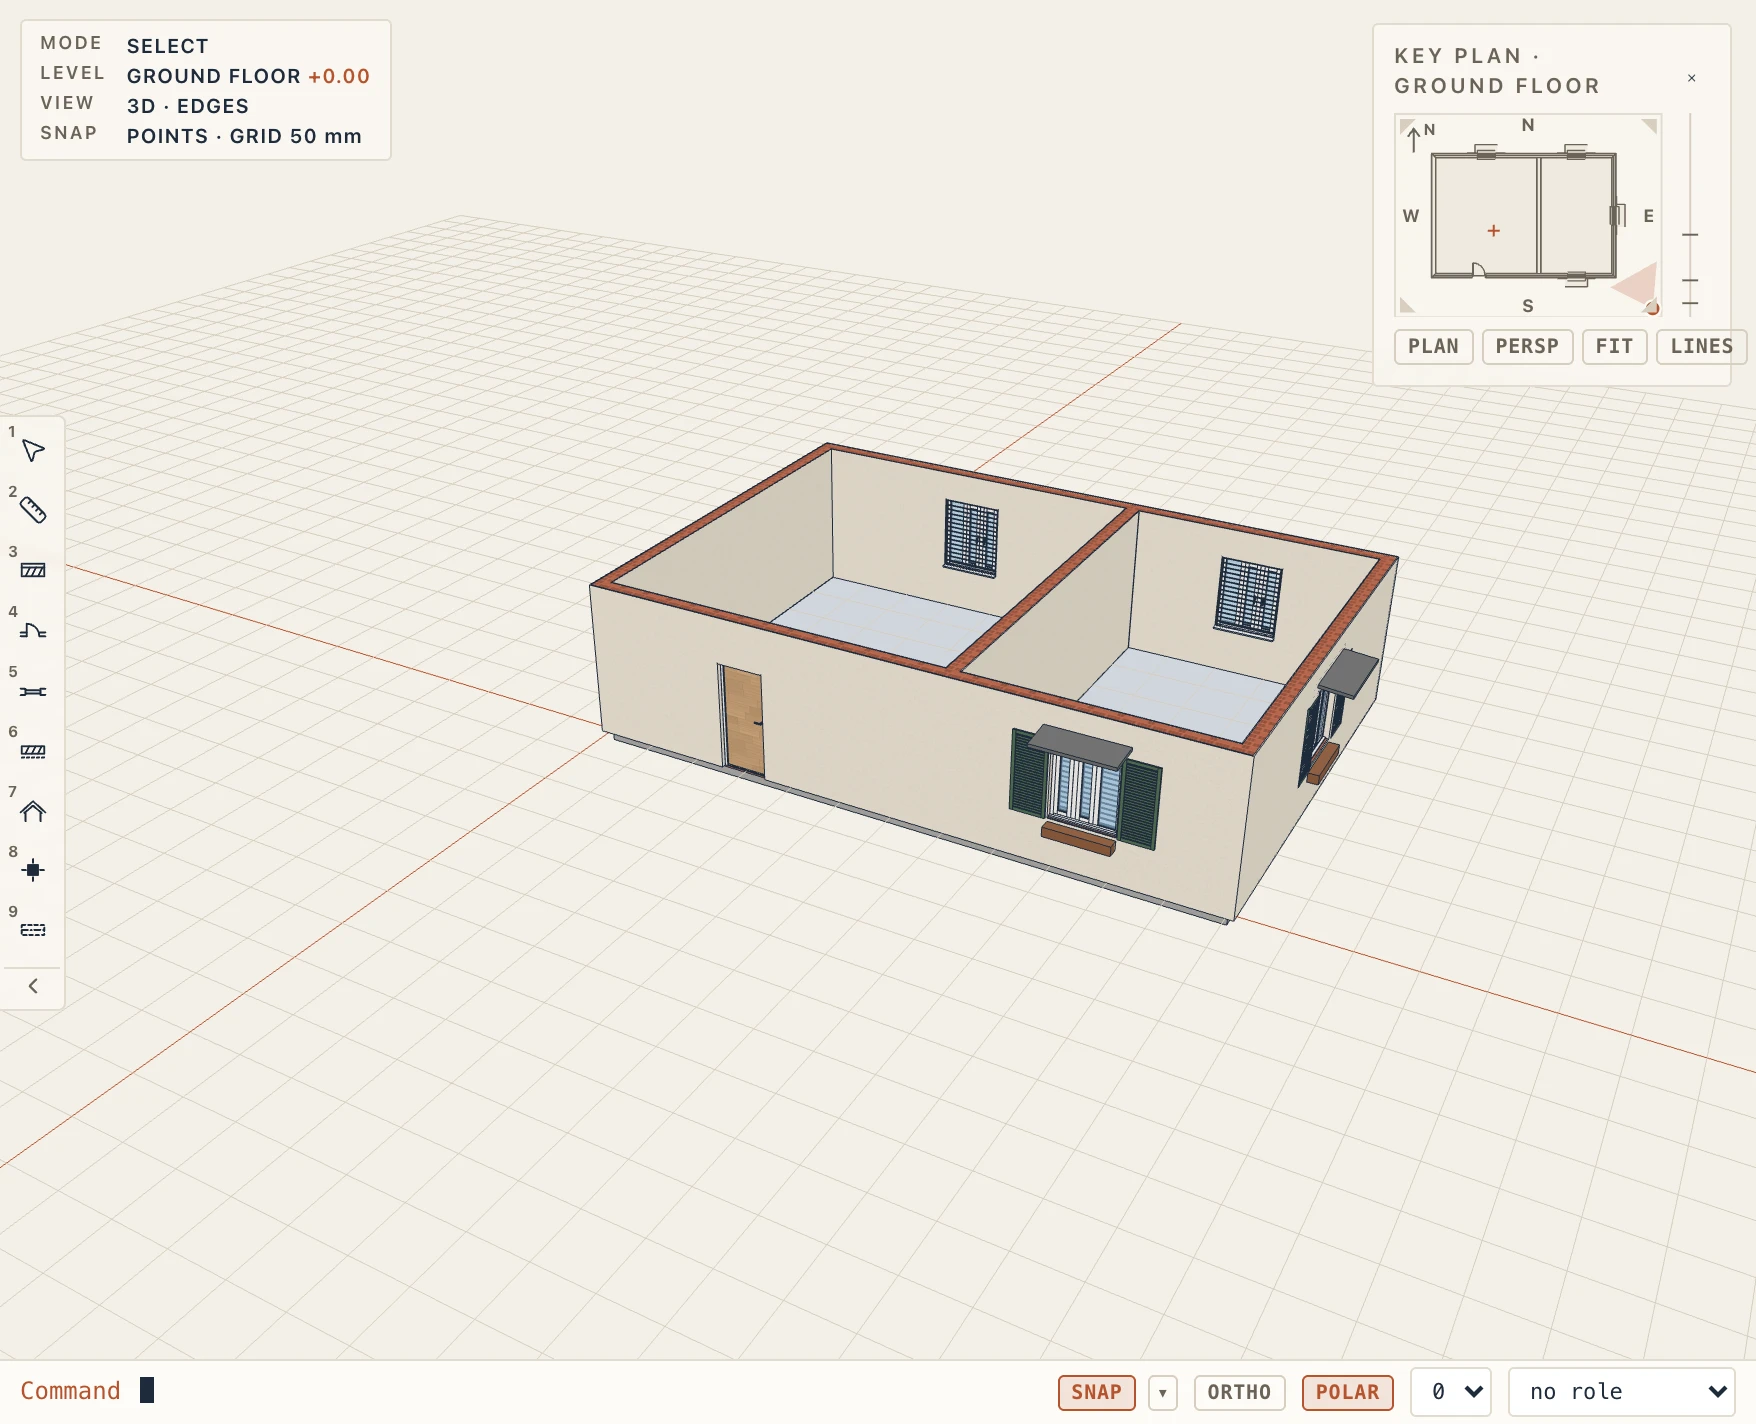
Under On the facade, a window type can have:
- Shutters: louvred, panel or planks, one or two leaves, shown open (folded against the wall beside the window) or closed over it;
- a Safety grille: in the reveal on the room's side (the default, where safety grilles usually go), in the reveal on the street's side, on the facade or on the interior face, with horizontal or vertical bars or both, their size and spacing;
- a Window box under the window;
- a Canopy over it, with its projection and slope.
Each one sits by the wall's real faces where the window is, from the wall's layers, so it stays right on any wall type. When the window has a surround, what is on the facade stands off the surround. You can move each one by hand: From the wall face sets how far it stands off the wall (for a grille in the reveal, Set back from the face sets how far in it sits), From the window's axis moves it along the wall, and Up or down moves it in height. They show in 3D, in plans, elevations and sections, and the schedules measure them.
Shapes, styles and ornaments
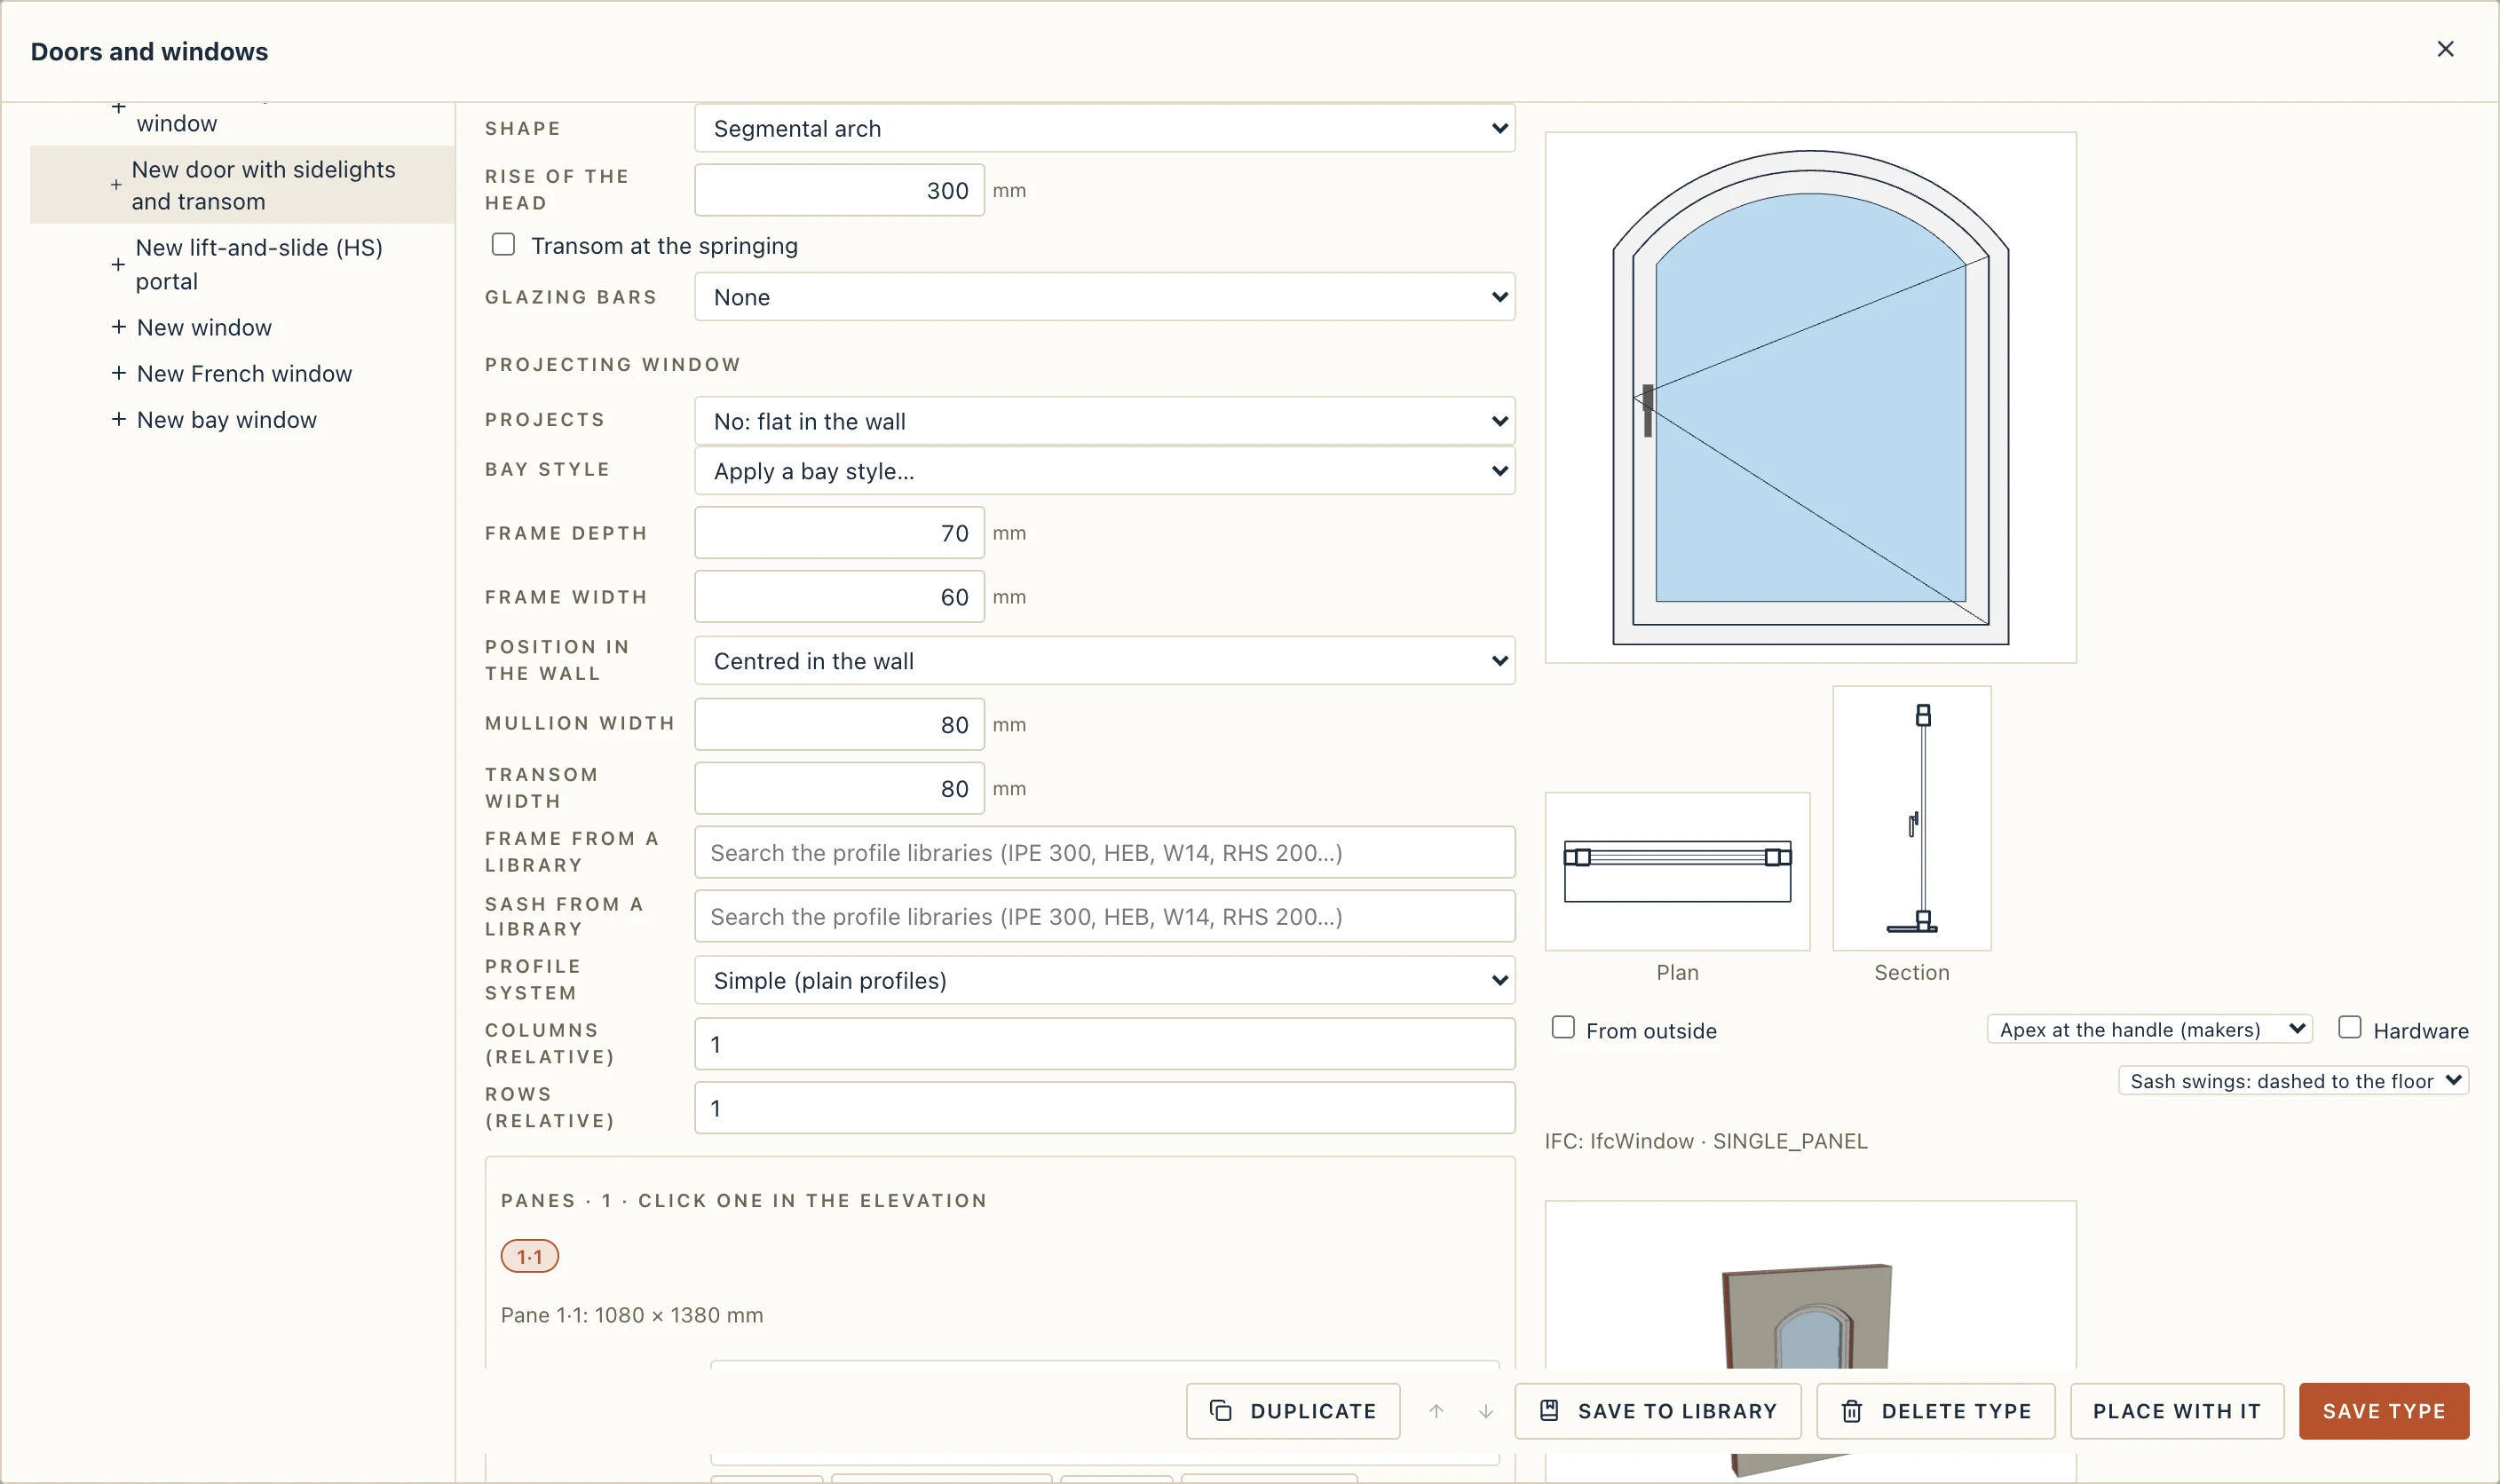
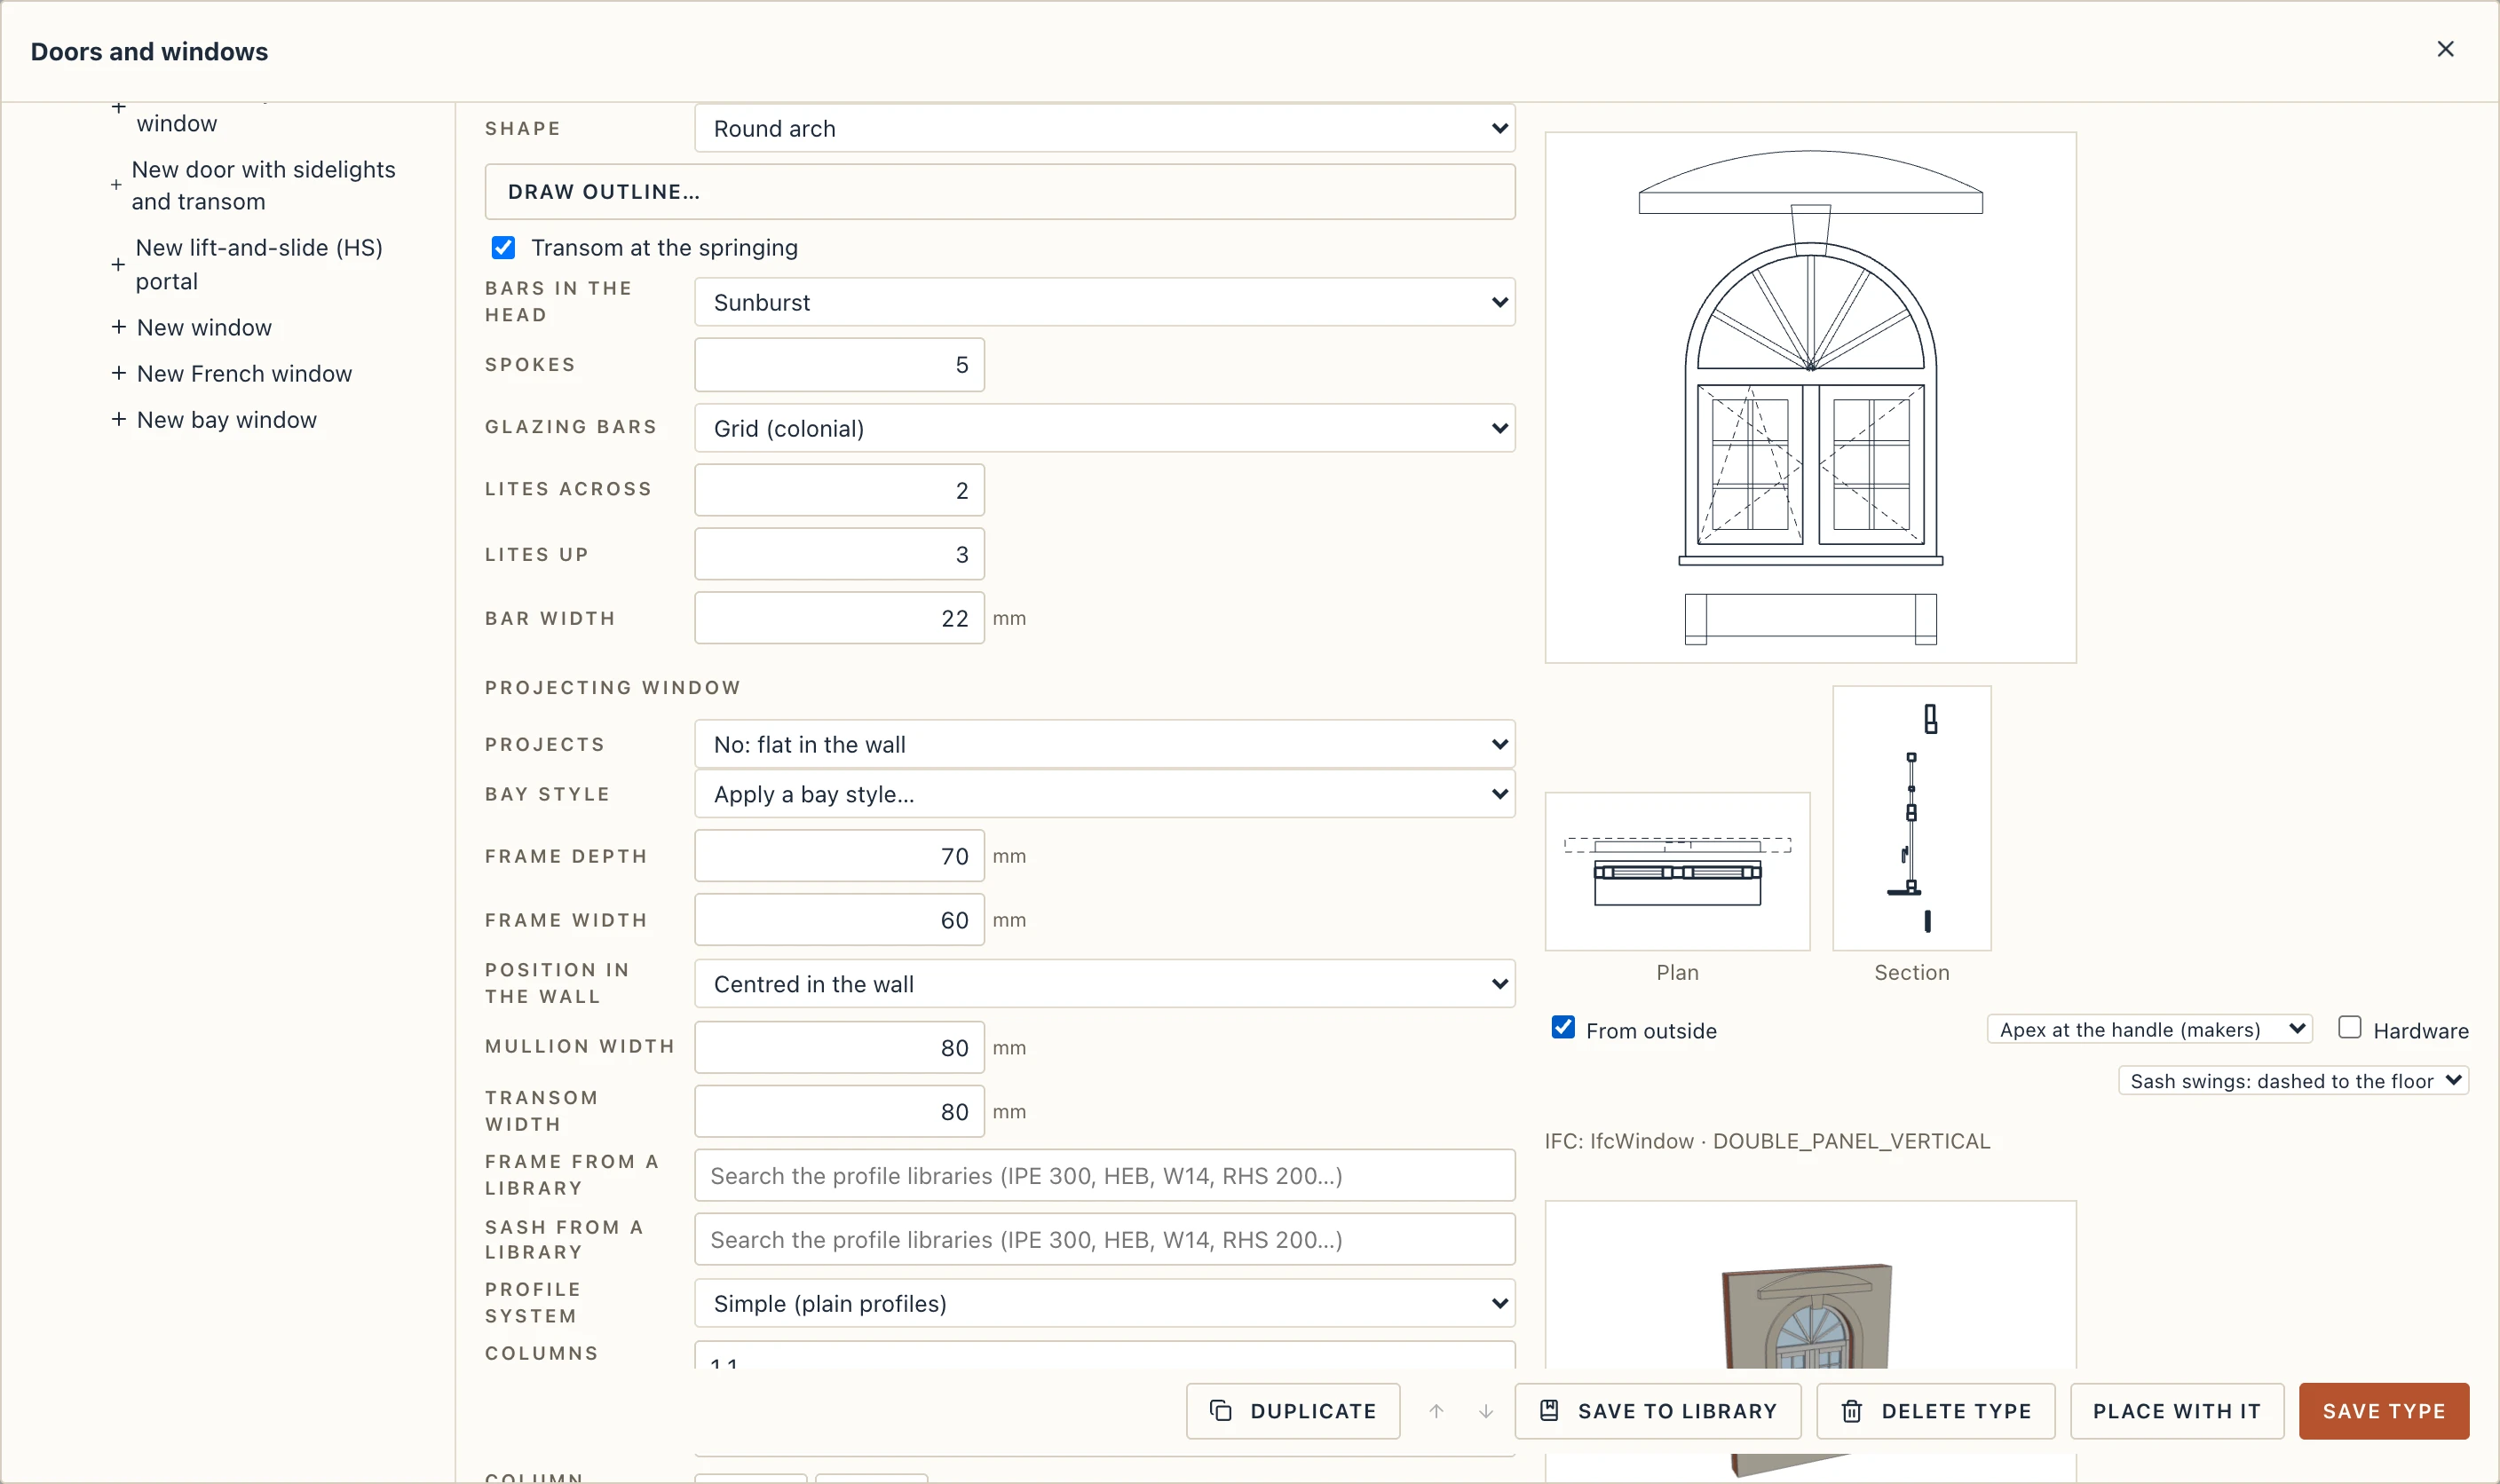
Shape gives a door or window an arched head (Round arch, Segmental arch, Elliptical arch, Radiused corners, Pointed arch, Triangular head) or makes it a Round or oval window (round when the width and height are equal). An arched type keeps its panes under a transom at the spring line, and above it a fixed fanlight that follows the head, with bars if you want them: a Sunburst, The mullions carried up or a Cross. Rise of the head sets how high a segmental, elliptical, pointed or triangular head rises, Corner radius how round a radiused head's corners are. The wall's opening, the frame, the glass, the surround and the drawings all follow the outline.
Transom at the springing, ticked by default, keeps that transom and the fixed fanlight over it. Untick it for an arched casement: the top row of panes reaches into the head, and the frame, the sash, its glass, the glazing bars and the opening symbol follow the arch all round, with no bar across under it. The pane opens as you set it (side-hung, tilt-and-turn, fixed), mullions run up to the arch, and plans, sections, elevations, the 3D preview and IFC show it so. The Arched casement style sets a segmental head with one side-hung sash at once.
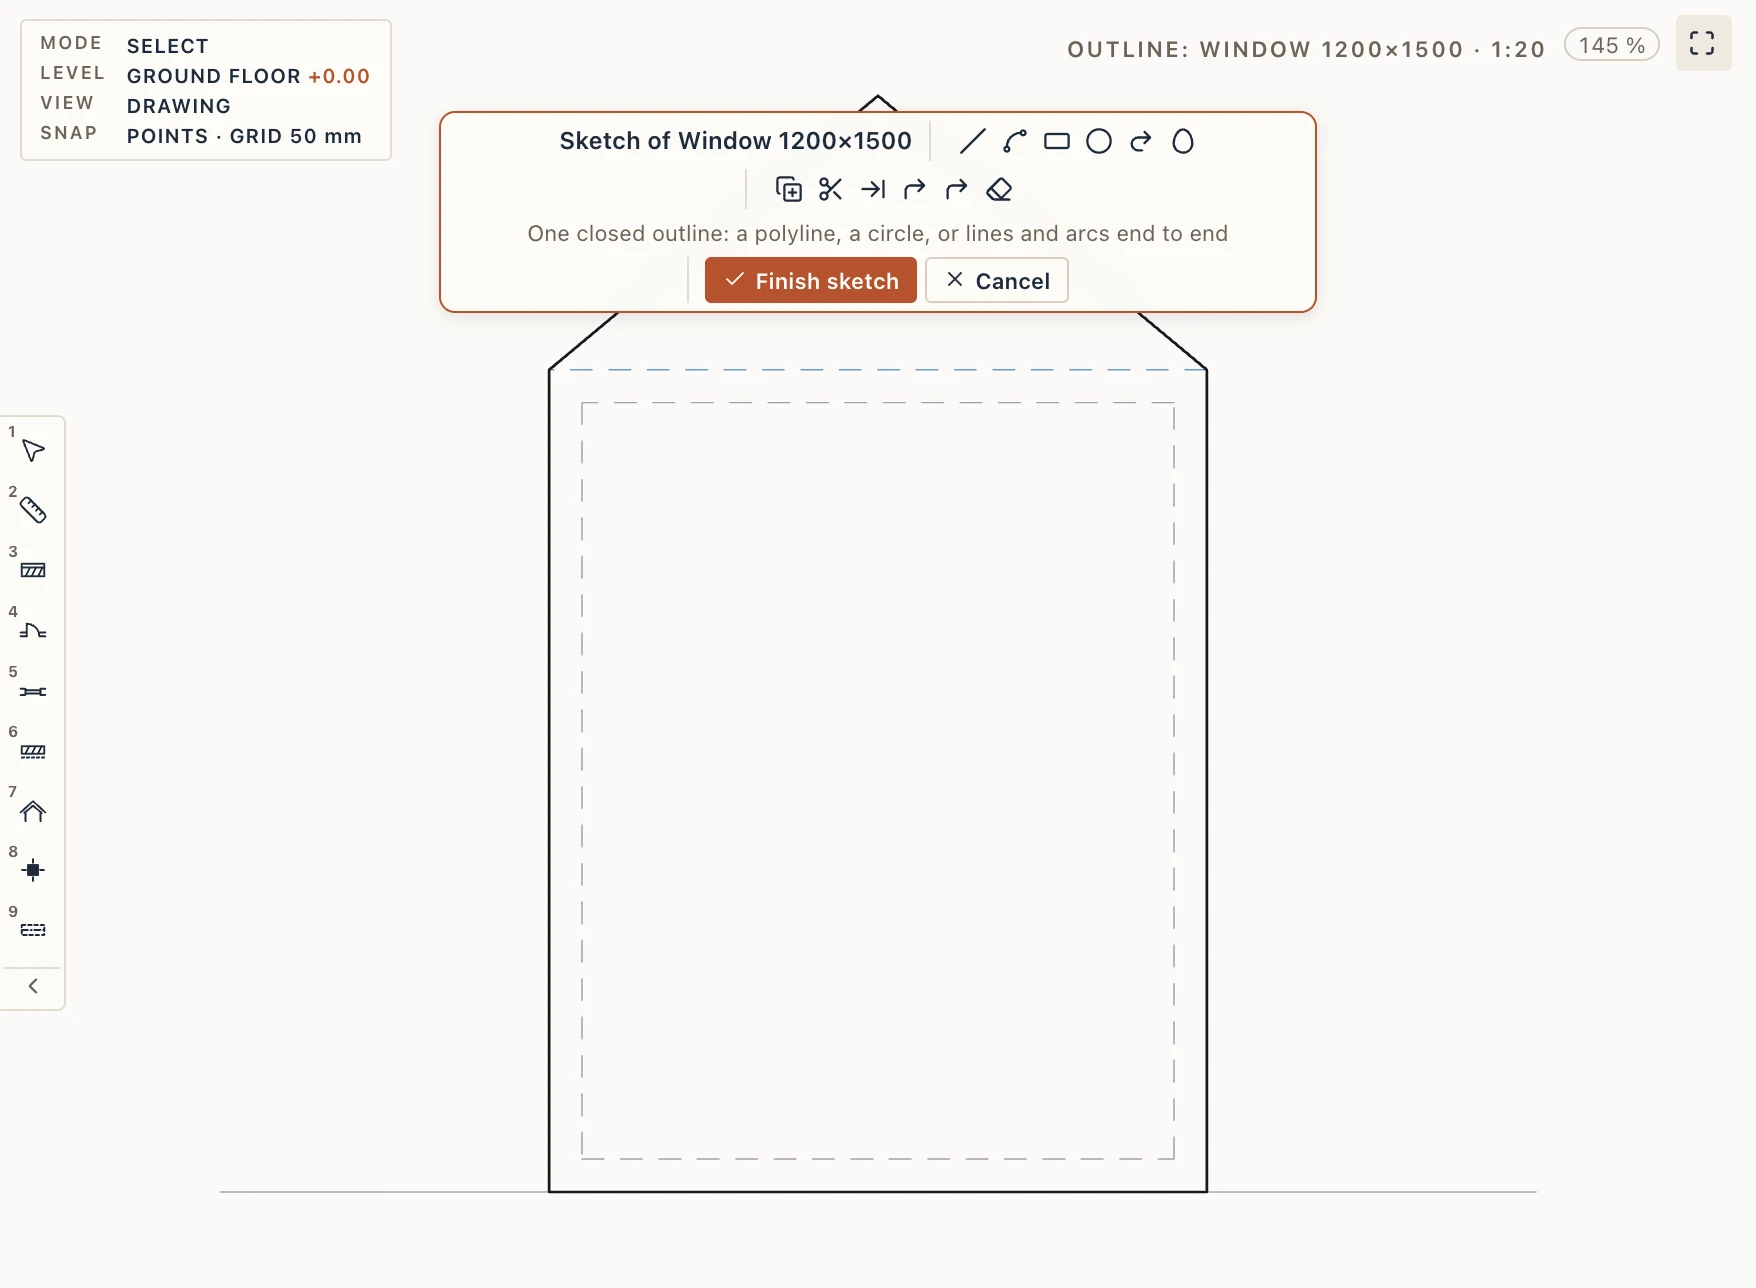
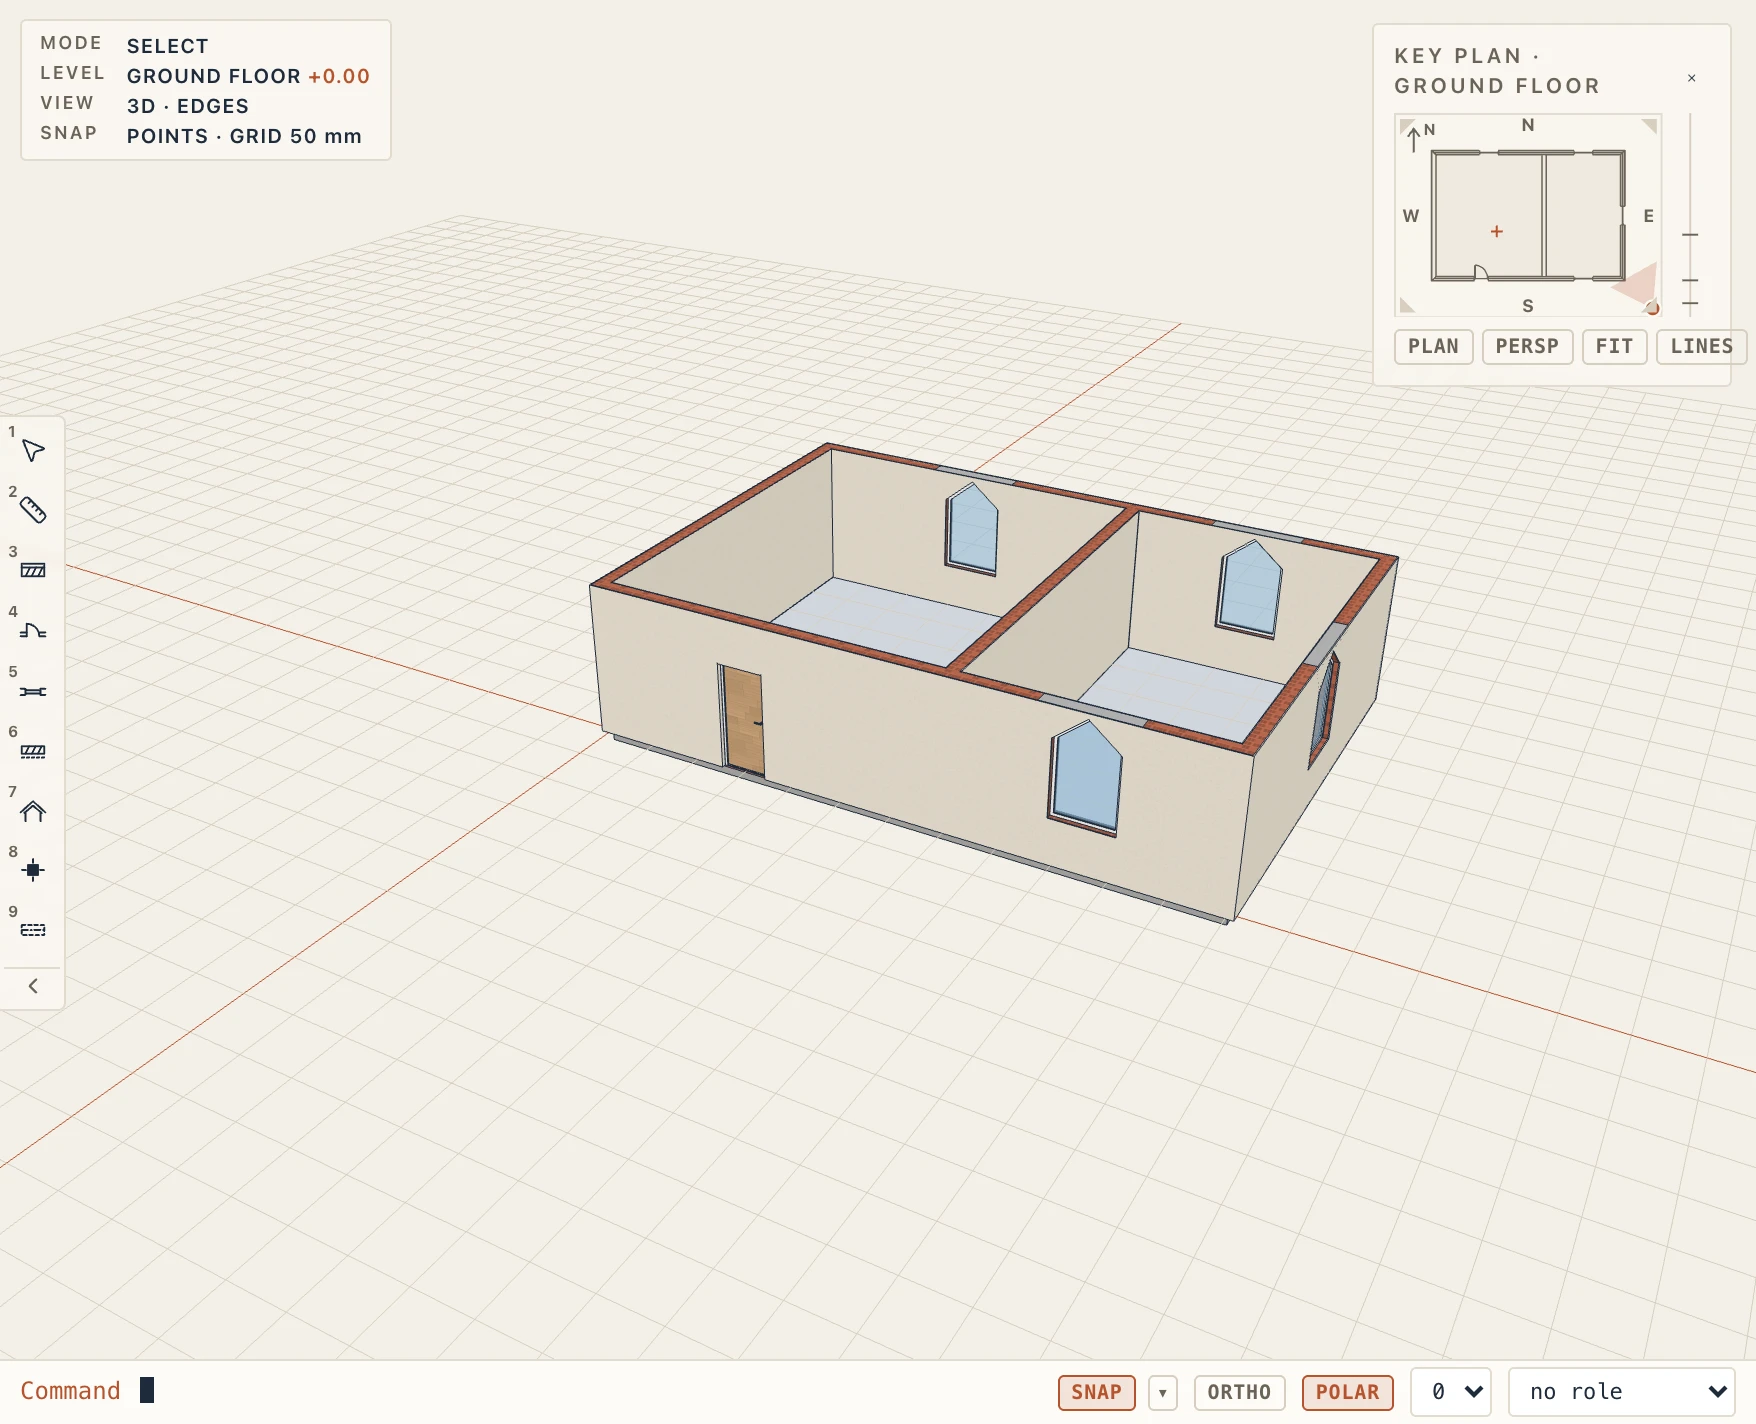
For a saved window type, Draw outline… (under Shape in the configurator) opens the type's elevation on a board: seen from outside, its bottom on the sill line, the current outline as one closed polyline, the frame's inner line dashed. Draw one closed outline (a polyline, a circle, an ellipse, or lines and arcs meeting end to end; construction lines may stay) and choose Finish sketch. The type takes that outline in one undo step: its width and height are the outline's bounds, a frame follows it all round and one fixed light sits inside. Every window of the type follows, and the Shape list then says Drawn outline. Drawing a rectangle gives the rectangle back. Doors keep the rectangle and the head shapes. The grid of the form stays the default way.
Frameless glass
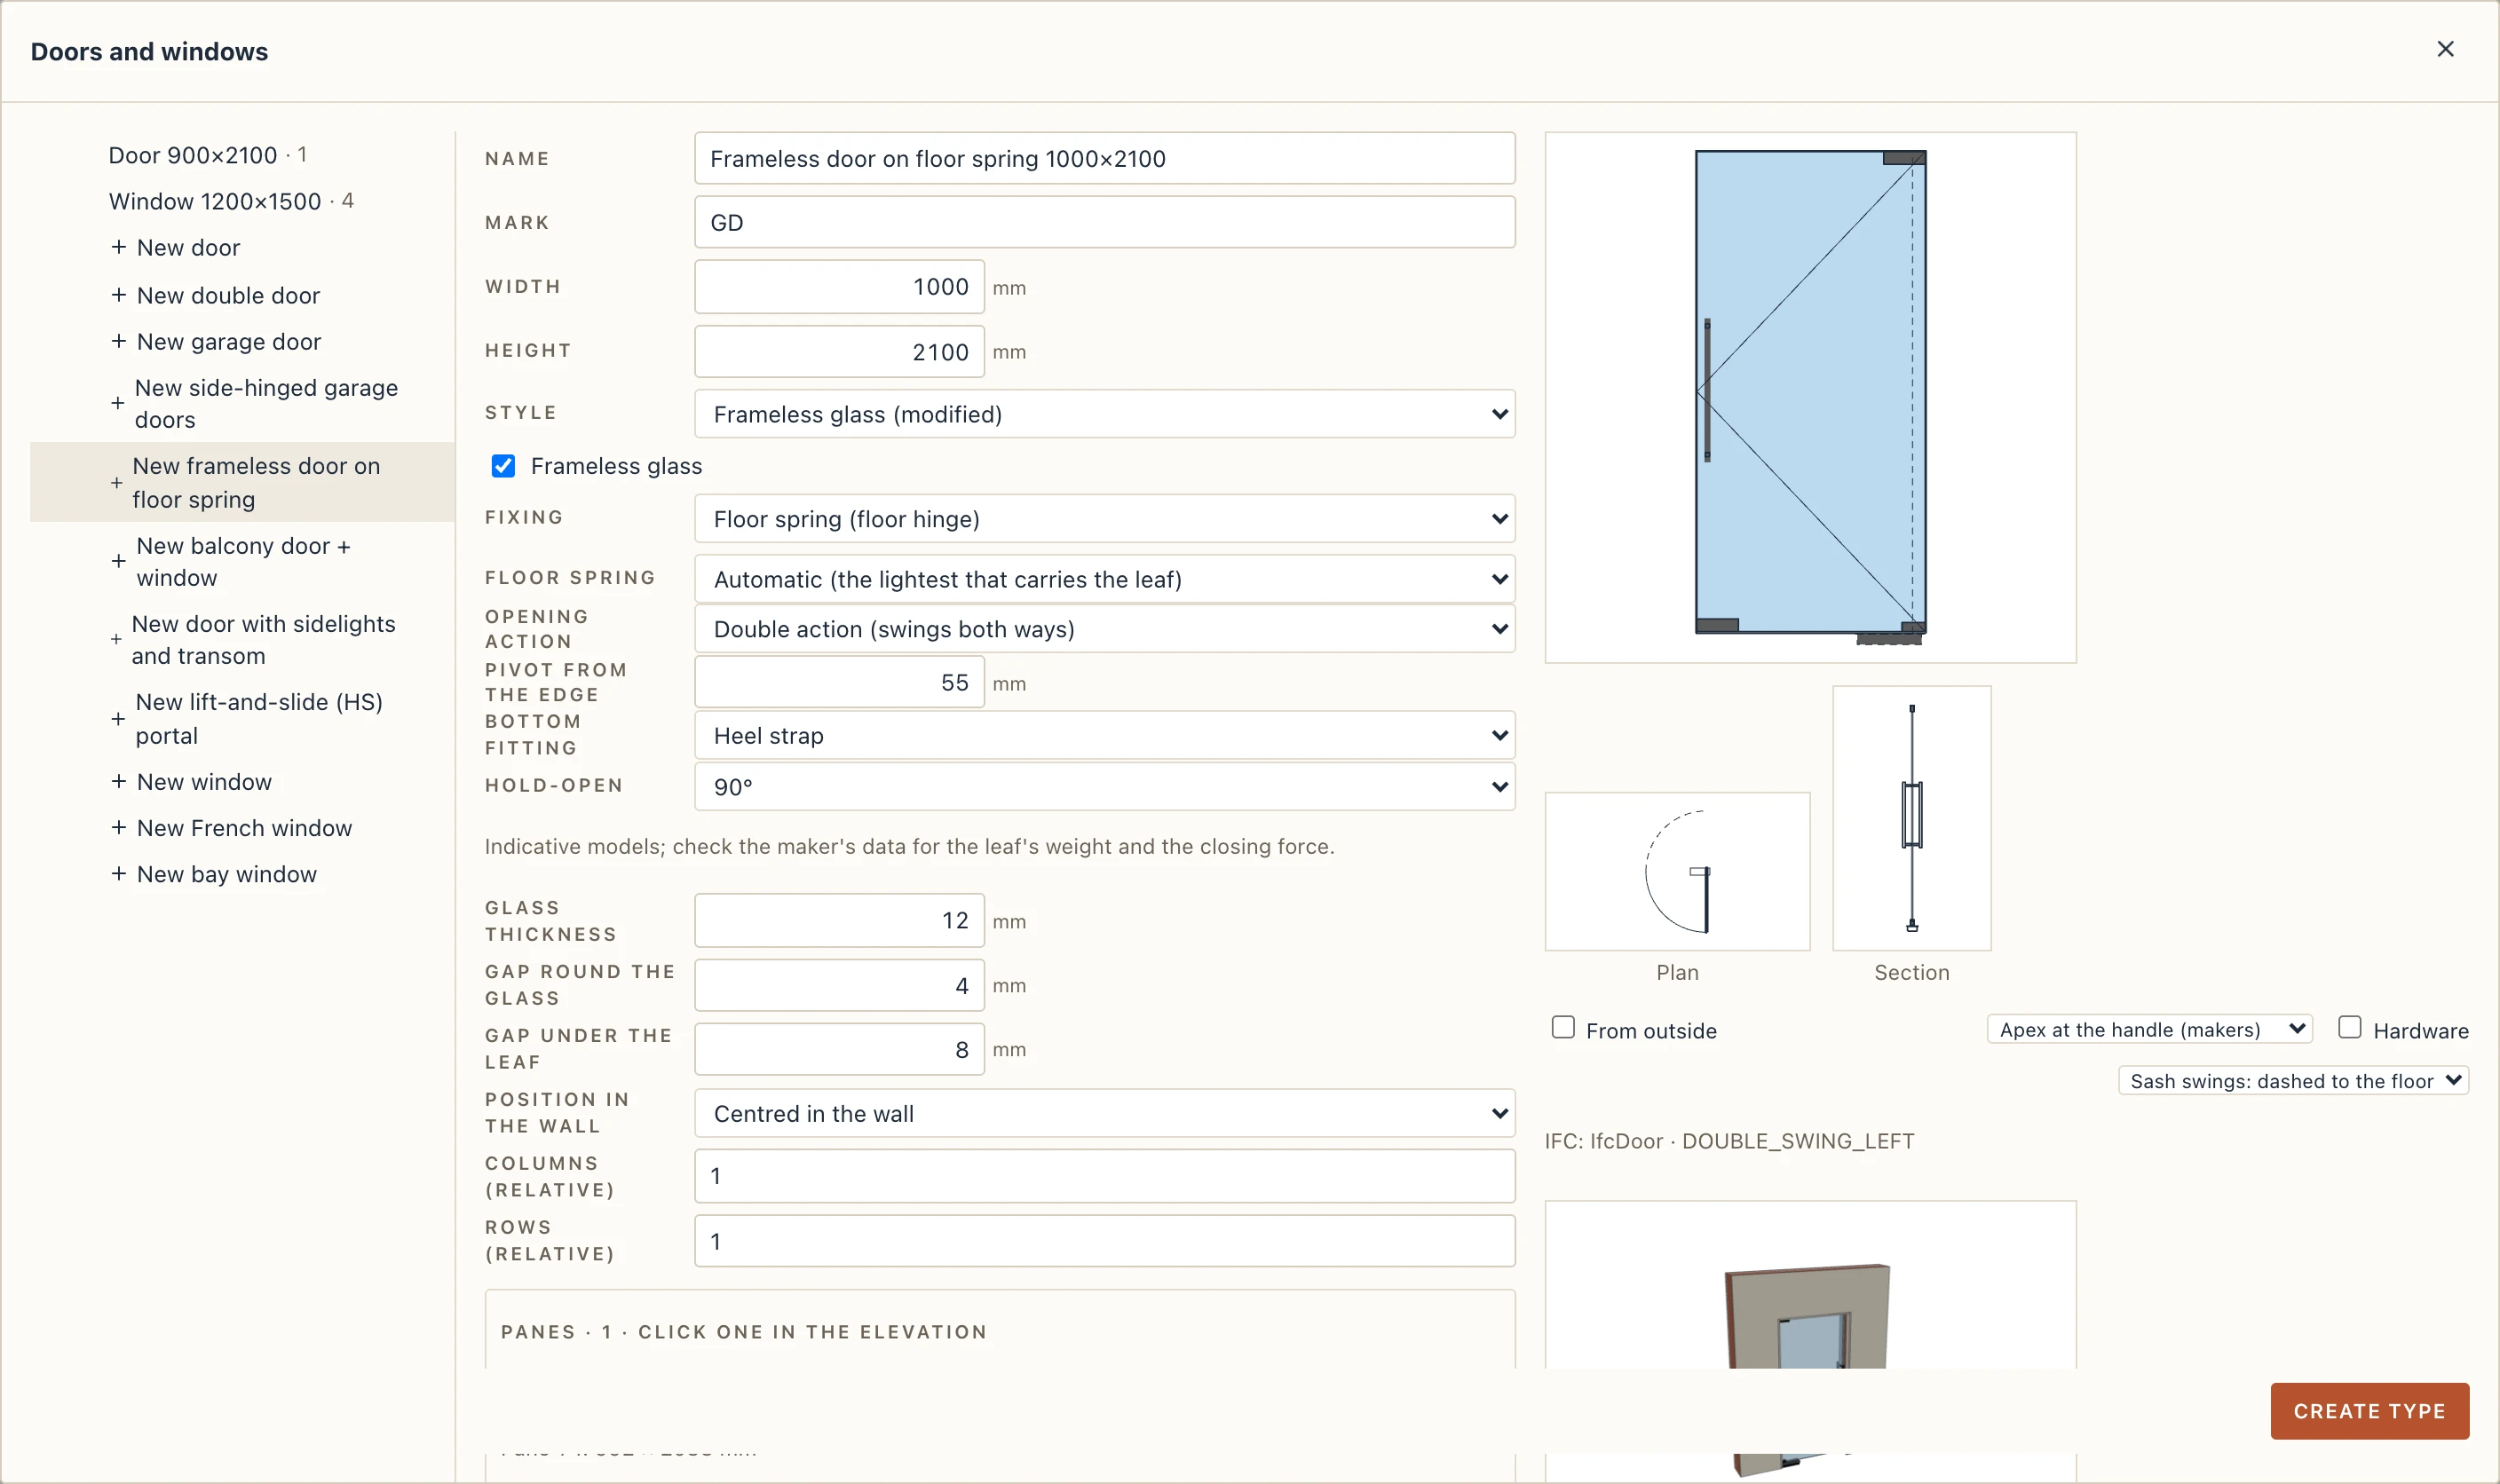
Frameless glass makes a door or window of toughened glass alone, with no frame and no sash; the Frameless glass style sets it at once, with one leaf on pivots. For a door, Fixing says what holds a leaf: Pivots and patch fittings (a floor spring and a top pivot, a fitting at each corner on the hinge side and a lock patch at the bottom opposite) or Glass hinges (two, three on a leaf taller than 2.30 m, clamped to the glass and fixed to the jamb or the pane beside it). Glass thickness is 6 to 25 mm (12 mm by default), Gap round the glass is the clearance to the opening and between the panes, Gap under the leaf the one over the floor. A leaf swings, swings both ways or slides; a pane beside or over it is fixed, standing in a channel on the floor and under the head. A sliding leaf hangs from a track across the head, in front of the fixed panes towards the room, and runs 50 mm past them, as a glass partition's or a shower screen's. The handle is a pull bar on both faces unless you choose another. A frameless window is fixed glazing. Plans draw a leaf open as its glass, elevations the fittings and the track; in IFC the type has no lining (its thickness is the glass's).
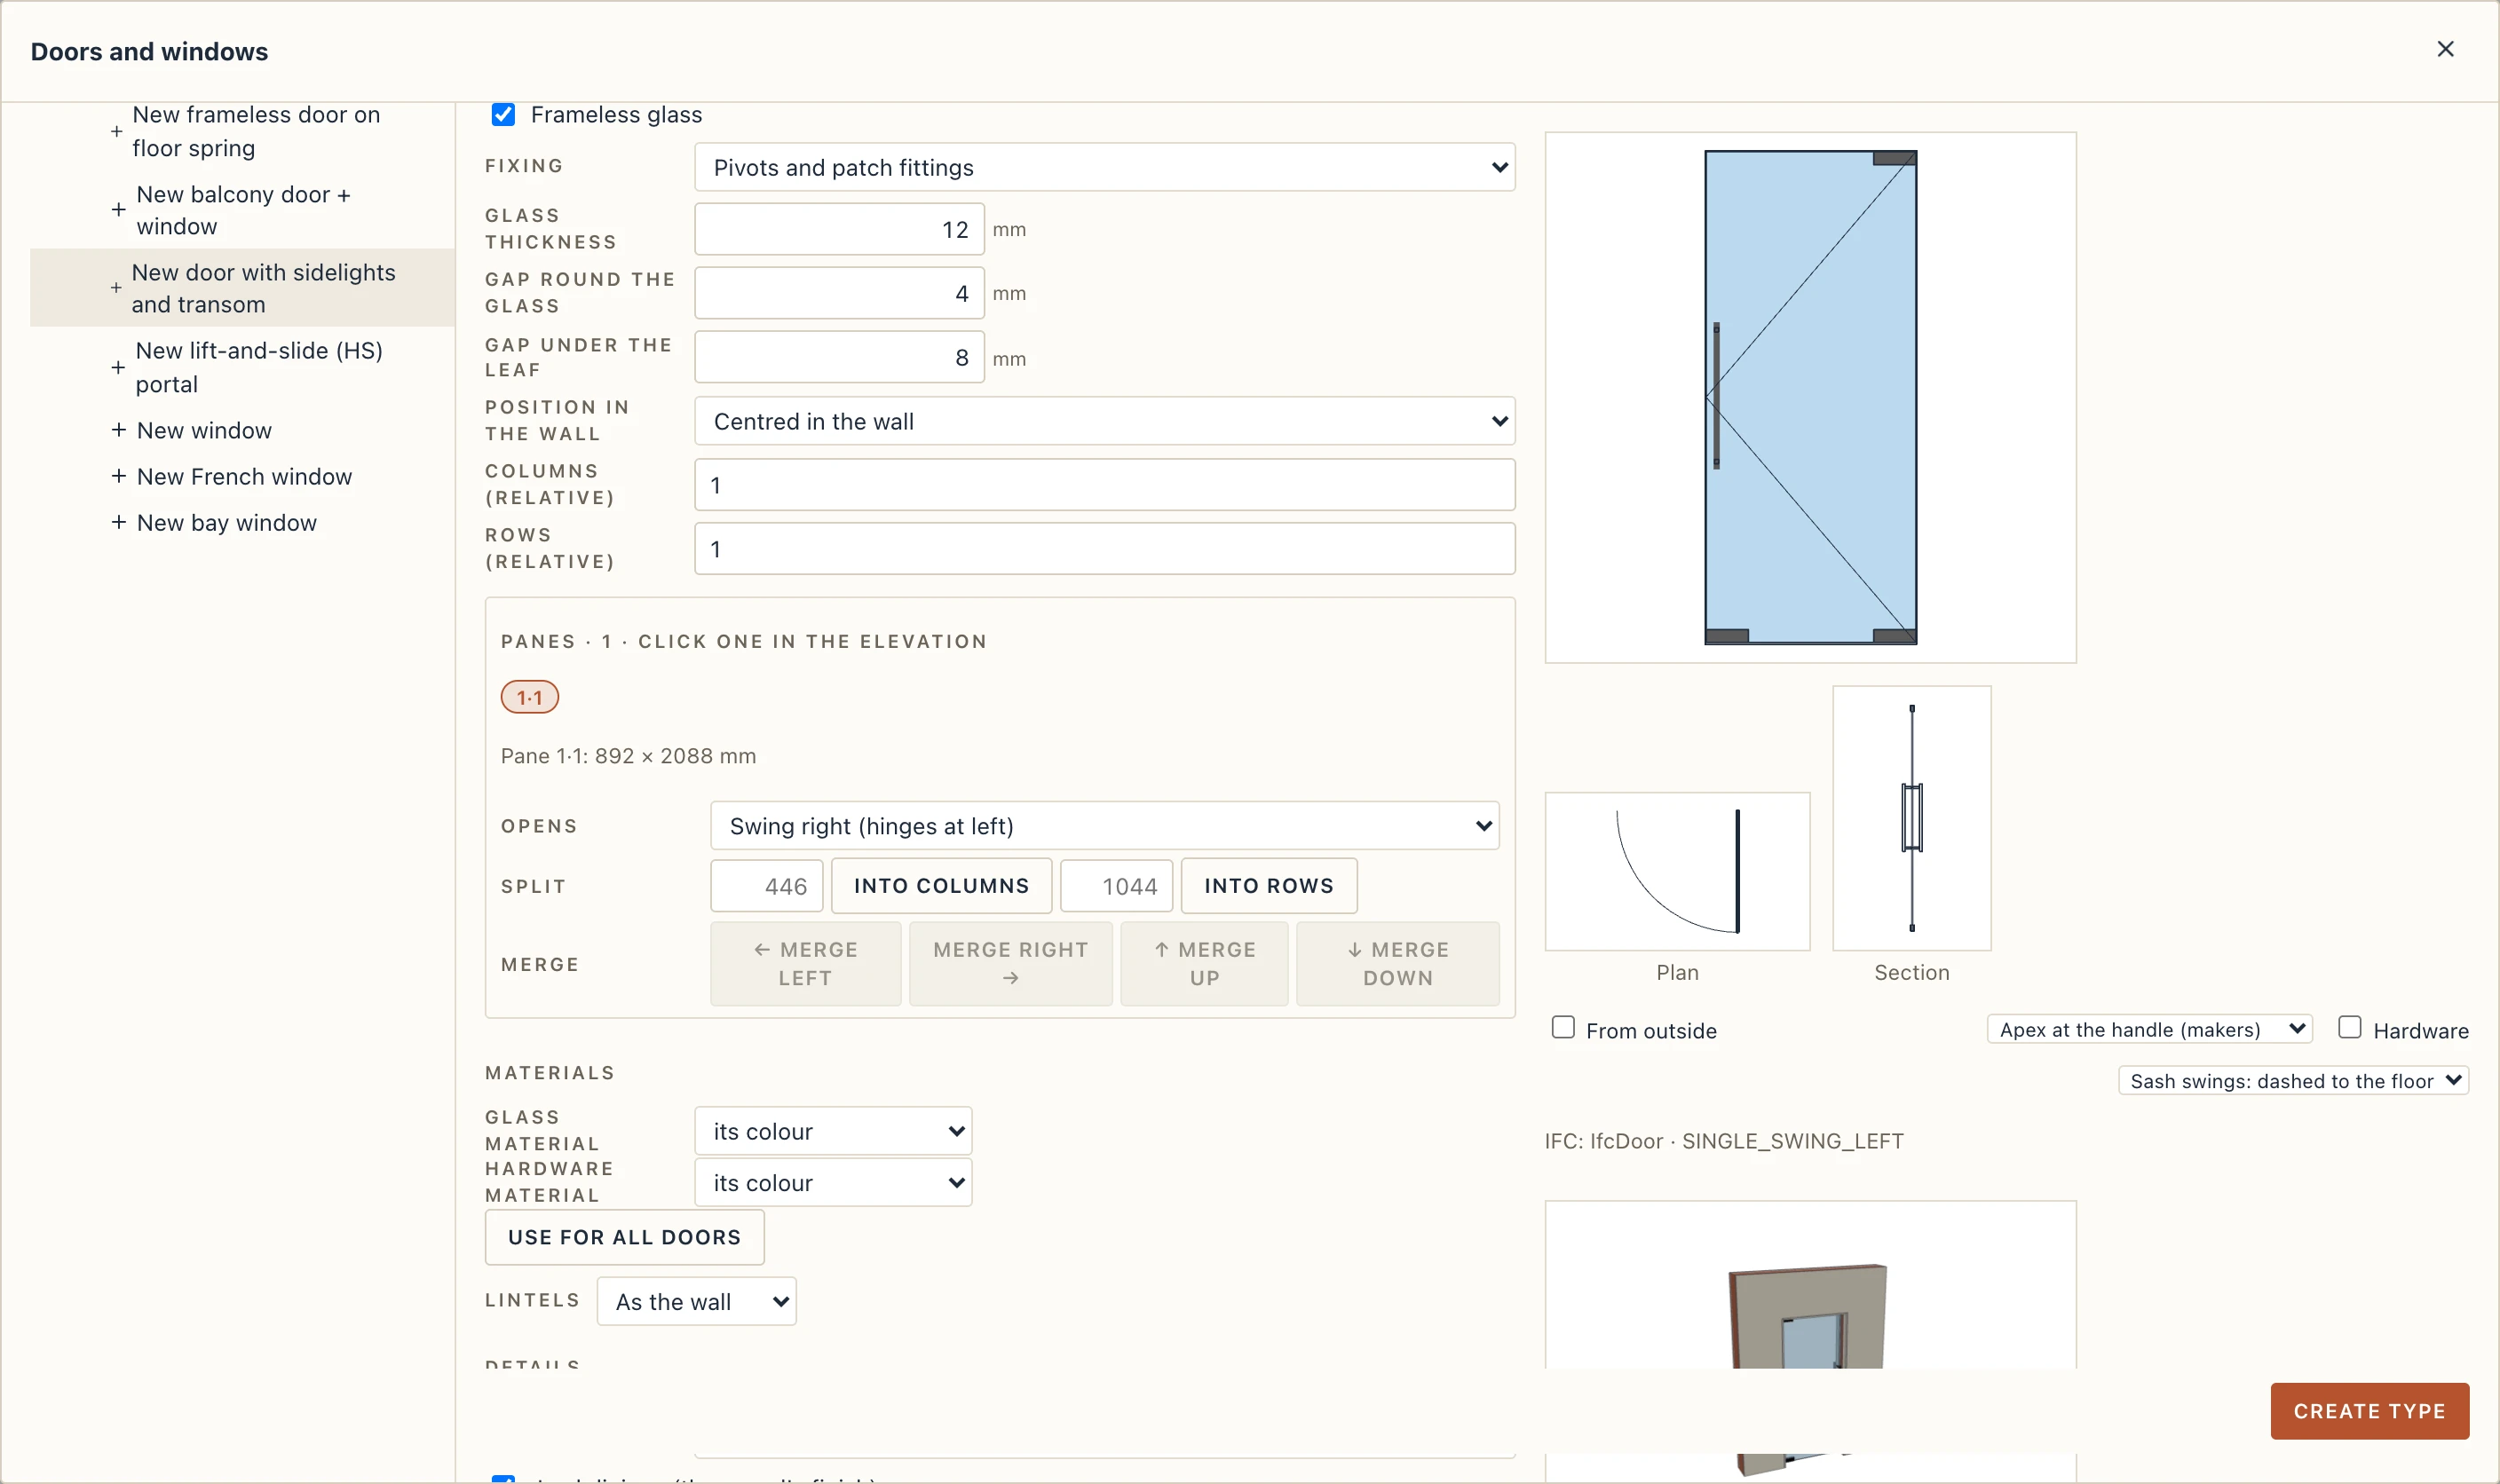
Floor spring (floor hinge) hangs a swinging leaf on a floor spring let into the floor under its pivot, with a top pivot and a patch fitting over it; New frameless door on floor spring starts one (1000 × 2100, double acting, held open at 90°). Floor spring picks the model by the heaviest and widest leaf it carries and its closing force (EN 1154); Automatic (the lightest that carries the leaf) chooses for you (12 mm glass weighs 30 kg/m²), and a model too light for the leaf is refused. Opening action is Single action or Double action (swings both ways), both swings drawn in plan; Pivot from the edge is 55 mm by default (30 to 150 mm); Bottom fitting is a Bottom patch fitting or a Heel strap; Hold-open is none, 80°, 90°, 105° or 120°. The spring's box lies under the floor finish: plans draw its cover plate and swing the leaf about its pivot, elevations draw the box dashed and the pivot's axis. The door schedule names the hanging, and IFC writes it in the set Lapin_FloorSpring (the model, the leaf's weight, the pivot's offset, the fittings, the hold-open angle). The models are indicative: check the maker's data.
Glazing bars divide the panes: Grid (colonial) with its lites across and up, Prairie with bars near the edges, or a Diamond lattice.
On the facade, besides the surround, a window can have a Keystone, a Crown over the opening (a Cornice, a Pediment, a Segmental pediment, or a Hood mould that follows an arched head) and an Apron under the sill with its consoles.
Apply a style… sets the shape, the glazing bars and the ornaments at once: Modern, Classical, Georgian, Victorian, Romanesque, Baroque, Gothic, Tudor, Prairie, Traditional, or a round window. Everything it sets stays editable. The select then shows the style the type has; once you change something the style set it reads Georgian (modified), and picking the style again applies it again.
Garage doors
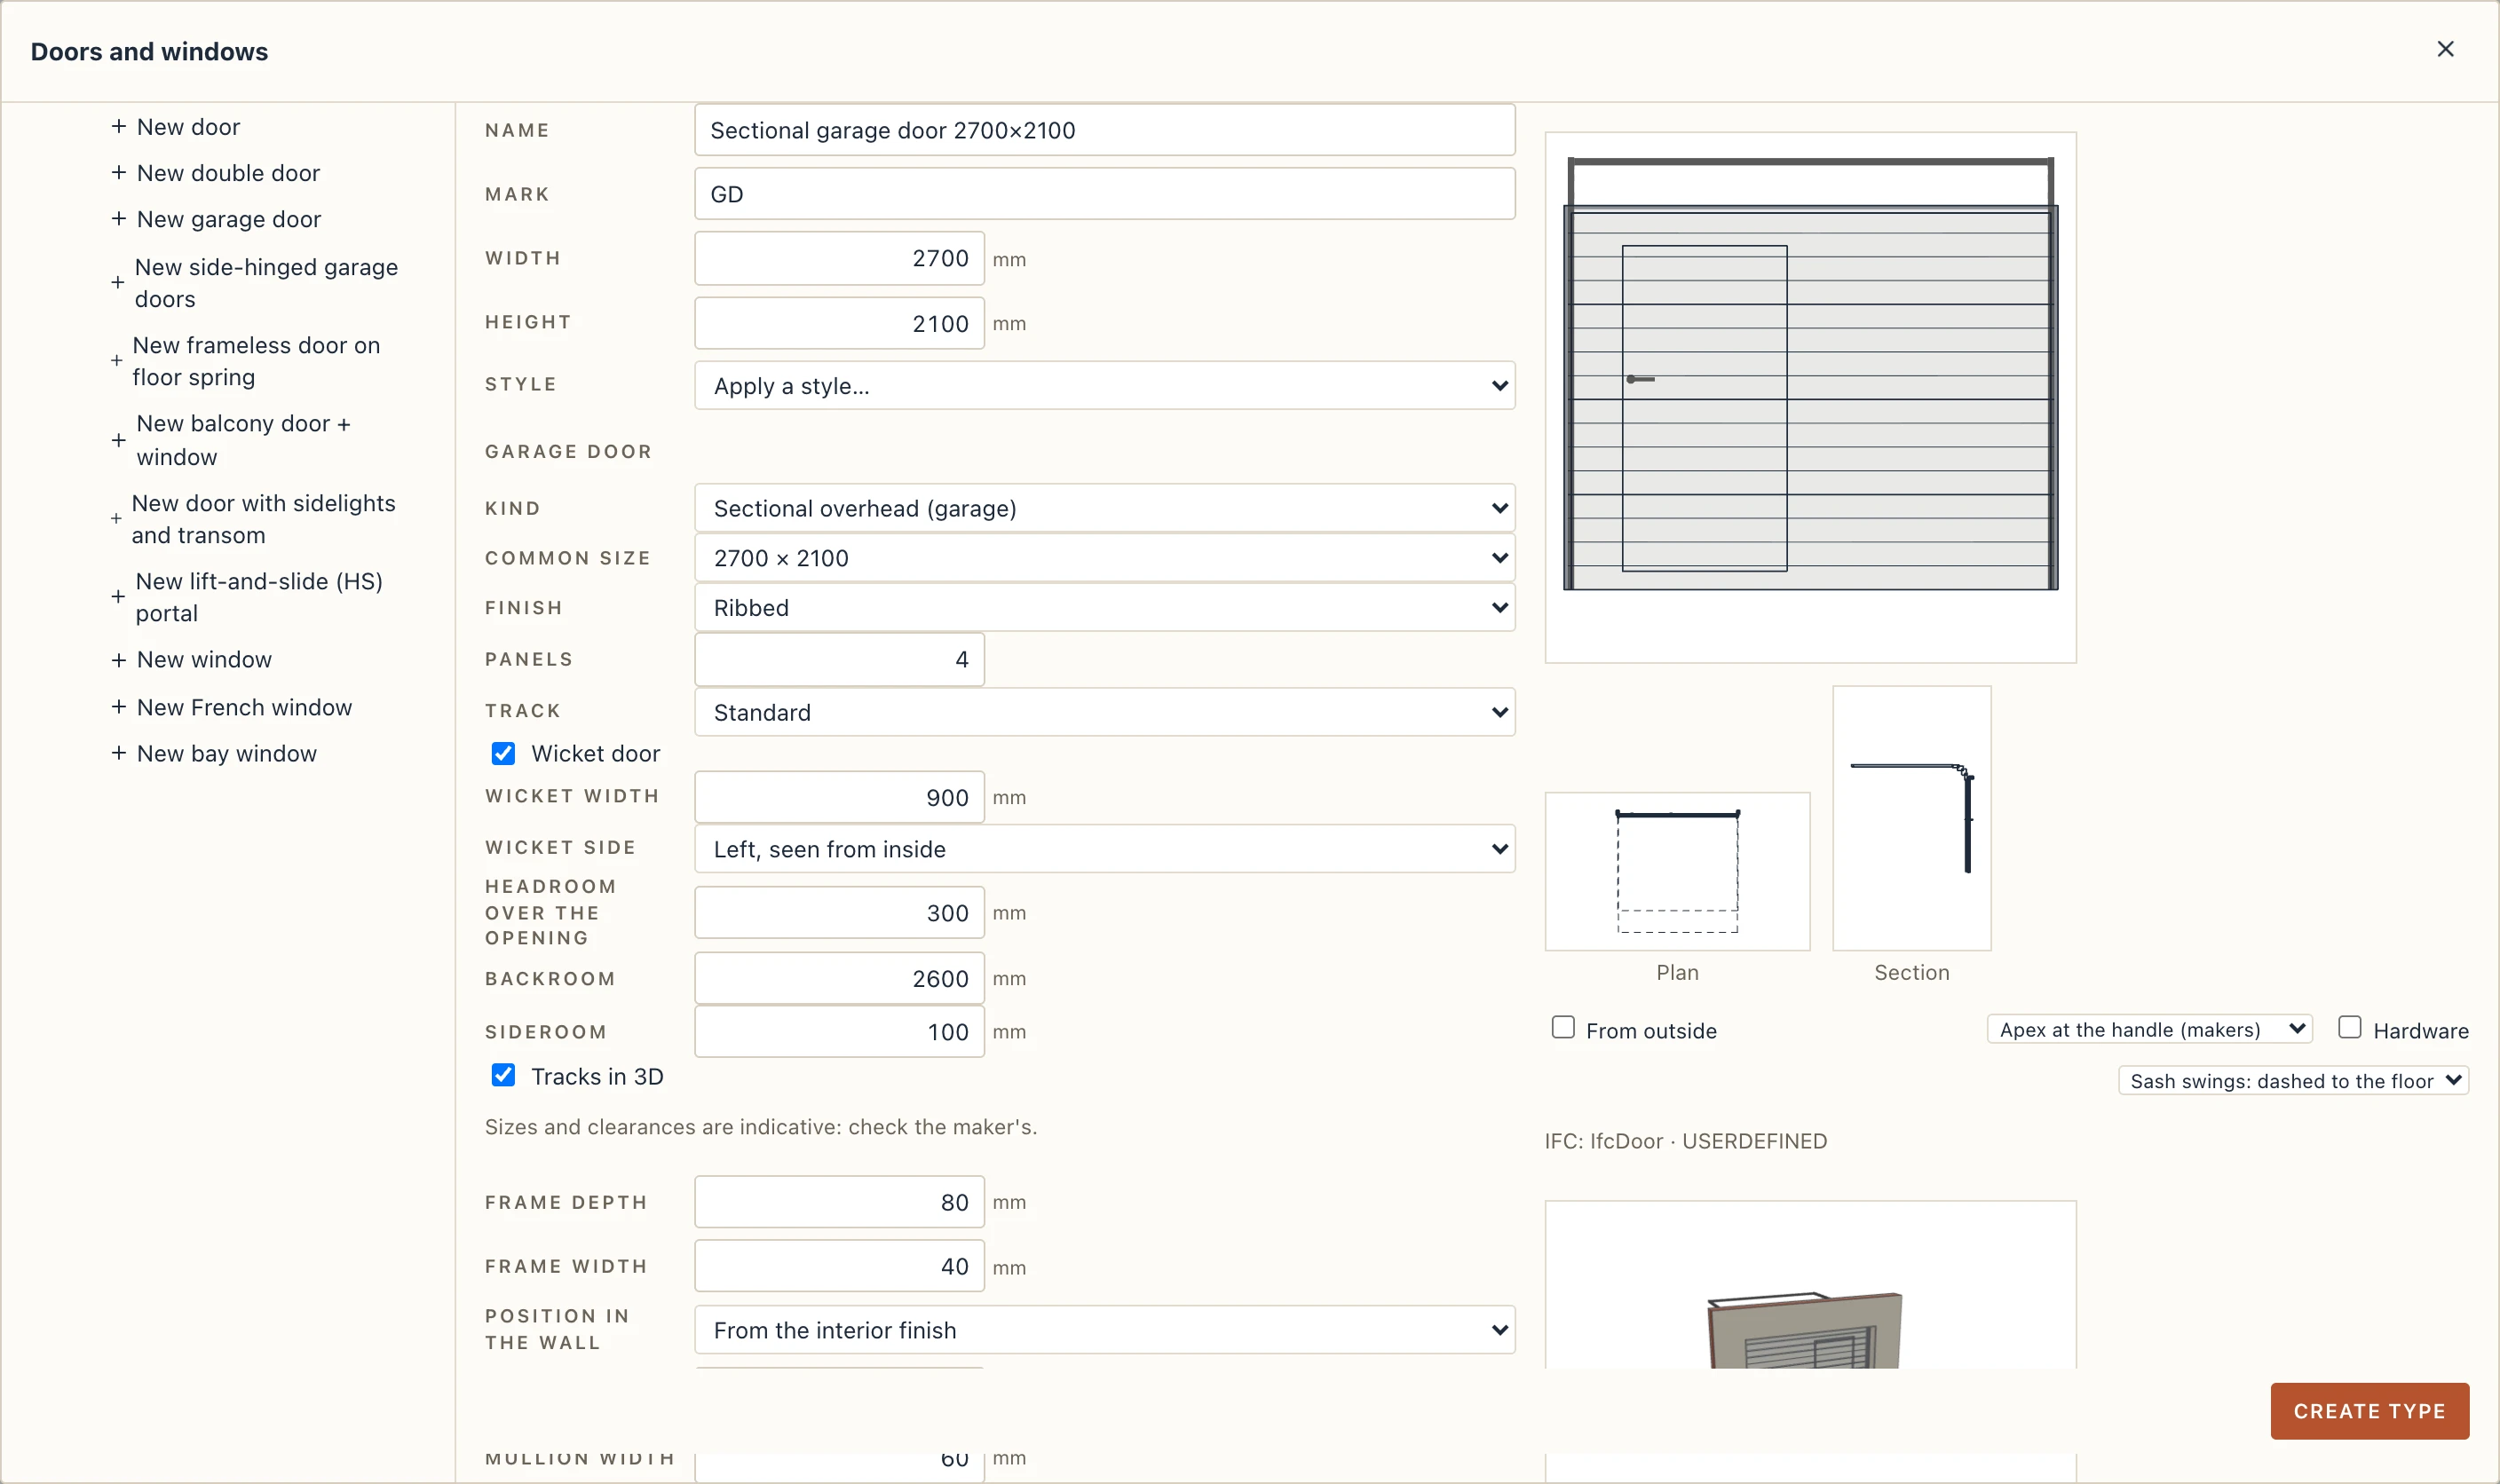
New garage door starts a sectional overhead door, 2400 × 2100, the kind a steel sectional panel lift door is. Under Garage door, Kind makes it a Sectional overhead door (horizontal panels running up and back under the ceiling on two tracks), a Roller door (a curtain of slats rolling onto a drum in a box over the head), an Up-and-over door (one panel tilting up) or a Side-sliding sectional door running to the left or to the right (vertical panels running round the corner along a side wall). Common size offers Australia's 2400, 2700, 3000, 4800 and 5400 × 2100 and Europe's 2375 × 2000 and 2500, 3000 and 5000 × 2125; any other is typed in Width and Height. Finish is Ribbed, Flat, V-groove or a Glazed top panel; Panels comes from the door's height (about 610 mm each) unless you type it. A sectional door has a Track (Standard, Low headroom, or High lift rising an Extra lift first) and may have a Wicket door (600 to 1200 mm wide, on the left, in the centre or on the right seen from inside); a roller door's Roll box is Inside or Outside; an up-and-over door's Mechanism is a Canopy (part of it stays outside, open) or Retractable (it runs back on tracks). Headroom over the opening, Backroom (how deep into the garage it reaches, from the wall) and Sideroom are worked out from the kind; type the maker's own, and Auto gives them back. Tracks in 3D shows or hides the tracks' bodies.
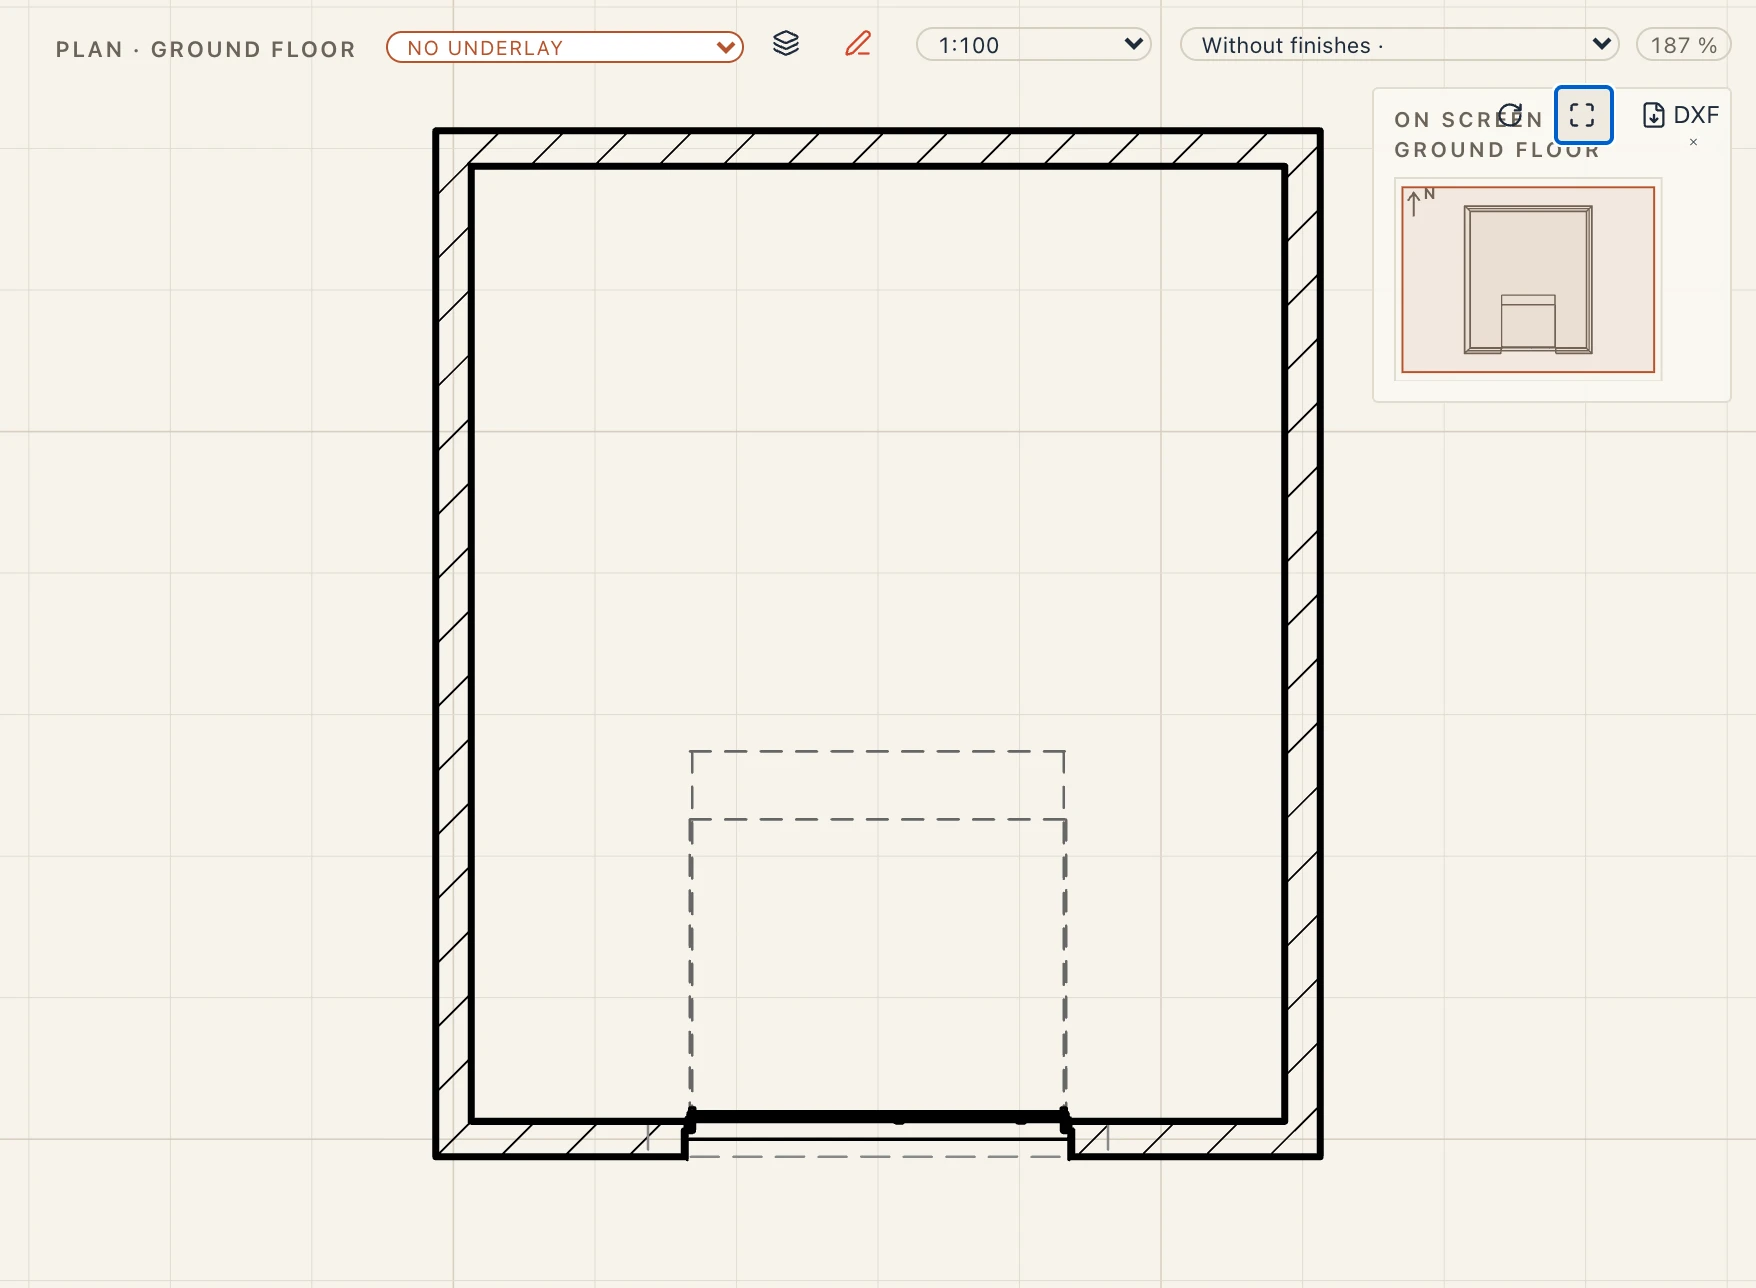
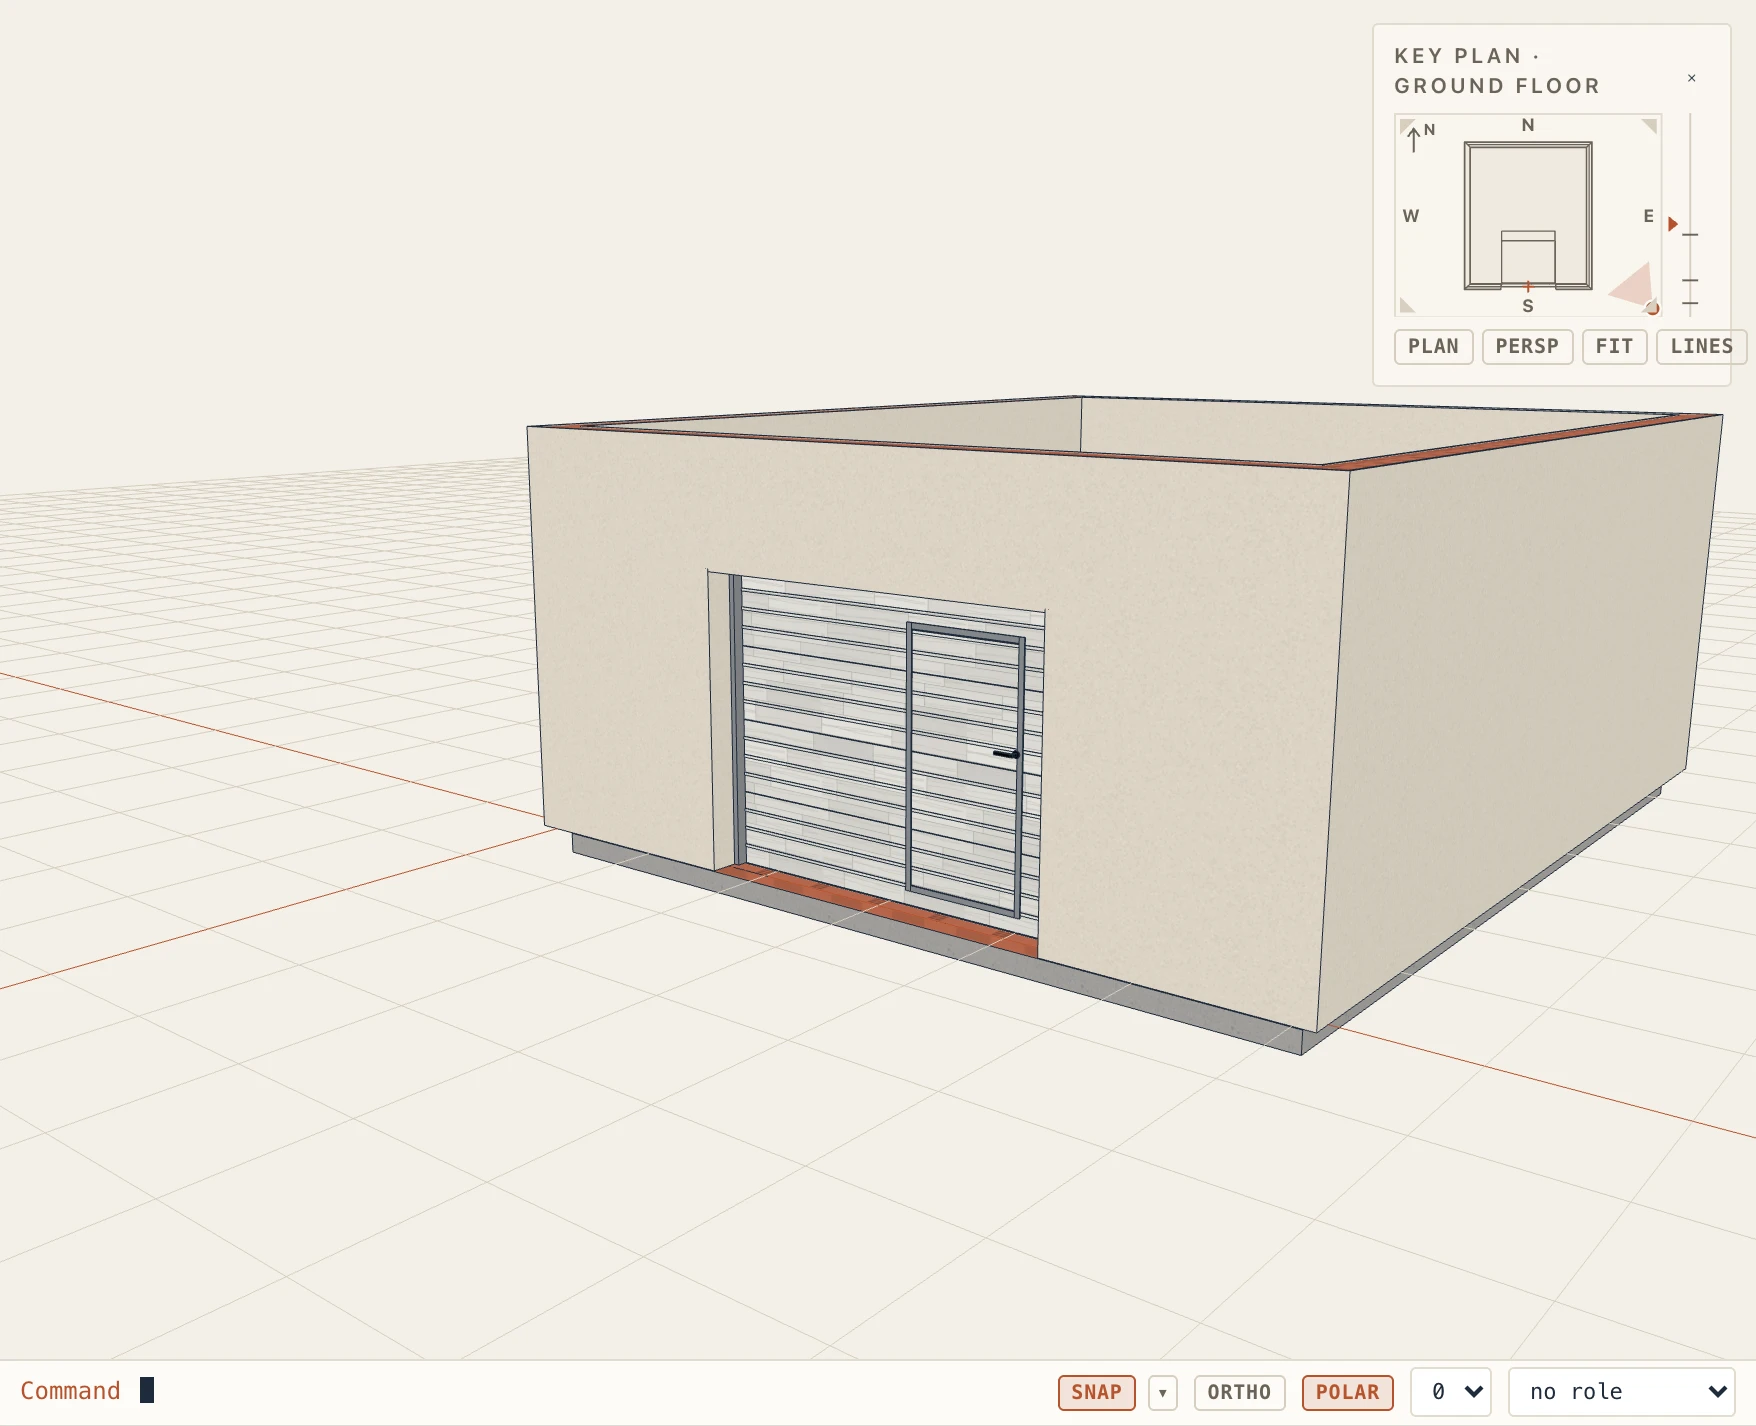
A garage door hangs behind its opening: its frame's inner face on the wall's interior finish (Position in the wall → From the interior finish). Plans draw it as CAD libraries do: the curtain at the opening, and dashed overhead a sectional door's two tracks back to the backroom with the door open under the ceiling, a roller's box, an up-and-over door's open panel, a side-sliding door's track round the corner and the door parked along the side wall. Elevations draw the panel joints, the ribs, the windows and the wicket; sections the curtain cut and the tracks seen. The door schedule names the operation and, in its Hanging row, the panels, finish, track or box and the room the door needs; the quantities add the set Lapin_GarageDoor (the curtain's area, the panels, the headroom, backroom and sideroom). In IFC it is an IfcDoor whose OperationType is the best each schema has: ROLLINGUP for a roller door in both; LIFTING_HORIZONTAL for a sectional or up-and-over door in IFC4X3, USERDEFINED with SECTIONAL_OVERHEAD or UP_AND_OVER in IFC4; USERDEFINED with SECTIONAL_SIDE_LEFT or …_RIGHT for a side-sliding one. Lapin reads its own file back whole, and a foreign file's rolling or lifting door as a garage door. New side-hinged garage doors makes a pair of leaves of a garage's size (2400 × 2100) meeting rebated. The sizes and clearances are indicative: check the maker's.
Bay, bow and box windows
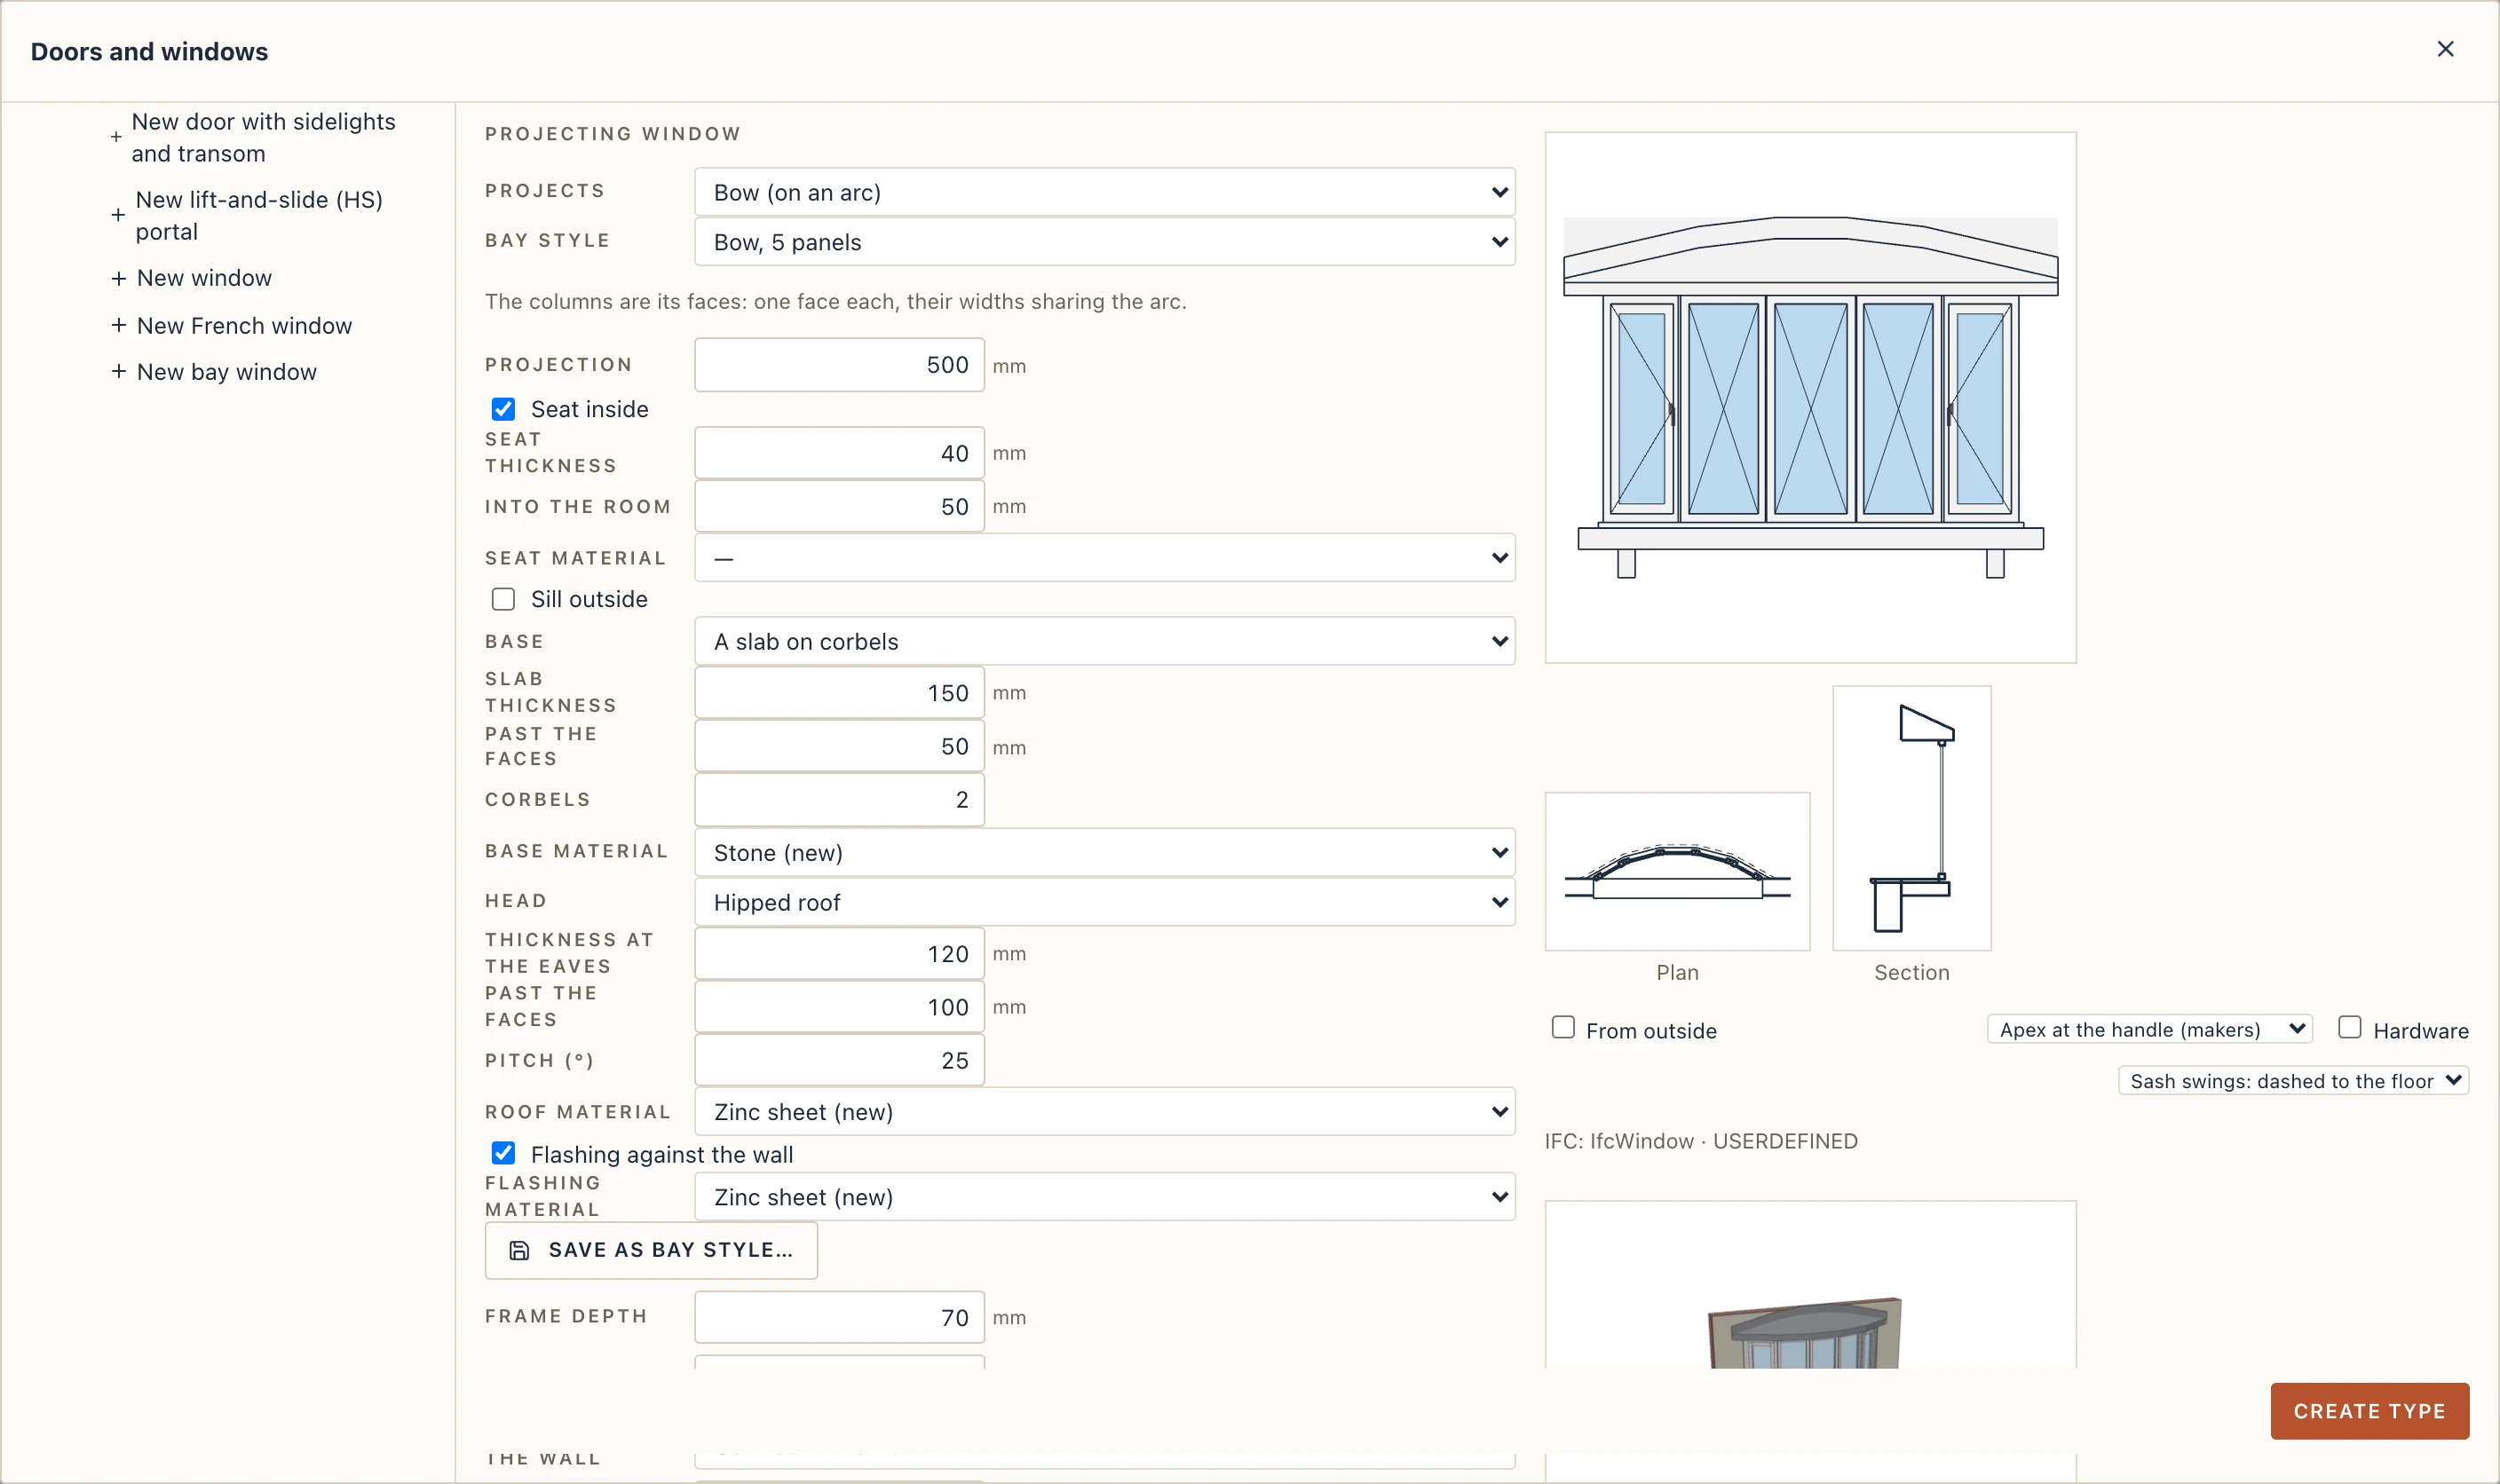
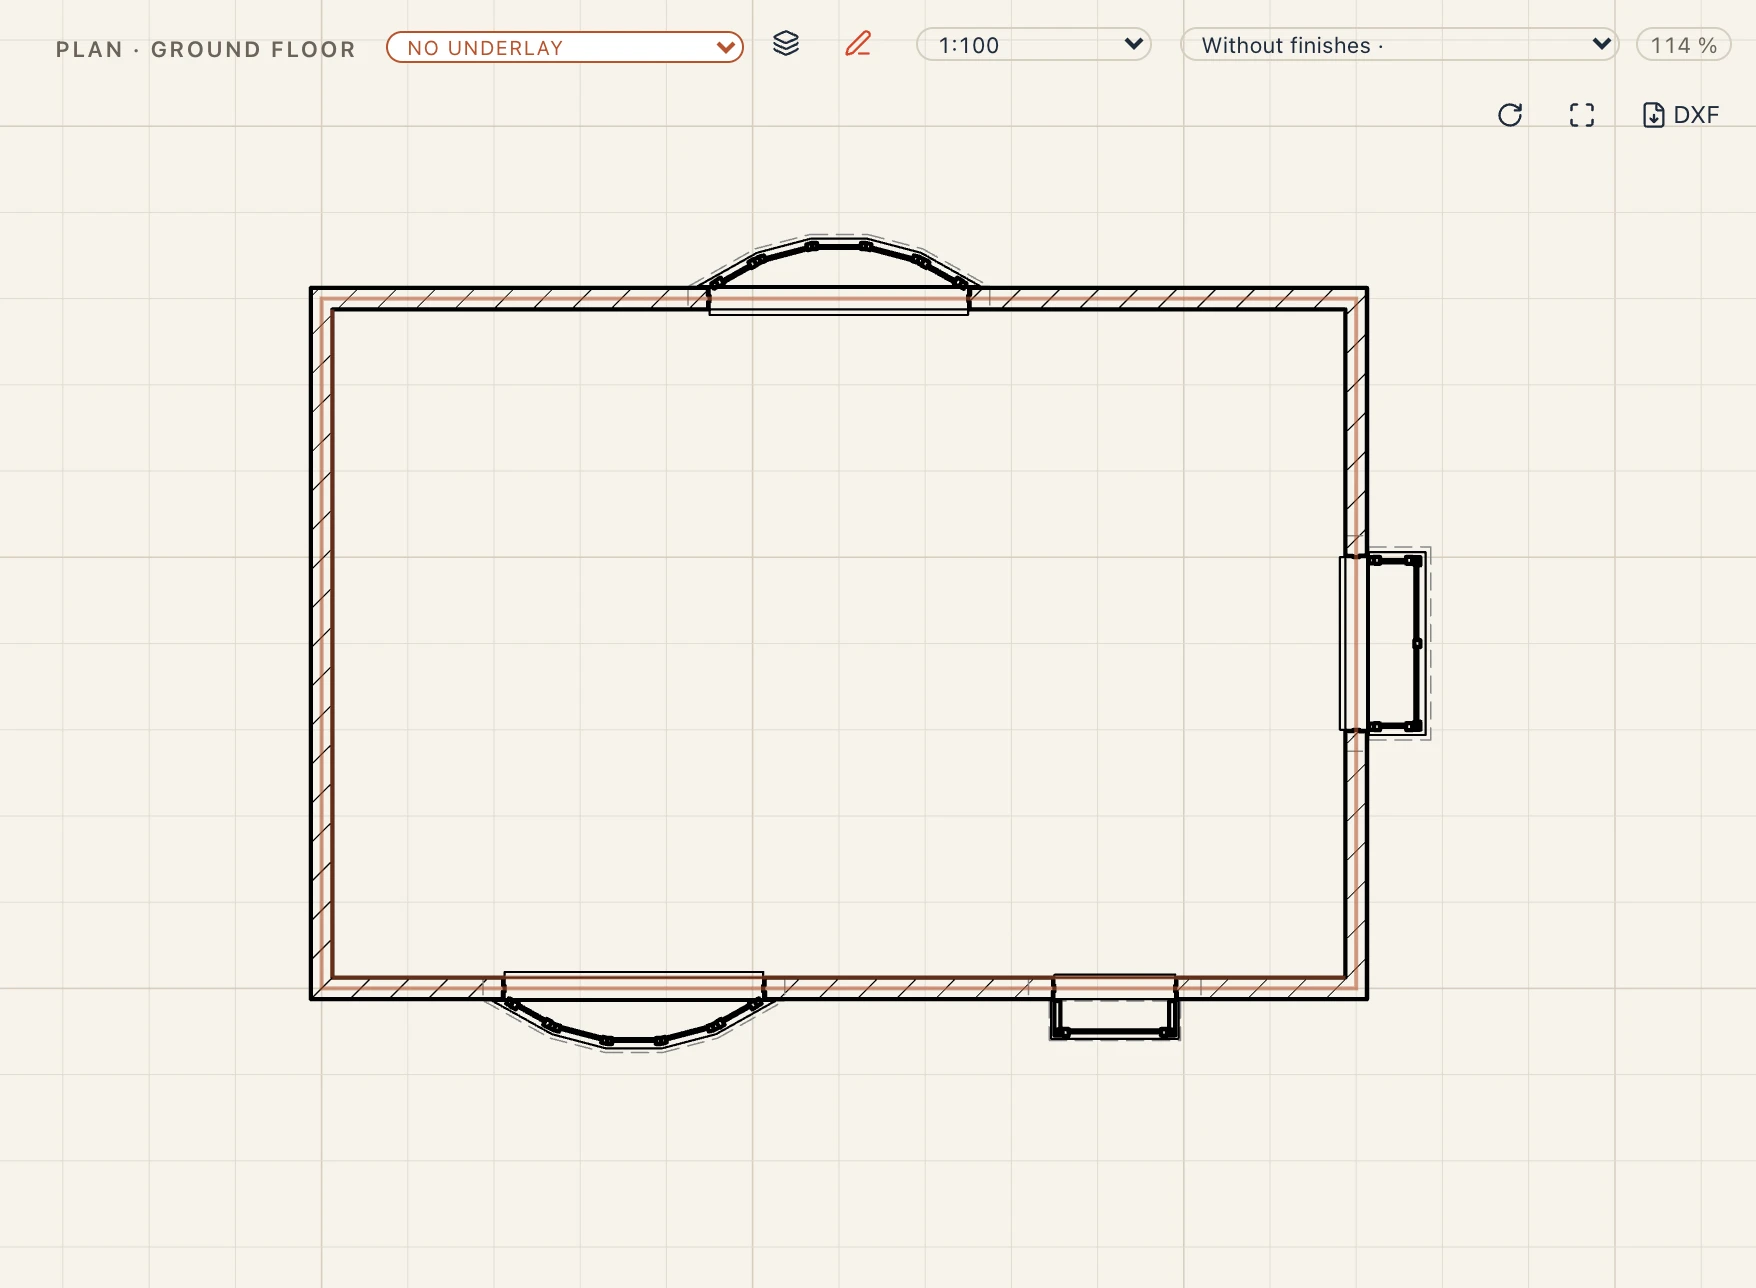
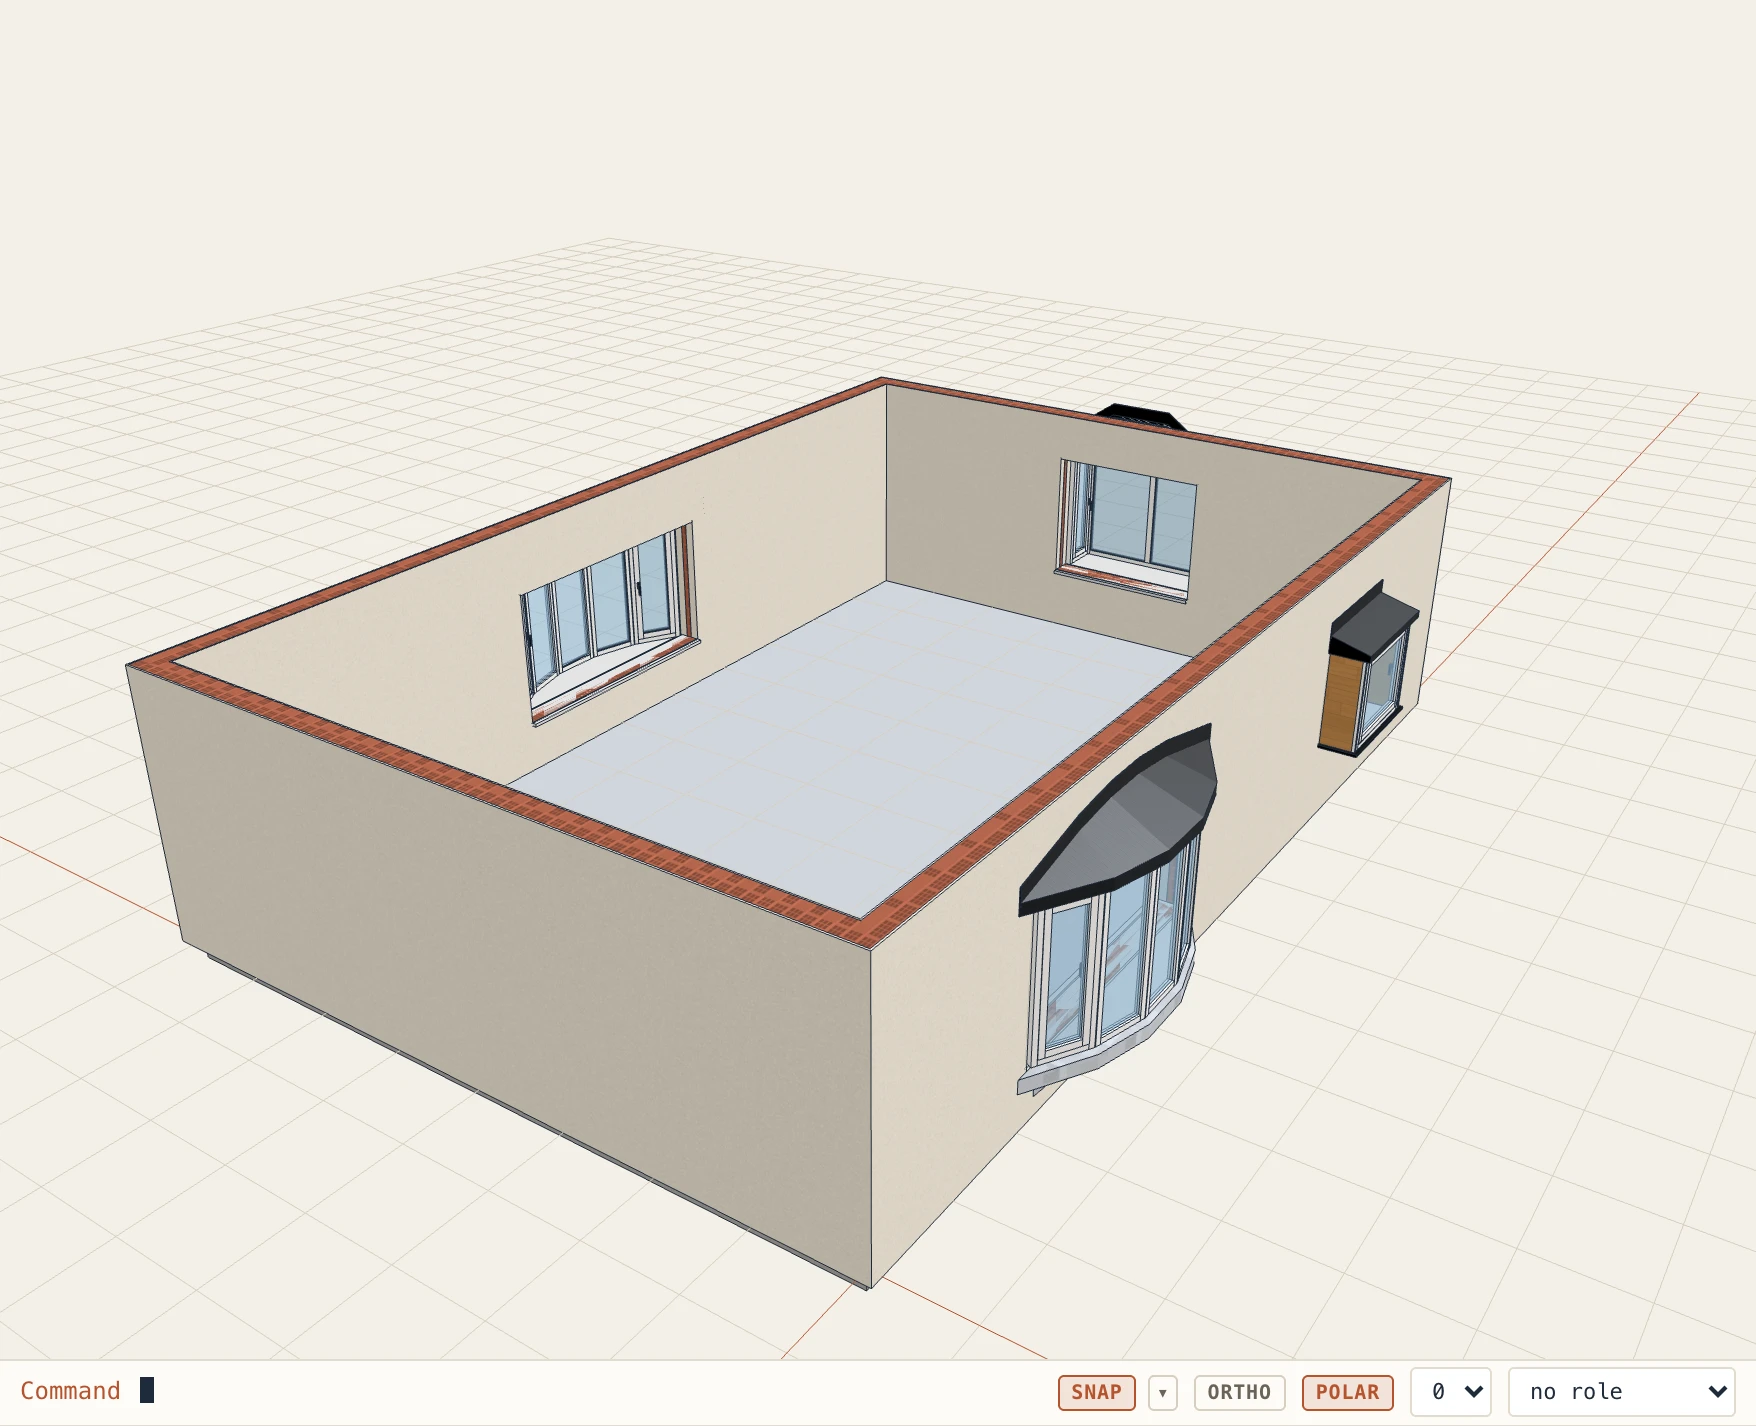
A window type can project from its wall. In the configurator, Projects makes it a Bay (a centre and two sides at an angle to the wall), a Bow (equal panels on an arc) or a Box (sides square to the wall), and New bay window starts a new type as a 45° bay. The window still fills one opening in the wall, as wide and high as the type: it is placed, moved, copied, flipped, numbered and scheduled like any window. Architecture → Opening set to Bay window (BW) puts one in the wall you click: the type picked in the configurator when it projects, else the project's first bay, else a 45° bay.
The grid's columns are its faces. A bay's and a box's first and last columns are its sides and the columns between them its centre; a bow has one face per column, their widths sharing the arc. Each pane opens as its Opens says, so a bay can have its sides opening and its centre fixed. Then:
- Projection, from the wall's exterior face to the frames' outer face, and for a bay the Sides to the wall angle (15° to 90°);
- Sides: a box's sides glazed or solid, with their material;
- Seat inside: the board at the sill, how far it runs into the room, its material;
- Sill outside under the faces;
- Base: none (hung on the wall), walls down to the floor, a projecting slab, or a slab on corbels, with its thickness, how far it runs past the faces and its material;
- Head: a hipped, lean-to or flat roof, or a slab, its thickness at the eaves, its overhang, its pitch and material, and a flashing against the wall.
The frames, sashes, glass and handles are the type's, so its materials and handles apply to every face. Bay style sets everything at once: a 45° or shallow 30° bay, a canted bay on the floor, a bow of five or four panels, a box with glazed or solid sides, an oriel on corbels. Like Apply a style…, the select shows the bay style the window has, (modified) once you change what it set. Save as bay style… keeps the one you configured as a style of the project, offered next to Lapin's; rename or delete it in the list under the fields.
In a plan the faces are cut, the seat, sill and base are drawn below the cut and the roof dashed over them; elevations, sections and 3D show the whole body. The windows schedule has one card for the type, its faces unfolded, with a Projecting row (kind, projection, faces); its area is the glazed faces' and its details measure the roof, the seat and the base. In IFC it is one IfcWindow of a user-defined partitioning (Bay 45°, projection 600, 3 faces, 4 panels) whose body is the whole bay, its panels listed face by face; Lapin reads the bay back from it.
Handles
Handle picks the handle of the type: a Lever, a Knob, a Pull bar or a Window handle, or None. By default a door has a lever and a window a window handle. A door has its handle on both faces, at the Handle height you set; Handle colour sets its colour. Handles show in 3D, in sections and elevations, and in the configurator's drawings when Hardware is ticked.
Frame position and sills
Position in the wall sets where the frame sits across the wall as a value, not only centred: choose From the exterior finish, From the core or From the wall’s centre, and Set back, how far the frame’s outer face is behind that reference (from the centre, how far the frame’s centre is). From the exterior finish and 50 mm puts the frame 50 mm behind the render. The frame, the reveals, the sills and the opening symbols move with it, in plans, sections, 3D and IFC. A type made without a position stays Centred in the wall. In the properties panel a door or window has Frame in the wall to give itself its own position (As the type gives it up) and Set back for its distance.
The Exterior sill has a Slope in degrees (5° to start; 15° for a metal sill). A sloped sill falls away from the frame and takes everything over it out of the wall: the render, the core and the plaster are cut to its sloping top face, in 3D, in sections and elevations, and in the quantities.
Data: U-value, fire rating, fittings
Data…, under the type in the configurator (and in the properties panel, for the doors and windows selected), opens a box of free text: U-value, g-value, Safety glass (laminated inside, tempered both sides…), Fire rating (EI 30, EI2 60-C5…) and Fittings; More data adds any of your own, such as Sauna window or Frosted glass. Nothing is chosen from a list. A door or window’s own value wins over its type’s; an empty field falls back to the type’s (shown greyed).
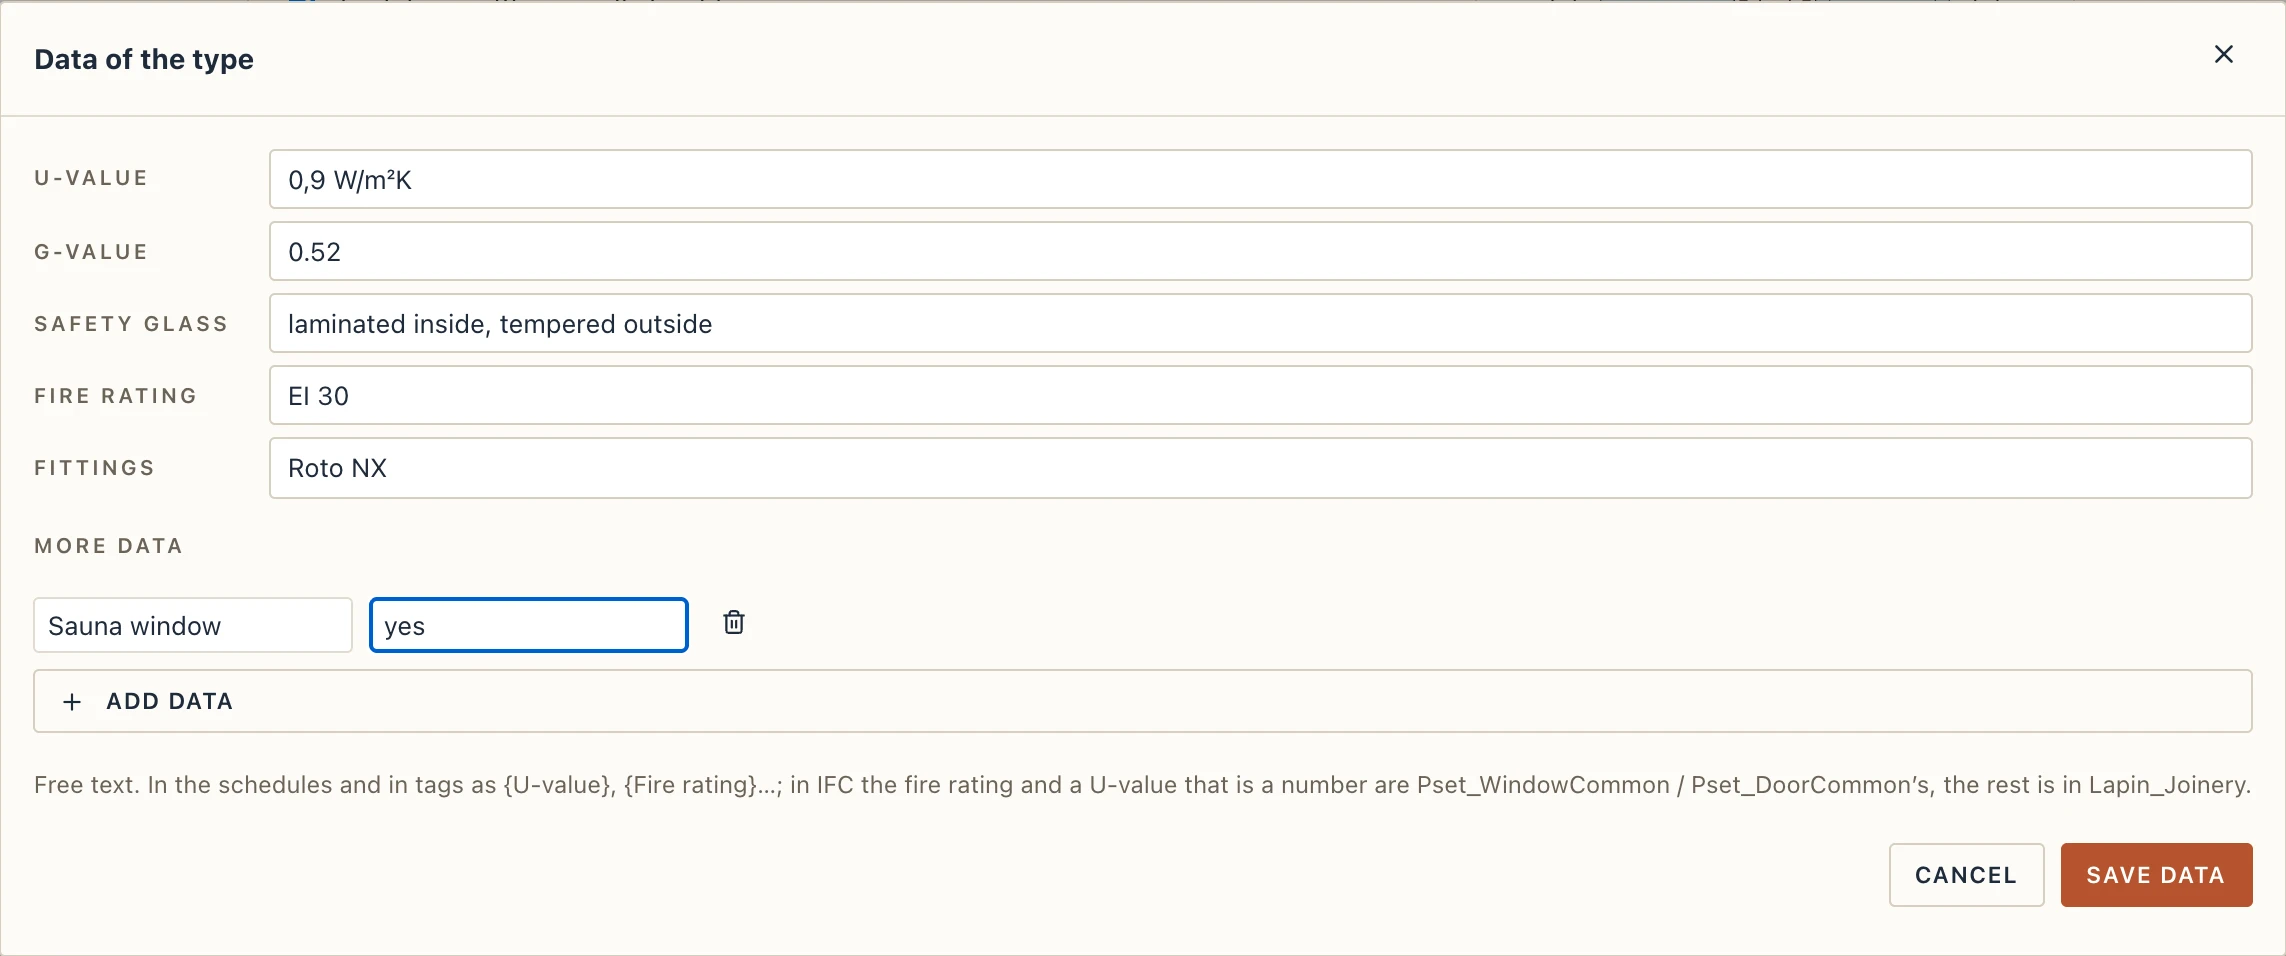
They are the type’s parameters: the door and window schedules show each as a row, tags read them as {U-value}, {g-value}, {Safety glass}, {Fire rating} and {Fittings}, and IFC keeps them. The fire rating is FireRating of Pset_WindowCommon or Pset_DoorCommon; a U-value that reads as a number (0.9, or 0,9 W/m²K) is ThermalTransmittance there too, with GlazingAreaFraction for a window; the rest is in the set Lapin_Joinery.
Parameters
Parameters · in schedules, at the bottom of the configurator, holds the type's own parameters: + Fire rating (kept in IFC's Pset_DoorCommon or Pset_WindowCommon as FireRating), + Manufacturer, + Product code, + Website, or any parameter you name. The type's doors and windows inherit them, and each one becomes a row of the joinery schedules: see Schedules and charts.
Sunshades
Architecture → Sunshade (SN) puts a sunshade on the door or window you click: sized to its opening, past its jambs, over its head or across it, and it follows the window when it moves. Sunshade along a facade takes two points: on a wall it runs along that wall's exterior face, anywhere else along the line, out to its right. The bar of both tools picks the type, or a style a new type is made from.
The kinds:
- Canopy: a slab, louvred or glass, with its projection, thickness, tilt and a fascia, on brackets, tie rods or posts;
- Vertical fins: their depth, thickness, spacing and angle, rails top and bottom;
- Louvres (brise-soleil): horizontal blades, flat, aerofoil or box, their depth, spacing and angle, off the wall, between end plates;
- Egg-crate: horizontal and vertical plates together;
- Perforated screen: a plate off the wall, with round or square holes or slots, their size and pitch;
- Awning: fabric on a slope, a valance, a cassette and folding arms;
- Pergola: rafters, a beam, slats on top and posts to the floor;
- External venetian blind: slats, how far it is lowered, its head box and guide rails.
Sunshade types (in Types) edits a type: its kind and every parameter of it, its materials, beside the drawing of it from outside, in section and in plan. Every sunshade of the type follows a change. A new type starts from a style: a concrete canopy, a timber canopy on brackets, a glass canopy on tie rods, a louvred canopy, a tiled hood, a brise-soleil, vertical fins, a concrete egg-crate, a perforated Corten screen, a fabric awning, a timber pergola, an external venetian blind; Save as style… keeps a type as a style of the project.
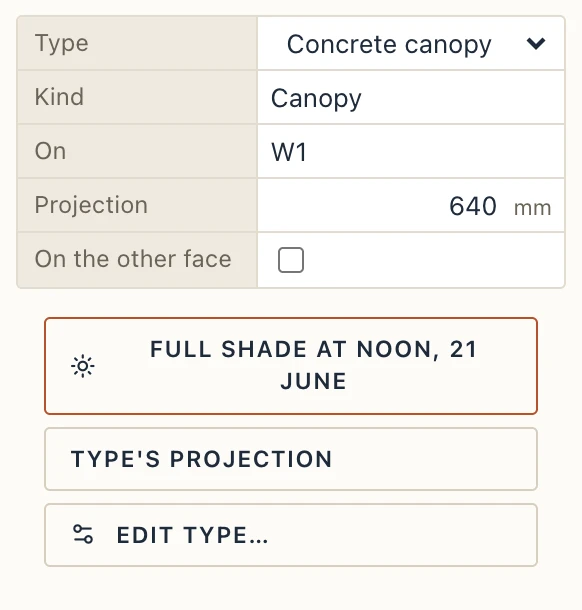
Selected, a sunshade shows its type, what it stands on and its own Projection (empty: its type's). Full shade at noon, 21 June works out, for a canopy, an awning or a pergola over a window, how far it must project so that the whole window is in shade when the sun is highest on the longest day, at the project's place (Manage → Location; Bucharest until one is set), and sets it. On a south facade at 45° N the sun is 68.4° high then: a window 1.5 m high under a canopy 150 mm over its head needs 650 mm. Its grips drag its ends along the wall or line and its projection.
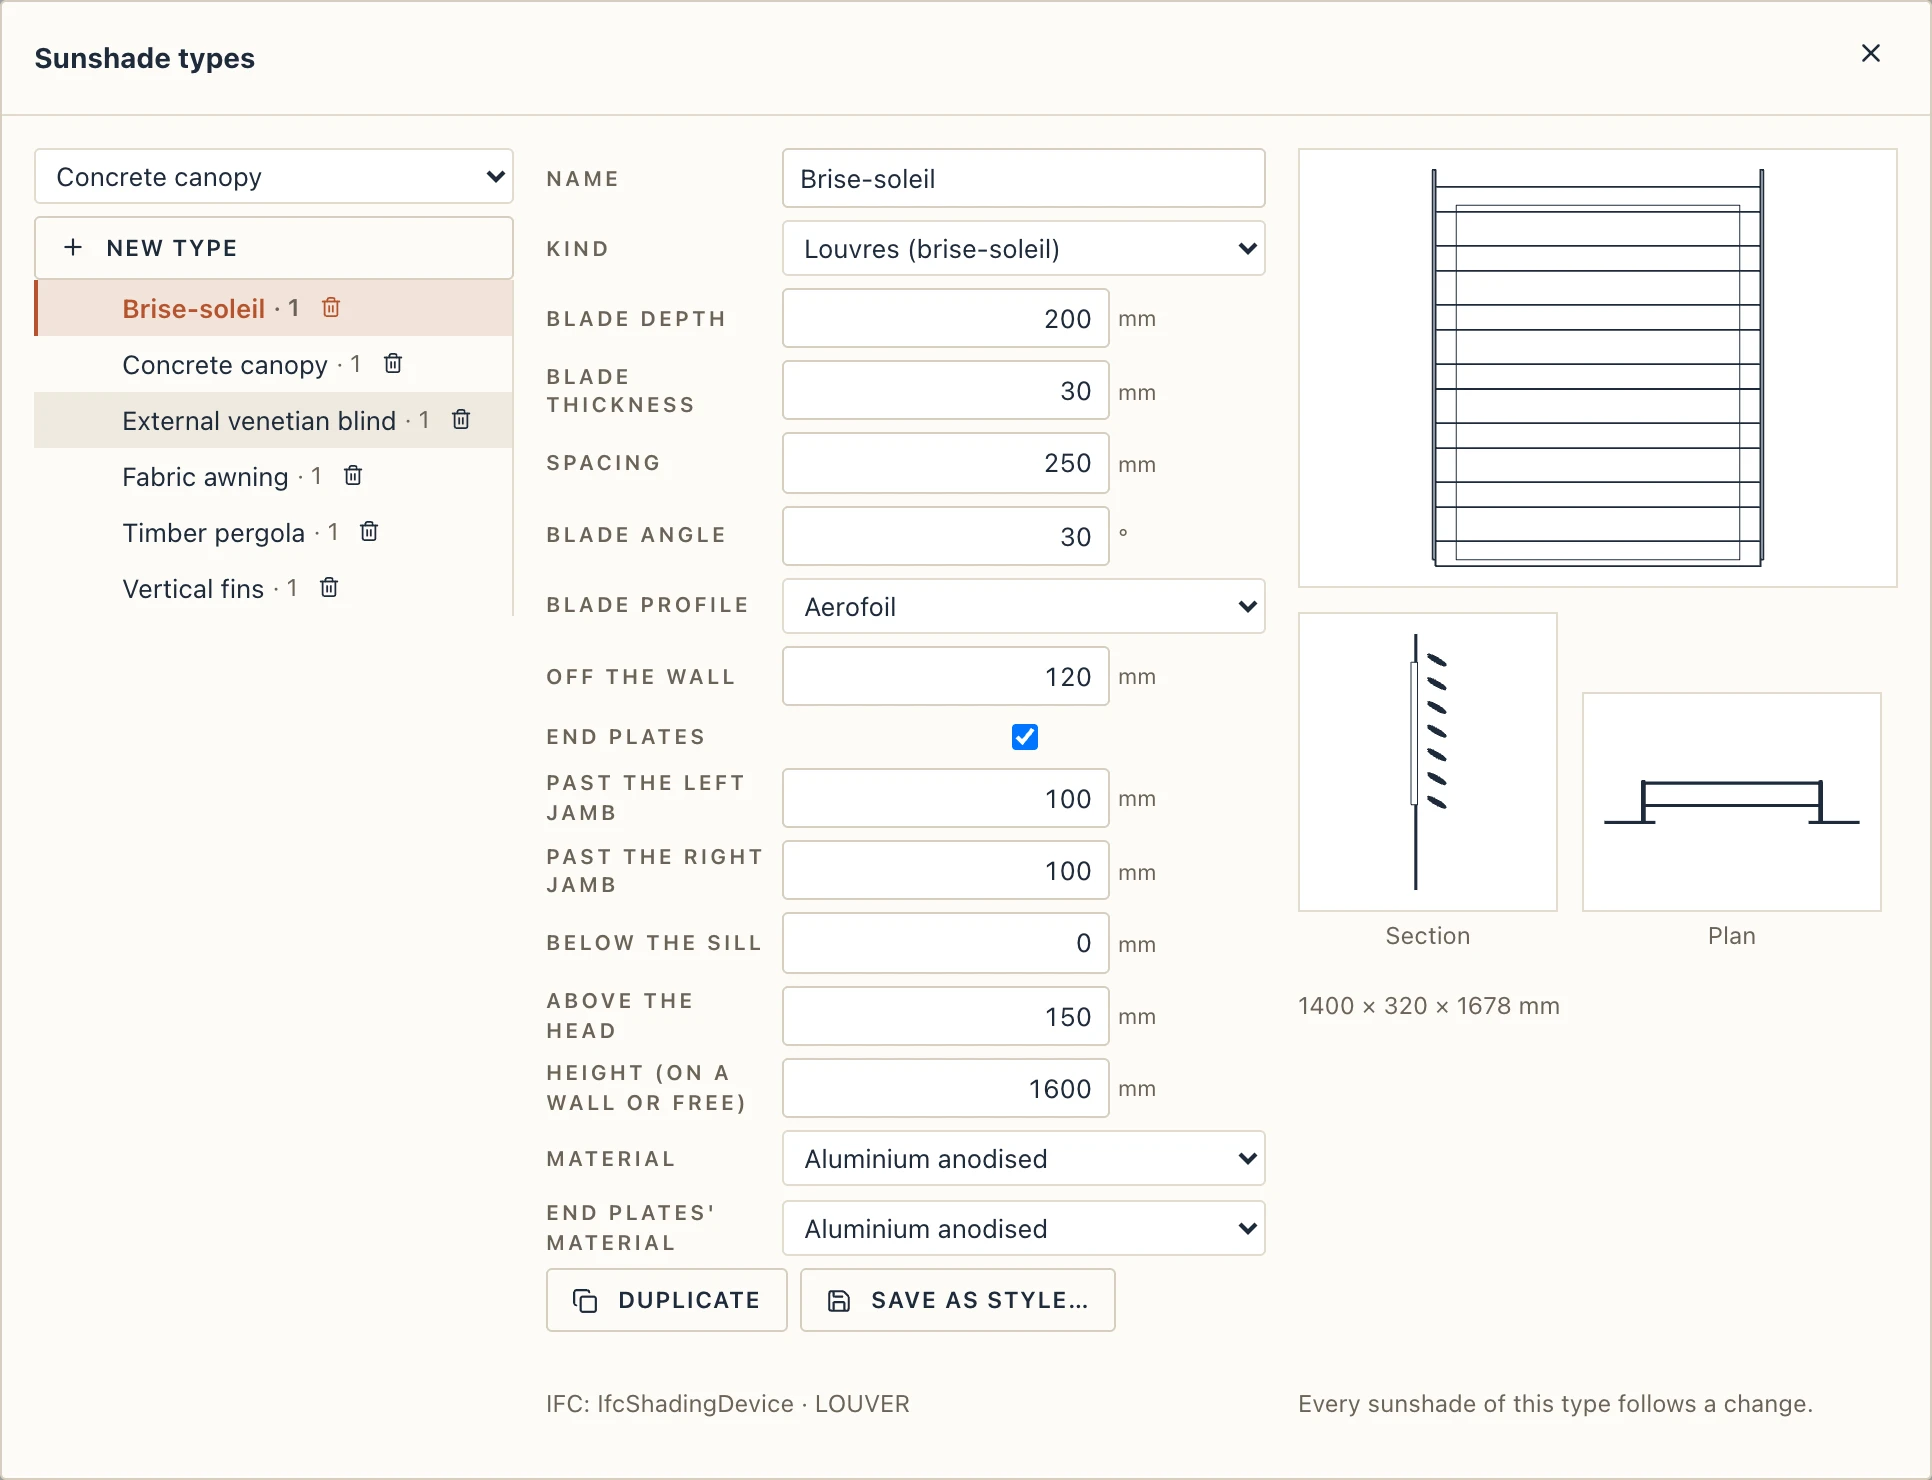
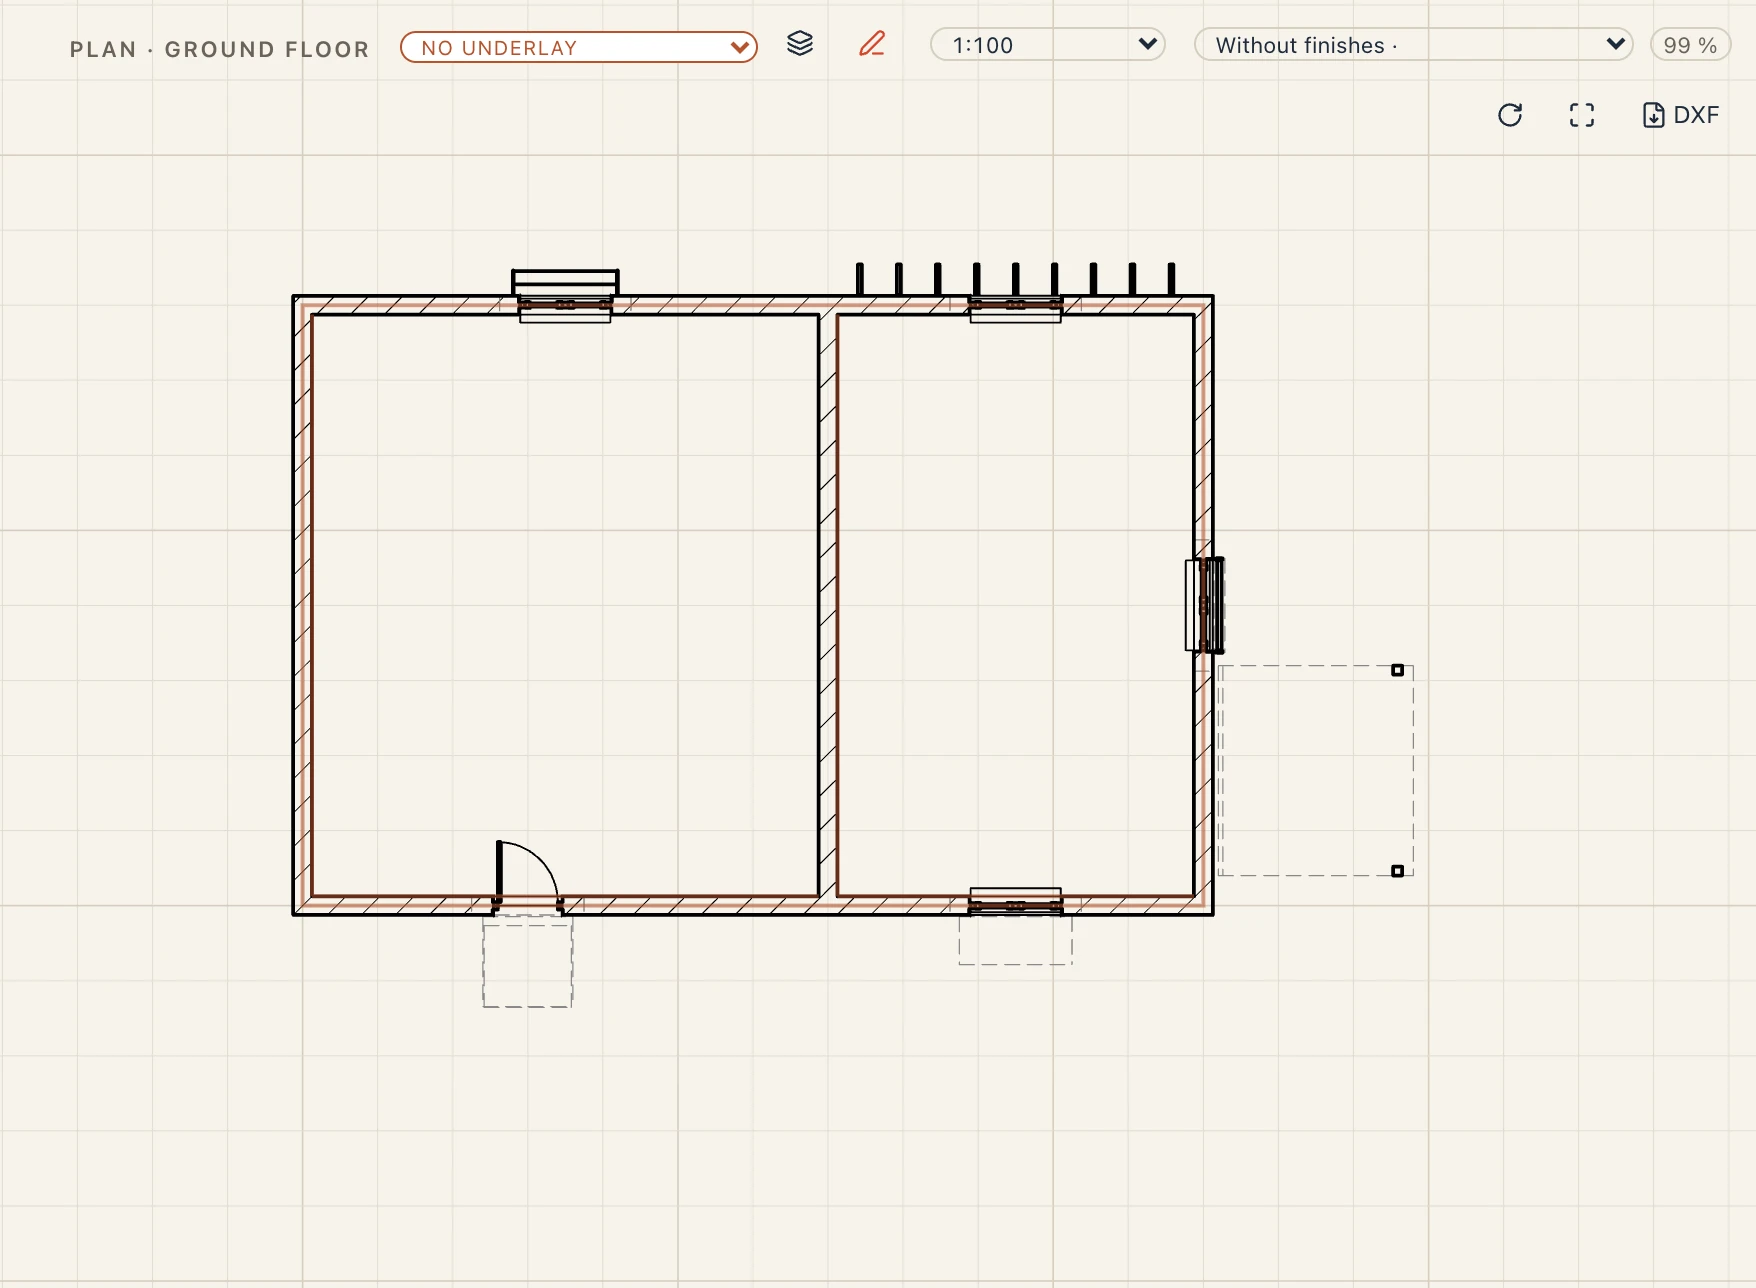
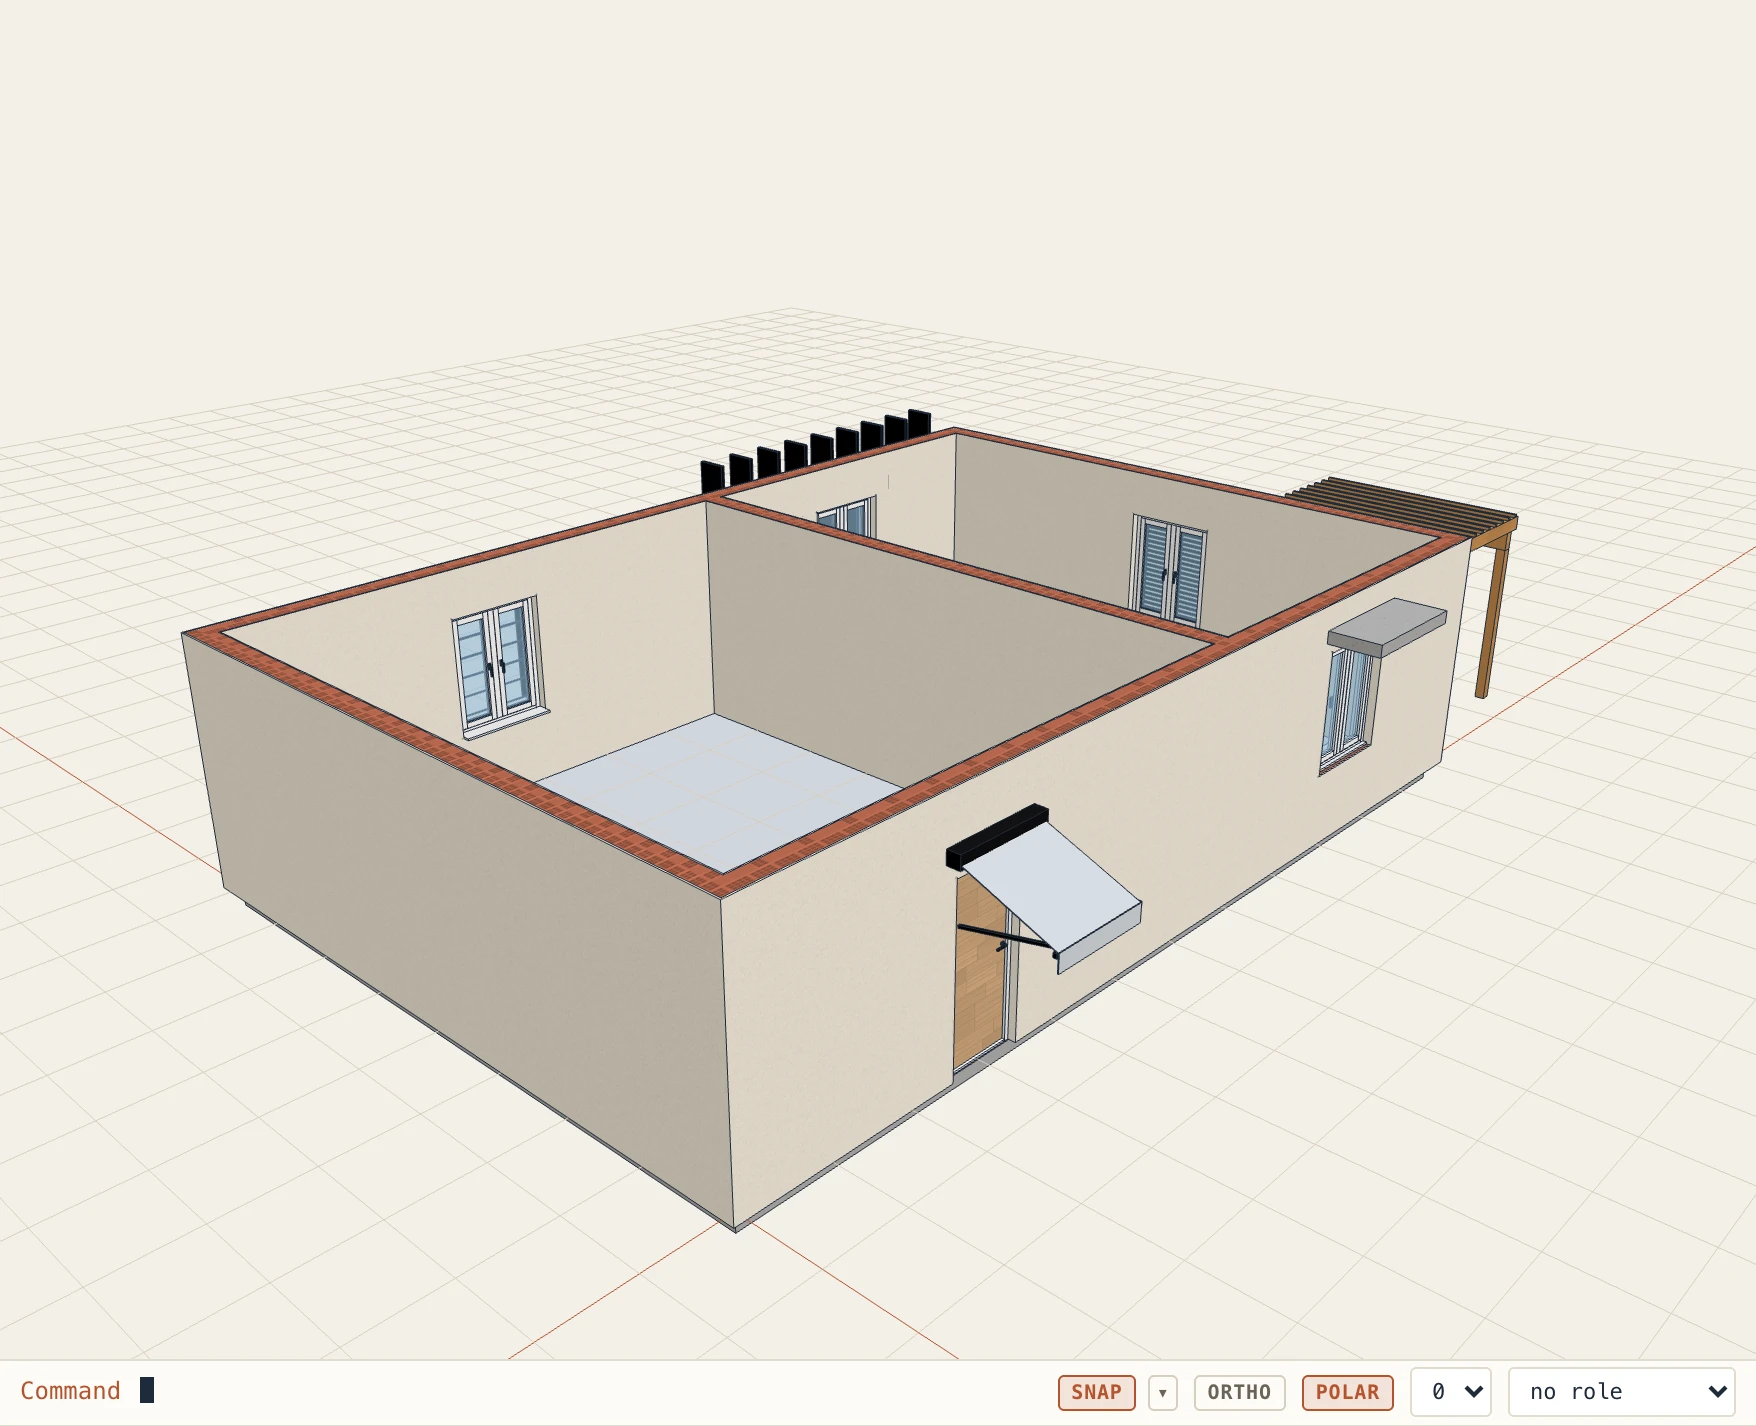
Plans draw a sunshade over the cut dashed, one crossing it cut (fins, a screen) and one under it seen; elevations, sections and 3D show its body, with the hatch of its material, and it casts its shadow with the rest (View → Sun and shadows). Sunshade schedule lists them by type with where they stand, their length and projection, how many and the area they shade; their quantities (length, projection, area, volume) take the cost articles of their type. In IFC they are IfcShadingDevice of an IfcShadingDeviceType: an awning AWNING, an external blind JALOUSIE, louvres LOUVER in IFC 4.3 (user-defined in IFC4), the others user-defined (Canopy, Fins, Egg-crate, Screen, Pergola); Lapin reads them back as they were.
Tags in plan
Annotate → Door & window tags puts a marker on each door and window of a plan: a line across the wall, the mark outside, and the size and sill inside. To change how the tags look, go to Manage → Drafting standards → Tags.
Editing a marker on screen
Each marker can be laid out by hand, part by part. Click its line or one of its texts to select it: every text then has a square grip (drag it to move the text) and a round one past its end (drag it to turn the text), and each end of the line has a grip (drag it to lengthen or shorten the line; the text at that end goes with it). Ctrl/⌘-click a grip to put that part back as it was. Each drag is one step to undo. With several markers of the same plan selected, a part dragged on one changes the same part of all of them.
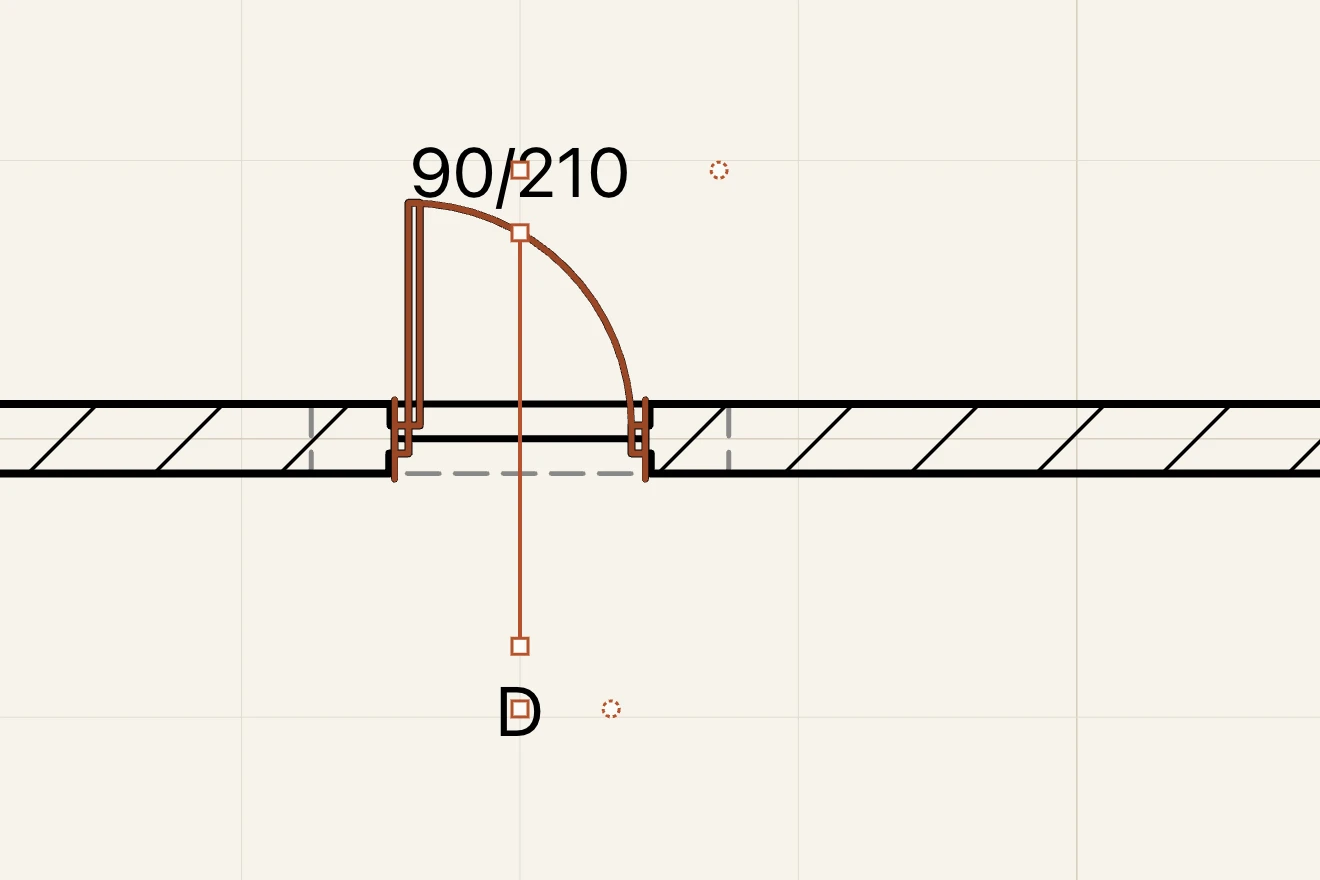
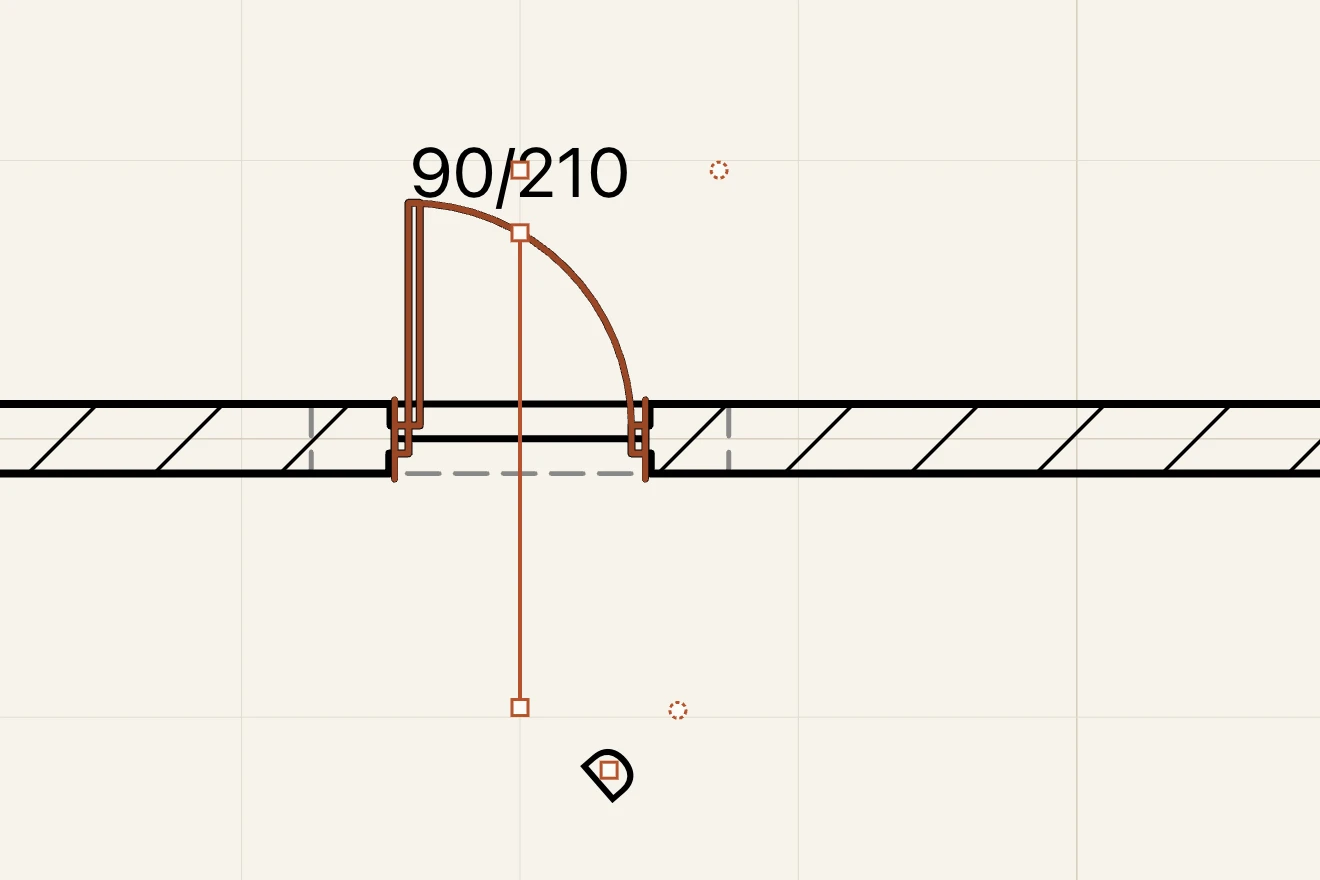
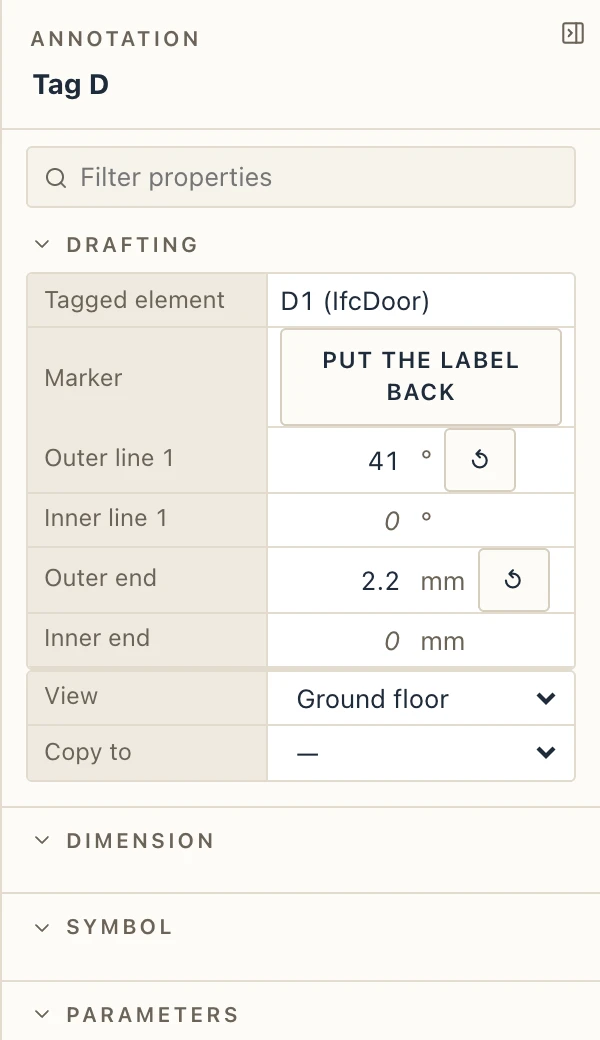
The edits belong to the marker, and so to that plan: the same door can be laid out differently in another plan. They are kept along and across the wall, so they follow the door when it moves, turns or flips to the other side. In the marker's properties, Marker lists its parts: type a text's turn in degrees or an end's reach in paper millimetres, put one part back with ↺, or all of them with Put the label back. The engine draws markers as edited, so sheets, PDF and DXF print them the same.
Whether the texts lie across the marker's line (along the wall, as by default) or along it is set for each tag type, in Manage → Drafting standards → Tags, column Text direction: perpendicular to the tag line or along the tag line. Either way they are drawn upright, never upside down; a text turned by hand is kept upright too.