User guide
Getting started
The start screen, a new project, the parts of the window, moving around a drawing and choosing your units.
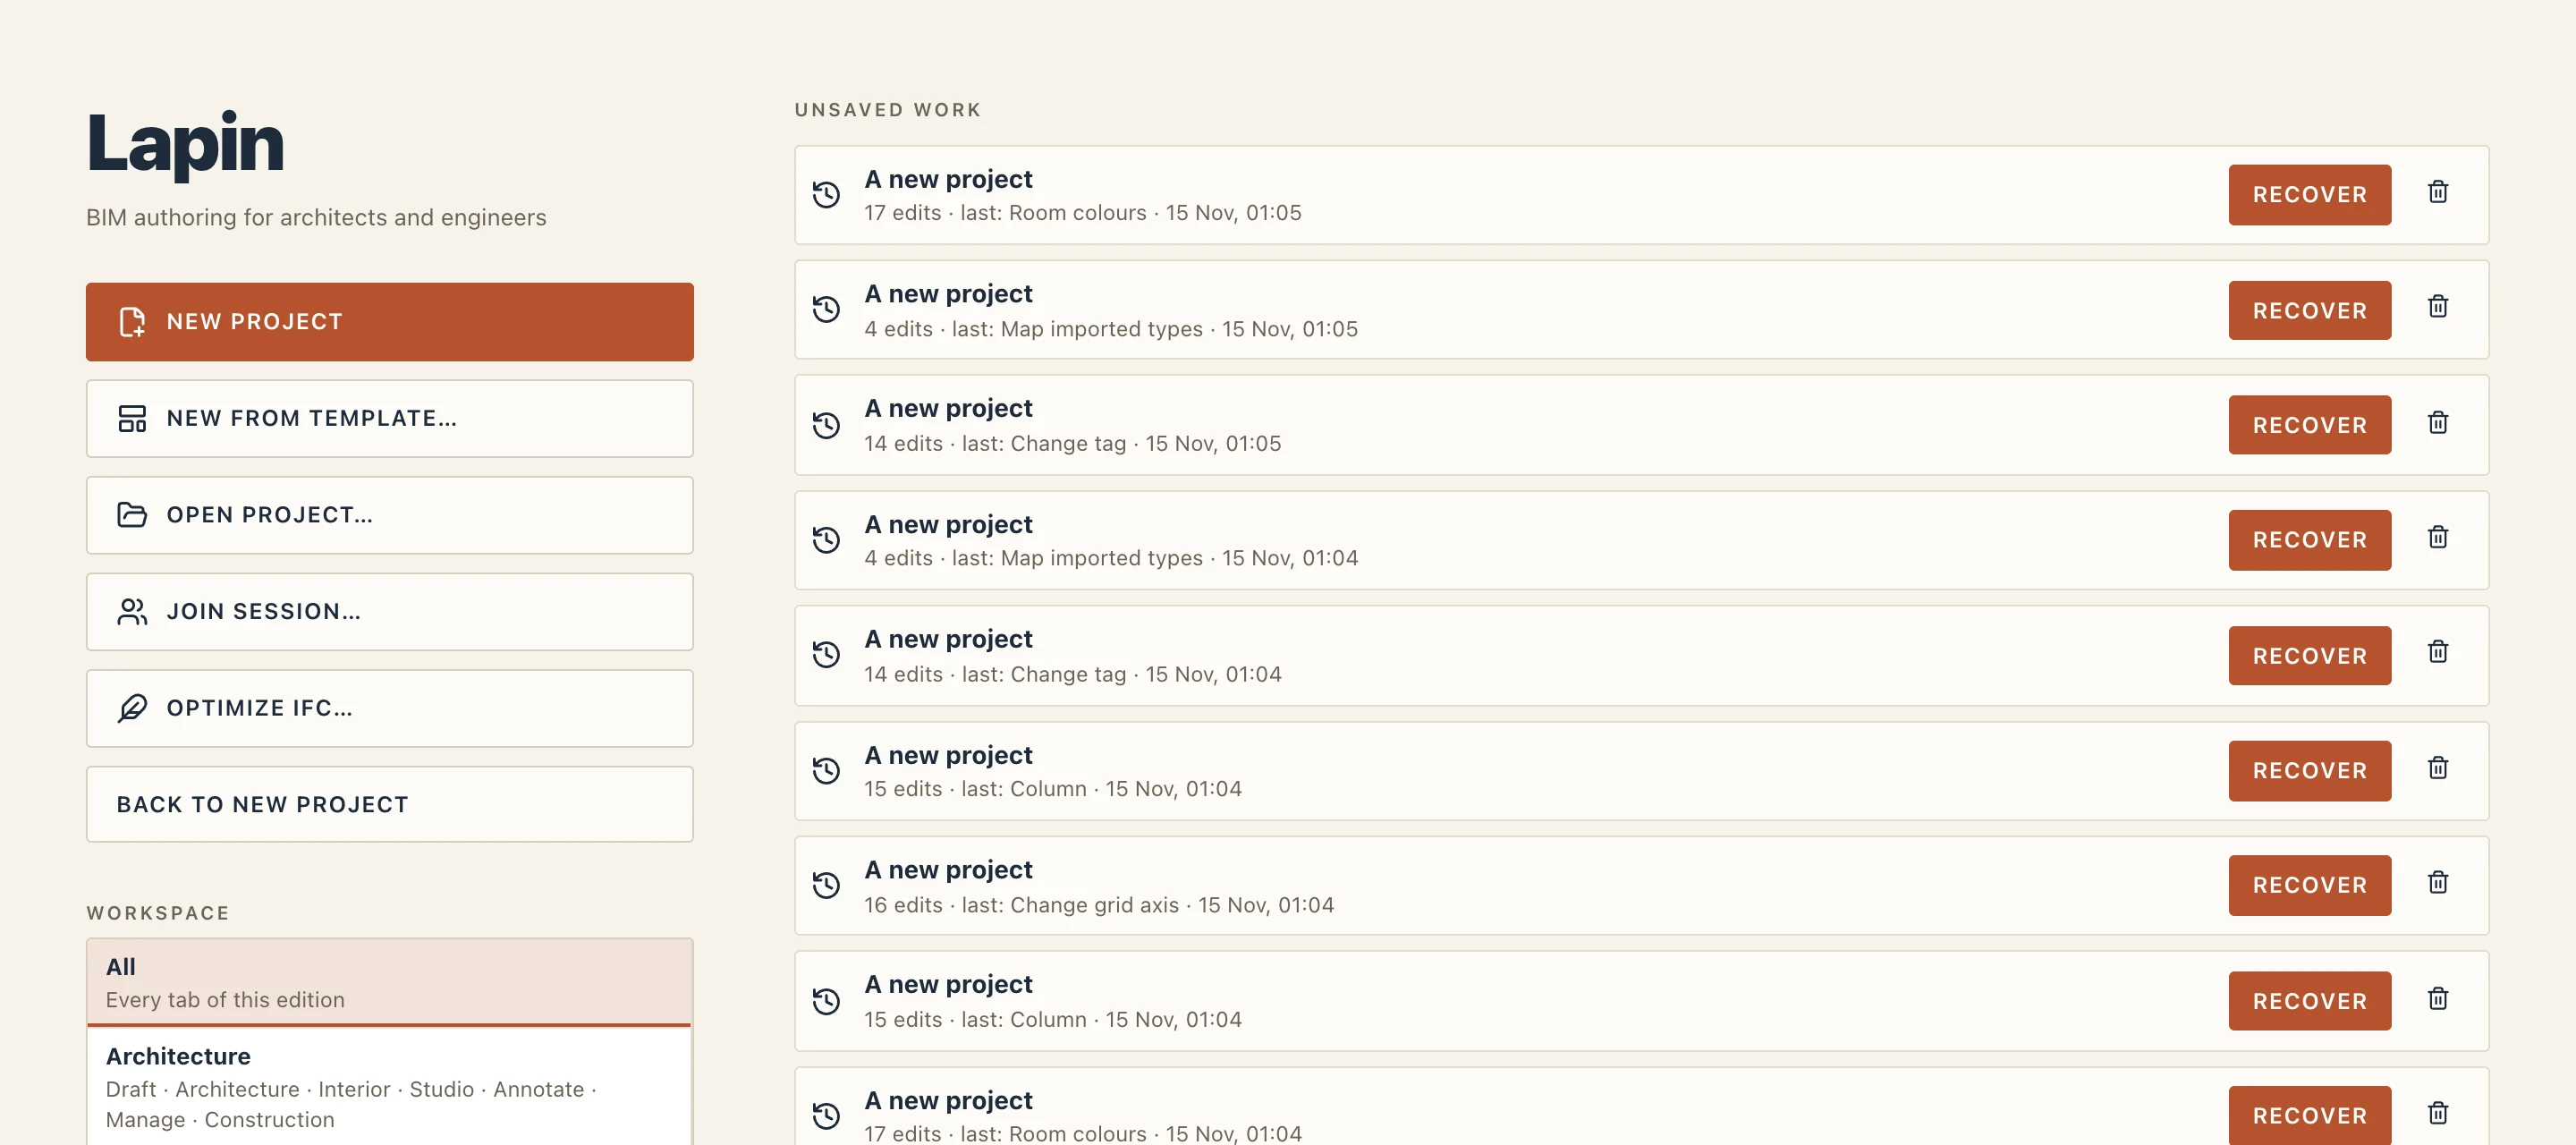
The start screen
When Lapin opens, it shows the start screen. New project starts an empty building. Open project… opens a .lapin file. The projects you have opened before are listed under Recent.
Start from gives a new project set up for its work: Single-storey house (foundations and a ground floor), Two-storey house (and a first floor), Apartment block (a ground floor and four floors), Hall or frame (one storey 6 m tall, in the Structure & rebar workspace), Drafting only (one level, in the Drafting 2D workspace) and Start from an IFC (a new project, then the IFC file to import). Each chooses its workspace too; the levels can be renamed, added or deleted later as in any project.
New from template… starts from a project template of your own: the types, materials, units, styles, storeys and sheets you set up once, with no element. Your templates are listed under Start from too, and the one chosen in File → Preferences… is what New project starts from. See Files, versions and recovery.
A new project already has three levels: Foundations (−1.50), Ground floor (±0.00) and First floor (+3.00). It opens on the ground floor's plan, ready for the first wall.
The window
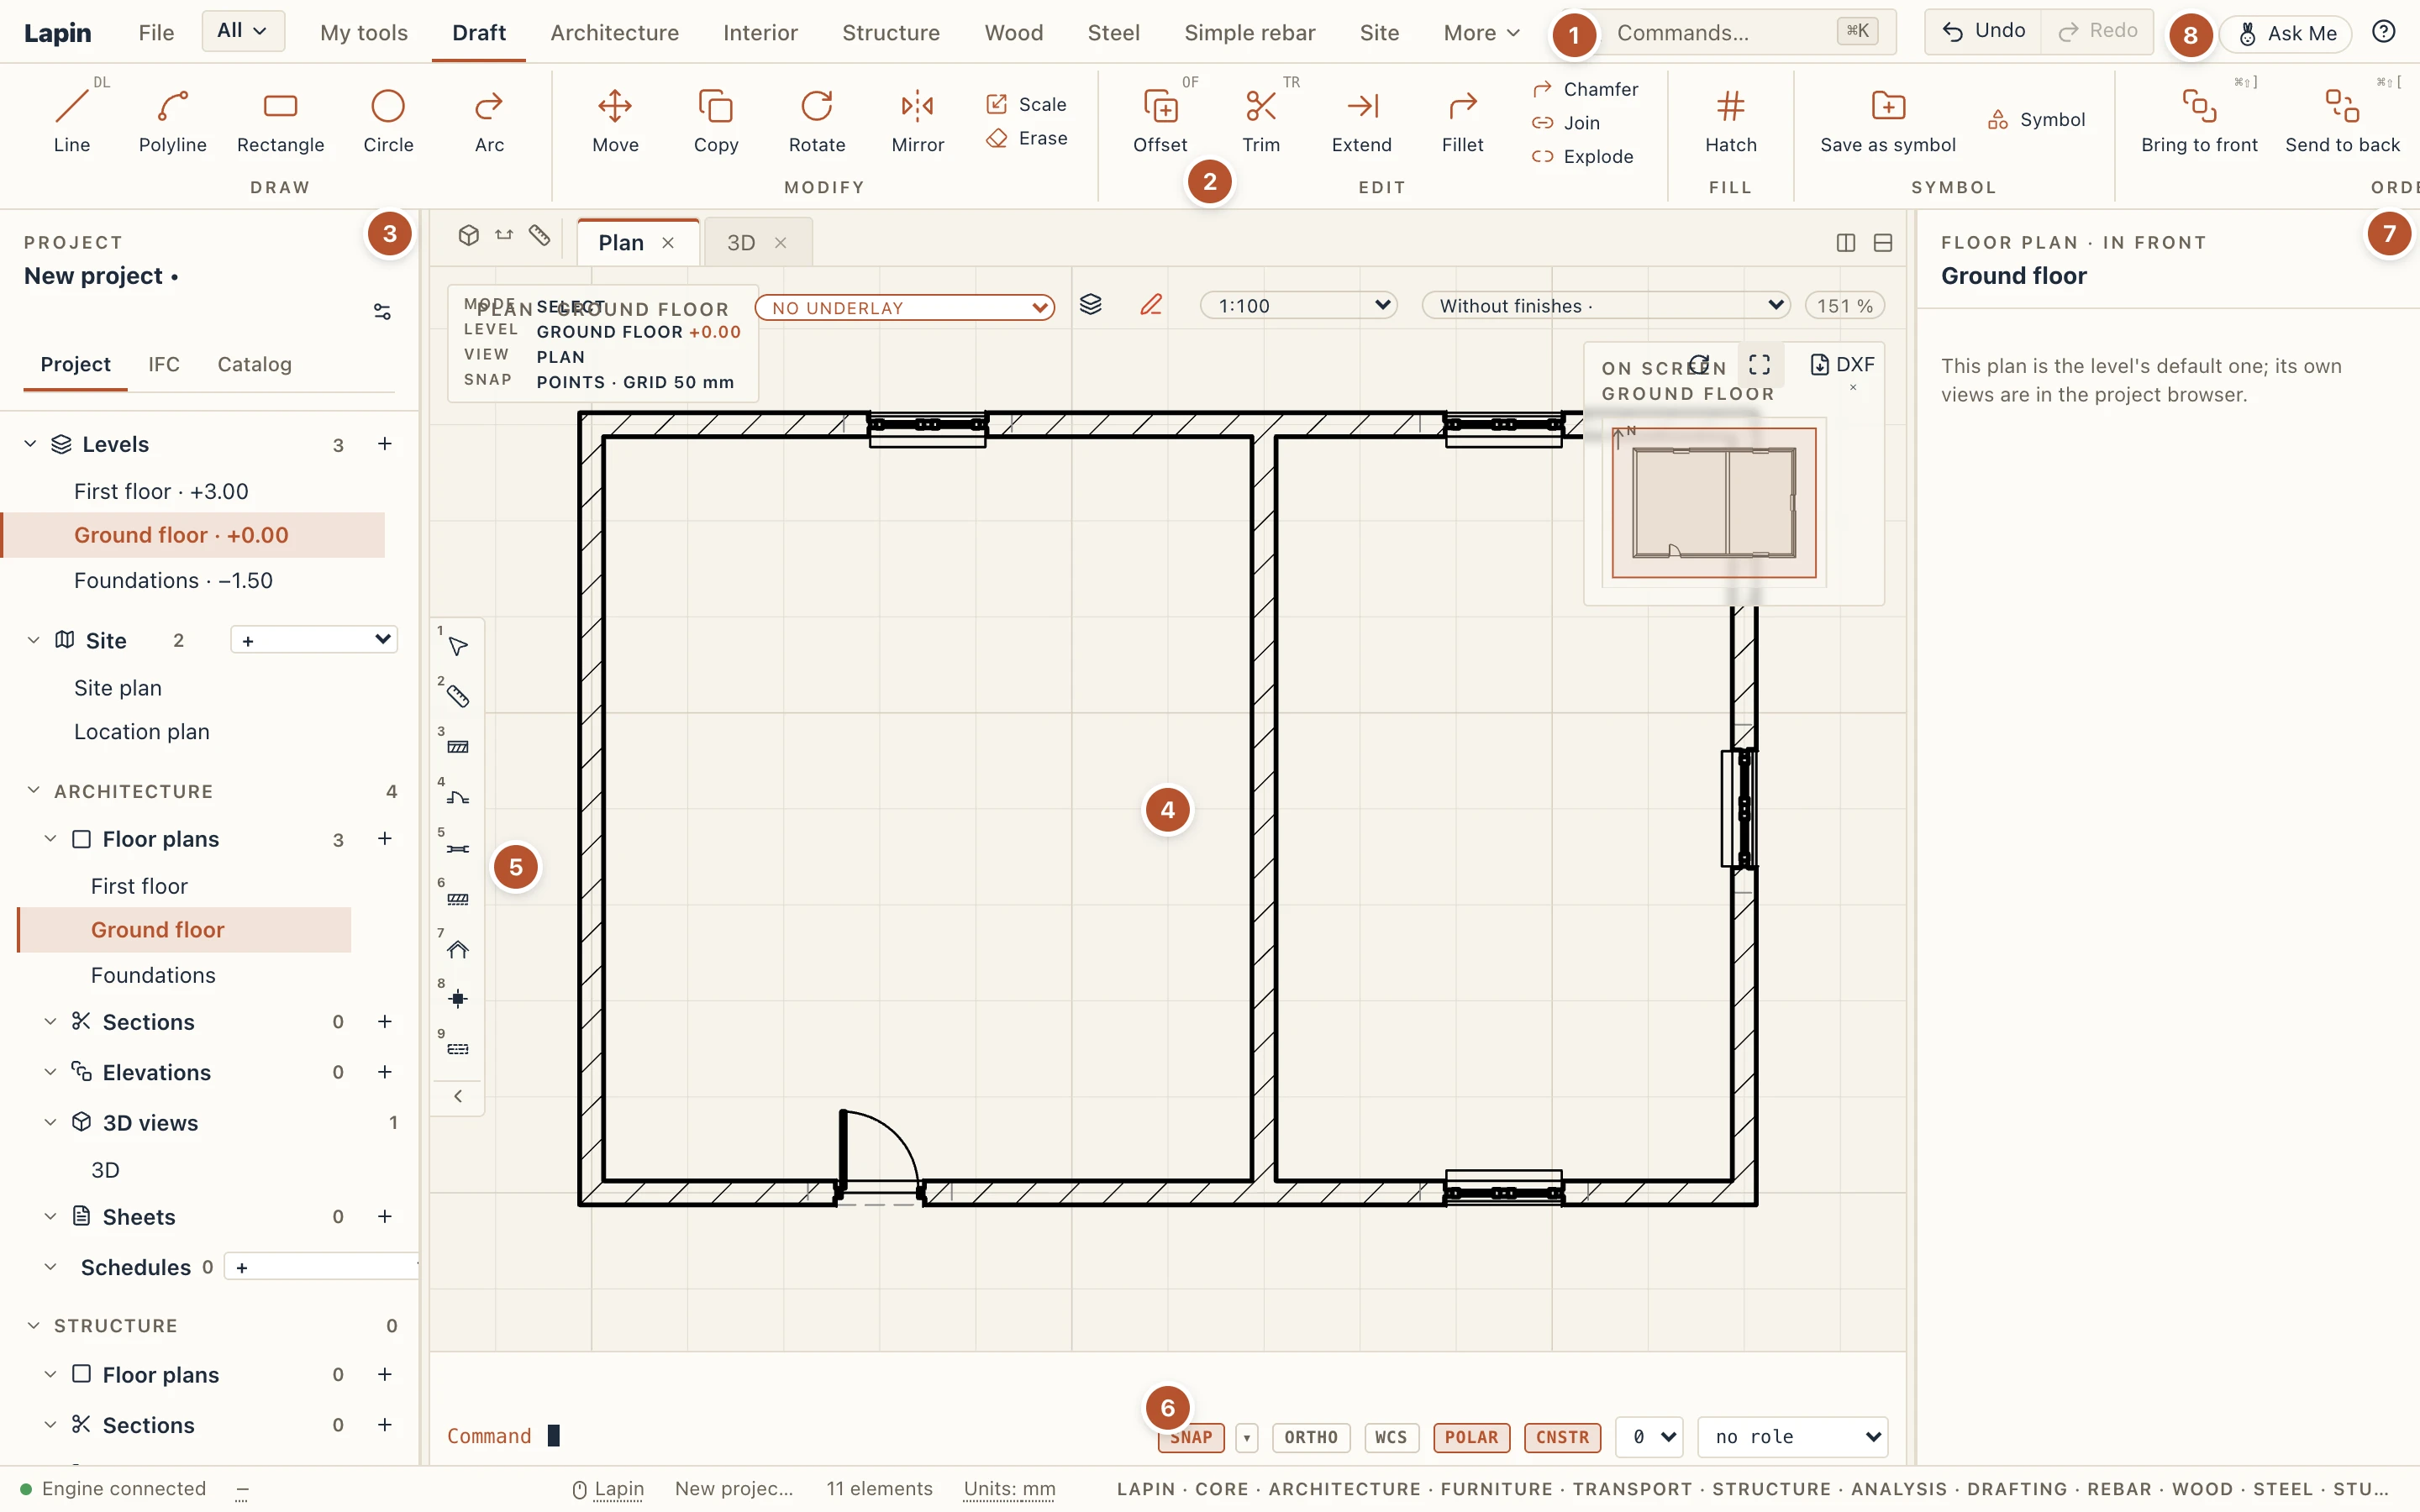
- The ribbon tabs. Draft, Architecture, Interior, Structure, Site, Studio, Annotate, Manage, Construction and View each group their tools. File opens, saves, imports and exports. Undo and Redo are at the right end of the same bar (Ctrl Z, Ctrl Y).
- The ribbon. It holds the current tab's tools. Hover over a tool to see its name and its keyboard letters.
- The project browser. It lists the levels, plans, sections, elevations, 3D views, sheets and schedules. Double-click one to open it in a tab. A project opens on the ground floor's plan, with the 3D view in a tab beside it.
- The view. This is where you draw: a plan, a section, a 3D view or a sheet. You can open several views side by side with the two buttons at the top right of the view.
- The hotbar. It gives the most used tools on the number keys 1–9.
- The command line. Type a tool's letters here and press Enter. While a tool runs, the line tells you what it needs next. See Drafting and the command line.
- The properties panel. It shows whatever is selected. With nothing selected, it shows the view in front.
- Ask Me. This is Lapin's help assistant. See Help and feedback.
Want more room for the drawing? View → Interface… chooses a more compact window, and the side panels fold away. See The interface and shortcuts.
Moving around
- Zoom. Turn the mouse wheel or pinch on a trackpad. Lapin zooms where the cursor is.
- Pan. Drag with the middle or the right mouse button, or with two fingers on a trackpad.
- Orbit in 3D. Drag with the left mouse button. With elements selected, the view turns round them; otherwise round the point of the model under the cursor. To move a selected element by dragging it, press and hold briefly on it, then drag; a plain drag always orbits.
- Show the model. Press the Fit button or double-click the middle button: the view frames the model's main body, so the building fills it even when something stands far away (a survey point kilometres off, a text an imported drawing left at its origin, a stray line). What is left out is counted in a message. ZE frames everything, those far things included. A plan opens framed the same way, and so does the 3D view.
Units
Lapin works in millimetres unless you choose otherwise. To change the units, open Manage → Drafting standards → Project → Units, or click Units in the status bar at the bottom of the window. You can choose millimetres, centimetres, metres, feet and inches, or inches. Area rounding on the same tab rounds room areas to 0.1, 0.5 or 1 m² (Rooms).
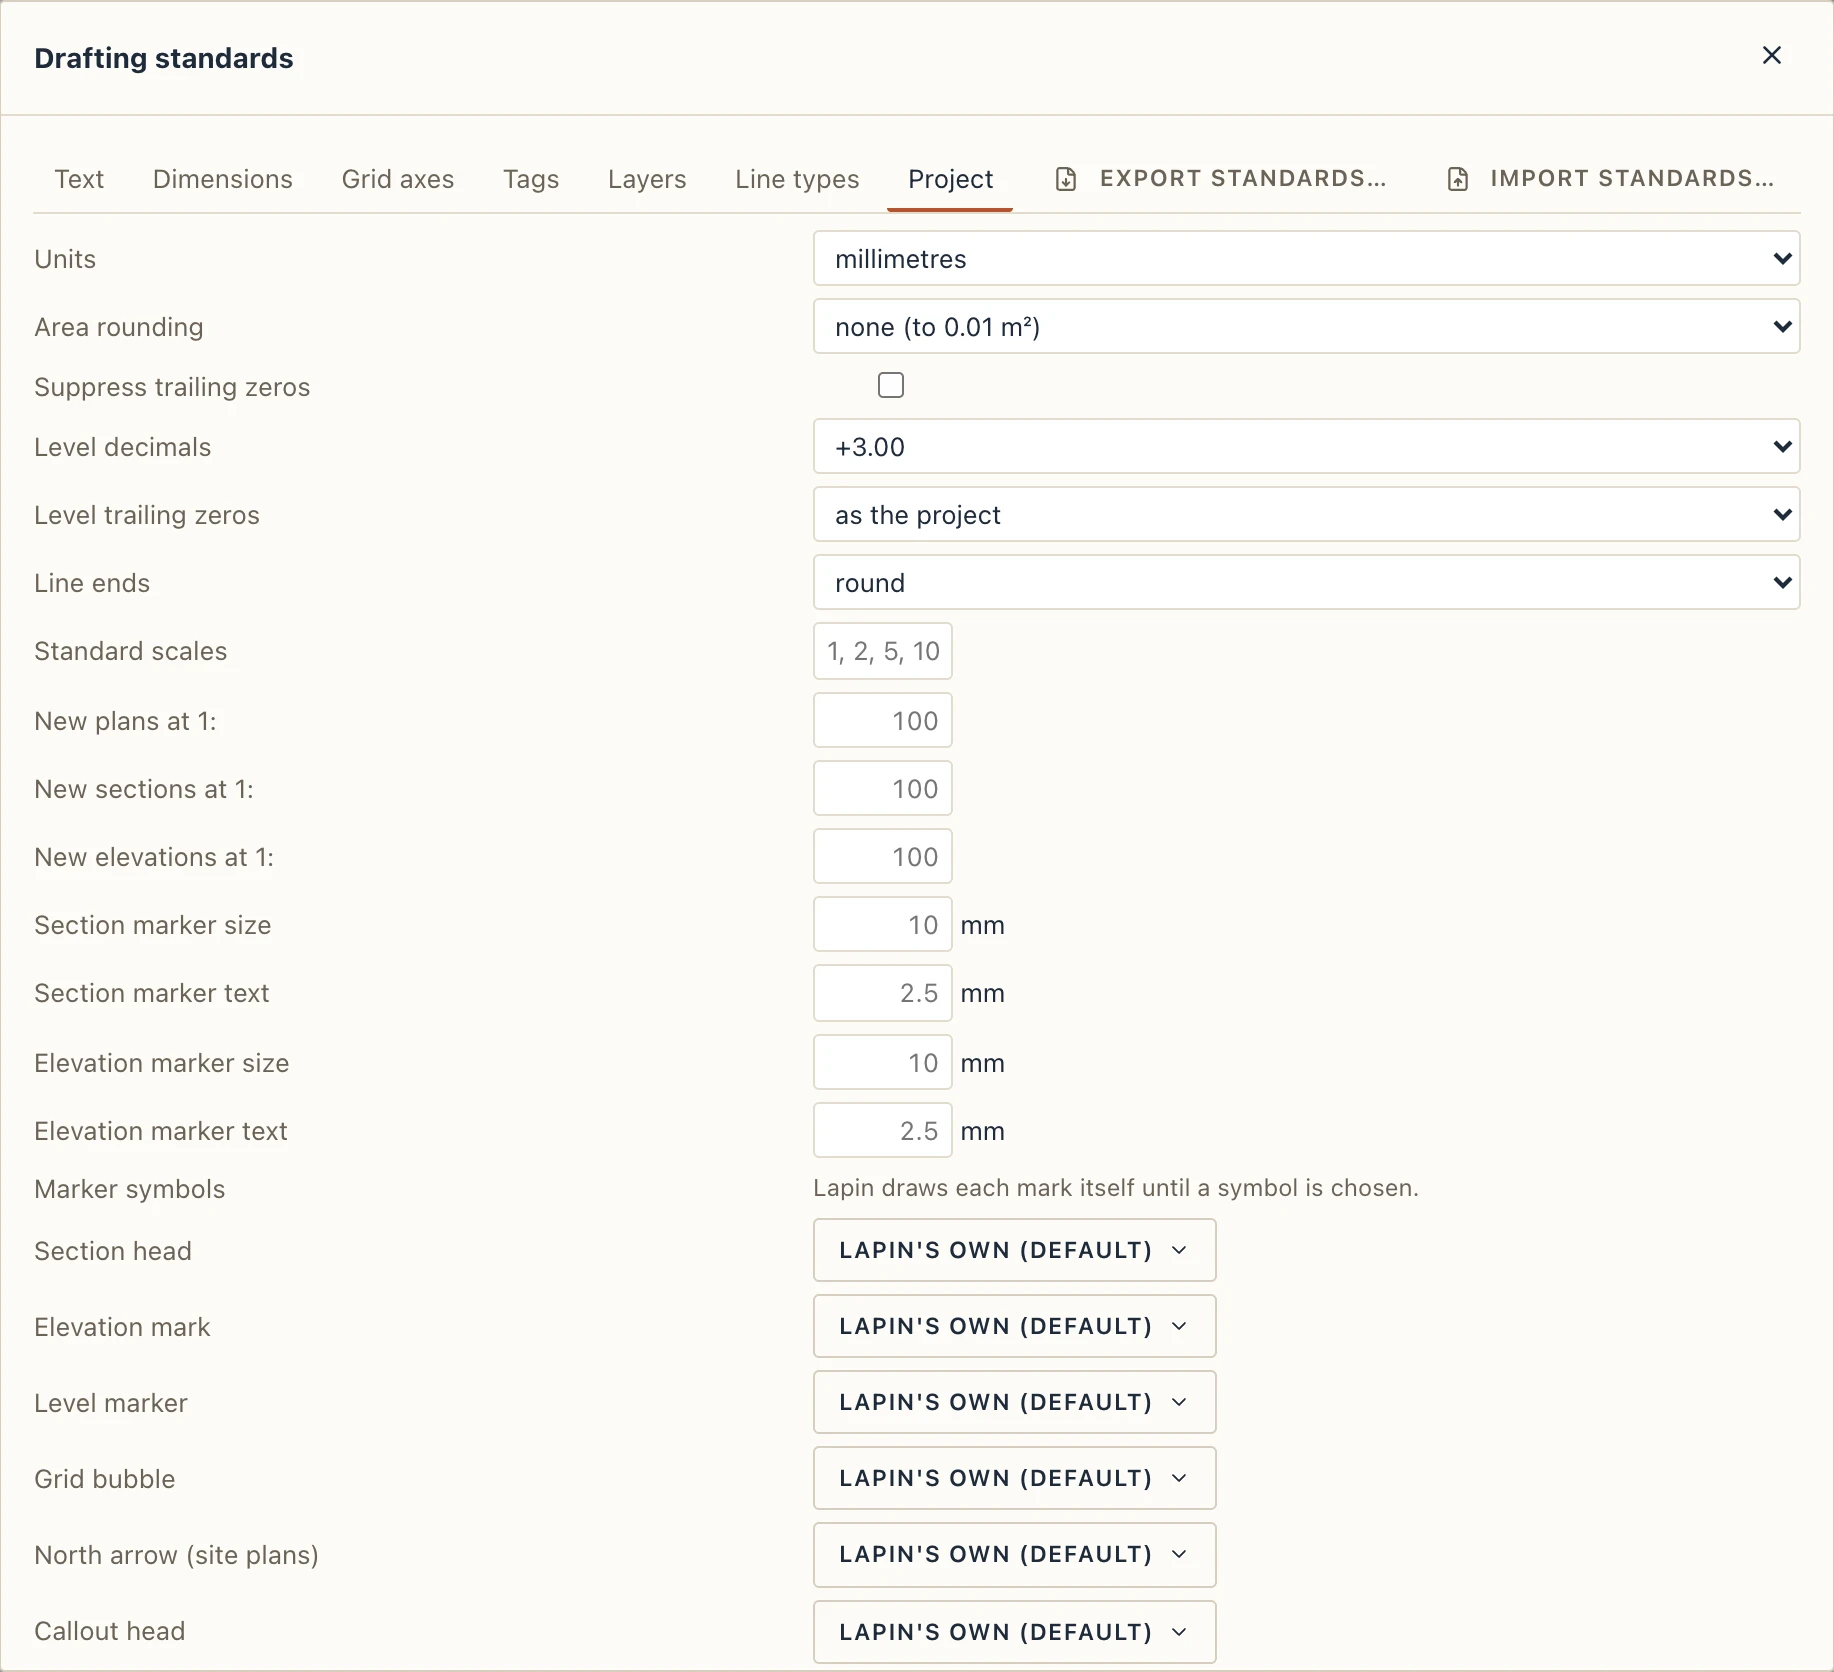
Every length follows this setting: the panels, the values you type while drawing, the command line and the dimensions. The model itself is kept in metres, so changing the units never changes your building. Levels and grid axes follow it too.
In millimetres, centimetres and metres, lengths are kept and shown to a tenth of a millimetre: a 12.5 mm board stays 12.5 mm (1.25 cm), and whole values are written without decimals. Feet and inches go to the nearest 1/16". Dimensions on drawings are rounded as their dimension style says.
Saving
File → Save (Ctrl S) writes a .lapin file. See Files, versions and recovery.