User guide
Sheets, PDF and DXF
Lay views out on sheets with a title block, and print them to PDF or DXF.
Making a sheet
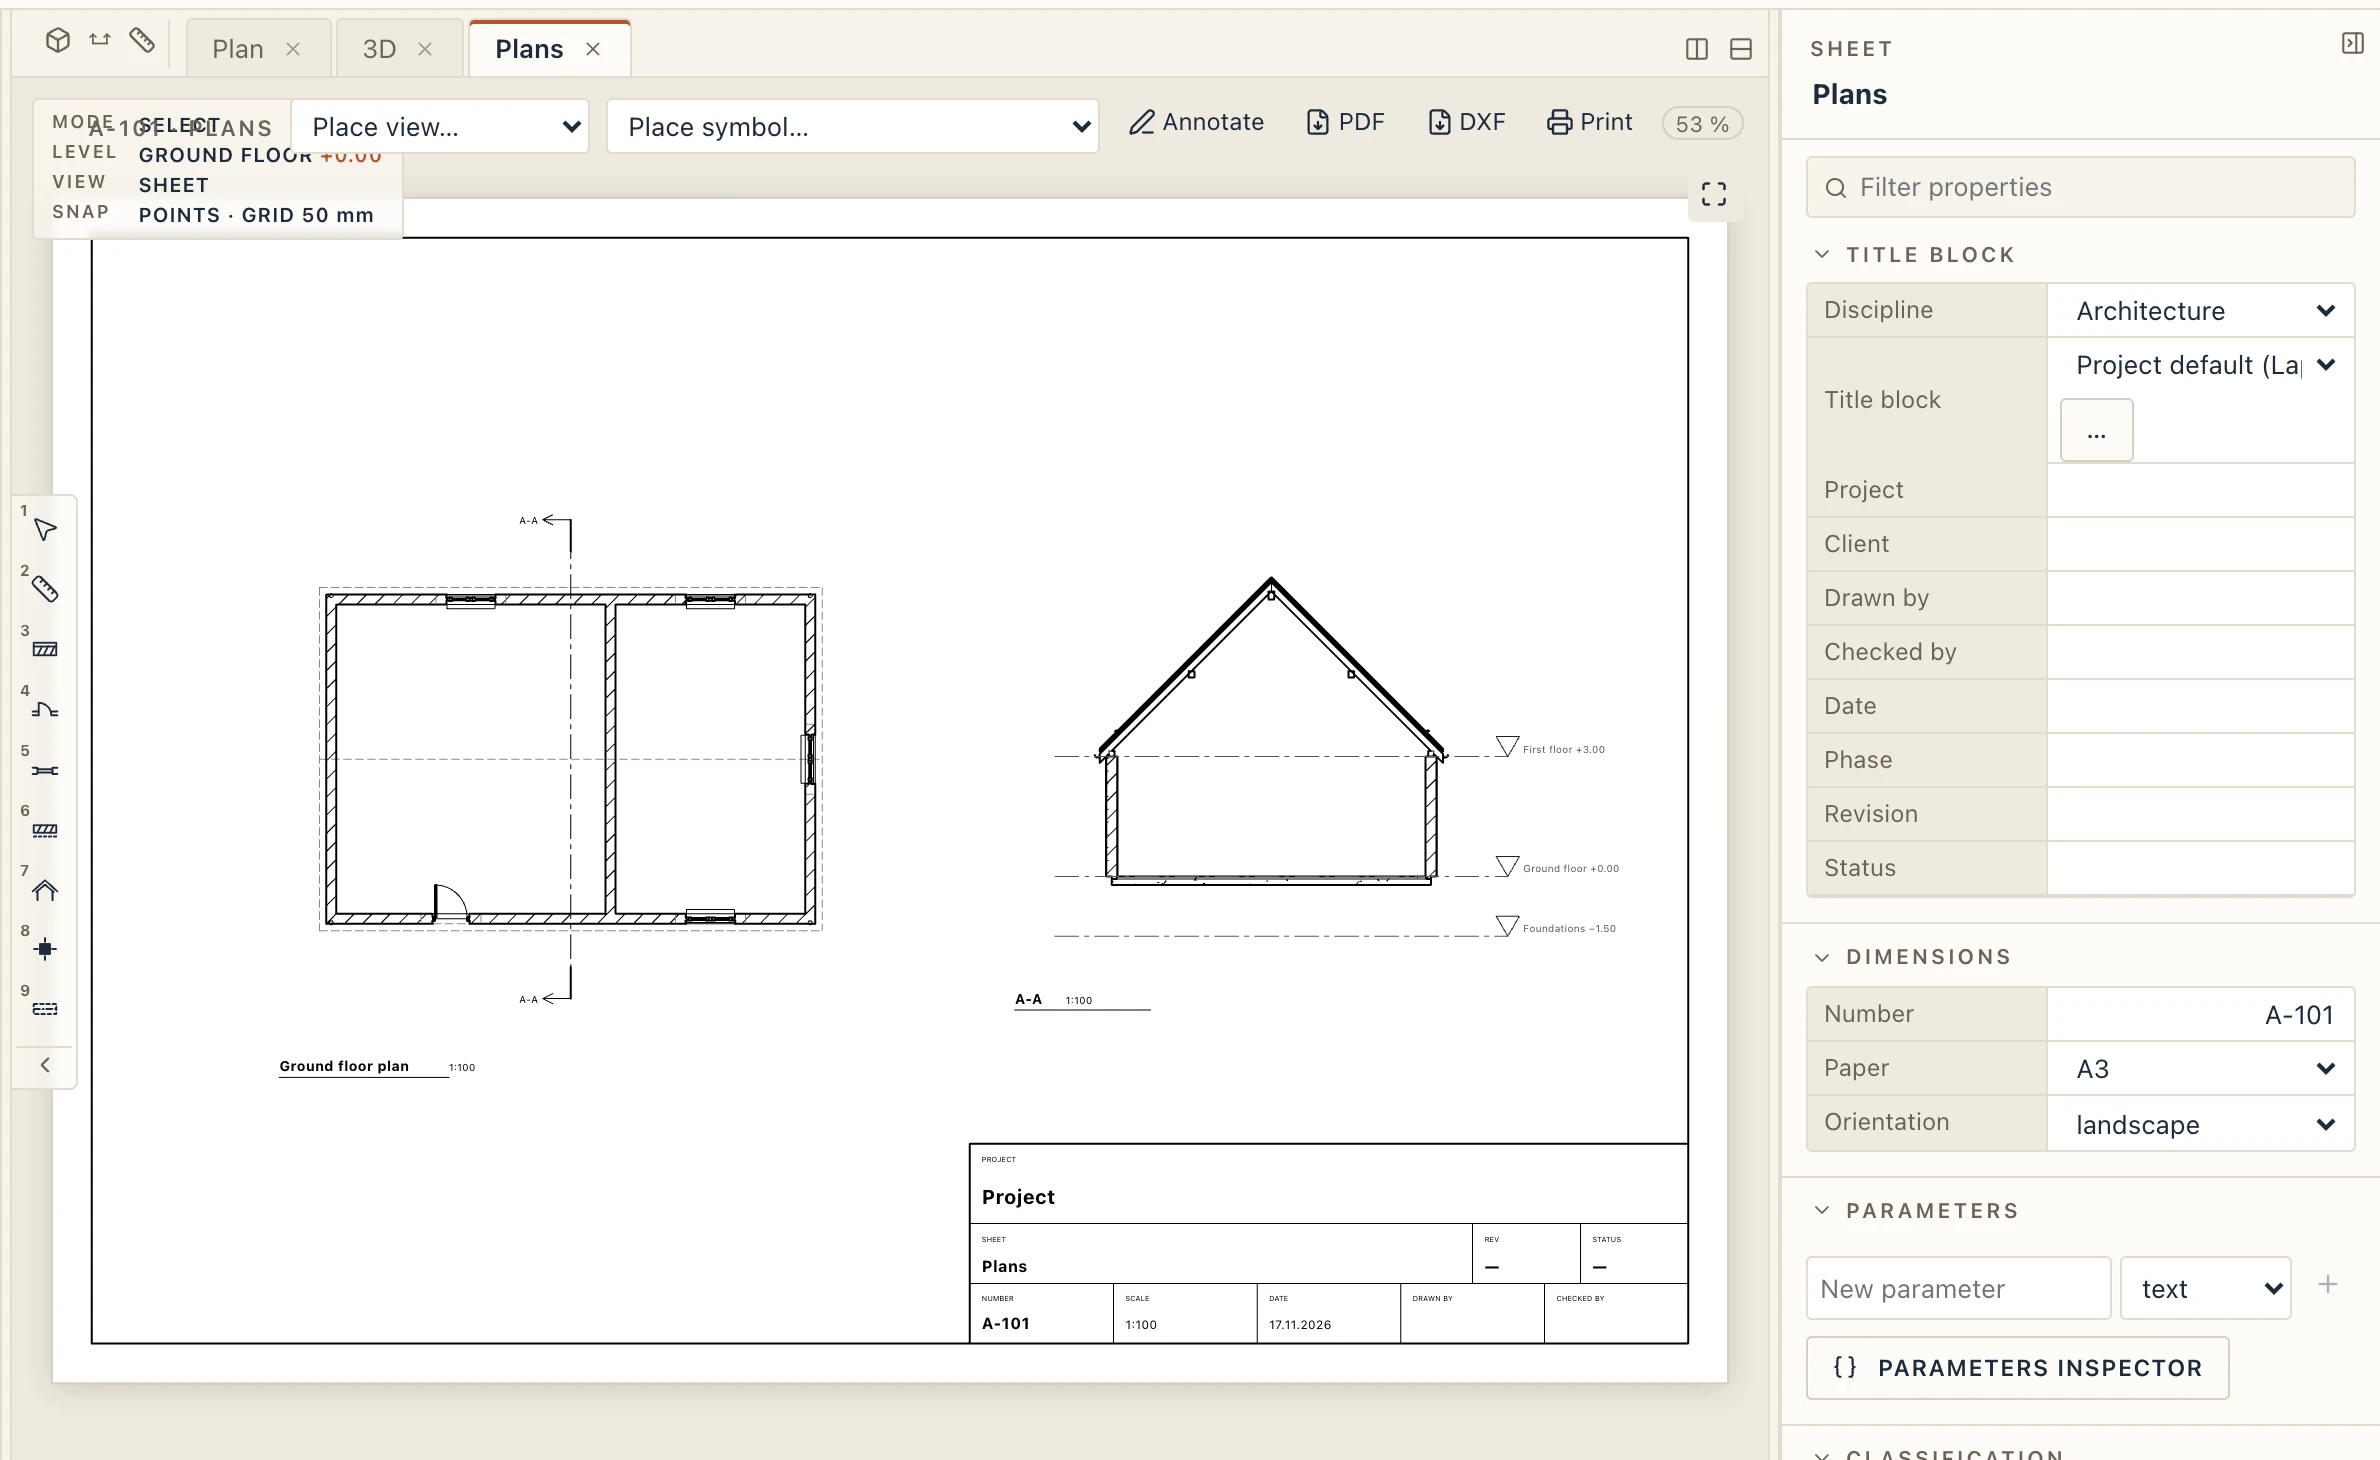
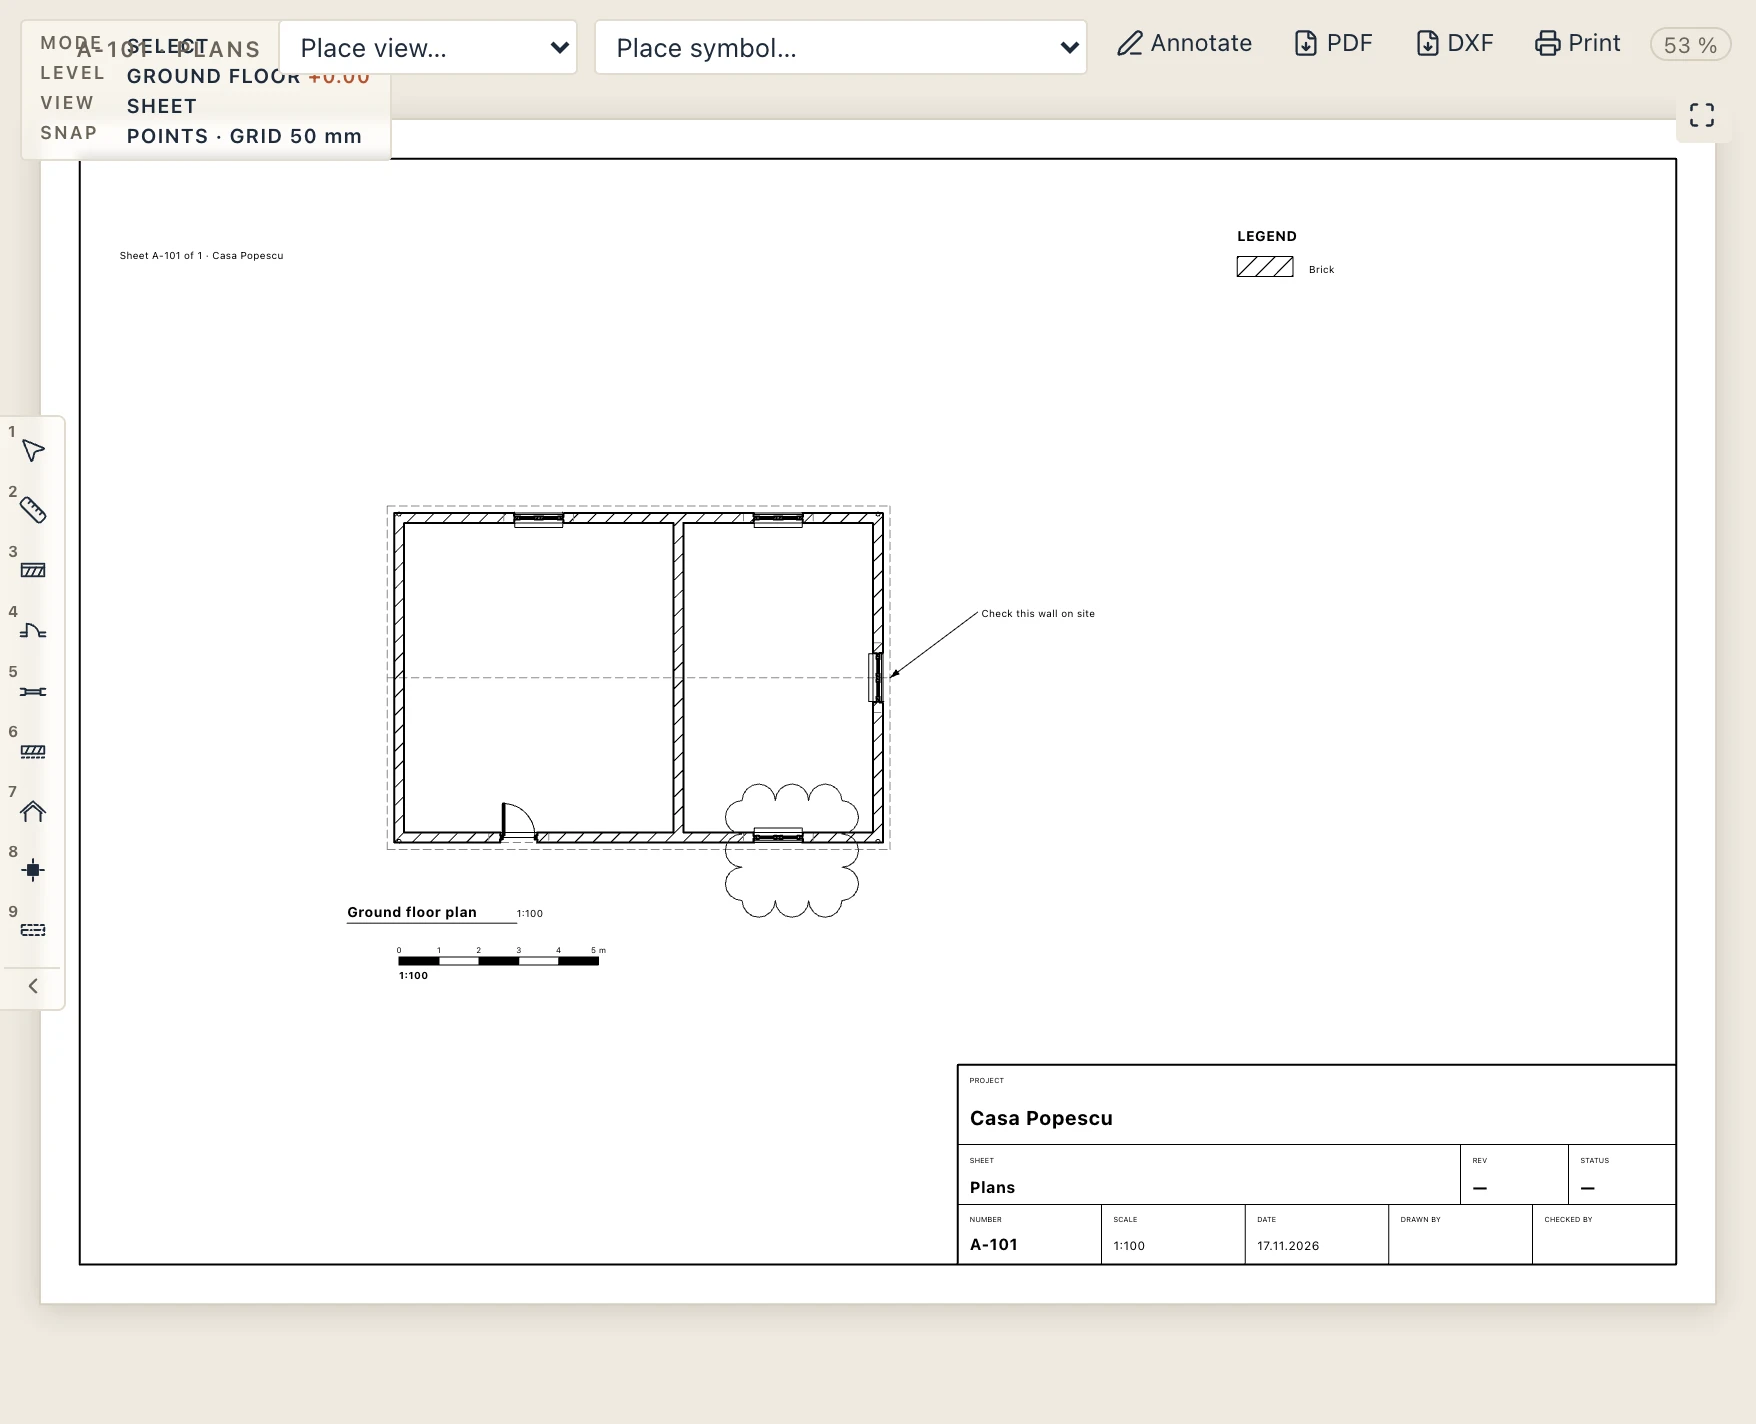
Click + next to Sheets in the project browser. To place a view, drag it from the browser onto the sheet, or choose it in Place view… in the sheet's bar. Each view keeps its own scale and stays linked to the model, so the sheet changes when the model does. On the sheet, drag a view to move it: the view goes alone, with its title, while the frame, the title block and the other views stay; it snaps to the frame's edges and middle and to the other views, and the arrow keys nudge it by 1 mm (10 mm with Shift).
A saved 3D view goes on a sheet the same way. It is drawn in lines, as an elevation is, from the camera the view keeps (the camera button beside it in the project browser, Keep the camera as it is now, saves the camera as it is). An orthographic camera shows the whole model seen from that side, an axonometric at the view's scale (1:100 until you set another). A perspective camera shows what its field of view takes in, at its true size where the camera looks. The drawing follows the view's Visibility / Graphics, the elements hidden in it, the storeys it shows and its section box, and prints the same in the PDF. A 3D view saved without a camera is seen from the south-west, from above. Double-click it on the sheet, or click ✎, to open it in 3D with its camera.
Select the sheet to fill in its title block in the properties panel: the project, the client, who drew it, who checked it, the date and the revision. Its number, paper and orientation are set there too. The paper is an A size (A0 to A4), one of ISO's long sheets (A0×2, A1×3, A2×3, A3×3, A3×4, A4×3), a North American size (Letter, Tabloid, ARCH D, ARCH E), or custom, with its Paper width and Paper height in millimetres. Left empty, the project field shows the project's name: the name given to the project, else its file's name.
What a view shows
A view on a sheet shows what you choose, without dragging it blind:
- Crop it on the sheet. Click a view: handles appear at its corners and edges. Drag them and the box takes more or less of the view, while the drawing stays where it is on the paper. Shift-drag inside the view to slide the drawing within its box.
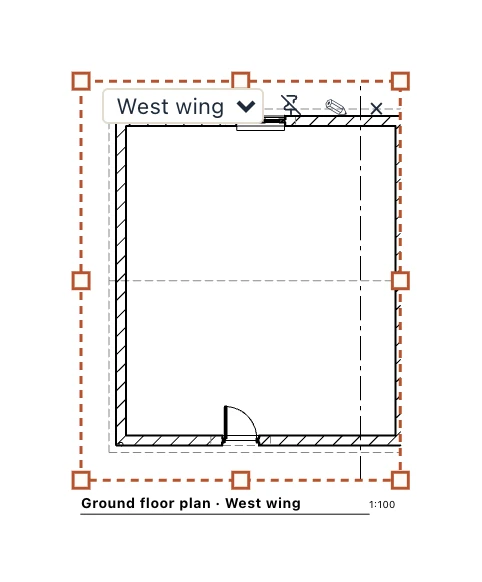
- Draw its boundary in the view. Annotate → View boundary (VB): draw a rectangle on a plan, section or elevation and give it a name, unique in the project. In Place view… the view is then offered with each of its boundaries ("Ground floor plan › East wing"), and a view placed that way shows exactly that rectangle and follows it when you move or resize it in the view. The same view can go on several sheets, one boundary each. A placed view switches between its boundaries, or to a free crop, in the list on its box. Boundaries show on the screen only, never on paper.
- Pin it. The pin on a view's box keeps it where it is: it is still picked, but not moved, nudged or cropped by mistake.
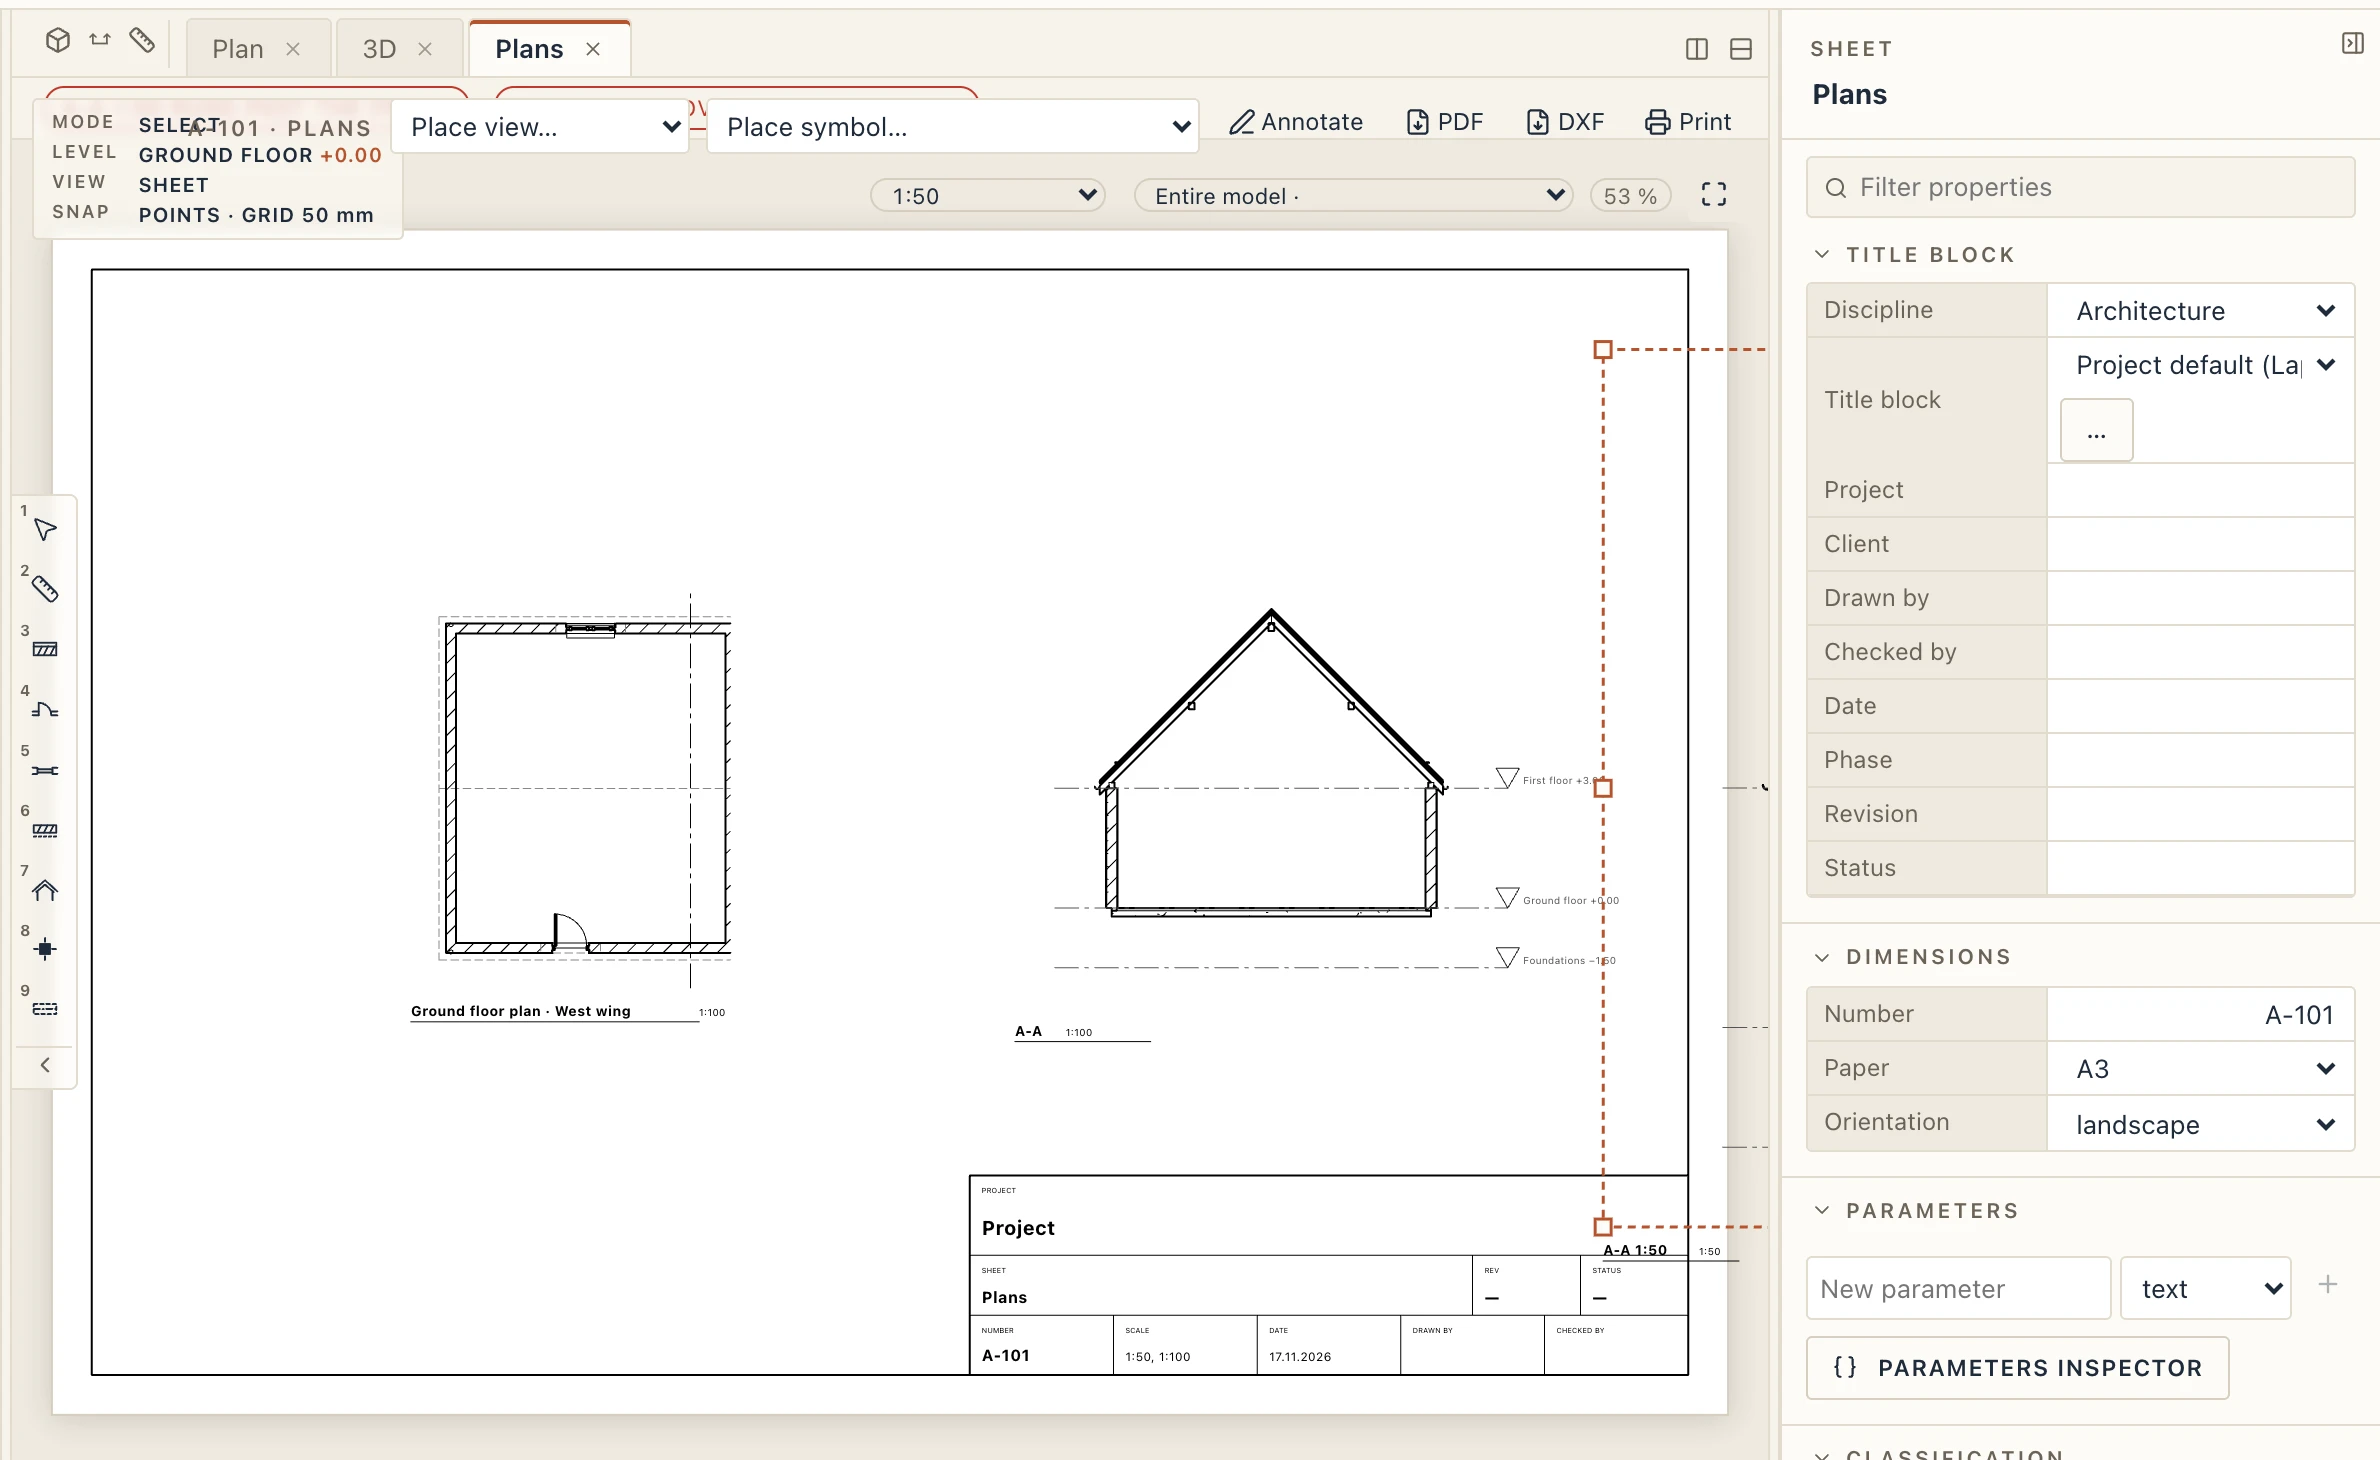
- Place it again at another scale. Right-click a view on the sheet and choose Place again at 1:25… (the project's other standard scales are offered), then drag a rectangle round the part to show, or just click to keep the whole view as it is cropped (the bar says so). Lapin duplicates the view with its annotations, gives the copy that scale, crops it to the part and places it on the same sheet beside the original, to its right if there is room (else left, below or above), in one undo step: a plan at 1:100 and its corner at 1:25 on one sheet. The copy is named after the view and its scale ("Ground floor 1:25"). In the project browser, right-click a view that is on a sheet for the same, with the view as it is cropped; its sheet opens.
- Place a detail. A detail view made by a callout (View → Detail callout, see Views) goes on a sheet like any view. The callout's head in the view it was called from then writes the detail's number on the sheet and the sheet's number ("3 / A-501"), on the screen and on paper; before it is placed it shows "–". Its number is its place among the sheet's views; moved to another sheet, the head follows.
- Take a view off the sheet. Click a view and press Delete (or Backspace): the view comes off the sheet, and only the view; the model, the view itself and the sheet stay. Ctrl-click (⌘-click on a Mac) more views first to take several off together; it is one undo step. The × on a view's box does the same for that view. A sheet is deleted from the project browser: its trash button, beside the sheet's name.
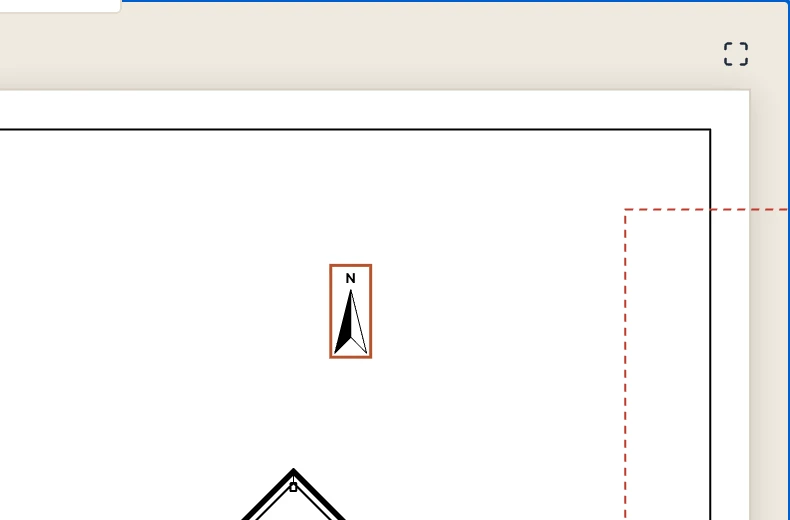
A symbol placed with Place symbol… (see Drafting) is picked like a view: it lights under the pointer, a click selects it and shows its properties, a drag moves it (one undo step) and Delete deletes it.
The frame and the title block belong to the paper. They are never picked or moved, and a click picks the smallest view under the pointer, so a view placed over the title block can always be selected.
Your own title block
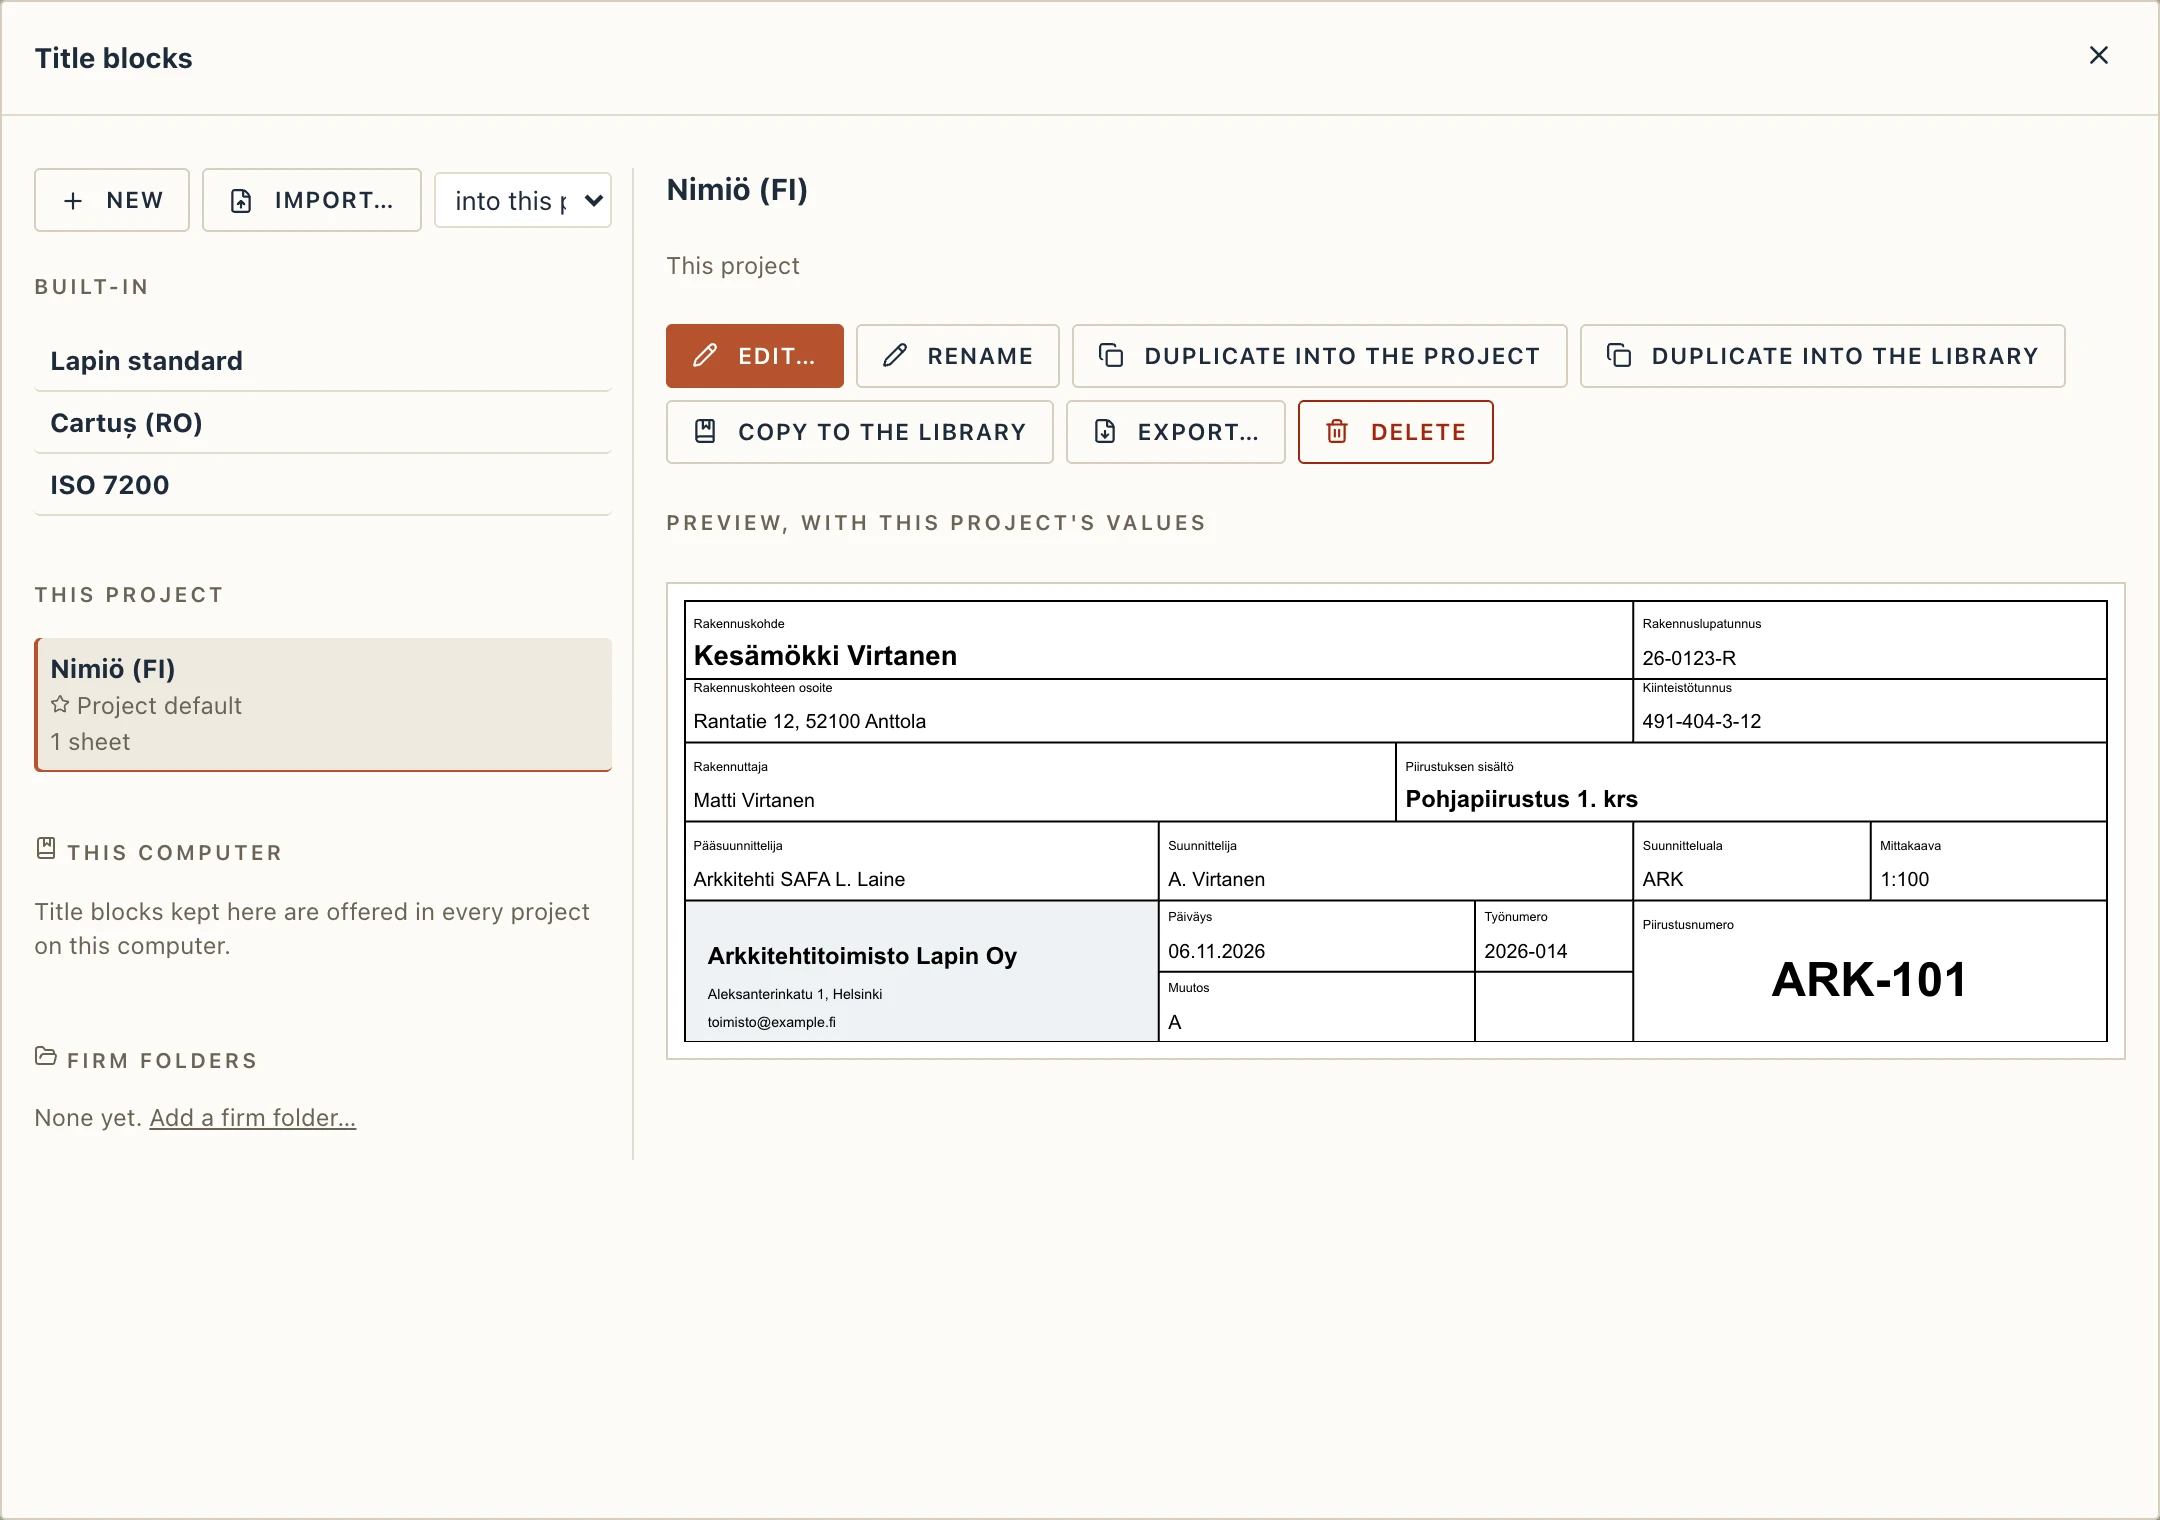
Manage → Title blocks… lists the title blocks: Lapin's own (Lapin standard, the one every sheet had so far, the Romanian cartuș and an ISO 7200 block), this project's, and this computer's library, which every project on this computer offers. Click one to see it with the project's values. Duplicate into the project makes an editable copy, New an empty one; Set as project default gives it to every sheet that does not choose its own, and a sheet chooses its own under Title block in its properties.
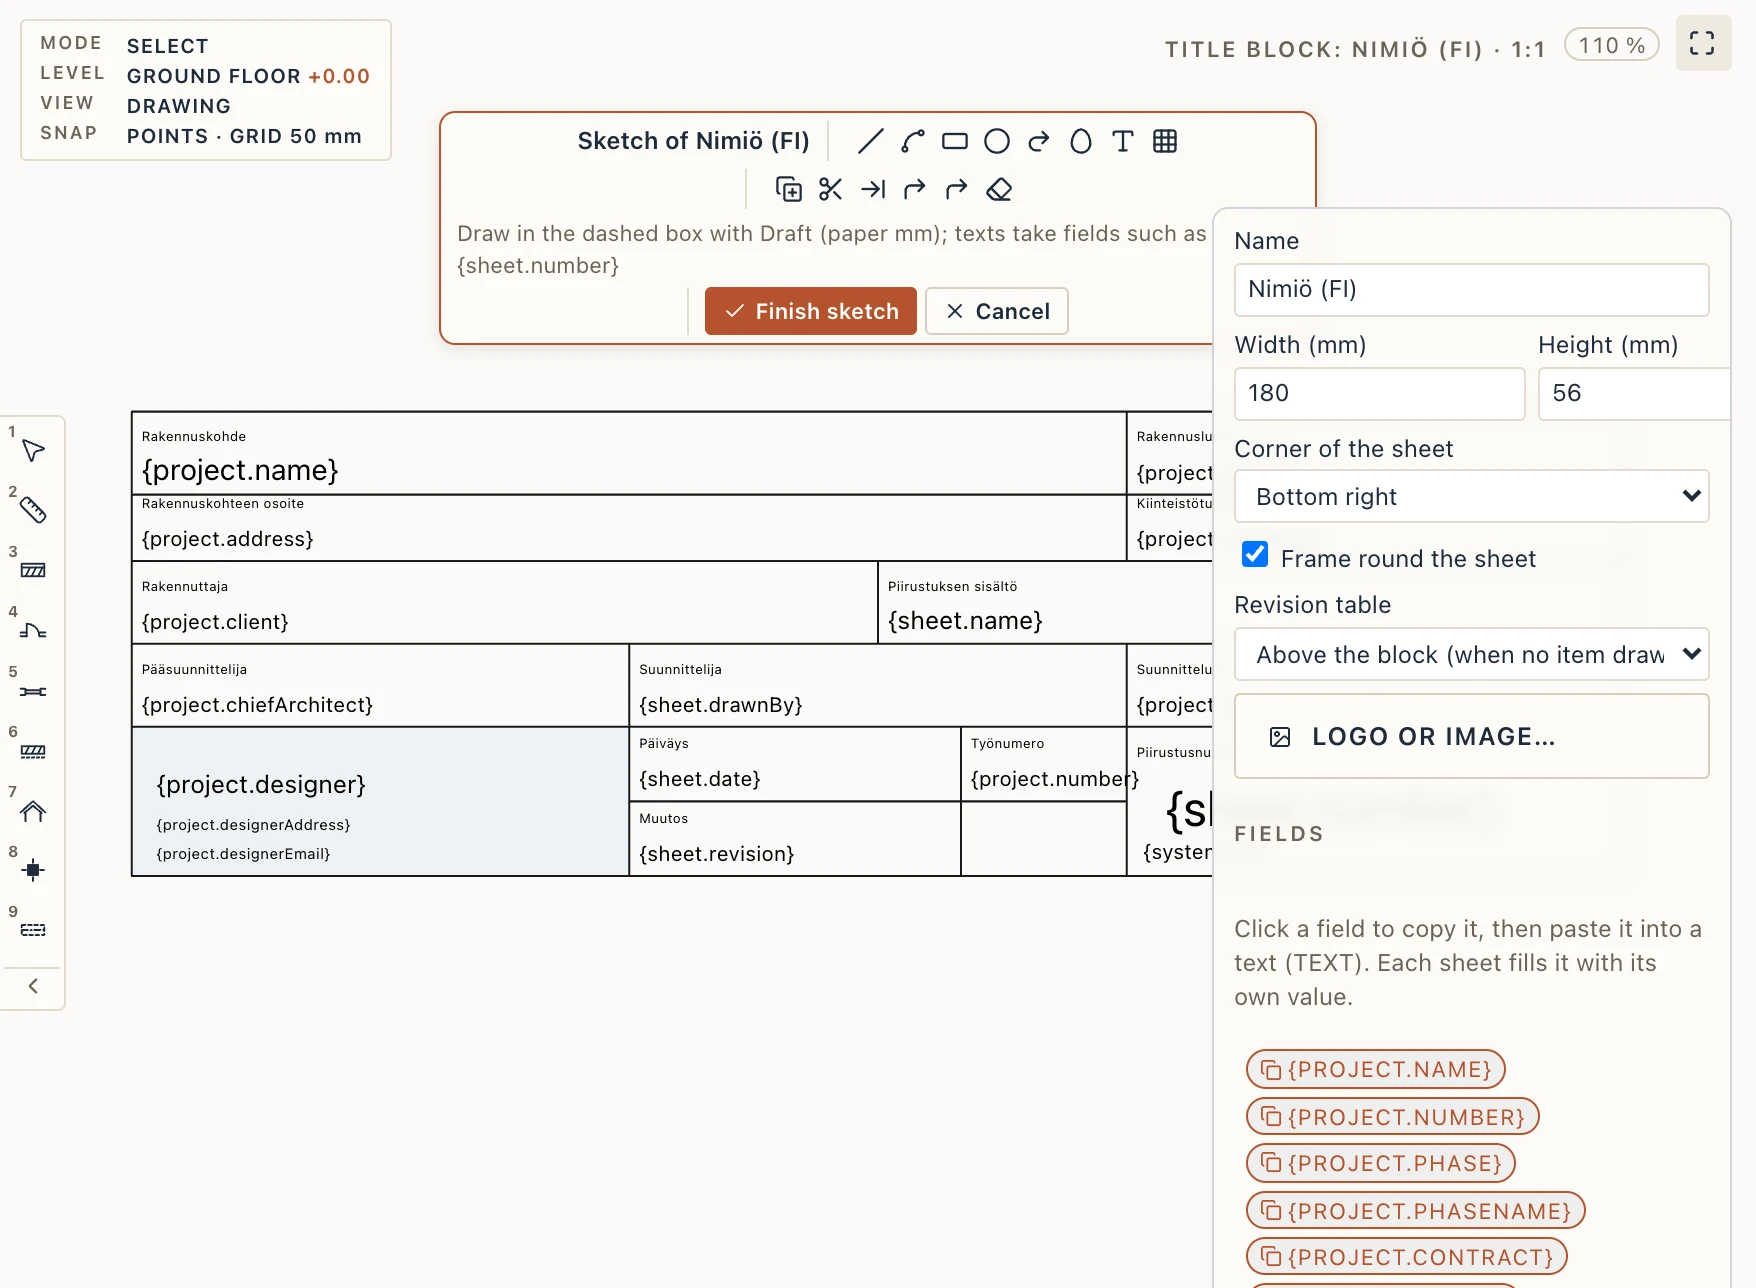
Edit… opens the title block on a board: a drawing view of its own in paper millimetres, with the block's box dashed. The block is a box in a corner of the frame, so the same block fits A4 to A0, portrait or landscape. Draw it with the same Draft tools as on any view (Line, Polyline, Rectangle, Circle, Arc, Text, Hatch and the Modify tools); snaps and grips work as usual. Texts keep their live fields as typed, {project.name}, {sheet.number}. The logo is a picture: Logo or image… in the panel, or Draft → Import image. The revision table shows as its box; move or resize it. A panel beside the board holds the Name, the width and height of the box (mm), the corner of the sheet, Frame round the sheet, where the revision table goes, and the fields to copy. Finish sketch writes the title block in one undo step and its sheets follow; unchanged, it stays exactly as it was. Cancel drops the edit.
The Fields list holds the live text: the project's (name, number, client, site, permit, designer, people, and your own parameters), the sheet's (number, name, scale, paper, revision, status, date, drawn, checked and approved by, phase, sheet x of y) and the system's (date of print, file name). A click copies a field, to paste into a text written with Text; a text can mix words and fields, Project: {project.name}. A field Lapin does not know prints as <field> and Manage → Check reports it.
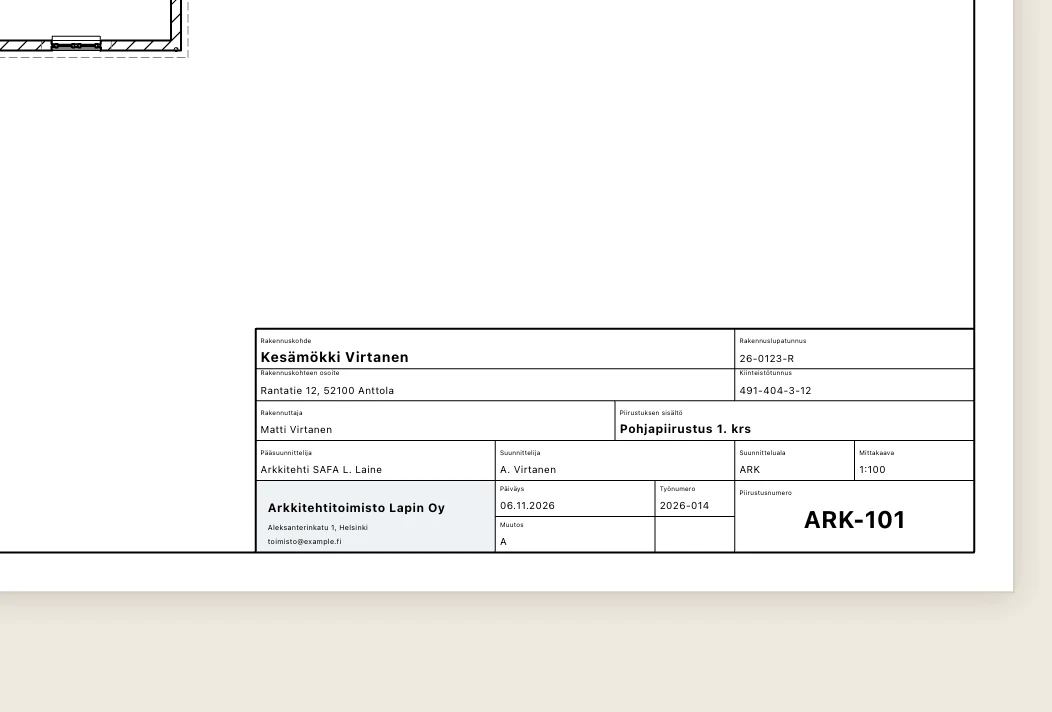
The sheets, their PDF, Print and the issue draw it with each sheet's values. In DXF it is a block with attributes, one for each live text (PROJECT_NAME, SHEET_NUMBER…), as AutoCAD's own title blocks are. Export… saves a title block as a .json file, its images inside, and Import… reads one into the project or the library, so an office passes its title blocks from one computer to the next. Old projects keep Lapin standard and draw exactly as before.
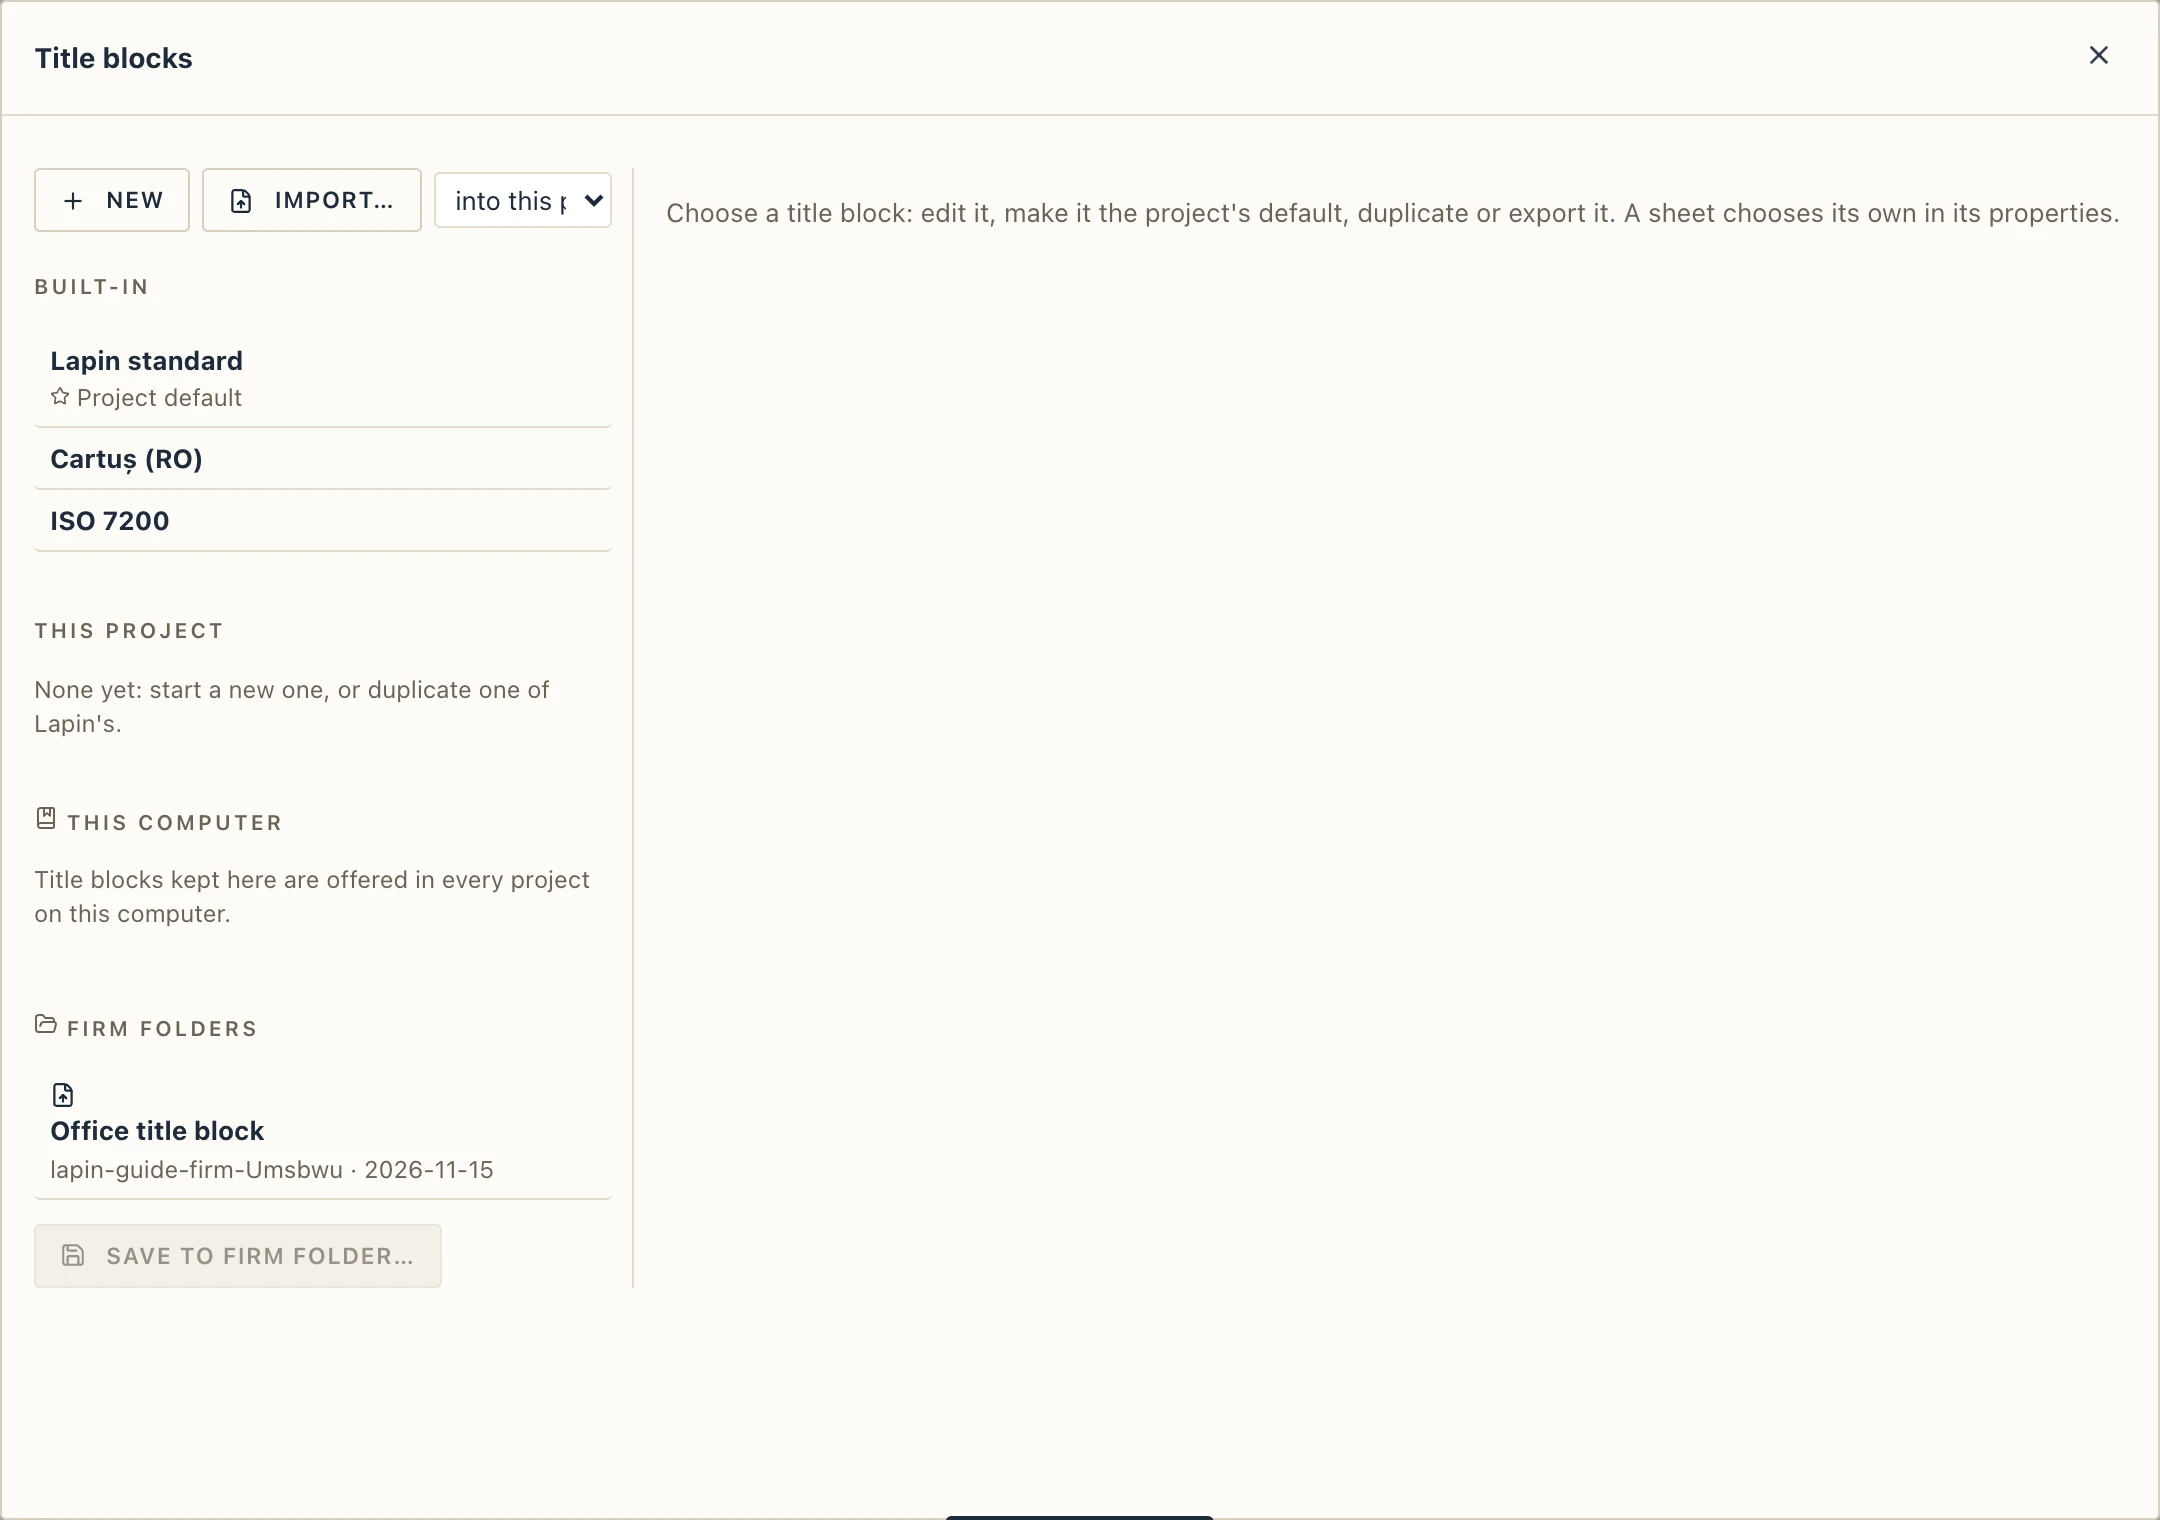
In the desktop app, Title blocks also has a Firm folders block: the .lapintitleblock files in your firm's folders, one click adding a block to the project, and Save to firm folder… writing the chosen block into a writable folder, so every drawing office project starts from the same blocks.
Drawing on the sheet
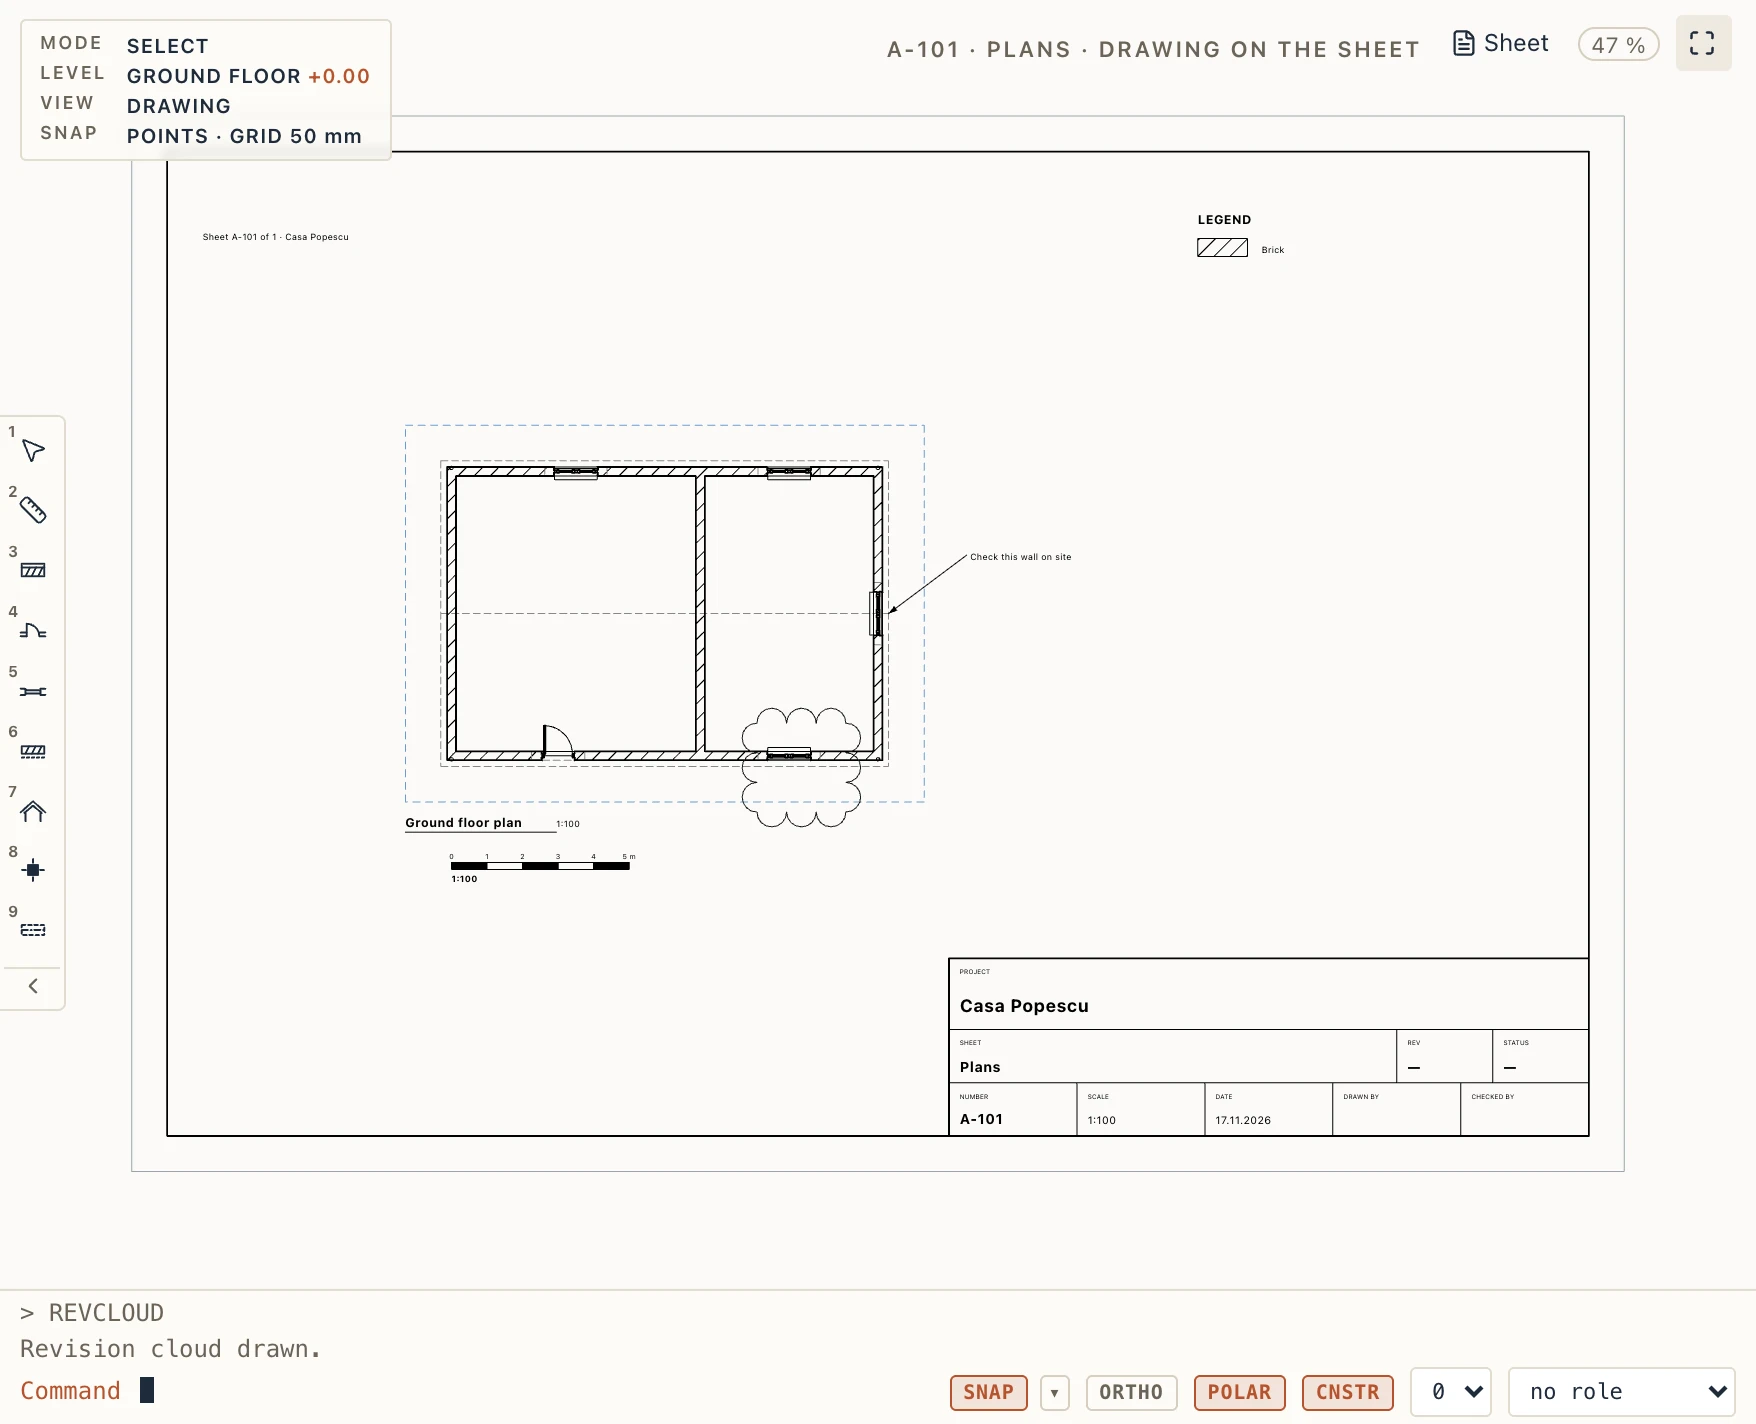
Notes, marks and keys that belong to the sheet rather than to one of its views are drawn on the sheet itself. Click Annotate in the sheet's bar, or double-click the paper outside the views (Annotate → Annotate sheet does the same). The sheet opens in the drawing pane as its paper, at 1:1, with the views, the frame and the title block under it, and the bar says drawing on the sheet. Every Draft and Annotate tool works there as on a view, in paper millimetres: type 50 and a line is 50 mm long on paper, and a text's height is its height on paper. Points snap to the frame, the title block, the views' boxes (dashed blue) and what the views draw. Sheet in the bar goes back to arranging the views.
- Texts may hold live fields, as a title block's do:
Sheet {sheet.number} of {sheet.count},{project.name},{sheet.date}. On a view, a text reads as typed. - Leader note (Annotate → Text): click where the arrow points, then where the text goes, and type it. Moved, the note takes its arrow with it; Leader → remove in its properties takes the arrow off. Selected, its arrow's tip and each bend have grips of their own: drag one to move it alone.
- Lines, polylines, rectangles, circles, arcs, hatches, symbols and pictures are the Draft tools' own, with their grips, layers and Modify tools. A north arrow is one of Lapin's symbols (Annotate → Symbol). Symbols placed with Place symbol… in the sheet's bar are taken by a click here too, and move in paper millimetres.
- Revision cloud (Draft → Fill, Annotate → Sheets, or REVCLOUD in the command line): two corners, or P for a polygon closed with Enter. Revision cloud in the properties of any closed polyline or circle turns it into a cloud or back, and sets its scallop on paper.
- Legend (Annotate → Sheets): a live list of what the sheet's views draw: the materials their cuts are hatched and filled with or, with Lists in its properties, their lines by role, type and width. It changes as the views and the model do, and its title takes fields too. Its own words (the heading, the lines' roles and types) are written in the language the interface had when it was placed; Language in its properties changes them.
- Scale bar (Annotate → Sheets): at the scale of the sheet's first view, or of the scale its properties give, a round length about 80 mm long or one you set. On a plan, section or elevation a scale bar takes the view's scale.
What is drawn on the sheet prints on it, over the views, exactly as shown: in its PDF, in Print and in its DXF. It belongs to the sheet: Duplicate the sheet (its button in the project browser) copies it, with the symbols placed on the sheet, and deleting the sheet deletes it. Each drawing is one undo step. Sheets made before have nothing drawn on them and print as they did. An issue counts it too: a sheet changed only by what is drawn on its paper or by its symbols is told changed since its last issue (Manage → Check, CDE).
Printing
The PDF and DXF buttons in the sheet's bar export the sheet. A PDF is ready to print or send. A DXF opens in AutoCAD and other CAD programs with its layers, lines and hatches; circles, arcs and ellipses (drafted, or the curved edges of floors and other outlines on a plan) are written as real CIRCLE, ARC and ELLIPSE entities, not short lines, and come back as curves when the DXF is imported again. Print sends the sheet to a printer or plotter at its own paper size, at 1:1, as vector lines: choose the plotter and the paper in the print dialog. On a smaller printer, choose fit to page.