Benutzerhandbuch
Parts
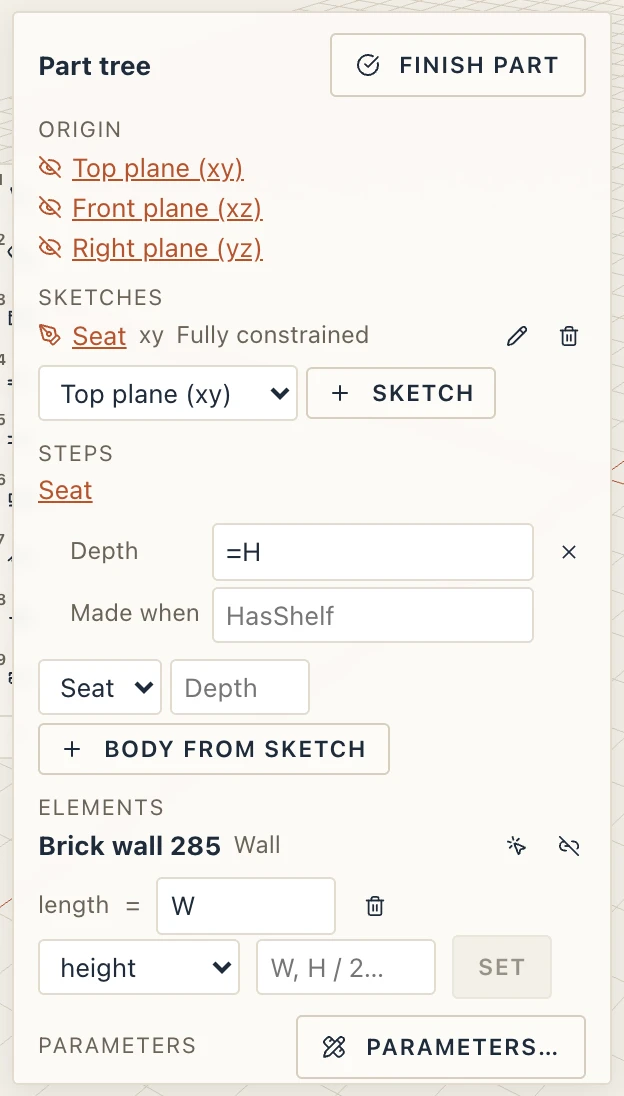
Edit a Studio solid or a placed part in place with Tab — the rest of the model fades, and the part's tree lists its origin, sketches, steps and parameters.
What a part is
A part is a Studio solid with a definition behind it: a sketched solid with its steps, or an object of your own whose bodies follow parameters (what used to be a family). A part is placed as many times as you need, and each object keeps its own parameter values.
Families are now parts. A project saved with families opens with the same objects as parts, with the same names, values and ids; their corners are sketches of the part's own. Studio → Parts… manages them (the Families page describes it), and the old tools keep working.
Editing a part
Select one Studio solid or placed part in 3D, then do one of these:
- press Tab;
- double-click the part in 3D;
- press Edit part in Studio → Parts, or in the Part section of its Properties.
The part is then in edit mode. The rest of the model fades and cannot be selected, but it is still there to snap to. The part is drawn as usual, and the bar over the view says what you are editing.
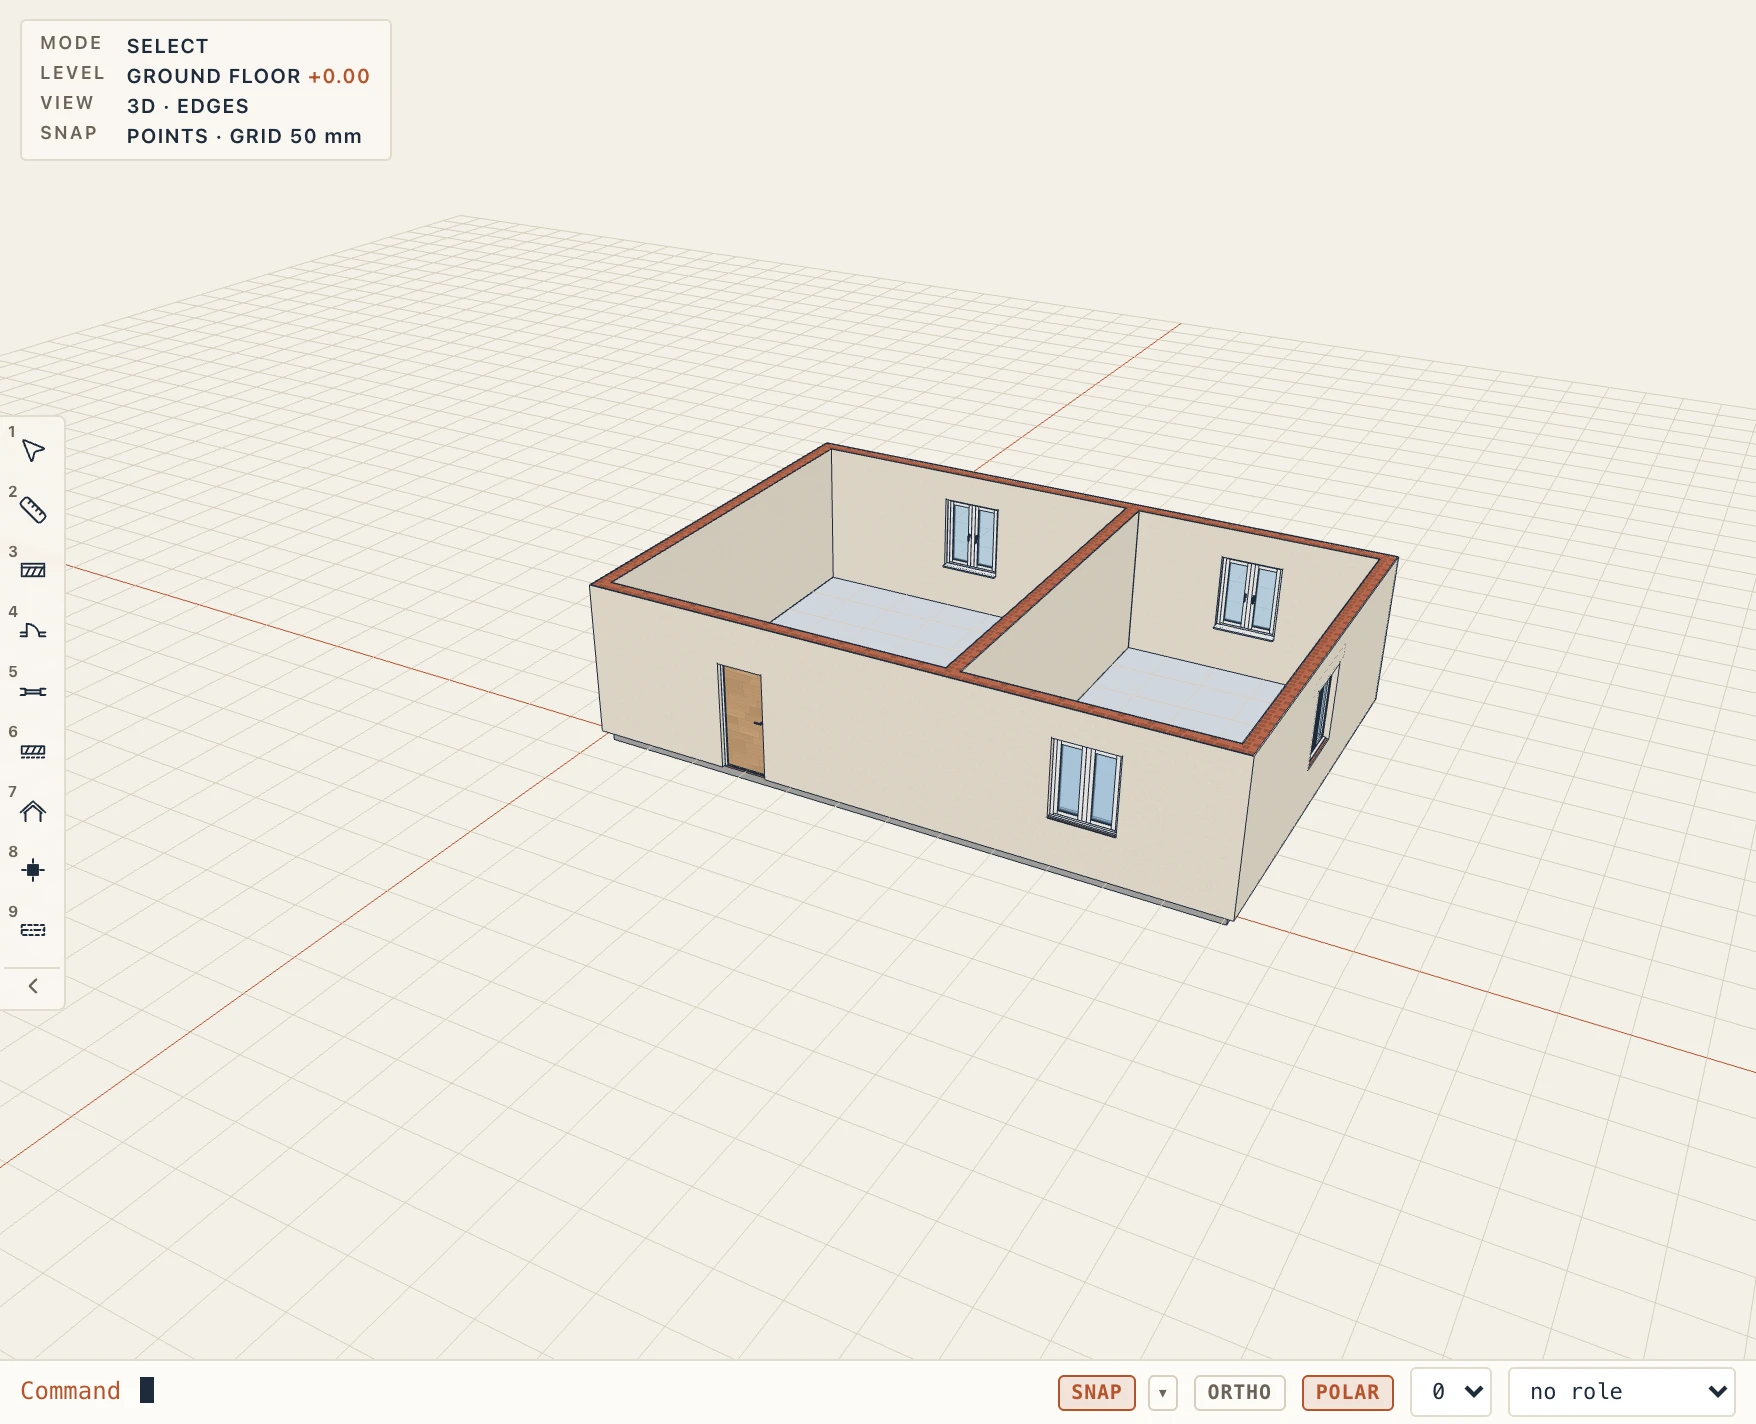
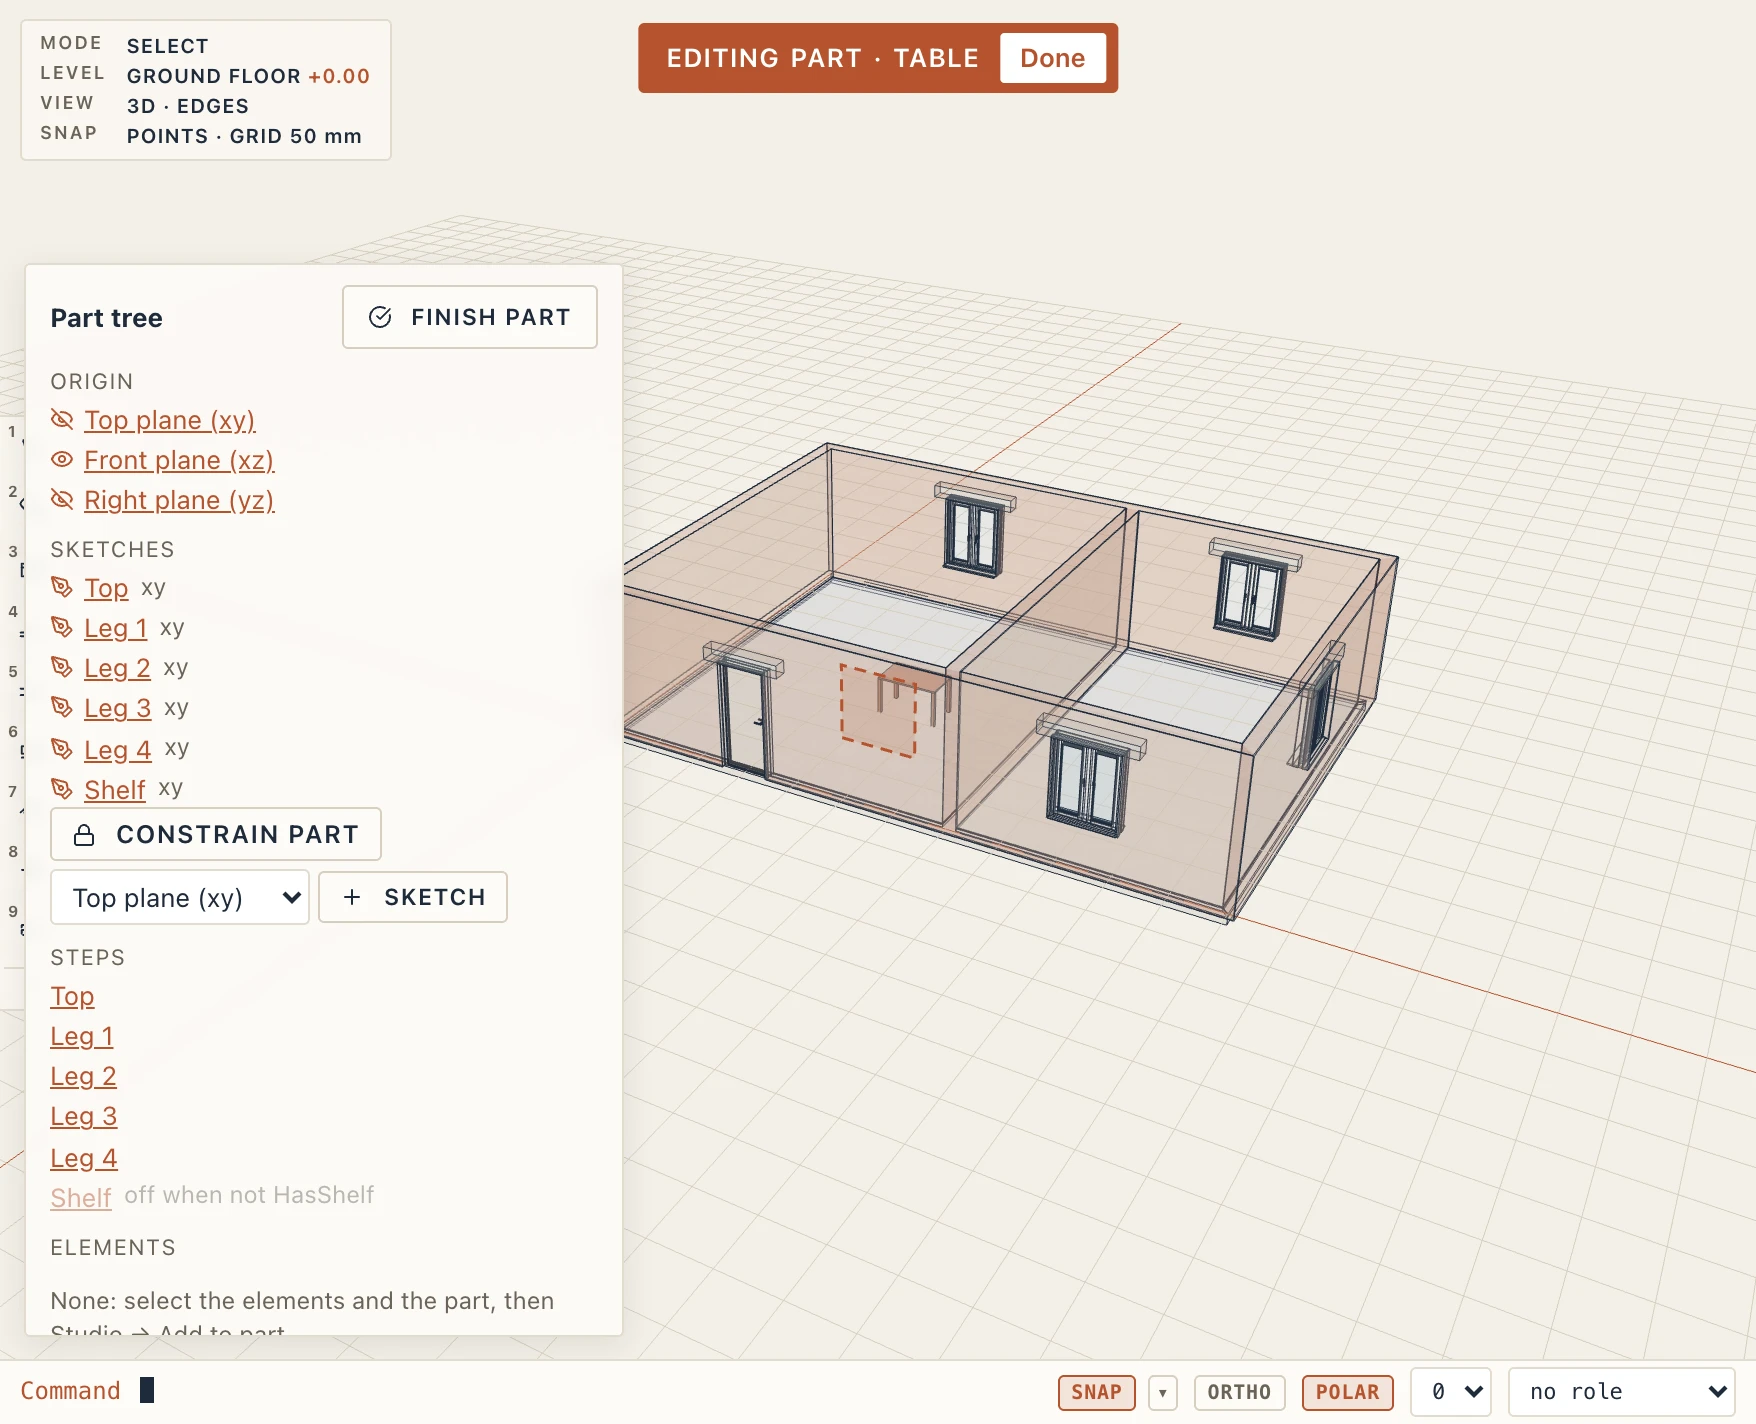
To leave, press Tab or Esc again, or Finish part in the tree. Leaving is not an undo step; every change made inside is one undo step, as everywhere in Lapin.
Tab does nothing special while a text field has the focus, while a dialog is open, or while a tool is running: it folds the panels as before.
The part's tree
The panel on the left of the view lists what the part is made of, and is read again after every change.
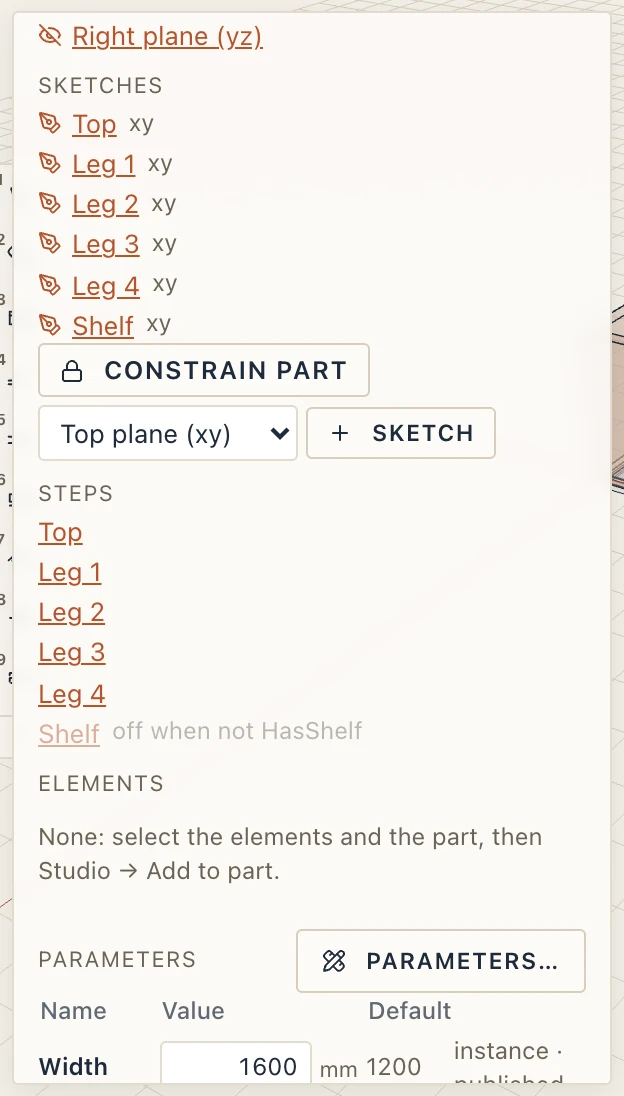
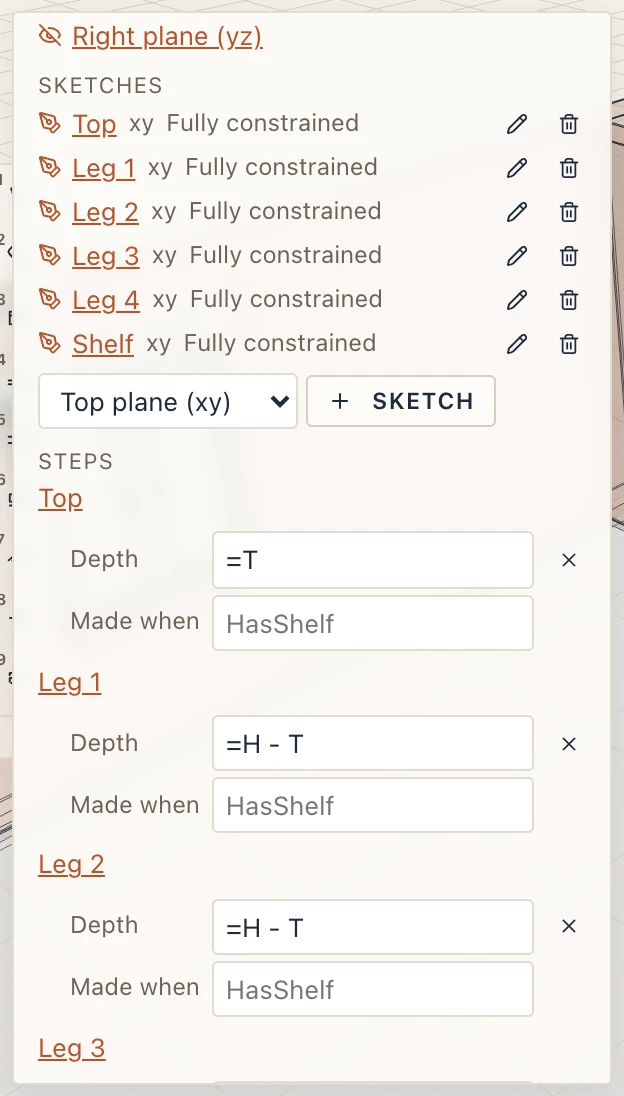
- Origin has the three planes of the part: top (xy), front (xz) and right (yz). Point at one to see it in 3D, or click it to keep it shown; click again to hide it.
- Sketches lists the part's sketches. A sketch of a solid (an extrusion, a sweep, a revolution, a loft) opens on its view, as Edit sketch does; because the sketch lives on its view, the edit mode ends as it opens. A part made of bodies opens in its editor, with the part chosen.
- Steps lists what makes the part, in order: its operation or its bodies, then the steps done to it (push/pull, fillet, shell, split…). A step that is off is greyed; a body made only when a condition holds shows it (off when not HasShelf). For the steps done to the part, the buttons switch one off or on, move it earlier or later, or remove it. Pressing a step's name shows the part in Properties, where its numbers are edited.
- Parameters lists each parameter with its value, its unit and its default, and whether it belongs to each object (instance) and is published. Type a new value and press Enter: the part's object follows. A parameter that differs from its default is in bold; a derived one shows its formula. Parameters… opens the full table (next section).
The parameter table
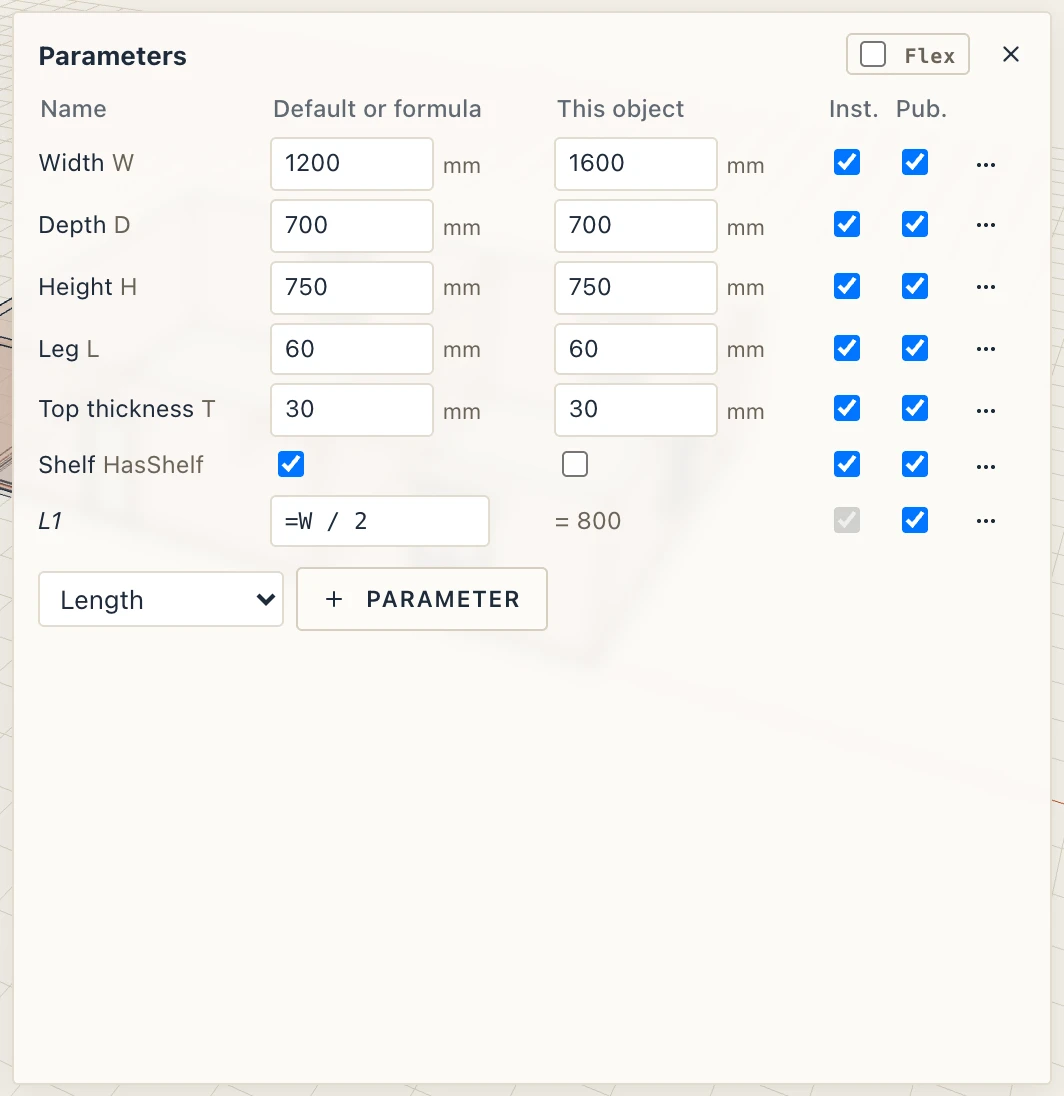
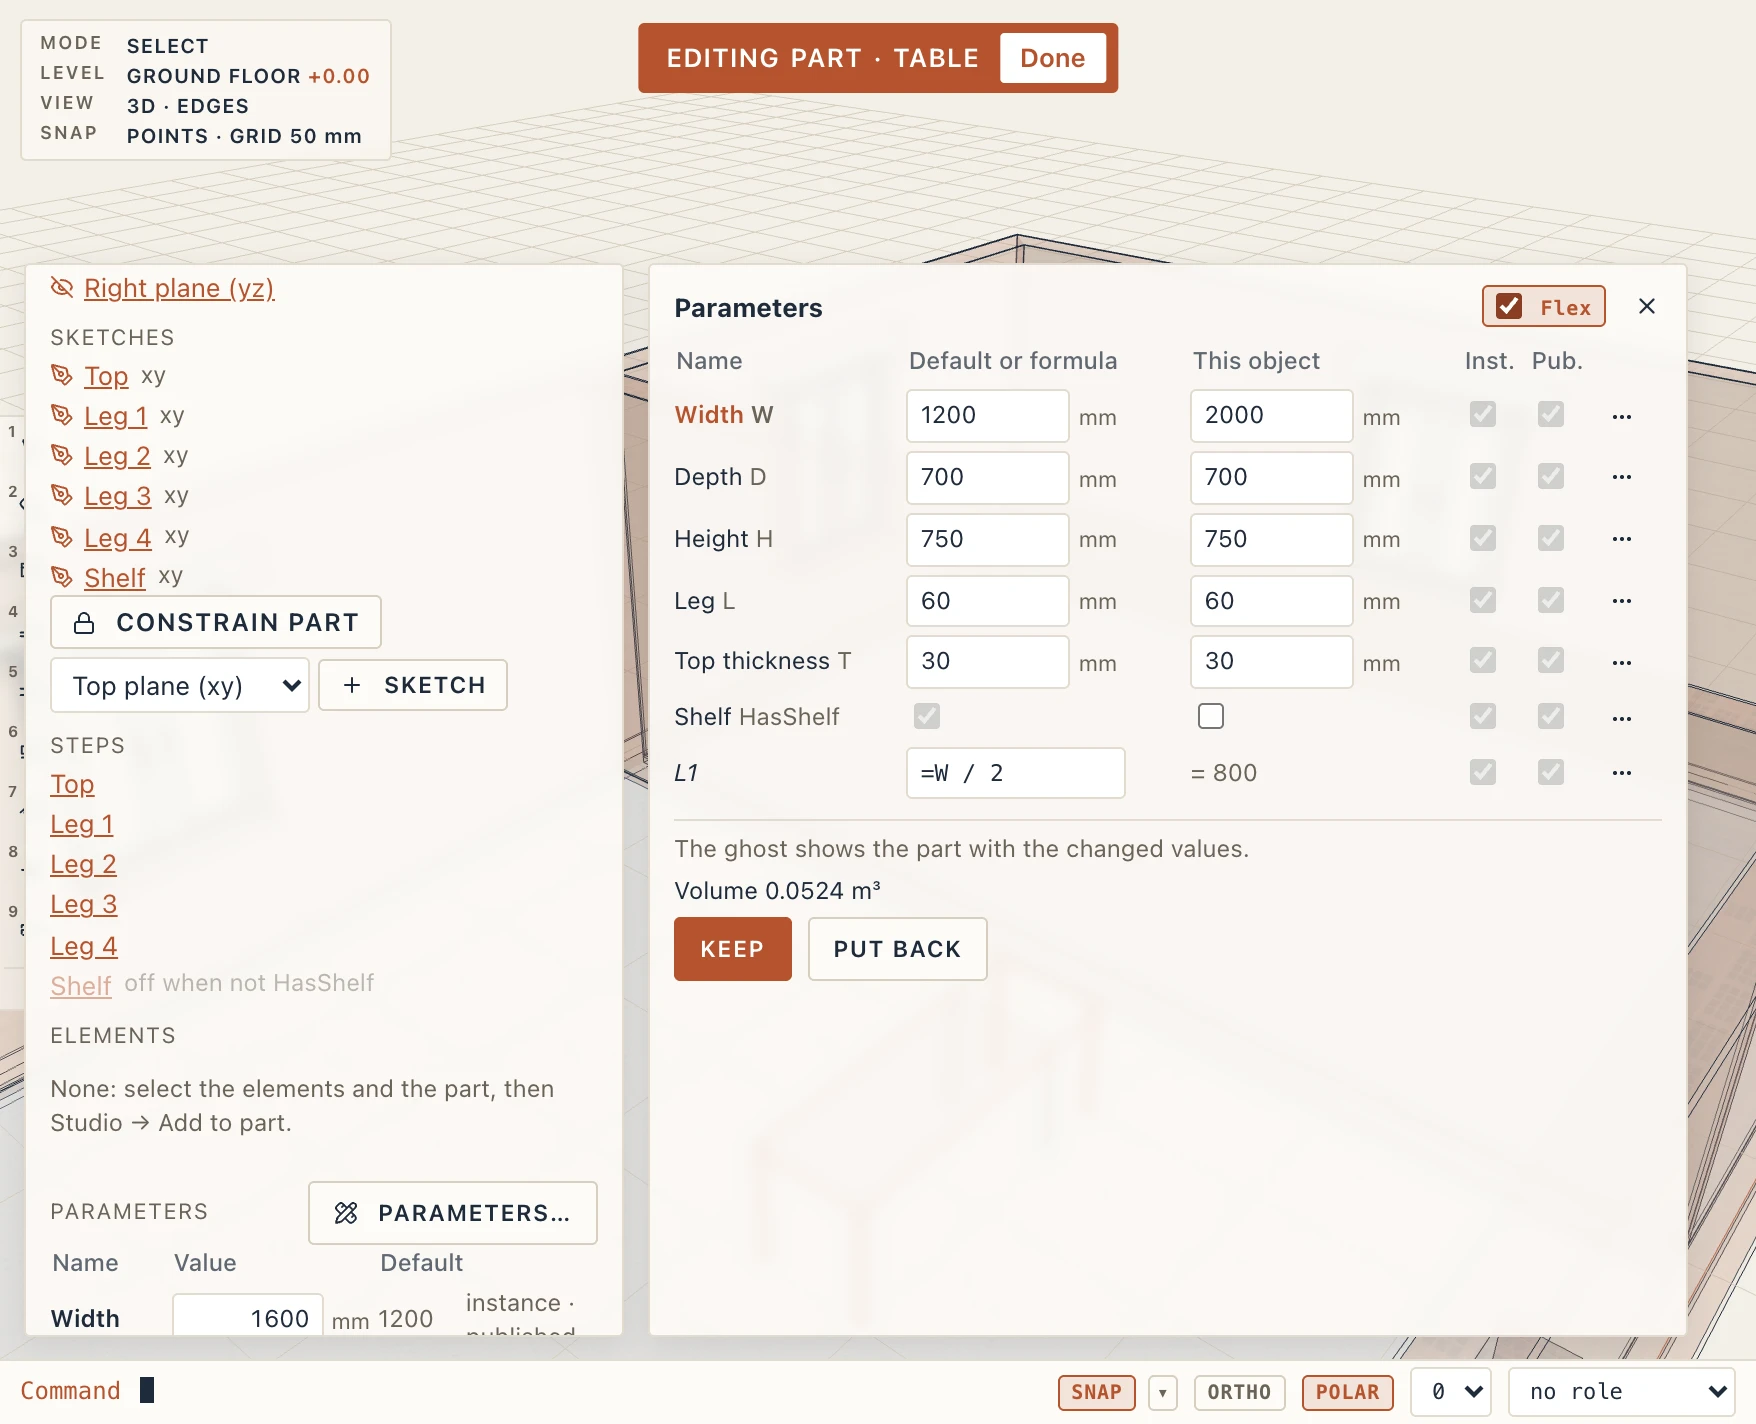
Parameters… in the tree opens a wider table beside it, where the parameters are made and set up. Rows are grouped by their group, and each has:
- Name: the label and, beside it, the key used in formulas.
- Default or formula: the part's own value, which every object starts from. Type a value (a length in the project's unit, or with one:
1600,1.6m), or type=and a formula of the other parameters (=W / 2): the parameter is then derived, its value is worked out on every ask and never stored. A value typed over a formula takes the formula away. - This object: this object's own value, for an instance parameter. A type parameter shows only its default, the same for every object, and a derived one shows
= value, with its formula on hover. - Inst.: instance (each object may have its own value) or type (the part's value for all). Changing an instance parameter to type drops the objects' own values, and the table says so.
- Pub.: published, shown in the object's Properties in the model. A parameter you leave unpublished is the part's inner working.
- ⋯: the row menu opens the rest: the key (renaming it renames it in formulas), label, description, group, minimum and maximum, kind and unit, Move up, Move down and Delete. The engine refuses a Delete while a formula or a sketch's dimension still uses the parameter, and says where, under the row.
+ Parameter adds one of the kind picked beside it: length, number, angle, yes/no, text or whole number. Every change is one undo step.
Flex
Flex (the switch in the table) lets you try values without changing the part. While it is on, changing a value only asks the engine for a preview: the part with those values is drawn as a dashed ghost over the part in 3D, with its volume under the table. A value that does not give a part (a depth that is not positive, a formula that fails) shows the engine's reason instead of a ghost. An instance parameter flexes in This object, a type parameter in its default's cell.
Keep applies the flexed values: an instance value to this object, a type parameter's value as the part's new default, all in one undo step. Put back forgets them; turning Flex off, or closing the table, does the same.
In the model: the published parameters
Back in the model, a placed part's Properties show only its published parameters. An instance parameter is a field to edit for this object (an empty field is the part's default); a type parameter is read-only, with a type badge, since it belongs to the part; a derived one is read-only with a formula badge and its formula on hover. Edit part (Tab) goes into the edit mode, where the rest is set up.
Constrain part: a part's own sketches
A part whose bodies are written as corners ([W, D], [W - L, L]…) can be turned into one with sketches of its own. In the part's tree, press Constrain part (also in the Part section of Properties). Each body's outline becomes a sketch on its plane, each corner held by horizontal and vertical dimensions that carry the same formulas, so the part keeps exactly the shape and volume it had. The tree then lists those sketches, with how free each one is, and the button goes away. It is one undo step.
Editing a part's sketch
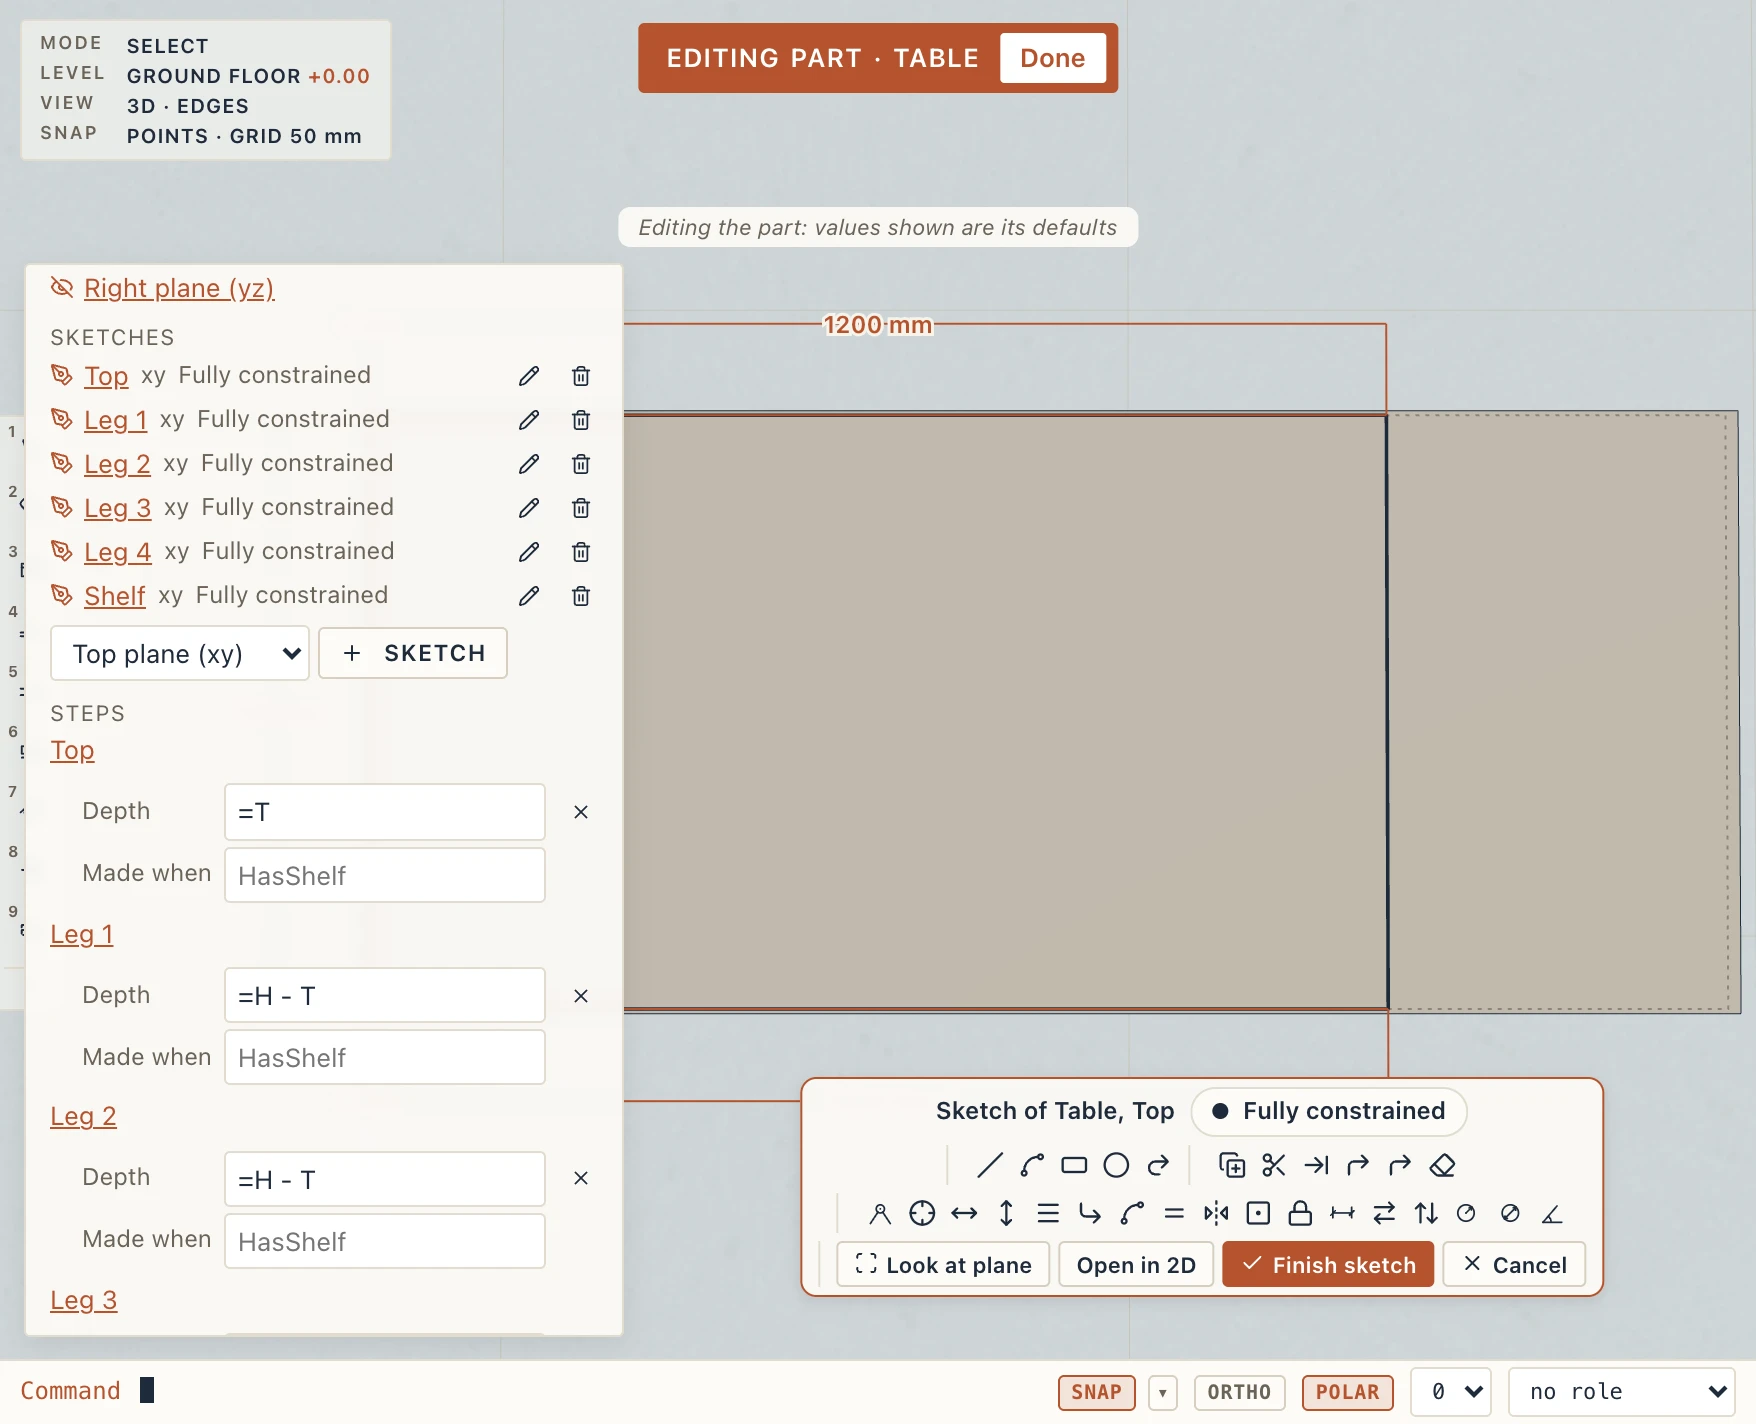
Click a sketch of the part in the tree (or double-click the part in its edit mode, which opens the first sketch with a body). The sketch opens on the same sketch canvas as every other sketch in Lapin (a plan's drafting, a floor's Edit sketch, a sketch on a face):
- the 3D camera turns to look straight at the sketch's plane, with a smooth move, and goes back to where it was when you leave;
- the rest of the part stays faded behind, and the sketch is drawn on its plane: its shapes coloured by how free they are (blue free, dark fully held, red in conflict), its constraint glyphs and its dimensions;
- the bar at the bottom names the sketch, tells how many degrees of freedom it still has, and holds the tools: the Draft tools, the constraint tools, Finish sketch and Cancel;
- the sketch is the part's, so every object of it follows when you finish. It is shown as the part stores it, with the part's default values: when this object has values of its own (a width of 1600 where the part's default is 1200), a note says Editing the part: values shown are its defaults, and the object's own outline is drawn faintly behind.
- Draw and edit with Draft's own commands, on the bar, in the Draft tab or typed in the command line: Line, Polyline, Rectangle, Circle, Arc, Offset, Trim, Extend, Fillet, Chamfer, Erase, and Move, Copy, Rotate, Mirror. The object snaps, tracking and the typed lengths work as on a plan. A point placed on an existing one stays coincident with it (hold Ctrl while clicking to place it free), a rectangle's sides stay horizontal and vertical. Each command is one undo step. A part's sketch takes lines, polylines, circles and arcs: an ellipse, a hatch, a text or a construction line is refused when you finish.
- Move a point by selecting a shape and dragging its grip: the engine solves the constraints when you let go.
- Constraints: the same tools as in a plan's sketch (Coincident, Horizontal, Equal, Fix… and the dimensions). Double-click a dimension to change its value, or type
=and a formula of the part's parameters (=W - 2*L). See Sketch constraints. - Open in 2D shows the same sketch flat, on its plane's own view; Back to 3D returns.
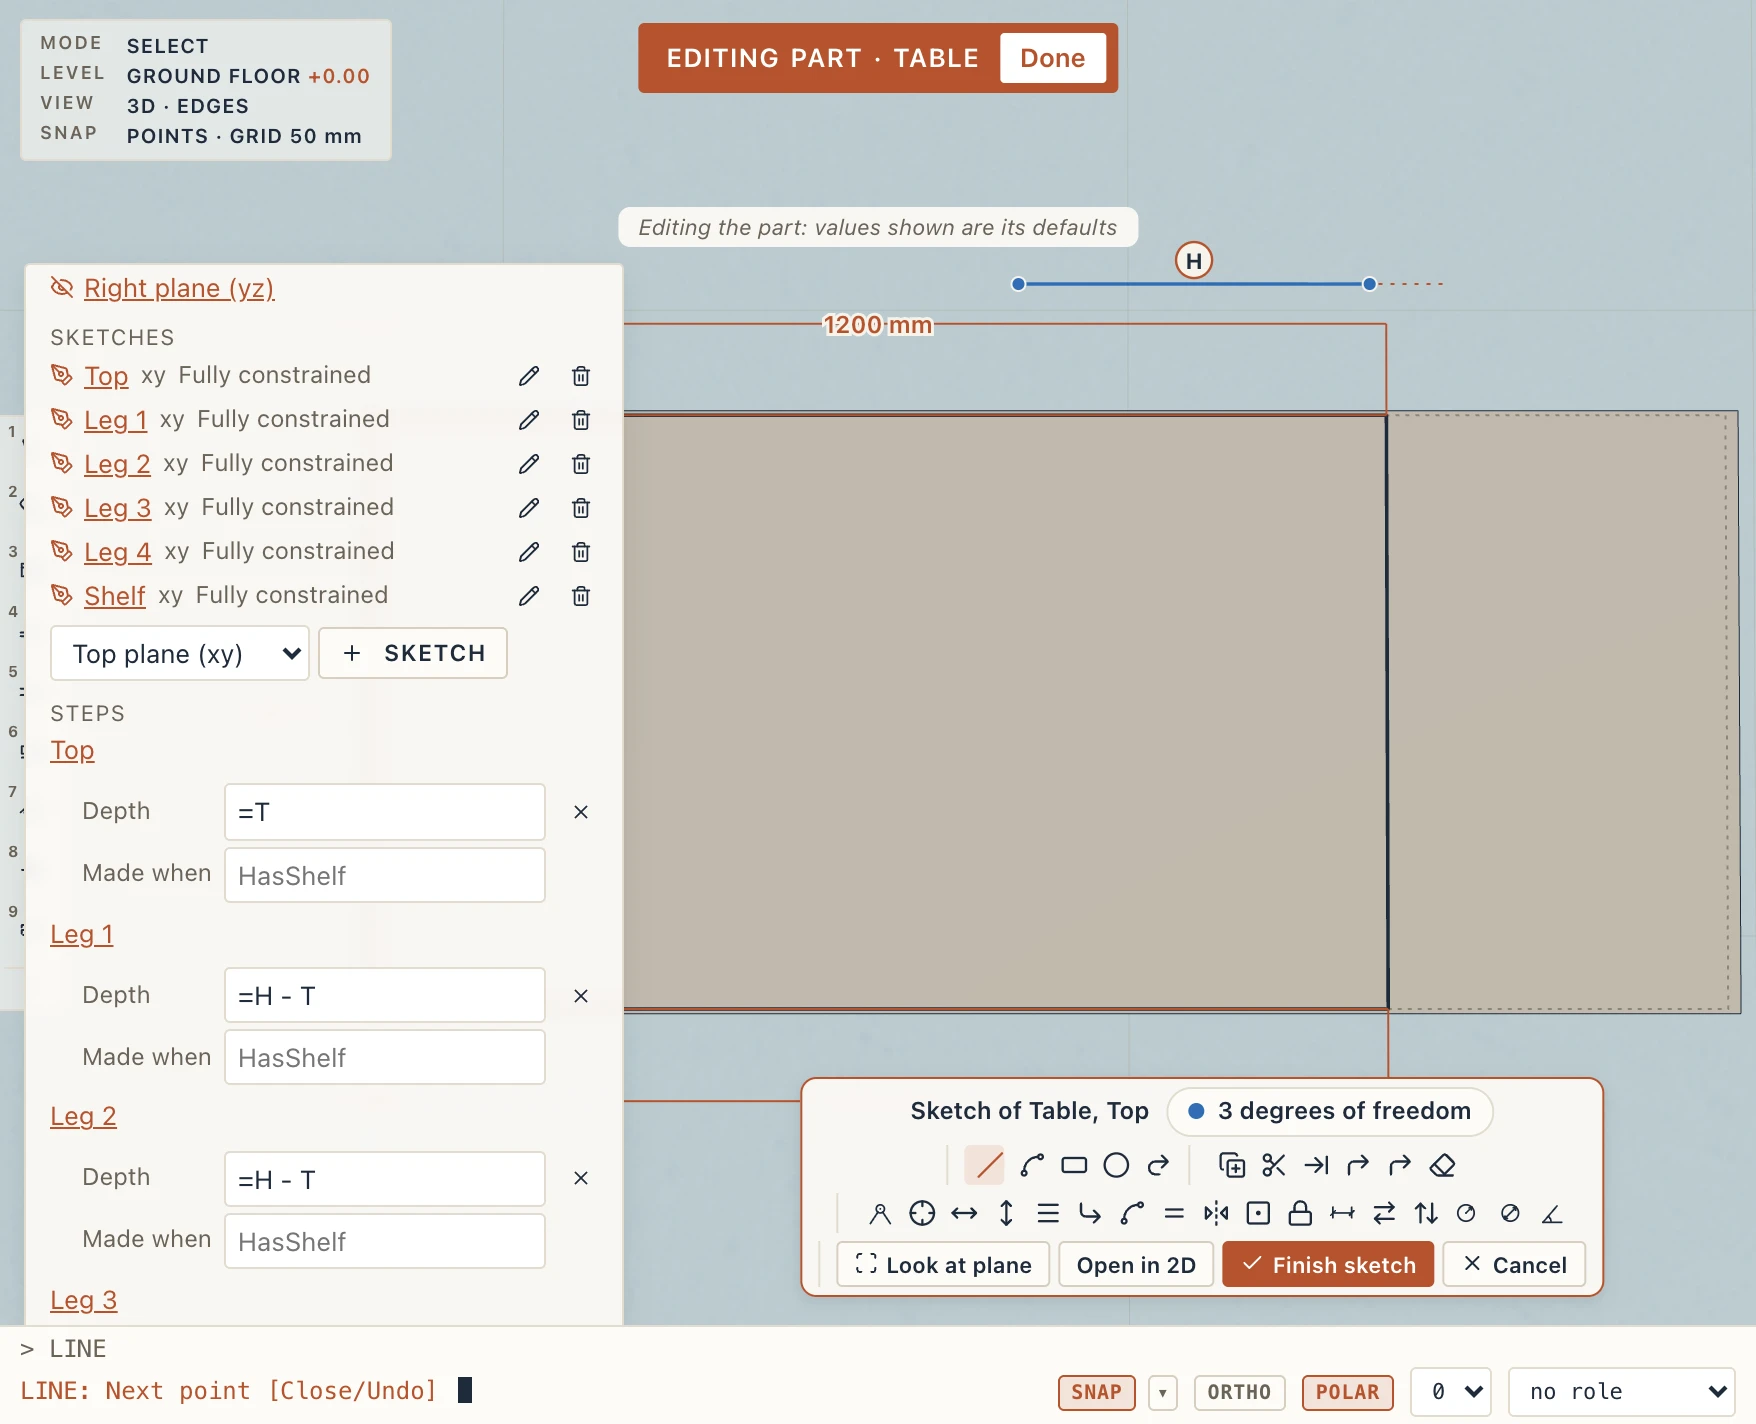
Finish sketch (or Esc with no command running, or Tab) writes the sketch into the part in one undo step: every object of the part follows, the shapes already there keep their identity (the bodies drawn from them stay), and you are back in the part's edit mode with the camera as it was. If the sketch cannot be kept (it does not solve, a body loses its outline, an object's values would not build) Lapin says why and the sketch stays open. Cancel drops what was drawn: the part as it was. Undo after Finish brings the sketch back as you left it.
Sketches and bodies in the tree
- + Sketch adds a sketch on the plane chosen (top, front or right). Beside each sketch of the part are buttons to rename it and to remove it (the bodies drawn from it go with it).
- + Body from sketch makes a body of a sketch's closed shape: choose the sketch and type its depth, a length or a formula of the parameters (
=H - T). Under the body's step in the tree, its depth and its made when condition can be changed, and the body removed.
A sketch of a body whose corners are still formulas opens with Constrain part, which makes them sketches of the part's own first.
Elements a part holds
A part can hold native elements: walls, slabs, furniture, MEP equipment and whatever else stands on a storey. Make a bench, put the wall behind it into the part, and every object of the part has its own wall.
- Place an object of the part and draw or place the elements next to it, on the same storey.
- Select the placed part together with the elements and choose Studio → Add to part. Without a placed part and other elements selected, a notice says what to select.
- The elements are the part's now: every other object of the part gets its own copy, placed the way the part is.
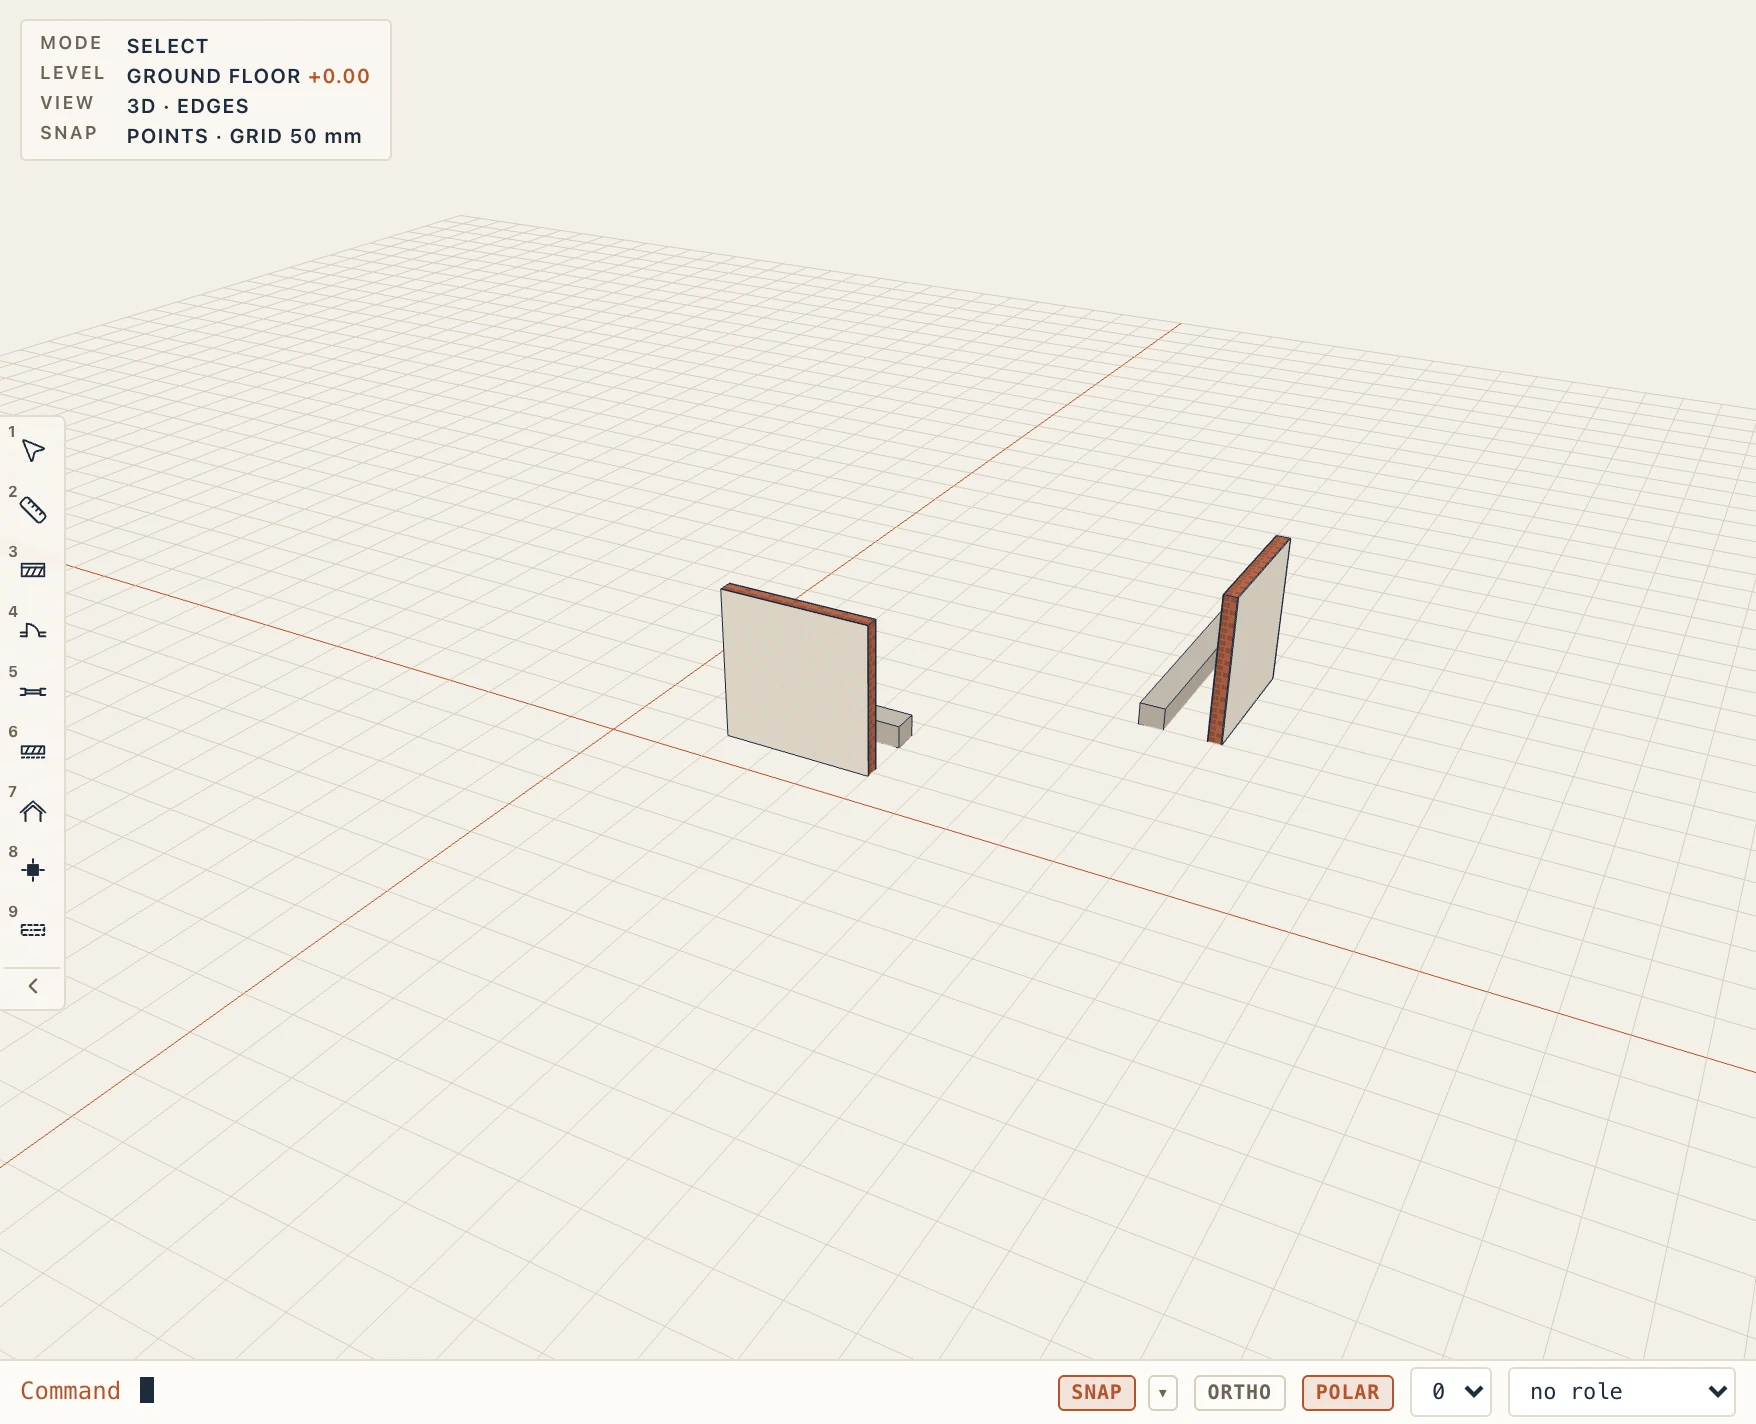
Editing. Open the edit mode (Tab) and the elements can be picked and edited there, with any command: change the wall's thickness, move it, give it a type. The change is written back to the part and reaches every placed part. Outside the edit mode, a click on an element of a part picks the part; its Properties say which part holds it, with Edit part.
Elements in the tree. The part's tree has an Elements section listing each element with its class. Select picks it, and Let go frees it: it stays in this object as a plain element and goes from the other objects.
Drives. An element's attribute can follow a formula of the part's parameters: choose the attribute (a wall's length or height, for instance), type the formula (W, H / 2) and press Set; the trash button stops it. With length = W the wall is as long as the bench is wide, in each object, whatever its width. A driven value follows its formula.
What moves with the part. Moving, turning, mirroring, copying and deleting an object of the part takes its elements along. A part of elements only needs no body of its own.
In IFC. The elements are written as their own classes (an IfcWall stays an IfcWall). Each is a part of the placed part through an aggregation relation (IfcRelAggregates), and a part of elements only is written as an IfcElementAssembly. Quantities are counted once, on the elements, not again on the part.
Limits. Joins to walls outside the part are not kept when the part is rebuilt. An element that came from a file, a Studio solid, an opening of a wall (choose its wall, which brings it) or a placed part cannot be added.
Where to go next
The Studio page tells how to model solids, and the Families page how the Parts manager, placing and Make part from sketch work.
Sketches in a part can be held with constraints and dimensions: see Sketch constraints.